Tenvis JPT3815W Quick Start Manual
Version us2.0
Hide thumbs
Also See for JPT3815W:
- Quick start manual (20 pages) ,
- Quick start manual (19 pages) ,
- Quick start manual (20 pages)
Table of Contents
Advertisement
Advertisement
Table of Contents

Related Manuals for Tenvis JPT3815W


Summary of Contents for Tenvis JPT3815W
- Page 1 Version US2.0 the world in my eyes Quick Start Guide...
- Page 2 TENVIS End User Agreement TENVIS IP Camera is designed to serve as a supplement to existing residential and business security systems. This home monitor is intended as an aid. It is not a substitute for home security supervision and should not be used as such.
-
Page 3: Table Of Contents
Table of Contents Quick Installation Guide............1 What’s In the Box..............2 Quick Start Guide..............2 Operation Guide for iPhone............3 Live Video................ 3 Wi-Fi Setup..............7 Alarm Setup..............8 Other Settings..............8 Operation Guide for iPad............10 Live Video.............. -
Page 4: Quick Installation Guide
Quick Installation Guide Hardware Installation Software Installation Live Video Wireless Connection Setting Alarm Setup NOTE: Certain functions, line drawing and snapshots mentioned in this manual may vary according to camera's model. For example, pan and tilt function are for Pan/Tilt enabled cameras only. -
Page 5: What's In The Box
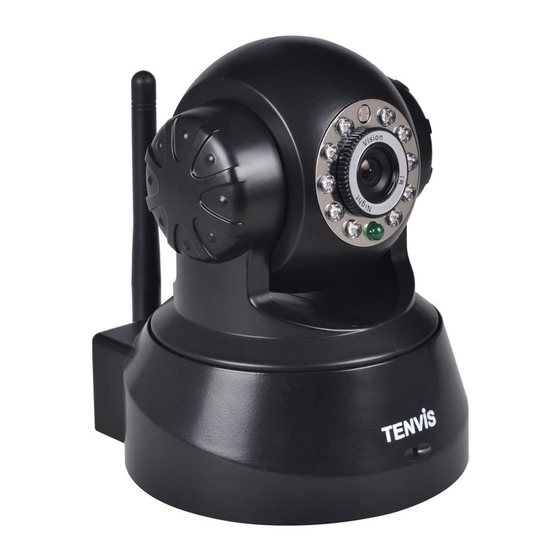
What’s In the Box 1.IP Camera 2.DC Power Adapter (5V-2.0A) 3.Network Cable 4.Mounting Bracket 5.Quick Installation Guide 6.CD-ROM with Setup Software (1) (2) (3) (4) (5) (6) Quick Start Guide Connect the power cable and wait for the camera to initialize itself. Connect the camera to your router by using the included network cable. -
Page 6: Operation Guide For Iphone
QR code to download and install NEW TENVIS directly. 2. Tap on Sign up if you do not already have an account with New TENVIS. Fill in the required information to register for a New TENVIS user account. 3. After signing up, please log on to your account. - Page 7 4. Tap on to add your new camera to your account; find the camera by matching UID code in the list to the UID code displayed at the bottom of the camera. If your new camera resides in the same LAN (Local Area Network), its UID code will show up in the list.
- Page 8 6. Enter the camera's name and password. By default the password is admin. Notice: One IP camera could not be added by several accounts. When the IP camera is added by a new account, the old one will be deleted automatically. If you need to share the camera video to your friends, please make use of the share function rather than create a new account.
- Page 9 Audio Talk • Pan/tilt control: 8 directions pan/tilt control. • Talk: Allows user to talk to the camera from NEW TENVIS App. • Snapshot: Take a snapshot picture from current camera feed; • Albums: View the snapshots taken. • Audio: Allows user to listen to the camera's audio feed.
-
Page 10: Wi-Fi Setup
Wi-Fi Setup 1. Click to start configuring your camera for wireless operation. 2. The camera will start scanning for Wi-Fi connections. Select your Wi-Fi connection or network ID (SSID). Enter the password for your Wi-Fi connection. 3. When the Wi-Fi is successfully configured, you can now disconnect the network cable from your camera and start using your camera as a wireless device. -
Page 11: Alarm Setup
Alarm Setup 1. To enable motion detection, please choose the appropriate sensitivity level for movement detection. *Notice: We recommend this function to be deactivated in a busy environment to avoid excessive notifications. Other Settings Flip Video Mirror the displayed image horizontally or vertically. - Page 12 Account: Your current account name. Modify account password: Modify NEW TENVIS account password. Send feedback: Send us feedback of the camera. App version: The version of NEW TENVIS. About TENVIS: Go to TENVIS website. Log out: Log off your NEW TENVIS account.
-
Page 13: Operation Guide For Ipad
QR code to download and install NEW TENVIS directly. 2. Tap on Sign up if you do not already have an account with New TENVIS. Fill in the required information to register for a New TENVIS user account. 3. After signing up, please log on to your account. - Page 14 4. Tap on to add your new camera to your account; find the camera by matching UID code in the list to the UID code displayed at the bottom of the camera. If your new camera resides in the same LAN (Local Area Network), its UID code will show up in the list.
- Page 15 Tap on the button on the video to pan or tilt the camera Pan/tilt control Allows User to listen to the camera's audio feed and talk to the camera from NEW TENVIS App. View the snapshots taken This function is suit for TENVIS HD Cameras Enable panorama mode.
-
Page 16: Wi-Fi Setup
Wi-Fi Setup 1. Click to start configuring your camera for wireless operation. 2. The camera will start scanning for Wi-Fi connections. Select your Wi-Fi connection or network ID (SSID). Enter the password for your Wi-Fi connection. 3. When the Wi-Fi is successfully configured, you can now disconnect the network cable from your camera and start using your camera as a wireless device. -
Page 17: Alarm Setup
Alarm Setup 1. To enable motion detection, please choose the appropriate sensitivity level for movement detection. *Notice: We recommend this function to be deactivated in a busy environment to avoid excessive notifications. Other Settings Flip Video Mirror the displayed image horizontally or vertically. - Page 18 Account: Your current account name. Modify account password: Modify NEW TENVIS account password. Send feedback: Send us feedback of the camera. App version: The version of NEW TENVIS. About TENVIS: Go to TENVIS website. Log out: Log off your NEW TENVIS account.
-
Page 19: Operation Guide For Android Device
QR code to download and install NEW TENVIS directly. 2. Tap on Sign up if you do not already have an account with New TENVIS. Fill in the required information to register for a New TENVIS user account. 3. After signing up, please log on to your account. - Page 20 4. Tap on to add your new camera to your account; find the camera by matching UID code in the list to the UID code displayed at the bottom of the camera. If your new camera resides in the same LAN (Local Area Network), its UID code will show up in the list.
- Page 21 Pan/tilt control View the snapshots taken Take a snapshot picture from current camera feed. Allows User to listen to the camera's audio feed and talk to the camera from NEW TENVIS App. This function is suit for TENVIS HD Cameras...
-
Page 22: Wi-Fi Setup
Wi-Fi Setup 1. Click to start configuring your camera for wireless operation. 2. The camera will start scanning for Wi-Fi connections. Select your Wi-Fi connection or network ID (SSID). Enter the password for your Wi-Fi connection. 3. When the Wi-Fi is successfully configured, you can now disconnect the network cable from your camera and start using your camera as a wireless device. -
Page 23: Alarm Setup
Alarm Setup 1. To enable motion detection, please choose the appropriate sensitivity level for movement detection. *Notice: We recommend this function to be deactivated in a busy environment to avoid excessive notifications. Other Settings Basic setting Video quality: Adjust the video quality. - Page 24 Public camera: View the live video of camera shared by others. You may also share your camera's live video to other customers. Shopping: Find the latest TENVIS promotion here. Setting: Log out current NEW TENVIS account.
-
Page 25: Operation Guide For Windows Web Browser
1. Install TENVIS Search Tool from CD or download and install it from http://www.tenvis.com/download 2. Run TENVIS Search Tool on desktop, click search to search cameras in LAN. 3. Select the camera listed in LAN by its UID code, highlight the camera in the list and click Open. - Page 26 4. It will prompt you to install the web browser plug-in. Click Allow to allow the Internet Explorer to begin the plug-in installation; 5. After installation of the plug-in, you can now refresh the page and watch the live video. Icons and buttons on live video page: Single camera: Display one camera’s video stream at a time...
- Page 27 Take snapshot still image from camera feed Record video to your PC or network drive, you can change the video file path in the Advanced Settings *Notice: For in-depth explanation on how to use this web application, please download user manual from http://www.tenvis.com/download.
-
Page 28: Operation Guide For Mac Web Browser
Operation Guide for Mac Web Browser 1. Open your CD and run TENVIS Search Tool.dmg. Drag TENVIS Search Tool into Applications to install the search tool in Apple 2. Run TENVIS Search Tool in Launchpad, click search to search cameras in LAN. - Page 29 4. The default web browser will be launched to display the login window. Log on to the camera by using camera's username and password. By default username is admin and password is admin. 5. After login the camera, you could get the live video. Icons and buttons on live video page: Click this button for Advance Settings Eight triangle button to control the Pan/Tilt of camera...
- Page 30 Turn off IR LED manually. Invert image horizontally or vertically Adjust the brightness and contrast Take snapshot still image from camera feed *Notice: For in-depth explanation on how to use this web application, please download user manual from http://www.tenvis.com/download.
-
Page 31: Camera Reset
Camera Reset Please press the reset button under or on the camera for about 15 seconds until the camera reboots. Please make sure the power supply is connected to the camera when you are doing it. Reset Reset *Notice: Once you reset the camera, the camera will lose all the configuration. -
Page 32: Fcc Statements
FCC Statements FCC STATEMENT This equipment has been tested and found to comply with the limits for a Class B digital device, pursuant to Part 15 of the FCC Rules. These limits are designed to provide reasonable protection against harmful interference in a resi dential installation. -
Page 33: Frequently Asked Questions
Frequently Asked Questions 1. Why does my computer or security software say the software is dangerous and it is a virus? The search tool will detect device in your network, and it seems like a virus. Please ignore the warning and continue. 2. -
Page 34: Warranty
Warranty WARRANTY COVERAGE: This warranty obligation is limited to the terms set forth below. TENVIS IP Camera is designed to only supplement existing residential and business security systems. WHO IS COVERED: This product is warranted to the original purchaser or the person receiving the product as a gift against defects in materials and workmanship as based on the date of original purchase (“Warranty... - Page 35 Recovery or reinstallation of programs, data or other information is not covered under this Limited Warranty. This warranty does not apply (a) to damage caused by accident,...
-
Page 36: Contact Us
Contact us TENVIS Technology Co., Ltd Address: Room 505, Rujun Building 105 Zhongxing Road, Ma'antang Community Bantian Street, Longgang District Shenzhen, China. Website: www.tenvis.com E-mail: support@tenvis.com Hot Line: 0086-755-89732479 USA Distributor Address: Zettaguard Inc. 363 Cliffwood Park St, Ste A...
Need help?
Do you have a question about the JPT3815W and is the answer not in the manual?
Questions and answers