Table of Contents
Advertisement
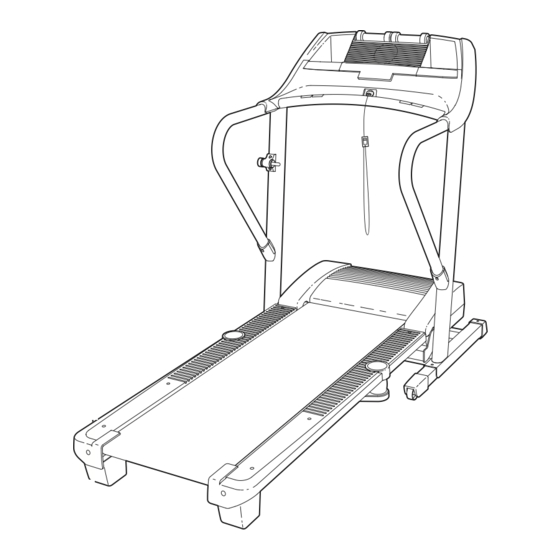
Model No. RBTL06008.0
Serial No.
Write the serial number in the space
above for reference.
Serial Number Decal
QUESTIONS?
As a manufacturer, we are com-
mitted to providing complete cus-
tomer satisfaction. If you have
questions, or if parts are missing,
PLEASE DO NOT CONTACT THE
STORE; please contact
Customer Care.
IMPORTANT: You must note the
product model number and
serial number (see the drawing
above) before contacting us:
CALL TOLL-FREE:
1-877-994-4999
Mon.–Fri. 6 a.m.–6 p.m. MST
Sat. 8 a.m.–4 p.m. MST
ON THE WEB:
www.reebokservice.com
CAUTION
Read all precautions and instruc-
tions in this manual before using
this equipment. Save this manual
for future reference.
USER'S MANUAL
Visit our website at
www.reebokhomefitness.com
®
new products, prizes,
®
fitness tips, and much more!
Advertisement
Table of Contents

Related Manuals for Reebok 8000 C treadmill RBTL06008.0


Summary of Contents for Reebok 8000 C treadmill RBTL06008.0
- Page 1 Model No. RBTL06008.0 Serial No. Write the serial number in the space above for reference. Serial Number Decal QUESTIONS? As a manufacturer, we are com- mitted to providing complete cus- tomer satisfaction. If you have questions, or if parts are missing, PLEASE DO NOT CONTACT THE STORE;...
-
Page 2: Table Of Contents
TABLE OF CONTENTS WARNING DECAL PLACEMENT ............. .2 IMPORTANT PRECAUTIONS . -
Page 3: Important Precautions
IMPORTANT PRECAUTIONS WARNING: To reduce the risk of serious injury, read all important precautions and in- structions in this manual and all warnings on your treadmill before using your treadmill. ICON as- sumes no responsibility for personal injury or property damage sustained by or through the use of this product. - Page 4 20. Use the included dumbbells only as de- scribed in this manual. Properly store the dumbbells in the dumbbell holders on the console when you are not using them. If the dumbbells are improperly stored, they may fall off the console, causing the user to trip. 21.
-
Page 5: Before You Begin
BEFORE YOU BEGIN Thank you for selecting the revolutionary REEBOK 8000 C treadmill. The 8000 C treadmill offers an im- pressive array of features designed to make your workouts at home more enjoyable and effective. And when you’re not exercising, the unique 8000 C tread- mill can be folded up, requiring less than half the floor space of other treadmills. -
Page 6: Assembly
ASSEMBLY To hire an authorized service technician to assemble the treadmill, call 1-800-445-2480. Assembly requires two persons. Set the treadmill in a cleared area and remove the packing materials; do not dispose of the packing materials until assembly is completed. Note: The underside of the treadmill walking belt is coated with high-performance lubricant. - Page 7 2. Insert the tab on one of the Handrail Brackets (42) into the indicated slot in the right Upright (84). Attach the Handrail Bracket with a Screw (3). Slide a Handrail Cap (8) onto the lower end of a Handrail (20). Make sure that the Handrail Cap is oriented as shown.
- Page 8 5. Insert the tab on the other Handrail Bracket (42) into the indicated slot in the left Upright (84). Attach the Handrail Bracket with a Screw (3). Slide a Handrail Cap (8) onto the lower end of a Handrail (20). Make sure that the Handrail Cap is oriented as shown.
-
Page 9: Operation And Adjustment
OPERATION AND ADJUSTMENT THE PRE-LUBRICATED WALKING BELT Your treadmill features a walking belt coated with high- performance lubricant. IMPORTANT: Never apply sil- icone spray or other substances to the walking belt or the walking platform. Such substances will deteriorate the walking belt and cause excessive wear. -
Page 10: Console Diagram
CONSOLE DIAGRAM FEATURES OF THE CONSOLE The treadmill console offers a selection of features de- signed to make your workouts more effective and en- joyable. When you select the manual mode of the console, you can change the speed and incline of the treadmill with the touch of a button. -
Page 11: How To Use Manual Mode
HOW TO TURN ON THE POWER IMPORTANT: If the treadmill has been exposed to cold temperatures, allow it to warm to room tem- perature before turning on the power. If you do not do this, the console displays or other electrical components may become damaged. - Page 12 6. Follow your progress with the display. Note: The display features six background col- ors. To select a color, press the Display Color button repeatedly. To adjust the contrast of the display, see THE INFORMATION MODE on page When the manual Track mode is se-...
- Page 13 HOW TO USE A CALORIE WORKOUT 1. Insert the key into the console. See HOW TO TURN ON THE POWER on page 2. Enter your weight. See step 2 on page 11. Note: Always enter your weight before using a calorie workout; the speed and incline settings of the workout will depend on the weight setting that you enter.
- Page 14 HOW TO USE THE POUND-A-WEEK WORKOUT The exciting new pound-a-week workout is a weight- loss workout designed to help you lose 3600 calories, equal to one pound of excess fat, in five days. For vari- ety, each of the daily 60-minute workouts offers differ- ent speed and incline settings from the previous day’s workout.
- Page 15 HOW TO USE A CROSS TRAINING WORKOUT 1. Insert the key into the console. See HOW TO TURN ON THE POWER on page 2. Select a cross training workout. To select one of the six cross training workouts, press the Professional Cross Training...
- Page 16 4. Perform the first strength exercise when prompted. When the first strength exercise segment be- gins (only one indicator will flash in the Current Segment column), the walking belt will slow to a stop and the name of the first strength exercise will appear in the display for a few sec- onds.
- Page 17 THE INFORMATION MODE The console features an information mode that keeps track of treadmill usage information. The information mode also allows you to select English or metric as the system of measurement, to adjust the contrast of the display, and to turn on and turn off the demo mode. To select the information mode, hold down the Stop button, insert the key into the console, and then release the Stop button.
-
Page 18: How To Fold And Move The Treadmill
HOW TO FOLD AND MOVE THE TREADMILL HOW TO FOLD THE TREADMILL FOR STORAGE Before folding the treadmill, adjust the incline to the lowest position. If you do not do this, you may damage the treadmill when you fold it. Remove the key and unplug the power cord. -
Page 19: Troubleshooting
TROUBLESHOOTING Most treadmill problems can be solved by following the steps below. Find the symptom that applies, and follow the steps listed. If further assistance is needed, please see the front cover of this manual. PROBLEM: The power does not turn on SOLUTION: a. - Page 20 Locate the Reed Switch (63) and the Magnet (46) on the left side of the Pulley (47). Turn the Pulley until the Magnet is aligned with the Reed Switch. Make sure that the gap between the Magnet and the Reed Switch is about 1/8 in. (3 mm). If necessary, loosen the Screw (7), move the Reed Switch slightly, and then retighten the Screw.
-
Page 21: Exercise Guidelines
EXERCISE GUIDELINES WARNING: Before beginning any exercise program, consult your physician. This is especially important for persons over the age of 35 or persons with pre-existing health problems. The pulse sensor is not a medical device. Various factors may affect the accuracy of heart rate readings. -
Page 22: Part List
PART LIST—Model No. RBTL06008.0 To locate the parts listed below, see the EXPLODED DRAWING near the end of this manual. Key No. Qty. Description Foot Rail Decal 3/4" Screw Screw Reset/Off Circuit Breaker Foot Rail Screw Isolator Hood Screw/Tie Screw Handrail Cap Platform Bolt, Back Platform Bolt, Front... - Page 23 Key No. Qty. Description Photo Switch Bolt Dumbbell Latch Plate Wire Tie Roller Ground Wire Photo Switch Wire Isolator Bracket Cover Center Isolator Bolt Rear Roller Lock Washer Crossbar Screw Crossbar Star Washer Front Roller Nut Crossbar Key No. Qty. Description Fan w/Cover Console Ground Wire...
-
Page 24: Exploded Drawing
EXPLODED DRAWING A—Model No. RBTL06008.0 R1207A... - Page 25 EXPLODED DRAWING B—Model No. RBTL06008.0 R1207A...
- Page 26 EXPLODED DRAWING C—Model No. RBTL06008.0 R1207A...
- Page 27 EXPLODED DRAWING D—Model No. RBTL06008.0 R1207A...
-
Page 28: Ordering Replacement Parts
ORDERING REPLACEMENT PARTS To order replacement parts, please see the front cover of this manual. To help us assist you, be prepared to pro- vide the following information when contacting us: • the model number and serial number of the product (see the front cover of this manual) •...
Need help?
Do you have a question about the 8000 C treadmill RBTL06008.0 and is the answer not in the manual?
Questions and answers