Table of Contents
Advertisement
Advertisement
Table of Contents

Related Manuals for SEMTOM ST-900

Summary of Contents for SEMTOM ST-900
- Page 1 OPERATION MANUAL...
-
Page 2: Table Of Contents
Content 1. Illustration ..................................3 2. Specifications ................................5 4. Operation ..................................9 1)Turn on/off the machine ............................ 9 2)AUTO or MANUAL mode ..........................10 3)ADD function ..............................10 4)Batch mode ..............................11 5)Counting speed setting........................... 11 6)Hopper adjustment ............................12 7)Restore to the factory default ........................ - Page 3 2)UV detection function ............................. 14 3)MG detection function............................. 15 4)IR detection function ............................16 6、Error message and solutions..........................18 7. Fault messages and solutions ..........................19 8. Precautions for handling the machine ........................21 9. Cautions ..................................22 10. Maintenance ................................23 11.
-
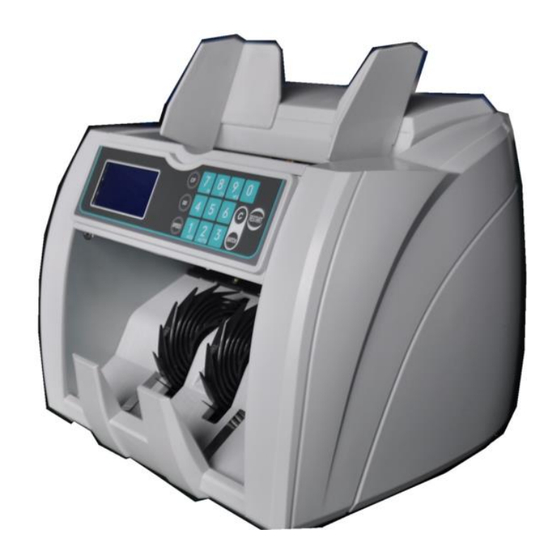
Page 4: Illustration
1. Illustration 1. Counting 1. Impeller guide 2. Display 2. Stacker 1. Feeding 1. Counting roller tube Reset 2. hopper sensor 3. Feeding Output sensor roller 第 3 页 共 24 页... - Page 5 1. Handle Power switch External 3. External display jack display Power outlet Adjustment screw 第 4 页 共 24 页...
-
Page 6: Specifications
2. Specifications Voltage/Frequency/C 100-240V~/50-60Hz/400mA urrency Power consumption 55W(Max) Counting range 5 digit 1600、1400、1100、800pcs/min Counting speed Feeding system roller friction Batching range 1-999PCS Banknote size L:50~100mm W:90~190mm Banknote thickness 0.075~0.15mm Hopper capacity 300PCS Stacker capacity 200PCS Net weight 5.3kg Dimension 298mm×251mm×248mm 第... - Page 7 3. Display and function keys Function Introduction 1.Start counting in the following cases: a.Clear or recover the error messages when counting, then start counting; RESTART b. In the manual mode,press “RESTART” to count 2. In the state of sensitivity setting, press “RESTART” to save the data and exit. 1.
- Page 8 1.Press this key to turn on the batch function, then press again the user can choose the batch number among 10, 20, 25, 50, 100, or can input the batch number(less than 999) by pressing the numeric keys, then press “C” key to save and exit the batch BATCH mode.
- Page 9 display/Ch display Function Display which function is on or off display 1. Press this key to turn on or off the DD detection function 2. Press “DD” key for 3 seconds to set the DD sensitivity level, “1 “is the lowest, “9” is DD Key the highest, “0”...
-
Page 10: Operation
1. It is the number 9 2. Press “CF” key, then press this key to turn on/off the MG function 9/MG Key 3. Press “MG” key for 3 seconds to set the MG sensitivity level, “1 “is the lowest, “9” is the highest, “0”... -
Page 11: 2)Auto Or Manual Mode
2)AUTO or MANUAL mode By pressing the “2/AUTO” to select the automatic or manual mode “AUT”is automatic counting mode: when place the notes in the hopper, then machine will start counting automatically. “MNL” is manual counting mode: when place the notes in the hopper, should press “RESTART” to start counting Notes: In the “AUTO”... -
Page 12: 4)Batch Mode
the notes from the stacker. 4)Batch mode By pressing “BATCH” to turn on/off the Batch function, then press “0-9” numeric key to set the batch number(range from 0-999) In the batch mode, press “1238” numeric keys then press “RESTART”, the user can check the total counting number since the machine left from the factory Notes: When the machine is stop in the mode of BATCH, there is no notes in the hopper and the count number is the same with the batch number, user should remove the notes from the stacker in... -
Page 13: 6)Hopper Adjustment
Note: when the counting speed reached up to 1600pcs/min, the machine does not have the MG and DD detection. 6)Hopper adjustment When the feeding of the notes is faulty, for example it comes up with the problem of double-note (error code: dbl), chain note (error code: CHN))and incorrect count, user should rotate the adjusting screw to the anticlockwise direction until the problem is solved. -
Page 14: 7)Restore To The Factory Default
7)Restore to the factory default Press the “C” key for 3 seconds to restore to the factory defaults, after you hear one “beep” sound, it is completed. 5. Counterfeit detection setting User can select the detection function according to the local currency. 1)DD detection function ——Press “DD”... -
Page 15: 2)Uv Detection Function
——The sensitivity of DD detection can be adjusted. Press “DD” key for 3 seconds, the display will show the current sensitivity level(range from 0-9 ), then press numeric key 0-9 to choose the desired sensitivity level (1 is the lowest, 9 is the highest, o is off). After choosing of the level, press “RESTART”key to confirm. Notes: In the DD mode, the machine will alert the user when the detection accuracy(width) is more than 5mm he measurement of the DD detection is the average of the length of the first and second notes. -
Page 16: 3)Mg Detection Function
the last one on the stacker. Remove the dubious bill, press “RESTART” key to continue or remove all of the bill and recount. ——The sensitivity of UV detection can be adjusted. Press “UV” key for 3 seconds, the display will show the current sensitivity level(range from 0-9 ), then press numeric key 0-9 to choose the desired sensitivity level (1 is the lowest, 9 is the highest, o is off). -
Page 17: 4)Ir Detection Function
bill and recount. ——The sensitivity of MG detection can be adjusted. Press “MG” key for 3 seconds, the display will show the current sensitivity level(range from 0-9 ), then press numeric key 0-9 to choose the desired sensitivity level (1 is the lowest, 9 is the highest, o is off). After choosing of the level, press “RESTART”key to confirm. - Page 18 the last one on the stacker. Remove the dubious bill, press “RESTART” key to continue or remove all of the bill and recount. ——The sensitivity of IR detection can be adjusted. Press “IR” key for 3 seconds, the display will show the current sensitivity level(range from 0-9 ), then press numeric key 0-9 to choose the desired sensitivity level (1 is the lowest, 9 is the highest, o is off).
-
Page 19: 6、Error Message And Solutions
6、Error message and solutions The batch display may show some error messages when counting, which means there are some problems with the machine. Refer to the following diagram to find way to solve it. Error code Messages Solutions Remove the suspicious bill from the stacker, press “RESTART”to continue;... -
Page 20: Fault Messages And Solutions
Remove the suspicious bill from the stacker, press “RESTART”to continue; Suspicious bill detected by DD function; Remove all the bill from the stacker, press “RESTART”to continue; Problem with Lower the DD sensitivity level function Remove all the bill from the stacker, Chain note press “RESTART”to continue;... - Page 21 Driving belt is damaged Replace the driving belt Problem with the feeding sensor or Replace the feeding sensor or the main the control circuit The way to judge the feeding sensor can work or not: to turn on the machine with hands covering the feeding sensor, if it shows “...
-
Page 22: Precautions For Handling The Machine
8. Precautions for handling the machine The user should pay attention to the following items when using this machine: 1.Damp and/or badly stained notes should be avoid; 2.Check there is no other things(paper clip, Damp and/or badly stained mixed with pieces of paper, rubber band, pieces of paper etc.)mixed in the note clip or rubber band... -
Page 23: Cautions
when the machine work. 9. Cautions Please read the all the instructions as below before using the machine, or it will lead to some danger and fault ——Avoid exposing the product to the sunlight ——The product should have well earthing performance ——The product may affected by the wireless device interference(like phone, intercom etc.) ——Please use the qualified power cable ——Turn off the product or pull out the power plug before moving it... -
Page 24: Maintenance
10. Maintenance The counting sensor and the start sensor belongs to the optical equipment. If there is some dust and dirty things covering the sensor, it will lead to the fault when the machine work. The user should clean the machine after using.
Need help?
Do you have a question about the ST-900 and is the answer not in the manual?
Questions and answers