Record Power PT260 Original Instruction Manual
Planer thicknesser
Hide thumbs
Also See for PT260:
- Operating manual and service instructions (42 pages) ,
- Instruction manual (14 pages)
Table of Contents
Advertisement
Quick Links
Original Instruction Manual
PT260
Planer Thicknesser
Version 3.1
January 2014
It is important to register your product as soon as possible in order to receive efficient after sales
support and be entitled to the full 5 year guarantee. Your statutory rights are not affected.
Kg
Always wear safety glasses when
using woodworking equipment.
To register this product please visit
www.recordpower.info
Please see back cover for contact details.
i
Always read the instructions
provided before using
woodworking equipment.
Kg
Important
For your safety read instructions carefully
before assembling or using this product.
Save this manual for future reference.
Advertisement
Table of Contents

Related Manuals for Record Power PT260


Summary of Contents for Record Power PT260
- Page 1 Original Instruction Manual PT260 Planer Thicknesser Version 3.1 January 2014 To register this product please visit www.recordpower.info It is important to register your product as soon as possible in order to receive efficient after sales support and be entitled to the full 5 year guarantee. Your statutory rights are not affected.
-
Page 2: Table Of Contents
Contents Terms & Conditions Of Usage Explanation of Symbols General Health & Safety Guidance Additional Health & Safety Guidance for Planer Thicknessers Record Power Guarantee User Manual Getting to Know your Planer Thicknesser Machine Specification Stand & Wheel Kit Assembly... -
Page 3: Explanation Of Symbols
Explanation of Symbols THE SYMBOLS AND THEIR MEANINGS SHOWN BELOW MAY BE USED THROUGHOUT THIS MANUAL. PLEASE ENSURE THAT YOU TAKE THE APPROPRIATE ACTION WHEREVER THE WARNINGS ARE USED. Mandatory Instructions Warning Read and fully understand the instruction manual Indicates a risk of severe personal injury or before attempting to use the machine. - Page 4 General Health & Safety Guidance cont. • The floor surface should be sound and level. All of the feet of the • Keep proper footing and balance at all times. machine should make contact with the floor surface. If they do not, either 15.
- Page 5 General Health & Safety Guidance cont. 23. Stay alert • Correctly maintained cutting tools are easier to control and less likely • Safety is a combination of operator common sense and alertness at all to bind. times when the machine is being used. •...
-
Page 6: Additional Health & Safety Guidance For Planer Thicknessers
Additional Health & Safety Guidance for Planer Thicknessers Warning: • When planing short work pieces an additional push block should be used. For your own safety, do not attempt to operate your planer Never attempt to plane a work piece that is too small to hold by hand. thicknesser until it is completely assembled and installed •... -
Page 7: Record Power Guarantee
Guarantee should be made directly to Record Power or its Authorised Distributor Record Power guarantees that for a period of 5 years from the date (for details of the Authorised Distributor in your country please see of purchase the components of qualifying Products (see clauses 1.2.1 your Product manual or check www.recordpower.info for details). -
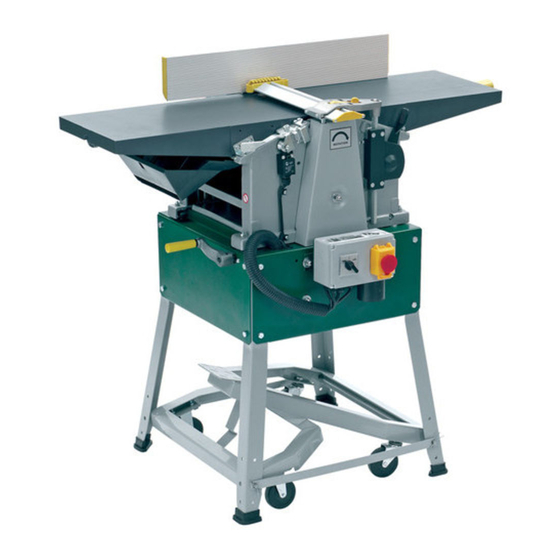
Page 8: Getting To Know Your Planer Thicknesser
Cutter guard rise and fall Wheel kit operating pedal Machine frame Motor rating plate 2. Machine Specification PT260 SPECIFICATION Thicknesser Feed Rate: 5 Metres / Minutes Cutter Block Diameter: 63 mm Maximum Thicknessing Width: 260 mm Maximum Planing Width: 260 mm... -
Page 9: Stand & Wheel Kit Assembly
3. Stand & Wheel Kit Assembly 3.1 Stand & Wheel Kit Assembly Fig.3.1 CAUTION! To fit the legs the machine must be placed onto its side. The machine is heavy. Additional help or a suitable lifting device or support will be required for lifting the machine onto the stand. - Page 10 3. Stand & Wheel Kit Assembly - cont. CAUTION! To fit the legs the machine Fig.3.2 Fig.3.4 must be placed onto its side. The machine is heavy. Additional help or a suitable lifting device or support will be required for lifting the machine onto the stand.
- Page 11 3. Stand & Wheel Kit Assembly - cont. 3.3 Wheel Kit Assembly Fig.3.7 Fig.3.11 1. On the underside of the operating frame, find the two flattened areas on either side. Mount the two fixed wheels and secure in place using the nuts and bolts provided Fig.3.7.
-
Page 12: Machine Assembly
4. Machine Assembly ASSEMBLY – IDENTIFYING CONTENTS Inside the shipping container you will find the following: Stand & Wheel Kit 1. PT260 Planer Thicknesser main body 2. Chip ejector hood Stand 3. Extraction port 1. 4 x stand legs 4. Switch box 2. - Page 13 4. Machine Assembly 4.1 Fixing the in-feed table Fig.4.1 Fig.4.7 1. Remove the four socket head cap screws from Self tap screw table cover rails already fitted and remove the & washer cover rails Fig.4.1. Slot 2. Take the in-feed depth of cut adjustment bar and remove the collar and sprung washer TABLE COVER Fig.4.2.
- Page 14 4. Machine Assembly - cont. 4.5 Fitting the fence Fig.4.10 Slide the fence assembly on to the fence carrier Fig.4.10 and tighten the lower ratchet handle to secure. Now fit the guard plate Fig.4.11. 4.6 Setting the fence Once the fence is in position it must now be accurately set at 90º.
-
Page 15: Machine Set Up
Also give the slot in the cutter block a Wedge wipe down with white spirit. Once the components are clean, treat with a lubricant such as Record Power Silicone Spray. Fig.5.5 Fig.5.3 Check the operation of the jacking mechanism in the wedge Fig 5.5. - Page 16 5. Machine Set Up - cont. 5.3 How to adjust Planer Knives Fig.5.7 The wedge and knives are now ready to be set. Turn the four locking nuts anti-clockwise Fig 5.7 and tighten enough to hold the knife, but not so hard that it cannot move.
- Page 17 5. Machine Set Up - cont. To make setting the blades an easier and faster operation Record Power offer the Fig.5.11 RPPSJ Planer Blade Setting Jig. See the website for full details. CAUTION! This procedure involves close contact with the planer blade. Ensure...
-
Page 18: Operation & Planer Thicknesser Practice
6. Operation & Planer Thicknesser Practice 6.1 Chip removal when planing Fig.6.1a Set thicknessing bed to approximately 2/3 capacity and place extraction connector on to it. Raise thicknessing bed to secure extraction connector in position Fig.6.1a Note: The microswitch has to be registered for the machine to operate Fig.6.1b. - Page 19 6. Operation & Planer Thicknesser Practice - cont. 6.4 Planing Fig.6.7A Fig.6.5A Fix the extraction port in position as shown in Section 6.1. This operation is carried out for straightening a workpiece and for trimming the long side of panels. Place workpiece flush on to in-feed table, with your left hand set the cutter guard to the required height (workpiece should be run clear of the guard).
- Page 20 The purpose of the microswitch is to enhance the safety of the machine by ensuring that the cutterblock is inaccessible whilst the machine is in operation. The PT260 is equipped with 3 Thicknessing Bed safety micro switches. 1. In thicknesser mode, the extraction port must be placed over the cutterblock, covering it before the machine will start Fig.6.10.
-
Page 21: Dust Extraction
Record Power Extractors be switched off for 20 minutes every hour. 0.5 micron filtration Record Power offer a range of high quality dust extractors, we offer both drum and bag type extractors which filter down 0.5 micron providing CX2000 Compact Chip Extractor protection from harmful fine dusts. -
Page 22: Maintenance
The PT260 features double sided knives so the reverse side can be used if one side is blunt. The knives are also re-sharpenable. It is advisable to buy a spare set of knives so that machine can be used while the other set is being sharpened. - Page 23 8. Maintenance - cont. To remove the planer knives Fig.8.2 1. Disconnect the machine from the electricity supply. 2. Remove the planer fence. 3. Raise the cutterblock guard extrusion and pull it outwards fully. 4. Turn each of the four screws of the planer knife lock bar fully inwards.
- Page 24 8. Maintenance - cont. Belt Tension Fig.8.13 Fig.8.8 After the first 5 hours of operation check belt the tension. 1. Remove the cutter guard assembly from the side of the machine by removing the 4 phillips screws Fig.8.8. 2. Undo the cap head bolt and remove the drive belt cover Fig.8.9.
- Page 25 8. Maintenance - cont. Re-checking and setting outfeed table Fig.8.17 Fig.8.21 The tables on this machine are factory set so it Depth Scale is very unlikely that any adjustment will need to be carried out. However if the performance of the machine indicates that the tables may be out of alignment follow the procedure below.
-
Page 26: Electrical Connection & Wiring Diagram
9. Electrical Connection & Wiring Diagram Machines supplied for use in the UK are fitted with a 3 pin plug conforming machine. If replacing the original fuse, always fit a fuse of equivalent rating to BS1363, fitted with a fuse conforming to BS1362 and appropriate to the to the original. -
Page 27: Trouble Shooting
10. Trouble Shooting Symptom Possible Causes Solutions Thicknesser will not 1. Thicknesser drive belt worn / broken 1. Check and replace as necessary feed workpiece through 2. Drive chain tension spring broken 2. Check and replace spring 3. Workpiece sticking on Thicknesser 3. -
Page 28: Parts Diagrams
11. Parts Diagrams Stand & Wheel Kit... - Page 29 11. Parts Diagrams - cont.
- Page 30 11. Parts Diagrams - cont.
-
Page 31: Parts List
12. Parts List Ref No. Description Ref No. Description Pedal Spacer shaft w/tapped hole Flat Washer Feed roller – coarse Hex Nut Set screw – M5 Check nut Washer M10 Thicknesser bed w/pointer Shaft Shim with hole 8.1 Split Pin Pressure spring Movable Castor Washer –... - Page 32 12. Parts List - cont. Ref No. Description Ref No. Description Pan head self tapping screw – St3.5 x 13mm Cap nut – M6 Side panel lid Hex. nut – M14 Pan head screw – M4 x 8mm Hex. socket head cap screw – M10 x 16mm Drive belt cover Spacer bush Washer –...
-
Page 33: Eu Declaration Of Conformity
EU Declaration of Conformity Cert No: EU / PT260 / 1 RECORD POWER LIMITED, Centenary House, 11 Midland Way, Barlborough Links Chesterfield, Derbyshire S43 4XA:- Type: Planer Thicknesser Model No: PT260 Serial No ................. Conforms with the following directives:- MACHINERY DIRECTIVE... - Page 36 Woodworking Machinery & Accessories United Kingdom Eire Australia New Zealand Record Power Ltd Record Power Ltd Tools 4 Industry Tools 4 Industry Centenary House, 11 Midland Way Centenary House, 11 Midland Way Po Box 3844 Po Box 276079 Barlborough Links, Chesterfield...
Need help?
Do you have a question about the PT260 and is the answer not in the manual?
Questions and answers
I have Record power Pt260, functions fine until today. Table for thicknessing (with scale in mm) suddenly stop. The chain (horzontal ) is ok but not possible to lower or raise table. What can it be?
The thicknessing table on a Record Power PT260 could stop moving up and down due to the following reasons:
1. Build-up of shavings or dust on the mechanism – This can cause stiffness and prevent movement. Cleaning and lubricating with a silicone-based lubricant can resolve this issue.
2. Rise and fall chain wrongly adjusted or broken – If the chain is misaligned or damaged, the table may not operate correctly. A suitably qualified person or authorized agent should check and repair the machine if necessary.
This answer is automatically generated