
Related Manuals for Eurotech PROTEUS


Summary of Contents for Eurotech PROTEUS
-
Page 1: User Manual
USER MANUAL PROTEUS SINGLE BOARD COMPUTER Rev 3.0 - April 2009 - ETH_PROTEUS_USM DIGITAL TECHNOLOGIES FOR A BETTER WORLD www.eurotech.com... - Page 2 The warranty on all third party manufactured products utilised by Eurotech is limited to 1 year. Eurotech will make all reasonable effort to repair the product or replace it with an identical variant. Eurotech reserves the right to replace the returned product with an alternative variant or an equivalent fit, form and functional product.
-
Page 3: Table Of Contents
Features of COM Express variants..................10 Comparison of PROTEUS variants ..................13 Power consumption ........................16 Support products ........................17 Getting started with your PROTEUS ..................20 What do need? ......................20 Connecting your PROTEUS ..................20 Identifying your PROTEUS ..................21 Connecting a SATA hard disk ..................21 Connecting a CD-ROM....................21... - Page 4 Module power supply ....................39 Indicator LEDs ......................39 Connectors and LEDs......................40 Connectors ........................ 43 LEDs .......................... 65 GPIO mapping ........................68 Appendix A – Reference information..................72 Appendix B – RoHS Compliance ................... 73 Eurotech Group Worldwide presence ..................75 Issue C...
-
Page 5: Handling Your Board Safely
Do not incinerate, crush or otherwise damage the battery. Use only standard CR1220 button batteries. Packaging Please ensure that, should a board need to be returned to Eurotech, it is adequately packed, preferably in the original packing material. Electromagnetic compatibility (EMC) The PROTEUS is classified as a component with regard to the European Community EMC regulations and it is the user’s responsibility to ensure that systems using the board... -
Page 6: Introduction
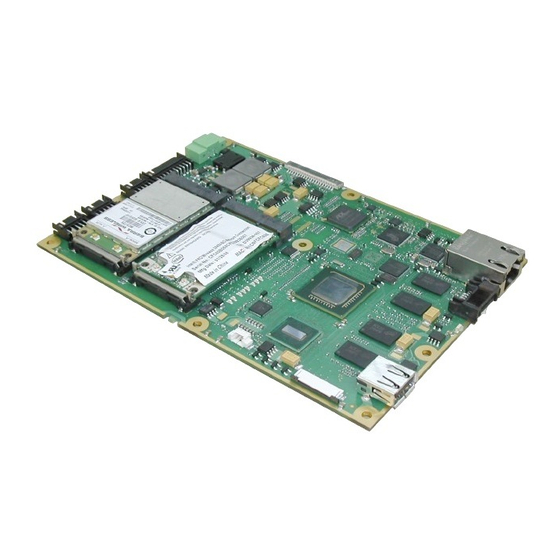
PROTEUS user manual Introduction The PROTEUS is a single board computer primarily based on the Type-1 COM Express extended format CPU module. It also has a secondary build option which allows it to operate in a standalone (base-board free) operating mode. -
Page 7: Features Of Standalone Variants
• Two single-channel LVDS 24-bit interfaced to two connectors. • One backlight connector. PROTEUS V1I1 only supports one single-channel LVDS interface on the LVDS A connector. Audio • HD Audio CODEC and 2W audio amplifier supporting stereo speakers, line in, microphone and headphone. - Page 8 PROTEUS user manual USB support • USB 2.0 supporting low/full/high speed modes. • Two ports connected to PCI Express MiniCard sockets. • Two user accessible ports (Pin header, one client configurable). • One port to board edge Type A connector.
- Page 9 Features of standalone variants Test support • JTAG Interface (Intel XDP). Power requirements • On-board voltage regulators and power management. • Power / Sleep LED. • +12V (optional: +5V standby, +3.3V battery). • +8.5V DC to +24V DC (+12V nominal). Physical/other •...
-
Page 10: Features Of Com Express Variants
• One single-channel LVDS 24-bit interface to COM Express. • One single-channel LVDS 24-bit interface to connector. PROTEUS V1I1 supports two single-channel LVDS interfaces on COM Express connector and none on the Interface connector. Audio • HD Audio interface on board-to-board connector. - Page 11 Features of COM Express variants USB support • USB 2.0 supporting low/full/high speed modes. • Two ports connected to PCI Express MiniCard socket. • Two user accessible ports (Pin header, one client configurable). • Four ports on board-to-board connector. Ethernet •...
- Page 12 PROTEUS user manual Bluetooth OR ZigBee (build option) • Bluetooth wireless communication provided by on-board Bluetooth module. • ZigBee interface provided by an on-board NanoZigBee module. Test support • JTAG Interface (Intel XDP). Power requirements • On-board voltage regulators and power management.
-
Page 13: Comparison Of Proteus Variants
Ultra low power integrated 3D graphics. One single-channel LVDS 24-bit interface to COM Express. One single-channel LVDS 24-bit interface to connector * (Note: for PROTEUS V1I1 see below) Two single-channel LVDS 24-bit interface to two connectors. One backlight connector. * (Note: for PROTEUS V1I1 see below) - Page 14 PROTEUS user manual COM Express Standalone Features Ethernet Gigabit Ethernet port supporting 10/100/1000 BaseT. Output to board-to-board connector. Output to board edge RJ-45 connector. Serial ATA Supports two SATA output to board-to-board connector. Output to one SATA connector. One power connector for SATA drive.
- Page 15 Comparison of PROTEUS variants COM Express Standalone Features Test Support JTAG Interface (Intel XDP). On-board voltage regulators and power management. Power / Sleep LED. +12V (optional: +5V standby, +3.3V Battery). +8.5V DC to +24V DC (+12V nominal). Physical/other 155mm x 110mm.
-
Page 16: Power Consumption
PROTEUS user manual Power consumption Board power – VIN Board power – VIN Total board rail input voltage [V] rail current [mA] HW / SW power [W] Note Board only / XPe, idle 19.99 437.50 8.75 Board only / XPe, BurnIn test + 20.05... -
Page 17: Support Products
Support products Support products The PROTEUS is supported by the following optional products: • PROTEUS development kit. See below. • PROTEUS ICE (Industrial Compact Enclosure). See below. • Breakout boards. See the next page. • LVDS to VGA adapter. PROTEUS development kit:... - Page 18 PROTEUS user manual Breakout boards Four breakout boards are available: • System Buttons (on/off, Reset, user button) and LEDs (power, HDD activity, PCIE minicards activity, two user LEDs). • USB and serial: One DB9M RS232, one double USB A type connector •...
- Page 19 Support products LVDS to VGA adapter Issue C...
-
Page 20: Getting Started With Your Proteus
PROTEUS user manual Getting started with your PROTEUS What do need? There are three basic configurations that can be used to access to your PROTEUS board: • PROTEUS board, TFT LCD display kit, keyboard/mouse, USB hub, and power. • PROTEUS board, LVDS to VGA adapter, monitor, keyboard/mouse, USB hub, and power. -
Page 21: Identifying Your Proteus
Connecting a SATA hard disk PROTEUS stand alone PROTEUS (stand alone) supports one SATA drive via a SATA cable. A 7-wire SATA cable is used to provide a direct connection between the PROTEUS board connector (J3) and the hard disk connector. Power for the hard drive is provided through... -
Page 22: Connecting A Keyboard
The PROTEUS board enters to a standby screen when power is connected. The operator must turn the unit ON via a remote switch connected to the board. The PROTEUS power button connection should be connected to a momentary ON push switch; this is... -
Page 23: Using The Usb Ports
Using the flat panel interface PROTEUS stand alone The PROTEUS V1I1 stand alone provides one LVDS output. This is connected to LVDS A connector (J4). The LVDS connector pin out is compatible with most standard LVDS flat panel displays and direct cable connection is possible. Alternatively an... -
Page 24: Using The Backlight Connector
COM Express Both PCIE minicard sockets (J13, J14) are connected to the PCIE switch. Using the micro SD The PROTEUS provides one micro SD slot (J24). The slot supports micro SD cards with a capacity up to 2GB. Issue C... -
Page 25: Using The General Purpose Inputs/Outputs (Gpio)
Using the GPS The PROTEUS provides an on board GPS module. The GPS module is connected to COM4 port. The port needs to be set as follows: 4800bps, 8, N, 1, N. For proper functionality an external antenna should be connected to the GPS antenna connector (J25). -
Page 26: Software Specification
All system components have drivers available for Windows XP and Linux. BIOS The PROTEUS incorporates a custom system BIOS which is based on the InsydeH2O core from Insyde Software, www.insydesw.com/products/products-efi-h2o.htm. The BIOS provides operating system support for Windows XP, Windows XP Embedded, Windows CE and Linux. -
Page 27: Hardware Implementation
The PCI Industrial Computer Manufacturers Group (PICMG) COM Express Module Base Specification Revision 1.0 is used to define the primary mechanical and electrical interconnects for the PROTEUS module design. A Type 1 connector pinout and an Extended module mechanical format are used. -
Page 28: Power
RTC input all of which are provided via the board-to-board connector from the carrier board. in the standalone implementation of the PROTEUS module the power rails are provided on a PCB mounted connector on the side of the module, input power is protected from over voltage and over current events. -
Page 29: Block Diagram
The following block diagram shows the COM Express Type 1 extended module implementation of the PROTEUS with connections to the COM Express board-to-board connector: For PROTEUS V1I1 is LVDS interface from LVDS B connected as second LVDS interface on COM express connector. LVDS B is not fitted in this version. - Page 30 PROTEUS user manual Standalone implementation This format of the PROTEUS module removes the COM Express board-to-board connector and associated components and allows for a processor core with bootable storage, dual LVDS display support, touch screen, wireless connectivity, Ethernet, SATA and USB expansion: LVDS B connector is not fitted on PROTEUS V1I1.
-
Page 31: Layout And Dimensions
Hardware implementation Layout and dimensions The following PROTEUS diagram show the connector placement for both COM Express and standalone implementations: Primary side Issue C... - Page 32 PROTEUS user manual Secondary side Issue C...
-
Page 33: Com Express Type 1 Carrier Board Expansion
Hardware implementation COM Express Type 1 carrier board expansion in the COM Express carrier board implementation the external IO from the module is provided via the COM Express board-to-board connector. The carrier board can be implemented using a method that best suits your needs. Processor and chipset Intel ATOM processor The Intel ATOM Z5xx series processor is a high-performance, ultra low power processor... -
Page 34: Graphics Support
PATA port, then the two devices have to share the backbone with PCI Express data being transferred to memory, and then from memory to the PATA port. in some usage models for the PROTEUS, full data bandwidth of devices is not available. -
Page 35: Clock Generation
Ports 0 and 2 are connected via a pin header to allow for off module expansion. Port 2 can be reconfigured in software to be a USB client port allowing the PROTEUS to appear as a peripheral. Ports 4 and 5 are routed to the PCI Express Mini Card sockets. -
Page 36: Pci Express Interface
PEX8505 four port PCI Express switch. The PCI Express four port switch interfaces to the WLAN PCI Express mini card socket, the Gigabit Ethernet controller and to the serial ATA controller. IO connectors are fitted to the edge of the standalone PROTEUS module to allow these interfaces to be used on the module. -
Page 37: Serial Ata
Hardware implementation Serial ATA Serial ATA (SATA) support is provided on the PROTEUS module using a Silicon Image (SiI3132) PCI Express SATA controller. The SiI3132 supports two independent Serial ATA ports with generation 2 transfer rates of 3.0GB/s and is compliant with the Serial ATA 1.0 specification. -
Page 38: Gps Receiver (Build Option)
PROTEUS user manual GPS receiver (Build option) A GPS module is provided as a factory build option on the PROTEUS to allow complete GPS functionality including position, velocity and time (PVT). A Fastrax iTrax300 GPS module is used, the iTrax300 is based on SiRF GSC3e/LP single chip. -
Page 39: Micro Sd Socket
2GB; sector based addressing is not supported. Module power supply The PROTEUS module supports a wide input voltage range from +8.5V to +24V DC with a nominal operating voltage of +12V. Over current and over voltage protection are provided on these main input rails. -
Page 40: Connectors And Leds
PROTEUS user manual Connectors and LEDs The PROTEUS has the following connectors: Connector Function Connector details in section USB 1, connector Type A J1 - USB Type A connector, page SATA J2 - SATA connector, page GBe Ethernet J3 - GB Ethernet... - Page 41 Connectors and LEDs Connector - top view Connectors - bottom view Issue C...
- Page 42 PROTEUS user manual LEDs The following diagram shows the location of the LEDs on the PROTEUS. D81 D36 D19 D18 The PROTEUS has the following connectors LEDs: Function LED details in section D80 - Power / sleep LED, page Power / sleep LED...
-
Page 43: Connectors
Connectors and LEDs Connectors J1 - USB Type A connector (stand alone only) J1 is connected to SCH USB port 1. Connector : EDAC 690-004-621-013. Signal name D- (USB port 1) D+ (USB port 1) J2 - SATA connector (stand alone only) J2 is connected to channel 1 of SATA controller. - Page 44 PROTEUS user manual J3 - Gb Ethernet connector (stand alone only) J3 is connected to GBe controller. Connector : L829-1J1T-43 Gigabit Ethernet Ultra Low ® Profile Single Port MagJack with LEDs. Signal name TRP1+ TRP1- TRP2+ TRP3+ TRP3- TRP2- TRP4+...
- Page 45 Connectors and LEDs J4 - LVDS A connector (stand alone only) J4 is connected to SCH LVDS interface. Connector : JAE FI-SE209-HFE, 20-way. Housing : 20Way 1.25mm pitch single row housing Hirose, part number DF14-20S-1.25C. Crimps : Gold 26-28 AWG crimps Hirose, part number DF14-2628SCFA. Signal name +3.3V +3.3V...
- Page 46 PROTEUS user manual J5 - Power connector (stand alone only) J5 is main power input connector (8.5V ~ 24V). Connector : IMO PC 20.155MHF/2. Mating socket : IMO PC 20.1550MF/2. Signal name VIN+ (Power in) VIN- (Power in) Issue C...
- Page 47 Connectors and LEDs J6 - System connector (stand alone only) Connector : HIROSE DF11-20DP-2DS(24). Housing : 20Way HIROSE Housing (DF11-20DS-2C) or equivalent. Crimps : Crimps for Housing (DF11-2428SCA) or equivalent. Signal name Signal name Description HDD LED HDD activity LED (220 Ω series HDD LED ANODE CATODE resistor on board).
- Page 48 PROTEUS user manual HDD LED connection example PCIE mini card LED connection example Power LED connection example User LED connection example Issue C...
- Page 49 Connectors and LEDs User button connection example POWER button connection example RESET button connection example Issue C...
- Page 50 PROTEUS user manual J7 - USB0/2 header J7 is connected to SCH USB ports 0 and 2. High level on Pin 9 change HOST USB port 2 to USB CLIENT mode (The mode needs to be enabled in BIOS too). If Pin 9 is low then USB port 2 is running in HOST mode.
- Page 51 Connectors and LEDs J9 - GPIO header J9 is connected to I2C GPIO expander. Each GPIO line has 100KΩ pull up to 3.3V. The GPIO pins are 5V tolerant. Connector : HIROSE DF11-10DP-2DS(24). Housing : 10Way HIROSE Housing (DF11-10DS-2C) or equivalent. Crimps : Crimps for HIROSE Housing (DF11-2428SCA) or equivalent.
- Page 52 PROTEUS user manual J12 - SIM card socket J12 is a SIM card socket connected to J13 PCIe Minicard slot 0. Connector : JAE SF7W008S1AE900. Signal name VCC (out) RESET (out) CLK (out) VPP (out) IO (in/out) CD1 (default NC)
- Page 53 Connectors and LEDs J13 - PCI Express Mini Card slot 0 Stand alone: J13 is connected to PCI Express channel 0 of SCH. COM Express: J13 is connected to PCI Express switch port 3. Connector : FOXCONN AS0B226-S68N-7F, MINIPCI express, 52.SMT, 0.7, 6.8mm, STD, 25. Signal name Signal name WAKE# (in)
- Page 54 PROTEUS user manual J14 - PCI Express Mini Card slot 1 J14 is connected to PCI Express switch port 4. Connector : FOXCONN AS0B226-S68N-7F, MINIPCI express, 52.SMT, 0.7, 6.8mm, STD, 25. Signal name Signal name WAKE# (in) +3.3V N.C. N.C.
- Page 55 Connectors and LEDs J17 - Audio connector (stand alone only) Connector : MOLEX 53261-137. Housing : 3Way MOLEX Housing (51021-1300) or equivalent. Crimps : Crimps for MOLEX Housing (50058-8000) or equivalent. Signal name Description FMIC_IN (in) Microphone input FMIC_BIAS (out) Microphone bias Analogue ground FLINEIN_R (in)
- Page 56 PROTEUS user manual J19 - Misc ZIF connector (stand alone only) Connector : MOLEX 54104-4096. Signal name Signal name 3.3V (S3) 3.3V (S3) 3.3V (S3) SDIO2_DATA0 SDIO2_DATA1 SDIO2_DATA2 SDIO2_DATA3 SDIO2_DATA4 SDIO2_DATA5 SDIO2_DATA6 SDIO2_DATA7 SDIO2_PWR SDIO2_CMD SDIO2_CLK SDIO2_CD SLOT2_LED (220Ω SDIO2_WP (pulled up)
- Page 57 Connectors and LEDs J20 - Backlight J20 is backlight connector for LVDS_A (J4). Connector : MOLEX 53261-0971. Housing : 3Way MOLEX Housing (51021-0900) or equivalent. Crimps : Crimps for MOLEX Housing (50058-8000) or equivalent. Signal name SMB DATA SMB CLK BRTH –...
- Page 58 PROTEUS user manual J21 - LVDS B connector (not supported by PROTEUS V1I1) J21 is connected to CH7308 SDVO LVDS Transmitter. Connector : JAE FI-SE209-HFE, 20-way. Mating socket : 2 off 20Way 1.25mm pitch single row housing. Manufacturer: Hirose, part number DF14-20S-1.25C.
- Page 59 Connectors and LEDs J22 - COM Express connector (COM Express only) Connector : TYCO 3-1318490-6. Mating socket : 5mm: TYCO 3-1827253-6, 8mm: TYCO 3-1318491-6. Signal name Signal name GBE0_MDI3- GBE0_ACT# (out) (160R series resistor) GBE0_MDI3+ LPC_FRAME# (out) GBE0_LINK100# (out) (160R LPC_AD0 (in/out) series resistor) GBE0_LINK1000# (out) (160R...
- Page 60 PROTEUS user manual Signal name Signal name AC_SYNC (out) AC_RST# (out) AC_SDIN0 (in) AC_BITCLK (out) SPKR (out) (220R series resistor) AC_SDOUT (out) I2C_CK (out) (EC LPC2132) BIOS_DISABLE# (in) (CPLD) I2C_DAT (in/out) (EC LPC2132) THRMTRIP# (in) (CPLD) THRM# (in) (CPLD) USB2- (SCH US15W port 6 - high...
- Page 61 PCIE_TX0+ (SCH US15W port 1) PCIE_RX0+ (SCH US15W port 1) PCIE_TX0- (SCH US15W port 1) PCIE_RX0- (SCH US15W port 1) LVDS_A0+ (SCH US15W LVDS) NC (PROTEUS V1I1: LVDS_B0+) LVDS_A0- (SCH US15W LVDS) NC (PROTEUS V1I1: LVDS_B0-) LVDS_A1+ (SCH US15W LVDS) NC (PROTEUS V1I1: LVDS_B1+)
- Page 62 PROTEUS user manual Signal name Signal name VCC_5V_SBY (+5V standby GPI3 (SuperIO: GP54) power) VCC_5V_SBY (+5V standby power) VCC_5V_SBY (+5V standby power) PCIE0_CK_REF+ (out) PCIE0_CK_REF- (out) GPO0 (SuperIO: GP56) VCC_12V (input power +12V) VCC_12V (input power +12V) VCC_12V (input power +12V)
- Page 63 Connectors and LEDs J23 - SATA power connector (stand alone only) Connector : MOLEX 53261-0471. Housing : 3Way MOLEX Housing (51021-0400) or equivalent. Crimps : Crimps for MOLEX Housing (50058-8000) or equivalent. Pin name J24 - Micro SD slot J24 is connected to SCH SDIO slot 1. Connector : HIROSE DM3AT-SF-PEJ.
- Page 64 PROTEUS user manual J26 - FAN 2 connector (optional) J26 is connected to Super IO FAN 2 control pins. Connector : MOLEX 53261-0371. Housing : 3Way MOLEX Housing (51021-0300) or equivalent. Crimps : Crimps for MOLEX Housing (50058-8000) or equivalent.
-
Page 65: Leds
Connectors and LEDs LEDs D80 - Power / Sleep LED D80 is dual colour LED: • Green colour indicates S0 state. in this state the board is fully running. • Orange colour indicates S3 state. in this state the board is in sleep mode. D36 - PCIe Minicard slot 0 activity D36 indicates PCIe Minicard slot 0 activity. - Page 66 PROTEUS user manual D81 - Thunderbolt / SATA activity D81 indicates access to Thunderbolt or SATA drive. D50 - Bluetooth activity D50 indicates Bluetooth activity and depends on WT11 module settings. D62 - Micro SD card activity D62 indicates access to micro SD card.
- Page 67 Connectors and LEDs D19 - S3 power state indicator If D19 is ON all S3 power supplies are switched ON and output voltages / currents are in allowed tolerance. D20 - S0 power state indicator If D20 is ON all S0 power supplies are switched ON and output voltages / currents are in allowed tolerance.
-
Page 68: Gpio Mapping
PROTEUS user manual GPIO mapping There are three groups of GPIO pins on PROTEUS. First group is connected between I2C GPIO expander and connector J9. The second group is connected between SUPERIO and COM express connector (J22) and the third group is connected between CPLD and J22. - Page 69 GPIO mapping SUPER IO pin mapping There is SCH3114 super IO used on PROTEUS. Following table shows connection some of the SUPER IO pins. SUPER IO GP pin number Signal Description GP61 GPIO3 Connected to pin A67 GP54 GPIO4 Connected to J22 pin A85...
- Page 70 PROTEUS user manual CPLD pin mapping Some of GPIO pins are controlled through CPLD. Control these pins use register mapped to I/O address 0x5A. Other registers can be found on 0x5B and 0x5C. See following tables with detailed description. Address: 0x5A (Read/Write)
- Page 71 GPIO mapping Address: 0x5C (Read only) Signal Description SDIO_SLOT1_OC# SDIO card over current flag PCIE_MINI0_OC# PCIE mini card slot 0: +3.3V over current flag PCIE_MINI1_OC# PCIE mini card slot 1: +3.3V over current flag Reserved Reserved Reserved Reserved Reserved Issue C...
-
Page 72: Appendix A - Reference Information
PROTEUS user manual Appendix A – Reference information Product information Product notices, updated drivers, support material: www.eurotech.com PCI special interest group PCI Bus specification and list of manufacturers: www.pcisig.org USB information Universal Serial Bus (USB) specification and product information: www.usb.org... -
Page 73: Appendix B - Rohs Compliance
HS Compliance The Restriction of the use of certain Hazardous Substances (RoHS) Directive came into force on 1st July 2006. The PROTEUS board is designed using RoHS compliant components, and manufactured to comply with the RoHS Directive. Eurotech has based its material content knowledge on a combination of information provided by third parties and auditing our suppliers and sub-contractor’s operational activities and arrangements. - Page 74 PROTEUS user manual Issue C...
-
Page 75: Eurotech Group Worldwide Presence
Eurotech Group Worldwide presence AMERICAS EUROPE ASIA North America Central & Southern Europe Japan EUROTECH USA EUROTECH Italy ADVANET US toll free +1 800.541.2003 tel. +39 0433.485.411 tel. +81 86.245.2861 tel. +1 301.490.4007 fax +39 0433.485.499 fax +81 86.245.2860 fax +1 301.490.4582 e-mail: sales-it@eurotech.com... - Page 76 www.eurotech.com...
Need help?
Do you have a question about the PROTEUS and is the answer not in the manual?
Questions and answers