Table of Contents
Advertisement
Advertisement
Chapters
Table of Contents

Related Manuals for Karma REVERO

Summary of Contents for Karma REVERO
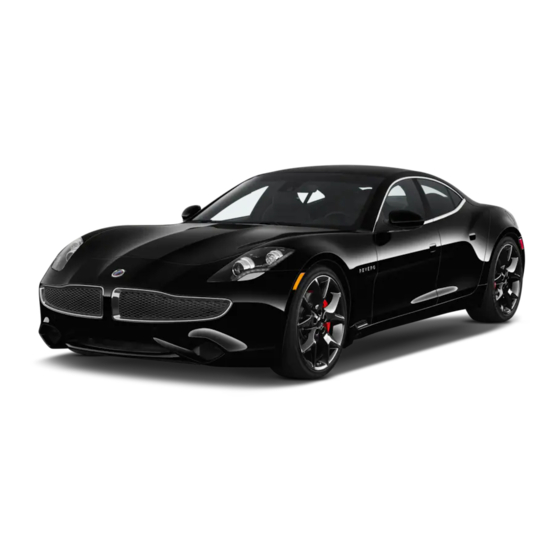
- Page 1 K A R M A R E V E R O Q U I C K R E F E R E N C E G U I D E...
- Page 3 This Quick Reference Guide is to familiarize the owner of the vehicle of all normal operations and functions of the vehicle. The content of this reference guide is correct for this vehicle at the time of publishing.The content of the vehicle is subject to change, please consult the official Karma Revero Owner’s Manual at www.karmaautomotive.com/owners.
- Page 4 This Page Intentionally Left Blank...
- Page 6 This Page Intentionally Left Blank...
-
Page 7: Table Of Contents
INTRODUCTION ........................ 7 LOCKING AND UNLOCKING THE VEHICLE............9 INSTRUMENT PANEL ....................17 SEATS AND RESTRAINTS ..................25 CONTROLS AND OPERATION ................29 STARTING AND DRIVING................... 35 USING THE TOUCH PANEL..................45 ROUTINE MAINTENANCE..................63 WHEELS AND TIRES ....................67 CHARGING AND FUELING THE VEHICLE............71 INDEX........................INDEX-1... - Page 8 This Page Intentionally Left Blank...
- Page 9 INTRODUCTION Introduction INTRODUCTION Using This Quick Reference Guide......................8 Symbols Glossary ............................8 Notes About This Quick Reference Guide ..................8...
-
Page 10: Symbols Glossary
• Tire Warranty - details the warranty for Note: This manual applies to the Karma Revero. Each vehicle is built to order the vehicle’s tires therefore you may find some explanations in this manual for equipment or options not installed on your vehicle. - Page 11 LOCKING AND UNLOCKING THE VEHICLE Locking and Unlocking the Vehicle LOCKING AND UNLOCKING THE VEHICLE Using the Key Fob ............................10 Opening the Doors ............................. 11 Master Lock and Unlock Switch......................11 Automatic Locking............................11 Child Safety Locks ............................. 12 Emergency Access ............................
-
Page 12: Locking And Unlocking The Vehicle
LOCKING AND UNLOCKING THE VEHICLE USING THE KEY FOB Key Fob Unlock: Locking and Unlocking the Vehicle • Press unlock button once to unlock the WARNING: Always remove the key driver door. Press a second time to fob from the vehicle any time you exit unlock all doors and walk away from the vehicle. -
Page 13: Opening The Doors
5 mph (8 km/h) is reached or when Drive [D] or Reverse [R] is selected. To get to the these settings press: My Karma Settings To open the door from the interior of the vehicle, press the switch on the interior Doors &... -
Page 14: Child Safety Locks
LOCKING AND UNLOCKING THE VEHICLE CHILD SAFETY LOCKS Child safety locks are installed on both rear doors to prevent children from using the rear door switches and accidentally opening the doors when the vehicle is in motion or parked. The child safety locks are activated in the touch panel settings, See “Rear Window Inhibit”... -
Page 15: Opening The Trunk
LOCKING AND UNLOCKING THE VEHICLE TRUNK INTERIOR RELEASE MANUAL DOOR OPENING HANDLE Your Revero is equipped with a mechanical trunk release handle that provides a means of escape in the event that a person becomes locked inside the trunk. Adults are... -
Page 16: Valet Mode
VALET MODE For your peace of mind, your Revero has a Valet Mode for those times that your vehicle is parked by another person. When Valet Mode is active, access to the... -
Page 17: Valet Mode
DEACTIVATING VALET MODE Touch the screen and a numeric keypad appears From Favorites select: My Karma Enter the four-digit pin code and press Valet Mode "Enter", the screen will display the home Note: Activating Valet Mode can be done in screen MyKarma >... - Page 18 10 seconds, the system returns to the locked screen. Note: If Valet Mode is active, and you cannot recall your PIN, you will need to take the vehicle to a Karma Automotive Retailer to reset the system.
- Page 19 INSTRUMENT PANEL Instrument Panel INSTRUMENT PANEL Interior Overview ............................18 Instrument Panel USA Specification ....................19 Instrument Panel Canadian Specification ..................20 Indicator Icons............................. 21 Warning and Information Messages....................23...
-
Page 20: Interior Overview
INSTRUMENT PANEL INTERIOR OVERVIEW Instrument Panel Exterior mirror control. Hazard warning flashers. Exterior lights and turn signal. Glove compartment open. STEALTH, SUSTAIN, SPORT Mode Touch panel. selection. PRND switch. Audio and phone controls. Power window controls. Instrument Panel. Horn. Cruise control. Steering column adjustment. -
Page 21: Instrument Panel Usa Specification
INSTRUMENT PANEL INSTRUMENT PANEL USA SPECIFICATION Lane departure warning (left/right) Performance buffer Fault indicator Odometer, Trip meter Audio / Phone status Fuel range Turn signals (left/right) Regenerative braking meter Drive Mode Speedometer Cruise control speed setting Total range Function indicators Selected PRND Mode Cruise control ON indicator Acceleration meter... -
Page 22: Instrument Panel Canadian Specification
INSTRUMENT PANEL INSTRUMENT PANEL CANADIAN SPECIFICATION Lane departure warning (left/right) Performance buffer Fault indicator Odometer, Trip meter Audio / Phone status Fuel range Turn signals (left/right) Regenerative braking meter Drive Mode Speedometer Cruise control speed setting Total range Function indicators Selected PRND Mode Cruise control ON indicator Acceleration meter... -
Page 23: Indicator Icons
Check tire pressure function Calibration Tire pressure monitoring required. Apply foot system function. Contact a and park brake Karma Automotive Retailer Press brake to start Function check Brake fluid level low Icon Description Park brake on Rear center brake light... - Page 24 INSTRUMENT PANEL Hazards (yellow) Fuel & Battery Icon Description Icon Description Powertrain function Good charge level Brake system function Low charge level Park sensor function Very low charge level Accelerator pedal function Onboard charger function Misc Hazards (red) Icon Description Icon Description Check engine...
-
Page 25: Warning And Information Messages
In addition to the instrument panel messages, other notification messages can Icon Description be accessed through the touch panel by pressing: 12 volt system function My Karma Messages High-voltage battery state of charge low High-voltage battery function High-voltage battery temperature is low... - Page 26 This Page Intentionally Left Blank...
- Page 27 SEATS AND RESTRAINTS Seats and Restraints SEATS AND RESTRAINTS Power Seats..............................26 Driver’s Seat Memory ..........................27 Seat Heaters............................... 27 Wearing the Seat Belt ..........................28...
-
Page 28: Power Seats
SEATS AND RESTRAINTS POWER SEATS Seats and Restraints WARNING: Do not adjust any part of a seat while the vehicle is in motion. Vehicle movement may cause the seat to suddenly shift, potentially causing injury or loss of control. WARNING: To prevent possible injury, ensure that rear passengers cannot become trapped as the seat moves. -
Page 29: Driver's Seat Memory
To turn on a front heated seat, touch the appropriate Heated Seat icon on the touch panel. From the touch panel, select: REAR SEAT HEATERS My Karma Settings Seats & Keys Seat Position Touch the “Set” selection You have now set the seat position for the current driver profile. -
Page 30: Wearing The Seat Belt
SEATS AND RESTRAINTS ADJUSTING THE HEIGHT OF THE To turn on a rear heated seat, press the FRONT SHOULDER BELT appropriate switch on the rear center console switch pack. WEARING THE SEAT BELT F A S T E N IN G T H E S E A T B E L T The height of the shoulder belt should be adjusted so that the belt passes over the center of your shoulder. - Page 31 CONTROLS AND OPERATION Controls and Operation CONTROLS AND OPERATION Steering Column Position........................30 Exterior Mirrors............................30 Power Windows ............................31 HomeLink® Transmitter ........................32 Programming a Device...........................32 Entry Gate/Canadian Programming ....................33 Information and Assistance ......................... 33 Accessory Power Outlets ........................34 USB Connections ............................34...
-
Page 32: Steering Column Position
EXTERIOR MIRRORS WARNING: Depending on the type of mirror glass installed on your Revero, distances may be difficult to judge accurately. Objects viewed in the mirror may be closer than they appear. To adjust the exterior mirror position:... -
Page 33: Power Windows
CONTROLS AND OPERATION POWER WINDOWS WARNING: Closing power windows on fingers, hands or other vulnerable parts of the body may result in serious injury. Ensure that your passengers are familiar with the window controls and aware of the potential dangers. The power windows can be operated in Accessory or Ready Mode. -
Page 34: Homelink® Transmitter
CONTROLS AND OPERATION HOMELINK® TRANSMITTER begins to flash, release the buttons. Do not hold the buttons for longer than 30 WARNING: Do not use this seconds HomeLink® transmitter with any This initializes the HomeLink® garage door that lacks safety stop and transmitter and erases previous reverse features. -
Page 35: Entry Gate/Canadian Programming
CONTROLS AND OPERATION ENTRY GATE/CANADIAN PROGRAMMING ROLLING CODE DEVICE EQUIPMENT PROGRAMMING Note: The assistance of a second person The technology of some entry gates may make the following steps quicker and requires you to press and repress (cycle) easier. Once the button has been pressed, the handheld transmitter button every two there are only 30 seconds in which to seconds during programming. -
Page 36: Accessory Power Outlets
CONTROLS AND OPERATION ACCESSORY POWER OUTLETS USB CONNECTIONS The power socket is suitable for 12V accessories requiring up to 10A or a maximum of 125 watts. FRONT 12V POWER OUTLET The center console has two USB ports. Both USB ports can be used for charging and playing music. - Page 37 STARTING AND DRIVING Starting and Driving STARTING AND DRIVING Starting the Vehicle ..........................36 Selecting Propulsion Mode (PRND)....................36 Drive Modes ..............................37 Cruise Control.............................38 Electronic Stability Control (ESC) ......................39 Parking Brake .............................39 Exterior Lighting ............................40 Turn Signals..............................40 Hazard Warning Flashers........................41 Wipers and Washers ..........................
-
Page 38: Starting The Vehicle
STARTING AND DRIVING STARTING THE VEHICLE Note: If left in Accessory Mode, the vehicle Starting and Driving will automatically turn itself off after 10 minutes. Note: The vehicle cannot be put into Accessory Mode if the vehicle is in motion. READY MODE ACCESSORY MODE In Ready Mode, the vehicle’s high-voltage... -
Page 39: Drive Modes
STARTING AND DRIVING STEALTH, SUSTAIN, AND SPORT With the vehicle in Ready Mode, press the MODES required button to select a propulsion. • Park [P] With Park [P] engaged, the propulsion unit is locked and the rear wheels cannot turn. To select another mode when the vehicle is in Park, the vehicle must be in Ready Mode and the brake pedal... -
Page 40: Cruise Control
STARTING AND DRIVING ENGAGING CRUISE CONTROL To select Regen-1: To engage cruise control, the The vehicle defaults to Regen-1. The vehicle vehicle’s speed must be between will experience little resistance and the 20 mph (32 km/h) and 90 mph instrument panel will indicate Regen-1 on (145 km/h). -
Page 41: Electronic Stability Control (Esc)
TURNING OFF ESC The indicator on the instrument panel To turn ESC off, press: should illuminate when the parking brake is engaged. My Karma Settings Safety Electronic Stability Control ESC Off Note: The current ESC setting will display... -
Page 42: Exterior Lighting
STARTING AND DRIVING EXTERIOR LIGHTING REAR FOG LAMPS With the headlamps on, rotate and release the collar on the lever to turn the rear fog lamps on. An indicator illuminates on the instrument panel when the fog lights are operating. TURN SIGNALS The exterior lights are controlled by the left-hand steering column lever. -
Page 43: Hazard Warning Flashers
STARTING AND DRIVING HAZARD WARNING FLASHERS High-speed operation INTERMITTENT WIPE With the wiper control in position 3, rotate the collar clockwise to increase the interval between wipes. Rotate the collar counterclockwise to decrease the interval between wipes. Press the switch indicated by the arrow to operate. -
Page 44: Park Distance Control (Pdc)
WARNING: The PDC system may not through the touch panel by pressing: detect moving objects, such as children and animals, until they are My Karma dangerously close. Always maneuver with Settings caution and always use your mirrors. Safety... -
Page 45: Advanced Driver Assistance System (Adas)
• For example: When the left turn signal be able to "see" either. is selected but the vehicle turns right, The Karma Revero is equipped with a front the system will activate an audible camera—mounted in the interior, on the and visual warning windshield —which is responsible for... - Page 46 This Page Intentionally Left Blank...
- Page 47 USING THE TOUCH PANEL Using the Touch Panel USING THE TOUCH PANEL Overview...............................46 Favorites............................... 47 Audio ................................49 Navigation..............................51 Phone ................................53 MiniBar ................................55 Using the System ............................58 Ventilation..............................61...
-
Page 48: Overview
USING THE TOUCH PANEL OVERVIEW Touch the desired icon on the home screen Using the Touch Panel to access the desired feature. When active, The Karma touch panel offers many the icon will turn blue. features. Audio Rear window defroster... -
Page 49: Favorites
• Navigation When the desired selection is • Phone highlighted, touch the Star icon next to • My Karma the selection to save it to favorites To remove a selection, just touch the Star icon again To delete favorites:... - Page 50 Touch Where To? Touch Go to begin navigation Up to ten destinations can be saved to the favorites list. My Karma Favorites is a place to PHONE find saved system configuration settings. Actions available from this screen include: • Quick activation of Valet Mode •...
-
Page 51: Audio
Press the desired level to adjust the volume accordingly The Revero audio system Press the Mute icon to mute the sound includes AM/FM radio with the (icon turns blue with strike through) - Page 52 USING THE TOUCH PANEL SELECT A SOURCE CHANGING STATIONS There are three methods for changing the To select an audio source: radio station: Touch the Music Note icon on the main • The + or - icons of the Tune function display screen •...
-
Page 53: Navigation
USING THE TOUCH PANEL NAVIGATION referencing the current position of the vehicle. WARNING: Be careful when Touch the icon at the bottom right of the operating the navigation system. display to toggle between centered and Looking away from the road can lead to a whole route views. - Page 54 USING THE TOUCH PANEL MANUAL DESTINATION ENTRY NAVIGATION SCREEN From the Navigation screen, touch Once a destination has been selected, Where To? press Go to begin navigation. The Touch the Search box to bring up the Navigation screen will display turn-by-turn on-screen keypad directions on the left and a map view of the route on the right.
-
Page 55: Phone
USING THE TOUCH PANEL PHONE WARNING: For your safety and that of other vehicle occupants, do not become distracted from driving when using any of these systems. BLUETOOTH To pair a phone via Bluetooth: Touch the Phone icon on the main display screen The first time a phone is paired, a To utilize the phone feature, a... - Page 56 Verify that the displayed pairing code Enter the phone number on the Revero screen matches the one Press the green button to place the call on the phone's display On the phone, select Revero to allow...
-
Page 57: Minibar
USING THE TOUCH PANEL ANSWERING CALLS CLIMATE CONTROL Touch the Climate icon at the center of the MiniBar. This screen contains options for all climate control settings: • Air conditioning (driver and passenger) • Heating (driver and passenger) • Ventilation (driver and passenger) •... - Page 58 USING THE TOUCH PANEL FAN SPEED Climate Control Icon Description Air conditioning system cools the cabin. Heating system heats the cabin. Air circulation controls the flow of air around the cabin. There are two options: recirculation or outside air. TEMPERATURE The fan speed control is indicated by a number and a small Fan icon.
- Page 59 USING THE TOUCH PANEL DEFROSTERS VOLUME CONTROL The Defroster icons are Touch the Speaker icon on the located on each side of MiniBar to bring up the volume the main Climate controls. Pressing the desired Control icon. The left icon controls the main level will move the indicator to that level windshield defroster, while the right icon and adjust the volume accordingly.
-
Page 60: Using The System
USING THE TOUCH PANEL USING THE SYSTEM BLOWER SPEED/TEMPERATURE CONTROL Note: The heating and air conditioning systems are powered by the battery. Prolonged use will decrease the range of the vehicle in STEALTH Mode. AUTO CLIMATE CONTROL The climate control system features automatic temperature and air distribution control and is programmed to maintain optimum levels of comfort within the... - Page 61 USING THE TOUCH PANEL DUAL ZONE TEMPERATURE AIR CONDITIONING Touch the icon to switch between Note: The air conditioning system can be single zone and dual zone used on its own or in conjunction with the temperature control. heating system. When dual mode is active, the temperature Touch the icon for cool and for the driver and passenger sides of the...
- Page 62 USING THE TOUCH PANEL HEATING AIR RECIRCULATION Note: The heating system can be used on Touch the icon to activate air its own or in conjunction with the air recirculation. conditioning system. Air recirculation prevents air Touch the icon to operate the entering from the outside and recirculates heating system and warm the air the air inside the vehicle.
-
Page 63: Ventilation
The rear window defroster will operate for a period of time CABIN AIR FILTER before automatically switching Your Revero has a cabin air filter installed off. that prevents pollen, industrial fall out, The rear window defroster can also be road dust, and other particles from manually turned off as well. - Page 64 This Page Intentionally Left Blank...
-
Page 65: Routine Maintenance
ROUTINE MAINTENANCE Routine Maintenance ROUTINE MAINTENANCE Opening and Closing the Hood......................64 Engine Compartment Overview ......................65... -
Page 66: Opening And Closing The
ROUTINE MAINTENANCE OPENING AND CLOSING THE Routine Maintenance HOOD WARNING: Never work on a vehicle the hood to prevent it from being closed by that is plugged in. Always remember the wind. to unplug the vehicle before working under Pull the (recessed) hood release handle, the hood or the underside of the vehicle. -
Page 67: Engine Compartment
ROUTINE MAINTENANCE ENGINE COMPARTMENT OVERVIEW Coolant reservoir - electric drive components Engine oil filler cap Brake fluid reservoir Windshield washer reservoir Coolant reservoir - engine Engine oil level dipstick Engine compartment fuse box Power steering reservoir Coolant reservoir - high-voltage battery... - Page 68 This Page Intentionally Left Blank...
- Page 69 WHEELS AND TIRES Wheels and Tires WHEELS AND TIRES Using the Tire Repair Kit ........................68 Tire Pressures.............................69 Tire Pressure Monitoring System (TPMS) ..................69...
-
Page 70: Wheels And Tires
25 minutes, or the wheel rim has not risen from the ground, then the tire is too severely damaged for a safe repair. Call Karma Automotive Roadside Thread the end of the hose onto the tire Assistance to have the vehicle transported. - Page 71 Karma Automotive Retailer Reattach the gauge to the valve and Replace the tire sealant canister and check the pressure sealant/air hose assembly.
- Page 72 WHEELS AND TIRES The telltale icon will flash for one minute if there is a system malfunction, then will illuminate continuously until the malfunction is corrected. The touch panel will display each sensor, showing its corresponding wheel temperature and pressure values.
- Page 73 CHARGING AND FUELING THE VEHICLE Charging and Fueling the Vehicle CHARGING AND FUELING THE VEHICLE Charging the Vehicle ..........................72 Safety Precautions ...........................74 Fuel Filler ...............................74...
-
Page 74: Charging And Fueling The Vehicle
CHARGING AND FUELING THE VEHICLE CHARGING THE VEHICLE DC fast charging provides an approximate Charging and Fueling the Vehicle range of 40 miles in 30 minutes or less. WARNING: Improper use of portable Position the vehicle so that the charging electric vehicle charge cords may cord can easily reach the charging port cause a fire, electrical shock, or burns, and... - Page 75 This screen informs you that your vehicle attached, the charge indicator on the has detected a problem with the vehicle instrument panel will flash to remind and that you should consult your Karma you to disconnect the charge cord. Automotive Retailer.
-
Page 76: Safety Precautions
WARNING: Only use containers specifically designed for carrying To refuel your Revero, it must first be fuel, and always remove them from the stationary in Park [P], powered off, and vehicle to fill them. Failure to do so may unlocked. - Page 77 CHARGING AND FUELING THE VEHICLE The fuel tank pressure will need to equalize with atmosphere, allow up to 60 seconds for the fuel filler cover to open from the time the fuel filler cover release button is initially pressed. A strap secures the fuel filler cap to the vehicle to prevent loss.
- Page 78 This Page Intentionally Left Blank...
-
Page 79: Index
Index Accessory Sockets Accessory Power Outlets ........................34 Front 12V Power Outlet ......................... 34 Rear Accessory Power Outlets......................34 USB Connections ............................34 Brakes Applying the Parking Brake........................39 Parking Brake .............................39 Releasing the Parking Brake........................39 Charging the Vehicle Charging the Vehicle ..........................72 Climate Control Air Conditioning ............................59 Air Distribution ............................60... - Page 80 Electronic Stability Control Electronic Stability Control (ESC) ......................39 Turning Off ESC............................39 Engine Compartment Engine Compartment Overview......................65 Exterior Exterior Lighting ............................40 Exterior Lighting Hazard Warning Flashers ........................41 High Beam Headlamps ..........................40 Low Beam Headlamps ...........................40 Rear Fog Lamps ............................40 Turn Signals..............................40 Fuel Filling Fuel Filler ..............................
-
Page 81: Using This Quick Reference Guide
Trunk Interior Release Handle ......................13 Unlocking the Vehicle From Inside the Vehicle................11 Introduction Symbols Glossary ............................8 Using This Quick Reference Guide......................8 Key Fob Opening the Trunk............................. 13 Using the Key Fob ............................10 Lane Departure Warning..........................43 Locking and Unlocking the Vehicle Automatic Locking............................ - Page 82 Safety Child Safety Locks............................12 Seat Belts Adjusting the Height of the Front Shoulder Belt .................28 Fastening the Seat Belt .........................28 Releasing the Belt.............................28 Wearing the Seat Belt ..........................28 Seats and Steering Column Driver’s Seat Memory ..........................27 Driver’s Seat Memory Setting Procedure ..................27 Driver’s Seat Programmable Memory.....................
- Page 83 FavoriteAudio............................. 47 FavoriteMy Karma............................48 Favorites............................... 47 Favorites Access ............................47 Keypad Dialer ............................. 54 Manual Destination Entry ........................52 MiniBar ................................55 MiniBar Volume Control......................... 57 Navigation..............................51 Navigation Screen............................52 Overview...............................46 Pairing a Phone ............................53 Phone ................................53 Recent Destinations/POI Entry ......................52 Select a Source............................50...
- Page 84 This Page Intentionally Left Blank...
- Page 85 C 1 8 1 0 A S D 5 0 8 1 This booklet is made from 80% K A R M A A U T O M O T I V E . C O M post-consumer waste recycled material...
Need help?
Do you have a question about the REVERO and is the answer not in the manual?
Questions and answers