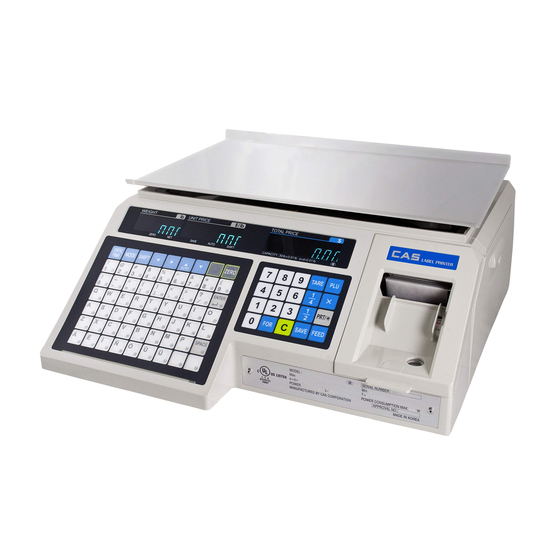
CAS LP1000N series Owner's Manual
Label printing scale
Hide thumbs
Also See for LP1000N series:
- Owner's manual (78 pages) ,
- Owner's manual (9 pages) ,
- Programming and initial set-up (4 pages)
Table of Contents
Advertisement
Advertisement
Table of Contents

Related Manuals for CAS LP1000N series


Summary of Contents for CAS LP1000N series
-
Page 2: Table Of Contents
CONTENTS PRECAUTIONS ..................5 1. Installation Procedures ...............7 1.1 Cautions....................7 1.2 Assembling the Display Pole ..............7 1.3 Installing the Label Roll..............9 2. Keypad & Display ................11 2.1 Numeric Keypad ................11 2.2 PLU Keypad..................12 2.3. Displays....................14 ................. 14 2.3.1 Weight Display ................ - Page 3 4.7 SET .......................30 ............34 4.7.1 Programming the Date (SET #1) ...........35 4.7.2 Programming the Time (SET #2) ......36 4.7.3 Programming the Department Number (SET #3) ..........37 4.7.4 Programming the Label (SET #4) ........42 4.7.5 Programming the Adjust Number (SET #5) ......44 4.7.6 Programming the Printing Information (SET #6) ......46...
-
Page 4: Precautions
PRECAUTIONS... -
Page 6: Installation Procedures
1. Installation Procedures 1.1 Cautions A) Environment : This scale must be installed in a dry and liquid free environment. B) Location : This scale must be placed on a flat and stable surface. Please keep the scale away from oscillating fans, ventilation systems, or drafts as these air disturbances can be picked-up by the scale and may cause incorrect weight readings. - Page 7 Please get the scale out of the box. And then please fix the 4 corners with SCREW after attaching the DISPLAY ASSY to the scale. Pleaes make sure the DISPLAY WIRE is in the scale.
-
Page 8: Installing The Label Roll
1.3 Installing the Label Roll To install the label roll at any time you must follow the directions in this section. Remove the printer front-cover and the printer side-cover. As you can see there is detailed diagram affixed onto the inside of the printer side-cover. Use this diagram (or this manual) for future reference on how to properly install the label roll. - Page 9 Take the new roll of labels and find the ending. Peel-off and discard about 3 labels. Place the label in the scale and thread the backing through the appropriate places. Please view the checkpoints on the diagram. Feed the backing paper over the Paper Pressure Shaft lifting the Pressure Plate in order to place backing between the two ( ①...
-
Page 10: Keypad & Display
2. Keypad & Display 2.1 Numeric Keypad The Numeric Keypad is used to enter all numerical data in PGM mode. In REG Mode, the Numeric Keypad is used to enter prices, quantities, and counts. (See below fig.) Function Numeric Keys used to enter numerical data. Clear Key used to clear error conditions and bring displays to their initial state. -
Page 11: Plu Keypad
2.2 PLU Keypad The PLU Keypad is used to enter alpha-numerical data. To use the keypad for programming you must remove the pull-out sheet. To use the PLU Keypad in REG mode, you can write the name and number of the PLU’s on the corresponding speed keys on the pull-out sheet. All commodity names, message data, and store name and address are typed using these keys. - Page 12 Function This key displays the time and date in REG mode. Used to go to PROGRAM mode and ACC mode. This key works like a Caps Lock key on a computer. It is used to type capital letters. You can tell if the SHIFT function is active by an indicator lamp in the UNIT PRICE display.
-
Page 13: Displays
2.3. Displays 2.3.1 Weight Display The WEIGHT display shows the weight of an item on the platter whether it be positive or negative and within the range of the scale. The WEIGHT display also indicates if the scale is at ZERO or if there is a tare entered into the scale by way of a ZERO and NET lamps. - Page 14 DO NOT TOUCH the underside of the printhead. If labels become jammed and stuck to the printhead, please call a qualified CAS Dealer to solve this problem. When finished installing labels, it is necessary to push down on the TOP of the printhead to lock it in place.
-
Page 15: Operation
3. Operation 3.1 REG mode Operations 3.1.1 Simple Weighing There are two types of sales you can generate; PLU Sales and NON-PLU Sales. PLU Sales are sales based on a programmed PLU whereas Non-PLU Sales are sales you generate without calling up a PLU. PLU Sales : To call up a PLU, simply type the PLU’s number on the Numeric keypad and then press the PLU key. -
Page 16: How To Use Tare
3.1.2 How to Use TARE Known Tare: If you know the weight of container you may use this method to enter the tare. For example, if the weight of the container is 10g press the 1, 0, and TARE key. Call up a PLU and place a commodity then you will see the net weight. -
Page 17: Multiple Labels
3.1.4 Multiple Labels You can generate identical labels by using multiple label printing. To use multiple label printing, and press the X key, enter the quantity of duplicate labels you need, and then press the PRT/* key. ① Call up a PLU. ②... -
Page 18: Auto Printing (Auto Mode)
3.1.5 Auto Printing (AUTO MODE) In AUTO mode, labels are issued when the weight is stabilized and greater than 100g. The use of PRT/* key will also generate a label. How to go to AUTO mode : Press the key. If the scale is in AUTO mode AUTO lamp is ON in the UNIT PRICE display. -
Page 19: Program Mode
4. PROGRAM Mode 4.1 System Maps To go to PROGRAM mode, press 1 by using numeric keys and MODE key. You can press the key or key to go up and down the Main Menu in PROGRAM mode ONLY if the UNIT PRICE and TOTAL PRICE displays are BLANK! The same rule is applied to ACC mode. -
Page 20: Plu Programming
4.2 PLU Programming PLU means Price Look Up. PLUs are used to store the price, name, and other data of items being sold. Every PLU has seven data fields: ① Item Code, ② Name, ③ Message no. ④ Unit price, ⑤ Shelf Life, ⑥... - Page 22 1) To go to PROGRAM mode, press 1 by using numeric keys and MODE key. 2) The display shows: “PLU ”. 3) Press PRT/* key. The display shows: “PLUno 4000”. The number in the UNIT PRICE display indicates the amount of empty PLUs ready to be programmed. 4) Type a PLU number you wish to program.
- Page 23 10) The display shows “nAME 02.01 ”. Type in the second line of name. 11) Press PRT/* key. 12) The display shows “MSGno ”. 13) Press PRT/* key. (If you do not wish to program the price, please press key) The display shows “MSGno EntEr”.
-
Page 24: Preset Keys Programming
4.3 Preset keys Programming The preset keys are used to quickly access a PLU with only one key press. For example, if ⑦ you had preset key programmed to call up PLU number 100, all you need to press is preset ⑦... -
Page 25: Message (Ingredients) Programming
4) The display shows “S kEy 0”. Press the Preset key (1 to 54) you wish to program. The number in the UNIT PRICE display is the number of the Preset key you have just pressed. The number in the TOTAL PRICE display is the PLU number that has been assigned to that Preset key. 5) Type the number of the PLU you wish to assign to that preset key. -
Page 26: Programming The Head Data
1) To go to PROGRAM mode press 1 by using numeric keys and MODE key. 2) Press key two times. The display shows “MSG”. 3) Press PRT/* key. The display shows “MSG 1000 ”. 4) Type the number of the MSG you wish to program or edit using the Numeric Keypad. Remember, the number can be from 1 to 1000. -
Page 27: Programming The Shop Data
How to program the head data 1) To go to PROGRAM mode press 1 by using numeric keys and MODE key. 2) Press key three times, the display shows “HEAd”. 3) Press PRT/* key. The display shows “HEAd 01.01”. The numbers in the UNIT PRICE display represent the line number and character number on which your cursor is at. - Page 28 How to program the shop data 1) To go to PROGRAM mode press 1 by using numeric keys and MODE key. 2) Press key four times. 3) The WEIGHT display shows “SHoP”. 4) Press PRT/* key. The display shows “SHoP 01.01”. The numbers in the UNIT PRICE display represent the line number and character number on which your cursor is at.
-
Page 29: Set
4.7 SET SET MENU DEFINITIONS Date (For details, see page 33) Time (For details, see page 34) Department Number (For details, see page 35) Label Length (For details, see page 36) Label Format (For details, see page 37) Label Mask (For details, see page 38) Label Barcode (For details, see page 39) - Page 30 SET MENU DEFINITIONS Adjust (For details, see page 41) Printing Information (For details, see page 43) Auto Printing (For details, see page 45) Address (For details, see page 46) Baud Rate (For details, see page 47)
- Page 31 SET MENU DEFINITIONS Weight Sign (For details, see page 48) Print Sign (For details, see page 49) Total Sign (For details, see page 50) Currency Enable (For details, see page 52) Decimal Point And Currency Rate (For details, see page 52) Result Decimal Point (For details, see page 52) Currency Total Sign...
- Page 32 SET MENU DEFINITIONS Peel Sensor (For details, see page 55) Head Sensor (For details, see page 56) Gap Sensor (For details, see page 56) Headup Sensor (For details, see page 57)
-
Page 33: Programming The Date (Set #1)
4.7.1 Programming the Date (SET #1) How to program the date 1) To go to PROGRAM mode, press 1 by using numeric keys and MODE key. 2) Press key five times. 3) The WEIGHT display shows “SEt”. 4) Press PRT/* key and the display shows “SEt EntEr 0”. 5) Press 1 key and PRT/* key. -
Page 34: Programming The Time (Set #2)
4.7.2 Programming the Time (SET #2) How to program the Time 1) To go to PROGRAM mode press 1 by using numeric keys and MODE key. 2) Press key five times. 3) The WEIGHT display shows “SEt”. 4) Press PRT/* key and the display shows “SEt EntEr”. 5) Press 2 key and PRT/* key. -
Page 35: Programming The Department Number (Set #3)
4.7.3 Programming the Department Number (SET #3) How to program the department number 1) To go to PROGRAM mode press 1 by using numeric keys and MODE key. 2) Press key five times. 3) The WEIGHT display shows “SEt”. 4) Press PRT/* key and the display shows “SEt EntEr”. 5) Press 3 key and PRT/* key. -
Page 36: Programming The Label (Set #4)
4.7.4 Programming the Label (SET #4) The label format type controls the label size and barcode format. 1) Label length How to program the label length 1) To go to PROGRAM mode, press 1 by using numeric keys and MODE key. 2) Press key five times. - Page 37 2) Label format How to program the label format 1) To go to PROGRAM mode, press 1 by using numeric keys and MODE key. 2) Press key five times. 3) The WEIGHT display shows“SEt”. 4) Press PRT/* key and the display shows “SEt EntEr”. 5) Press 4 key and PRT/* key.
- Page 38 3) Label mask How to program the label mask 1) To go to PROGRAM mode, press 1 by using numeric keys and MODE key. 2) Press key five times. 3) The WEIGHT display shows “SEt”. 4) Press PRT/* key and the display shows “SEt EntEr”. 5) Press 4 key and PRT/* key.
- Page 39 NOTE : If there is no Head on the label format it is not printed even though you set it to “1” in label mask. 9) The display shows “LAbEL EntEr”. If you want to program label barcode press “4” key. If you want to go to SET menu, press C key.
- Page 40 5) Press 4 key and PRT/* key. 6) The display shows “LAbEL EntEr 1”. 7) To program label barcode, press “4” key. The display shows “LAbEL bArCod “. 8) Look at the table and enter barcode number and press PRT/* key. TYPE 10 11 12 13 14 15 16 18 19 EAN 13...
-
Page 41: Programming The Adjust Number (Set #5)
4.7.5 Programming the Adjust Number (SET #5) - ADJUST is to adjust the position of label. - FEED is to feed label(or receipt). - Page 42 How to program the adjust number 1) To go to PROGRAM mode press 1 by using numeric keys and MODE key. 2) Press key five times. 3) The WEIGHT display shows “SEt”. 4) Press PRT/* key, “SEt EntEr”. 5) Press “5” key and PRT/* key. 6) The display shows “AdJSt EntEr 30 ”.
-
Page 43: Programming The Printing Information (Set #6)
4.7.6 Programming the Printing Information (SET #6) The printing information controls the label size, PLU item description and barcode format. - Page 44 How to program printing information 1) To go to PROGRAM mode, press 1 by using numeric keys and MODE key. 2) Press key five times. 3) The WEIGHT display shows “SEt”. 4) Press PRT/* key, “SEt EntEr”. 5) Press 6 key and PRT/* key. 6) The display shows “PmodE EntEr 0”.
-
Page 45: Programming The Auto Print Function (Set #7)
4.7.7 Programming the Auto Print Function (SET #7) The auto print function is used to determine when an automatic buffered label should be printed or buffered. The number stored in auto print is a weight value which is equal to the amount of stabilized positive weight variance needed to print or buffer a label. -
Page 46: Programming Baud Rate (Set #9)
4.7.8 Programming Baud Rate (SET #9) How to program baud rate 1) To go to PROGRAM mode, press 1 by using numeric keys and MODE key. 2) Press key five times. 3) The WEIGHT display shows “SEt”. 4) Press PRT/* key, “SEt EntEr”. 5) Press 9 key and PRT/* key. -
Page 47: Programming Signs (Set #10)
4.7.9 SIGN (SET #10) How to enter currency/weight sign settings. You can modify scale to adjust local law (currency, weight unit, dual currency, etc) NOTE: reference ASCII code table for signs 1) To go to PROGRAM mode, press 1 by using numeric keys and MODE key. 2) Press key 5 times. - Page 48 5) You can enter weight units up to 3 letters. (For example, kilogram (kg) consists of 'k' and 'g'. Enter k (107) in first letter and g (103) in second letter.) 6) After inputting the entire weight unit signs, the display shows "WEiGH ForMAt 0." 7) You can choose 0 (NO use) or 1 (Yes use) by pressing PRT/* key finish up inputting weight unit signs.
- Page 49 7) You can choose 0 (NO use) or 1 (Use unit price and printing total price's first unit sign) or 2 (Use unit price and printing total price's last sign). After Pressing PRT/* key to save, you can finish inputting unit Price of weight sign. 8) For example, you want to set format 1 and the total price's first sign is "$", you can see the unit price is $/kg.
-
Page 50: Currency (Set #11)
1) The display shows "SiGn". 2) Press 3 key and the display shows "totAL F-SiGn C1____0" 3) Type the first letter of total price's first unit sign by using ASCII CODE. 4) Type the second and third letter of total price's second, third unit sign by using ASCII CODE. 5) You can type up to 3 letters for Total price first sign. - Page 51 1) Enabling currency display 1) The display shows "CUrr". 2) Press 1 key and the display shows "CUrr USinG 0" 3) Select 0 (NO use) or 1 (Currency use). Press PRT/* key to save and exit. 2) Set decimal point and currency rate 1) The display shows "CUrr".
- Page 52 4) Setting signs of calculated total price 1) The display shows "CUrr". 2) Press 4 key and the display shows "CUrr, F-SiGn, C1 0" 3) Enter the first letter of calculated total price's first sign. (Reference ASCII CODE) 4) Enter the second and third letter of calculated total price's first sign. 5) You can enter up to 3 letters for calculated total price's first sign.
-
Page 53: Set Printer Sensors (Set #12)
9) You can enter up to 3 letters for "total price last sign." For example, you want to print YTL (Turkey currency symbol) in the last place, enter 89(Y), 84(T), 76(L), and then, you will see YTL in the calculated total price's last place. 10) The display shows "CUrr ForMAt 0". - Page 54 4) Press PRT/* key and the display shows "SEt EntEr 0". 5) Press 1 key and 2 key and PRT/* key. 1) Peel-off sensor peel-off sensor in not peel-off sensor is covered(opened) covered(closed) 1) The display shows "SEt PoFF". 2) Press Enter key and the display shows "SEt 130 PoFF 8" 3) Read set value when peel-off sensor is covered (closed).
- Page 55 2) Thermal Head sensor 1) The display shows "SEt PoFF". 2) Press key and the display shows "SEt HEAd" 3) Press Enter key and the display shows "SEt 100 HEAd 118" 4) Set heating value (factory setting is 100) deepens on printing darkness. (for light printing set value below 100, and set value above 100 to get darker results) NOTE: Inputting higher number may damage the thermal head.
- Page 56 1) The display shows "SEt HEAd". 2) Press key and the display shows "SEt PEnd" 3) Press Enter key and the display shows "SEt 130 PEnd 248" 4) Open label cover and head-up lever to adjust label paper onto gap sensor. NOTE: make sure put label paper onto gap sensor where the paper gap is located to make a gap sensor open.
- Page 57 1) The display shows "SEt PEnd". 2) Press key and the display shows "SEt HEAdUP" 3) Press Enter key and the display shows "SEt 130 HdUP 254" 4) Check display value when you OPEN label cover and head-up lever. NOTE: Compare value when head-up lever is open and close. 5) Enter average value (172) of open head-up lever (89) and close value (254).
-
Page 58: Int(Initialize Plu And Msg Data)
4.8 INIT (Initialize PLU and MSG data) You can initialize all PLU’s data , MESSAGE data or ALL data. How to clear memory 1) To go to PROGRAM mode, press 1 by using numeric keys and MODE key. 2) Press key six times. 3) The WEIGHT display shows “init”. -
Page 59: Account Mode
5. ACCOUNT Mode ACC mode is used for accessing sales totals, clearing all sales totals, and printhead check 5.1 System Maps To go to ACCOUNT MODE, press 2 by using numeric keys and MODE key. You can press the key or key to go up and down the Main Menu in PROGRAM mode ONLY if the UNIT PRICE and TOTAL PRICE displays are BLANK! The same rule applies in PGM mode. -
Page 60: Report
5.2 X Report There are four types of sales reports : Grand Total, ALL PLU, Non-PLU, and PLU no. Each of the reports prints on a label; the PLU prints a report label for each PLU that had sales activity. All reports labels contain the starting time and date, since the last time the sales report was cleared, the current time and date, and other data. -
Page 61: All Plu
5.2.2 All PLU There are two ways to take the PLU sales report: individually or ALL PLU. The All PLU report will generate labels of those PLUs that had sales activity. To take the All PLU sales report, 1) To go to ACCOUNT mode, press 2 by using numeric keys and MODE key. 2) The display shows “Print”. -
Page 62: Non-Plu
5.2.4 Non-PLU Non-PLU Report allows you to see how much and items were sold under the NON-PLU item descriptor. 1) To go to ACCOUNT mode, press 2 by using numeric keys and MODE key. 2) The display shows “Print”. 3) Press PRT/* key. The display shows “Print GrAnd”. 4) Press key or keys until the display shows “Print nonPLU”. -
Page 63: Grand Total
5.3.1 Grand Total 1) To go to ACCOUNT mode, press 2 by using numeric keys and MODE key. 2) Press key. The display shows “CLEAr”. 3) Press PRT/* key. The display shows “CLEAr GrAnd”. 4) Press PRT/* key. The display shows “CLEAr GrAnd End”. 5) You can use the key or key to select ALL PLU, nonPLU, or ALL. -
Page 64: Non- Plu
5.3.3 Non- PLU 1) To go to ACCOUNT mode, press 2 by using numeric keys and MODE key. 2) Press key. The display shows “CLEAr”. 3) Press PRT/* key. The display shows “CLEAr GrAnd”. 4) Press key or keys until the display shows “CLEAr nonPLU”. 5) Press PRT/* key. -
Page 65: Printhead Check (Chess)
5.4 Printhead Check (CHESS) You can use this function to check the quality of print and if there are any scratches or burn on the printhead. This function produces a pattern on the label which you can use to determine the condition of the printhead. 1) To go to ACCOUNT mode, press 2 by using numeric keys and MODE key. -
Page 66: Error Messages
6. Error Messages Error 1 The PLU number you have called up does not exist. Error 2 The PLU number you have called up is out of range. The weight on the platter is not stable or you have pressed the keys Error 3 before the weight became stable. -
Page 67: Specifications
Scale counts up to 9's & then shows: the platter from underneath. "Zero rAnGE Error" Call your CAS Dealer for SPAN calibration. Make sure that the Tare being entered is within 0.01~30.00 Lbs. Scale does not accept Tare. Make sure that the NET lamp is off before trying to enter a Tare. -
Page 68: Appendix
APPENDIX LABEL FORMAT name Style Label format # (Size,mm) #1 (2 - Iine Commodity) #2 (With Ingredient) #8000 (58 x 30) #3 (1 - Iine Commodity) #0(Default) (2-Iine Commodity #1) #10 (2 - Iine Commodity #2) #8010 (58 x 40) #11 (With Ingredient) #12 (1 - Iine Commodity) #8020... - Page 69 name Style Label format # (Size,mm) Kubota #4 (2 - Iine Commodity) #5 (1 - Iine Commodity #1) #3600 (54 x 35) #6 (1- Iine Commodity #2) Kubota #3610 (54 x 53) #16 (2 - Iine Commodity) #17 (1 - Iine Commodity) ACOM #7 (2 - Iine Commodity) #8 (W Ingredient)
- Page 70 name Style Label format # (Size,mm) #13 (2 - Iine Commodity) #14 (Whit Ingredient) #2810 (48 x 40) #15 (1 - Iine Commodity) #2730 (48 x 54) #18 (2 - Iine Commodity) #19 (1 - Iine Commodity) #4900 (58 x 51) #20 (2 - Iine Commodity) #21 (1 - Iine Commodity)
- Page 71 name Style Label format # (Size,mm) #24 (2 - Iine Commodity #1) #25 (1 - Iine Commodity) #2834 (48 x 68) #26 (2 - Iine Commodity #2 ) #4910 (58 x 63) #27 (2 - Iine Commodity) #28 (1 - Iine Commodity)
- Page 72 name Style Label format # (Size,mm) Blank Label (58 x 60) #29 (2 - Iine Commodity #1) #30 (2 - Iine Commodity #2) name Advance Label Format Setting Method (Size,mm) 1) Set label format #8000 at SET-#2. NOTE: #8000 is label format #1,2,3. 2) Set label length 50 at SET4 #1.
- Page 73 MEMO...
Need help?
Do you have a question about the LP1000N series and is the answer not in the manual?
Questions and answers