DAITEM SC901AU User Manual
Hide thumbs
Also See for SC901AU:
- Installation manual (64 pages) ,
- Installation manual (68 pages) ,
- Installation manual (65 pages)

Related Manuals for DAITEM SC901AU


Summary of Contents for DAITEM SC901AU
- Page 1 Doorphone SC901AU / SC902AU / SC906AU SC100AU SC200AU / SC201AU / SC206AX MHF01X / MHF02X MHF03X / MHF04X MHF05X / MHF06X USER GUIDE...
- Page 2 This manual describes how to install the following products: SC901AU Mains/mains code-operated 1-home doorphone kit SC902AU Lithium/mains 1-button 1-home doorphone kit SC906AU Battery/mains 1-button 1-home doorphone kit SC100AU Interior handset unit + base + EU power pack SC200AU Mains controller...
-
Page 3: Table Of Contents
Contents 1. Overview of handset keys and display ................... 4 1.1 Description of handset......................4 1.2 Description of display ......................5 1.3 Handset display in standby mode (general information screen) .......... 6 2. Answering a visitor’s call ......................6 2.1 Using the handset in handsfree mode (handset on base)............ 7 2.2 Using the handset in handheld mode (handset off base)............. -
Page 4: Overview Of Handset Keys And Display
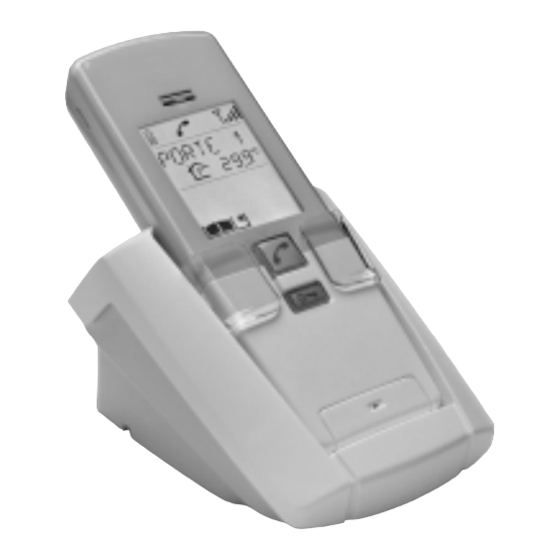
1. Overview of handset keys and display 1.1 Description of handset Cover closed Cover open Removable belt clip Loudspeaker Display Communication button Latch/side gate control Garage button control button Inter-handset communication button Lighting control button Gate control button Up and down scroll keys Validate button (OK) -
Page 5: Description Of Display
1.2 Description of display Handset battery status Communication in progress Radio range flat no signal Missed call Handset in silent mode needs poor charging charging average recommended good fully charged excellent charging Indoor temperature Scrolling text zone: Temperature unit: - display of time - °C: Celsius - outdoor temperature - °F: Fahrenheit... -
Page 6: Handset Display In Standby Mode (General Information Screen)
1.3 Handset display in standby mode (general information screen) Handset battery status Indication of the outdoor temperature The temperature displayed is Time the temperature measured at the first access point programmed and is updated every 10 minutes Indication of the indoor temperature The temperature displayed is the temperature measured on... -
Page 7: Using The Handset In Handsfree Mode (Handset On Base)
2.1 Using the handset in handsfree mode (handset on base) 1. Press 2. You can now talk. 3. At the end of communication, press If no button is pressed, communication is automatically cut off after 3 minutes. You can switch to “handheld” mode at any time by taking the handset off the base. 2.2 Using the handset in handheld mode (handset off base) 1. -
Page 8: Switching The Handset To Silent Mode
3. Switching the handset to silent mode The handset can be switched to silent mode using the key The handset then remains in silent mode for 12 hours or until it is switched back to ringing mode. 1. Press for 5 seconds until the icon is displayed. -
Page 9: Inter-Handset Communication Function
5. Inter-handset communication function You can communicate with another handset using the key Handset making the call Handset being called 1. Pick up the handset (if it is on the base), open the flip cover and quickly press 2. If you have more than 2 handsets, select the handset to be called using the keys... -
Page 10: Controlling Latch Access
6. Controlling latch access The installation has a latch or a lock and a gate. 6.1 When communicating You are communicating with access 1, for example. 1. Press (1). 2. The latch of the access making the call is unlocked within 5 sec. At the end of communication, the latch status icon is updated (if a position contact is connected). -
Page 11: When Not Communicating
6.2 When not communicating 6.2.1 Using the keypad caller unit Activate the outdoor Status display Latch access status caller unit on the handset (1) 1. Hold the tag in front of the name label. Mr et Mme Evêque-Mourroux Or enter the access code (2). - Page 12 6.2.2 Using the handset Status display Activate the handset Latch access status on the handset (1) 1. Quickly press (2). Closed 2. If you have more than Closed 2 latch access points, pick up the handset (if it is on the base), open the flip cover and select the access point to be opened using the keys...
-
Page 13: Controlling Gate Access
7. Controlling gate access The installation includes a gate and a latch. 7.1 When communicating You are communicating with access 1, for example. 1. Press (1). 2. The gate at the access point making the call is activated within 5 seconds. At the end of communication, the gate status icon is updated (if a position contact is connected). -
Page 14: When Not Communicating
7.2 When not communicating 7.2.1 Using the outdoor caller unit with keypad Activate the outdoor Status display Gate access status caller unit on the handset (1) 1. Hold the tag in front of the name label. Mr et Mme Evêque-Mourroux Or enter the access code (2). - Page 15 7.2.2 Using the handset Activate the outdoor Status display Gate access status caller unit on the handset (1) 1. Pick up the handset (if it is Closed on the base), open the flip cover and quickly press (2). 2. If you have several gate Closed access points, select the access point to...
-
Page 16: Controlling Side Gate Access
8. Controlling side gate access The installation only has one gate. 8.1 When communicating You are communicating with access 1, for example. 1. Press 2. The side gate at the access point making the call is unlocked within 5 sec. At the end of communication, the side gate status icon is updated (if a position contact is connected). -
Page 17: When Not Communicating
8.2 When not communicating 8.2.1 Using the outdoor caller unit with keypad Activate the outdoor Status display Side gate access status caller unit on the handset (1) 1. Hold the tag in front of the name label. Mr et Mme Evêque-Mourroux Or enter the access code (2). - Page 18 8.2.2 Using the handset Status display Activate the handset Side gate access status on the handset (1) 1. Quickly press Closed Closed If you only have one side Opening command sent gate access point, the opening command is sent directly to it. 3.
-
Page 19: Operating An Automatic Garage Door Control System
9. Operating an automatic garage door control system This function requires one or several relay output receivers to be connected. key can operate up to four different automatic garage door control systems. Status display Activate the handset Garage door system status on the handset (1) 1. -
Page 20: Controlling Lighting
10. Controlling lighting This function requires one or several relay output receivers to be connected. key can operate up to four different lights. Status display Activate the handset Light status on the handset 1. Pick up the handset (if it is on the base), open the flip cover and quickly press 2. -
Page 21: Modifying Outdoor System Operating Options
11. Modifying outdoor system operating options 11.1 How to browse through the menus Pick up the handset and open the flip cover. Select the “ACCESS” menu using the keys Handset display in standby mode TAGS RADIO LINK then HANDSET DISPLAY ACCESS SOUNDS PARAMETERS... -
Page 22: Modifying Tag Options
11.2 Modifying tag options TAGS Handset display in standby mode NAME RADIO LINK DISPLAY ACTIVE/INACTIVE HANDSET SOUNDS DELETE ACCESS PARAMETERS PULSE INFOS Setting Menu Using the setting possible Can be used to register a tag on the outdoor caller unit so that a side gate, gate or latch can be opened (16 tags max.). - Page 23 Setting Menu Using the setting possible NAME Can be used to change the name allocated to a previously registered tag (8 characters max.). 1. Select the tag to be modified. 2. Modify the 1 character using the keys TIP: press and hold the keys to quickly scroll through the characters.
-
Page 24: Modifying Access Code Options
11.3 Modifying access code options IMPORTANT: the CODES menu is only displayed if the outdoor caller unit has a digicode. TAGS SIZE Handset display in standby mode RADIO LINK DISPLAY NAME HANDSET SONS ACTIVE/INACTIVE ACCESS PARAMETERS DELETE PULSE INFO Setting Menu Using the setting possible... - Page 25 Setting Menu Using the setting possible NAME Can be used to change the name given to an access code that has already been registered (8 characters max.). 1. Select the code to be modified. 2. Modify the 1 character using the keys TIP: press and hold the keys to quickly scroll through the characters.
-
Page 26: Modifying Display Options
11.4 Modifying the display options TAGS NAME Handset display in standby mode BACKLIGHTING RADIO LINK DISPLAY HANDSET SOUNDS ACCESS PARAMETERS PULSE INFOS Setting Menu Using the setting possible NAME ACCESS 1 Can be used to modify a name given to an access KEYPAD 1 or to a call button (8 characters max.). -
Page 27: Modifying Sound Options
Setting Menu Using the setting possible BACK- If the controller is battery-powered, LIGHTING backlighting is activated when a button is pressed or a tag used cont.) (the BACKLIGHTING menu is not displayed and no other Factory: operating mode is possible). ON ACTION Controller/outdoor caller unit combinations Default message displayed... -
Page 28: Modifying Control Options
TAGS VOLUMES Handset display in standby mode NIGHT MODE RADIO LINK DISPLAY STRIKE SOUND HANDSET SOUNDS ACCESS PARAMETERS PULSE INFOS Setting Menu Using the setting possible NIGHT ACTIVE Can be used to lower the volume of a button when it is pressed MODE INACTIVE or of ringing on the outdoor caller unit (the volume is lowered to... -
Page 29: Modifying Opening Options
11.7 Modifying opening options TAGS GATE Handset display in standby mode PEDESTRIAN RADIO LINK DISPLAY ELECTRIC STRIKE HANDSET SOUNDS ACCESS PARAMETERS PULSE INFOS Setting Menu Using the setting possible GATE 0.5 SEC Can be used to change the pulse duration for gate motorisation 1 SEC control (terminal blocks 12 and 14). -
Page 30: Modifying Handset Operating Options
12. Modifying handset operating options 12.1 How to browse through the menus Pick up the handset and open the flip cover. Select the “HANDSET” menu using the keys DISPLAY Handset display in standby mode SOUNDS then RADIO LINK CONFIGURATION HANDSET INFOS ACCESS You will access a set of menus... -
Page 31: Modifying Display Options
12.2 Modifying display options DISPLAY DEGREES Handset display in standby mode SOUNDS NAME RADIO LINK CONFIGURATION BACKLIGHTING HANDSET INFOS ACCESS Setting Menu Using the setting possible DEGREES CELSIUS Can be used to change the unit of temperature. FAHRENHEIT Factory: CELSIUS NAME Can be used to change the name allocated: HANDSET... -
Page 32: Modifying Sound Options
12.3 Modifying sound options DISPLAY DOOR BELL Handset display in standby mode SOUNDS SOUND TIME RADIO LINK CONFIGURATION VOLUME HANDSET INFOS ACCESS Setting Menu Using the setting possible DOOR BELL Can be used to change ringing when: ACCESS 1 a call arrives from access 1 ACCESS 2 from access 2 ACCESS 3... -
Page 33: Modifying Use Options
12.4 Modifying use options DISPLAY AUTO PICK-UP Handset display in standby mode SOUNDS OPEN BUTTON RADIO LINK CONFIGURATION TIME HANDSET INFOS LANGUAGE ACCESS Setting Menu Using the setting possible AUTO ACTIVE Can be used to automatically establish communication when PICK-UP INACTIVE the handset is picked up off the base without pressing Factory: ACTIVE... -
Page 34: Information
12.5 Information DISPLAY Handset display in standby mode SOUNDS RADIO LINK CONFIGURATION HANDSET INFOS Information for use by the manufacturer. ACCESS 13 Fault indications Display Meaning Solution Handset battery charge low. Put the handset back on its base to charge. Controller batteries flat. -
Page 35: Questions And Answers
14. Questions and Answers Questions Answers Why can conversation be This can happen when you are at the radio reception limit. “broken” when using the The controller cuts off communication when you go beyond handset? this limit. You should move closer to the controller. What causes the interference This can happen when the handset is too close to another (Larsen effect, crackling, etc.) -
Page 36: Technical Data
DECLARATION OF CONFORMITY Manufacturer: Hager Security SAS • Address: F-38926 Crolles Cedex - France Product type: Doorphone • Trade mark: Daitem We declare under our sole responsibility that the products to which this declaration relates are compliant with the essential requirements of the following directives: •...
Need help?
Do you have a question about the SC901AU and is the answer not in the manual?
Questions and answers