
Related Manuals for Exinda EXNV-3062


Summary of Contents for Exinda EXNV-3062
- Page 1 ADMINISTRATION GUIDE Find out how to set up and configure Exinda Network Orchestrator in different environments and how to customize advanced features.
- Page 2 If you believe there are any factual errors in this document, please contact us and we will review your concerns as soon as practical. GFI and Exinda Network Orchestrator are trademarks or registered trademarks of GFI Software or its affiliates in the US and other countries.
-
Page 3: Table Of Contents
1.5 Product naming conventions 2 Getting started 2.1 WUI Guided Tour 2.2 Deployment options 2.2.1 Key terms 2.2.2 Basic characteristics and behaviors of Exinda Appliances 2.2.3 In-path topologies 2.2.4 Out-of-path topologies 2.2.5 Clustering topologies 2.3 Upgrading and downgrading 2.3.1 Upgrading to the latest firmware version 2.3.2 Rolling back to the previously installed version of ExOS... - Page 4 2.5 Managing multiple appliances with the Exinda Management Center 2.5.1 Getting started with EMC 2.5.2 Deploying Exinda Management Center as a Virtual Machine 2.5.3 How EMC fits into the appliance feedback loop 2.5.4 Exinda Management Center Concepts 2.5.5 Best Practices 2.5.6 Configuring the EMC...
- Page 5 3.5.4 Creating Applications from DSCP-marked traffic (like Riverbed accelerated traffic) 3.5.5 Clustering and high availability 3.5.6 Controlling anonymous proxy traffic 3.6 Managing Exinda Appliances with EMC 3.6.1 Viewing appliances in the tenancy 3.6.2 Moving appliances within the tenancy 3.6.3 Configuration Library 3.6.4 Configuring your Appliances through the CLI...
- Page 6 5.1.6 RAID Diagnostics 5.1.7 TCP Dump 5.1.8 View the status of an alert 5.1.9 View the status of the community 5.1.10 Open a case with Exinda Networks Support Services 5.2 Log Files 5.2.1 Viewing System Log Files 5.2.2 Live Log 5.2.3 Tail Log...
- Page 7 5.6.2 WMI Service is not running 5.6.3 System account showing in traffic reports 5.6.4 No Communication Between the Exinda AD Connector and the Exinda Appliance 5.6.5 Exinda AD Connector stops running 5.6.6 Excluded Users Still Appear on the Exinda Appliance 5.6.7 Changes to the Exinda Active Directory Controller have no effect...
-
Page 8: Introduction
Exinda Appliance learns about your network. Then you specify policies to regulate traffic in your network. After that, you use Exinda's robust set of monitoring tools to gain total insight into the traffic on your network and adjust your policies as needed. -
Page 9: Exinda Web Ui
1.3.2 Exinda Web UI Exinda offers to user and administrator a Web User Interface that allows users to configure policies and monitor the appliances performances through a variety of dashboard and reports. 1.3.3 Exinda Management Center The Exinda Management Center (EMC) provides complete management insight and configuration control of your Exinda Network Orchestrator appliances from one central console. - Page 10 Network Orchestrator 3062 Series Screenshot 1: Front view of the Exinda 3062. Screenshot 2: Rear view of the Exinda 3062. Specification Details Designed for Small Office Supported Users Up to 1,600 Traffic Shaping Shaping Throughput 150 Mbps Concurrent Flow 45,000...
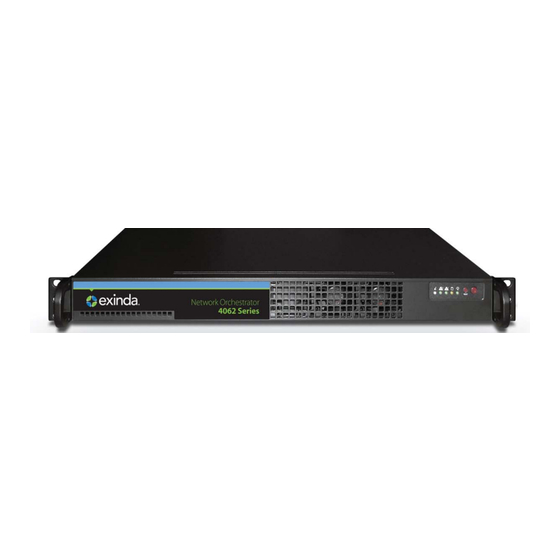
- Page 11 2 Bridge Pairs, or 1 Bridge Pair plus 1 Management NICs (expandable to) Redundant Power Network Orchestrator 4062 Series Screenshot 3: Front view of the Exinda4062. Screenshot 4: Rear view of the Exinda 4062. Specification Details Designed for Medium Office...
- Page 12 3 Bridge Pairs, 1 Management, 1 Cluster (10GbE and 1Gb Fiber options available) NICs (expandable to) 5 Bypass Bridges Redundant Power Network Orchestrator 8063 Series Screenshot 5: Front view of the Exinda 8062. The hardware of the Exinda 8062 and 8063 is the same. Screenshot 6: Exinda Network Orchestrator 1 Introduction...
- Page 13 1 half height occupied, 1 full height NICs (expandable to) 4 bypass bridges Redundant Power Network Orchestrator 10063 Series Screenshot 7: Front view of the Exinda 10062. The hardware of the Exinda 10062 and 10063 is the same. Exinda Network Orchestrator 1 Introduction...
- Page 14 Screenshot 8: Rear view of the Exinda 10062. The hardware of the Exinda 10062 and 10063 is same. Specification Details Designed for Medium to Large Data Center Supported Users Up to 400,000 Traffic Shaping Shaping Throughput 10 Gbps Concurrent Flow...
-
Page 15: Exinda Virtual Appliances
Capacity is determined by a combination of licensing and underlying hardware. Exinda Virtual A virtual Exinda Network Orchestrator runs on a host machine under a hypervisor, using dedicated resources. The minimum dedicated hypervisor hardware requirements are listed in the table below:... -
Page 16: Product Naming Conventions
Disk extending techniques are not supported on virtual appliances. Adding additional storage requires a hard disk. 1.5 Product naming conventions Encoded within the Exinda Network Orchestrator model numbers are the features and licensing of the appliance. This is the model number syntax: <hardware series>... -
Page 17: Getting Started
(page 491). Find solutions and get notified The Exinda appliance displays solutions and notifies you if certain undesirable thresholds are exceeded or if other notable traffic patterns are identified so that you can take action to tune your network. For more information, refer to Monitoring applications with the Exinda Solution Center (page 322). -
Page 18: Deployment Options
In-path describes a type of topology and refers to deploying an Exinda Appliance between network devices that send and receive data packets to each other, like a switch and a router. When an Exinda Appliance is in-path, it automatically inspects all packets traveling along its path. -
Page 19: In-Path Topologies
Exinda Appliances are often deployed between a core switch and a WAN/Internet router. In this type of deployment, the Exinda Appliance is referred to as inline, which is a way to describe a network device in a primary network path that receives packets and forwards them to their destinations. - Page 20 In this setup, the Exinda Appliance is connected to the switch and the router on the Main Site. So network traffic emanating from the Main Site to the Internet and traffic from the Internet to the Main Site must pass through the Exinda Appliance.
- Page 21 Overcoming the limitations of the main site internet link topology If you only have one Exinda Appliance but need to monitor and control network traffic to the Internet from users out- side the Main Site, disable direct access to the Internet for branch offices and route all Internet-bound traffic through the Main Site.
- Page 22 Installing the Exinda Appliance in a main site WAN link topology Topologies with Plug your Exinda Appliance in line between the switch and router or firewall. If you have a VPN, refer to VPNs 1. Connect the WAN port to your router/firewall using a crossover cable.
- Page 23 The sites are connected to the Internet and to each other via direct routes. All the network traffic at each site passes through an Exinda Appliance on its way to and from the Internet and WAN. The Exindas may work together to enhance network performance and accelerate specific network traffic.
- Page 24 4. Check for Internet connectivity. 5. Turn on the Exinda Appliance and check for Internet connectivity again. There are a few Exinda Appliance basics to keep in mind while planning a deployment. For more information, refer to Basic characteristics and behaviors of Exinda Appliances (page 18).
- Page 25 Acceleration of traffic to and from the DMZ. NOTE Define a network object called DMZ and mark it as "Internal," so the Exinda appliance can ignore all traffic between the local LAN and the DMZ. Installing an Exinda Appliance in a network environment with a firewall 1.
- Page 26 Screenshot 14: Topologies with VPNs deployment - Scenario 1 In scenarios where the Exinda Appliance is placed between the VPN terminator and the router, the Exinda Appliance sees only encrypted tunnel traffic. Screenshot 15: Topologies with VPNs deployment - Scenario 2...
- Page 27 2. Connect the Exinda LAN port into the external interface of the VPN terminator using a crossover cable. 3. Connect an Exinda unbridged interface (e.g., eth1 on a 4060) into the LAN switch and configure an address to man- age the appliance.
-
Page 28: Out-Of-Path Topologies
Exinda Appliance to get to their destinations. For example, connecting an Exinda Appliance to a switch or hub on the LAN. In this case, the Exinda Appliance behaves like any other network client and requires specific protocols or modes to enable packet monitoring and inspection. - Page 29 10 group-address 224.1.1.1 3. If a password has been configured for a service on the router, add that password on the Exinda. (config) # wccp service <service-group number> password <password> How network objects are used to determine traffic direction For an Exinda appliance to determine traffic direction, you must define all internal subnets as internal network objects.
- Page 30 Overview of SPAN and mirror port monitoring An Exinda Appliance can operate out-of-path or ON-LAN mode with any hub or switch that supports port mirroring or SPAN ports. Use this topology when you need to monitor traffic without installing the Exinda Appliance inline. The Exinda Appliance monitors and reports on all applications present on the SPAN/mirror port.
- Page 31 Before enabling Mirror/SPAN port monitoring, you must configure a switch port to mirror traffic to an unused port cabled to the Exinda Appliance. Alternatively, you can deploy a network hub in-path and directly cable the Exinda Appliance to the hub. A hub, by design, mirrors all traffic to all ports.
- Page 32 Directing traffic with policy-based routing Using Policy Based Routing (PBR), you can deploy your Exinda appliance in the network out-of-path but retain in-path optimization capabilities. To achieve this, configure the router with the policy that determines whether traffic is sent to the requested destination or to the Exinda Appliance.
- Page 33 The Policy Based Routing feature offers the following benefits: An Exinda Appliance can be deployed physically out-of-path, but logically in-path which makes it useful in virtual environments where an in-path deployment may undesirable or impossible. Increased selectivity of traffic to be optimized. For example, redirect all web traffic to an Exinda Appliance.
- Page 34 Configuring a router for a basic policy-based routing (PBR) topology While deploying your Exinda Appliance in a basic PBR topology, you must specify how the router should handle traffic coming from the out-of-path Exinda Appliance, the WAN, and the LAN.
- Page 35 10.10.10.2 Configuring an out-of-path Exinda Appliance for policy based routing To use policy-based routing, configure the interfaces on the Exinda Appliance with the appropriate settings, using either the Exinda Web UI or the CLI. Using Exinda Web UI 1.
- Page 36 2. In the Interface Settings area, clear the BR10 checkbox. The bridge expands to display eth10 and eth11. NOTE If a virtual appliance is hosting the Exinda Appliance software, uncheck the BR2 option. The bridge expands to display eth2 and eth3.
- Page 37 Overview of policy-based routing (PBR) with two subnets for failover and redundancy You can deploy policy-based routing (PBR) on two subnets serviced by their respective Exinda Appliances. The configuration detailed below reroutes traffic from one Exinda Appliance to another in case of hardware failure.
- Page 38 Exinda appliance for optimization, and then back through the router to the requested des- tination. or, sent directly to the requested destination. For more information about policy-based routing with two subnets, see these topics: Configuring a router for PBR with two subnets...
- Page 39 Set the duplex and speed parameters for the interface. hostname (config-if)# duplex auto hostname (config-if)# speed auto 4. Configure the interface parameters for the out-of-path Exinda Appliance #2 (Gig0/0/1). a. Specify the interface to configure. hostname (config-if)# ip policy route-map DivtEx1theEx2 hostname (config)# interface GigabitEthernet0/0/1 b.
- Page 40 3. In the Interface Settings area, clear the BR10 checkbox. The bridge expands to display eth10 and eth11. NOTE If you're running an Exinda virtual appliance, uncheck the BR2 option. The bridge expands to display eth2 and eth3. 4. Click Configuration > System > Network > IP Address .
- Page 41 1. On the out-of-path Exinda Appliance # 1, launch the Exinda Web UI. a. In the browser address field, type https://Exinda_IP_address . b. Enter the appliance User Name and Password . Click Login . The Exinda Web UI is displayed. c. Ensure you are in Advanced mode.
- Page 42 The VRRP provides automatic assignment of IP routers, using virtual routers as proxies for physical routers. An IP address acts as a gateway between the router and the Exinda Appliances. The VRRP receives traffic requests and distributes them to the appliances connected to it, providing greater reliability and steady traffic requests distribution.
- Page 43 To enter configuration (config) mode, at the prompt run the commands: hostname # configure terminal The hostname (config)# prompt appears. 3. Configure the interface parameters for the switch installed between the router and the out-of-path Exinda Appli- ances (Gig0/0). a. Specify the interface to configure: hostname (config)# interface Gig- abitEthernet0/0 b.
- Page 44 Configuring an Exinda Appliance for virtual router redundancy protocol (VRRP) and policy-based routing (PBR) To use VRRP with PBR, the interfaces on the Exinda Appliance must be configured with the appropriate settings, using the Exinda Web UI or using CLI.
- Page 45 1. On the out-of-path Exinda Appliance # 1, launch the Exinda Web UI. a. In the browser address field, type https://Exinda_IP_address . b. Enter the appliance User Name and Password . Click Login . The Exinda Web UI is displayed. c. Ensure you are in Advanced mode.
- Page 46 The VRRP provides automatic assignment of IP routers, using virtual routers as proxies for physical routers. A virtual router with a static IP address acts as a gateway between the router and the Exinda Appliances. The VRRP receives traffic requests and distributes them to the appliances connected to it, providing greater reliability and steady traffic requests distribution.
- Page 47 To enter configuration (config) mode, at the prompt run the commands: hostname # configure terminal The hostname (config)# prompt appears. 3. Configure the interface parameters for the switch installed between the router and the out-of-path Exinda Appli- ances (Gig0/0). a. Specify the interface to configure: hostname (config)# interface Gig- abitEthernet0/0 b.
- Page 48 Set a description for what the router interface is connecting to: hostname (config-if)# description Connected to EX-IN c. Set the router interface to route between VLANs for the switch: hostname (config-if)# encap- sulation dot1Q 10 Exinda Network Orchestrator 2 Getting started...
- Page 49 EXOOP2toEXIN permit 10 match ip address 102 set ip next-hop 10.10.20.100 route-map EXINtoEXOOP1 permit 10 match ip address 101 set ip next-hop 10.10.10.100 route-map EXINtoEXOOP2 permit 10 match ip address 103 set ip next-hop 10.10.20.100 Exinda Network Orchestrator 2 Getting started...
- Page 50 Configuring an Exinda Appliance for virtual router redundancy protocol (VRRP) and policy-based routing (PBR) and VLANs To use policy-based routing, configure the interfaces on the Exinda Appliance , using the the Exinda Web UI or CLI. Using Exinda Web UI 1.
- Page 51 3. In the Interface Settings area, clear the BR10 checkbox. The bridge expands to display eth10 and eth11. NOTE Clear the BR2 checkbox if you're using an Exinda virtual appliance. The bridge expands to display eth2 and eth3. 4. Click Configuration > System > Network > IP Address .
- Page 52 The VRRP provides automatic assignment of IP routers, using virtual routers as proxies for physical routers. A virtual router with a static IP address acts as a gateway between the router and the Exinda Appliances. The VRRP receives traffic requests and distributes them to the appliances connected to it, providing greater reliability and steady traffic requests distribution.
- Page 53 Based on the results of the analysis, the request is: either sent to the switch, which evenly distributes the traffic between the connected Exinda appliances, and then back through the router to the requested destination.
- Page 54 3. Configure the interface parameters for the Exinda Appliance installed out-of-path (Gig0/0). a. Specify the interface to configure: hostname (config)# interface Gig- abitEthernet0/0 b. Set the IP address of the out-of-path Exinda Appliance: hostname (config-if)# ip address 10.10.10.1 255.0.0.0 c. Set the duplex and speed parameters for the interface:...
- Page 55 Configure the Exinda Appliance for virtual router redundancy protocol (VRRP) with policy-based routing (PBR) and IP service levels for applications (SLA) tracking To use VRRP with PBR and IP SLA Tracking, configure the interfaces on the Exinda Appliance, using the Exinda Web UI or CLI.
- Page 56 4. Click Configuration > System > Network > IP Address . 5. In the eth11 area, select PBR . 6. In the Static Addresses field, type the IP address and netmask of the out-of-path Exinda Appliance. 7. In the PBR Next-Hop Address field, type the IP address of the router.
-
Page 57: Clustering Topologies
The environment is critical and failover is necessary. Typically, one network link is active and the other is passive. The Exinda Appliance on the passive link clusters with the active Exinda Appliance so it has all the required data and con- figuration settings in case the active link fails. - Page 58 Transparent failover. Installing a redundant topology 1. On each Exinda Appliance, assign an interface for cluster internal use and, an interface to manage the appliance. 2. Connect the cluster interfaces on each Exinda with a crossover cable. 3. Power up Exinda 1. After one minute, power up Exinda 2.
- Page 59 In this topology, two Exinda Appliances are connected to two routers. The two appliances are also directly connected to each other and each forwards its traffic to the other appliance. Note that the traffic received from the other Exinda appliance is not forwarded onto the LAN. Both appliances report on the data in the same way.
- Page 60 Your WAN switch (Switch 1) and LAN switch (Switch 2) must support the Spanning Tree Protocol (STP). Configure the STP in Switch 2, so that port 1 (connected to Exinda 1) has higher priority then port 2 (connected to Exinda 2).
-
Page 61: Upgrading And Downgrading
When Exinda is upgraded from a previous version, in most cases not enough space is allocated to the new log ser- resize vice and the Size column displays zero. The administrator is required to manually free up space on the device and the log service at least to the minimum required value before volume can be encrypted or formatted. -
Page 62: Rolling Back To The Previously Installed Version Of Exos
2.3.2 Rolling back to the previously installed version of ExOS If you have updated the version of ExOS running on your Exinda Appliance, you can rollback to the previously installed version. Exinda Appliances have two partitions for installing ExOS updates. The current (running) ExOS version is installed on one partition and the previously installed version is on the other partition. -
Page 63: Installing An Exinda Appliance
5. Click Configuration > System > Maintenance and switch to the Firmware Update tab. 6. In the Current Installed Images area, click Switch Boot Partition . 7. To finalize the ExOS install, reboot the appliance. The Exinda Appliance reboots, running the previous version of ExOS. For more information, refer to Reboot/Shutdown (page 651). -
Page 64: Gathering Required Information
(page 18). To physically connect an Exinda Appliance to a network, do the following: 1. With the appliance powered OFF, install a crossover cable (red) between the Exinda's WAN port (eth3) and the router- /firewall. 2. Install a straight-through cable (blue) between the Exinda LAN port (eth2) and the LAN switch. -
Page 65: Installing An Exinda Virtual Appliance
In an in-path topology, an Exinda Virtual Appliance is deployed inline. Using an image of a hardware appliance to represent a virtual appliance, an inline Exinda Virtual Appliance plugs into the network via the LAN and WAN ports like this: Screenshot 27: Inline deployment The challenge in a virtual environment is deciding how to pass traffic through the bridge. - Page 66 VT Enabled & 64-bit. The Exinda virtual appliance has a Flexible Storage option, with which you can adjust the size of the storage for Edge Cache, SMB1 cache and WAN Memory cache. By increasing the virtual file sizes for each of these caches, you can greatly improve the performance of your Exinda virtual appliance.
- Page 67 2.4GHz EXNV-12063 NOTE On the Exinda Virtual Appliance 10063, the number of CPUs depends on the licensed bandwidth for Diagnostics, Shaping, and Acceleration. NOTE In case of Minimum Disk Storage, storage at higher throughput will require higher disk I/O bandwidth, so the underlying storage should be RAID-based, ideally RAID 10.
- Page 68 These CPUs must be VT Enabled and 64-Bit Minimum Storage (GB) 250GB Minimum Memory (GB) EC-IOPS Monitoring-IOPS Exinda Virtual Appliance model 3062 specifications Requirement Details Diagnostics Licensed Bandwidth (in 150M mbps) Diagnostics and Shaping Licensed...
- Page 69 These CPUs must be VT Enabled and 64-Bit Minimum Storage (GB) 250GB Minimum Memory (GB) EC-IOPS Monitoring-IOPS Exinda Virtual Appliance model 4062 specifications Specification Details Diagnostics Licensed Bandwidth1 (in gbps) Diagnostics and Shaping Licensed...
- Page 70 Specification Details Minimum Memory (GB) EC-IOPS Monitoring-IOPS Exinda virtual model 6062 Specification Details Diagnostics Licensed Bandwidth 2.5G (Gbps) Diagnostics and Shaping Licensed 1.5G 2.5G Bandwidth (Gbps) Diagnostics, Shaping, and Acceleration Licensed Bandwidth (Mbps) Max Concurrent Flows 250,000 Max L7 New Connection Rate...
- Page 71 8 × 2.4GHz Minimum Storage (GB) 500GB Minimum Memory (GB) 32GB EC-IOPS Monitoring-IOPS Exinda Virtual Appliance model 8063 specifications Specification Details Diagnostics Licensed Bandwidth (Gbps) Diagnostics and Shaping Licensed Bandwidth (Gbps) Diagnostics, Shaping, and Acceleration Licensed Bandwidth (Mbps) 100M 200M...
- Page 72 On the EXNV-10062, the number of CPUs depends on the licensed bandwidth for Diagnostics, Shaping, and Acceleration. Minimum Storage (TB) Minimum Memory (GB) 64GB EC-IOPS Monitoring-IOPS Exinda Virtual Appliance model 10063 specifications Specification Details Diagnostics Licensed Bandwidth (Gbps) Diagnostics and Shaping Licensed Bandwidth...
- Page 73 On the EXNV-10063, the number of CPUs depends on the licensed bandwidth for Diagnostics, Shaping, and Acceleration. Minimum Storage (TB) Minimum Memory (GB) 64GB EC-IOPS Monitoring-IOPS Exinda Virtual Appliance model 12063 specifications Specification Details Diagnostics Licensed Bandwidth (Gbps) Diagnostics and Shaping Licensed Bandwidth...
- Page 74 1. The LAN-side users and applications connect to the Exinda Virtual Appliance through a physical NIC interface. 2. The applications are virtualized and isolated on the same host as the Exinda, on the LAN side interface of the Exinda Virtual Appliance.
-
Page 75: Scenario
In this scenario the hypervisor configuration is done at either a branch office with virtual infrastructure, or in the data center where the applications are running on the host VM. So, the local users accessing the WAN leverage the Exinda for diagnostics, shaping, and acceleration. - Page 76 ETH2 and ETH3 are mapped to NIC 2 and NIC 3, and are configured and bridged together by the Exinda virtual appliance. The data path from a client on the local LAN goes through the Exinda virtual appliance in Inline Mode and out to the WAN.
-
Page 77: Scenario
One physical NIC interface is configured to the WAN side link. Two virtual switches are bridged together in the virtual Exinda Virtual Appliance. The first switch is on the LAN side; the second one is for the WAN side. This results in isolating the applications behind the Exinda Virtual Appliance. -
Page 78: Use Cases
Screenshot 32: Use-case for Inline deployment with an isolated virtual LAN and virtual applications In the diagram above, a virtual LAN is isolated and sits behind the Exinda Virtual Appliance all running on the same host hypervisor. The host has two NICs; NIC 0 is dedicated for management of the system and NIC 1 is idle or used for other purposes. - Page 79 This configuration can be done either at a branch office with virtual infrastructure, or in the data center where the application and local user traffic accessing the WAN is redirected to the Exinda Virtual Appliance for diagnostics, shaping, and acceleration.
- Page 80 In this use case, there are multiple Exinda Virtual Appliances set up for out-of-band mode and configured for High Availability. PBR is the protocol used for redirection while the appliances act as VRRP nodes. One Exinda acts as the Master node, receiving all redirected traffic from the WAN router, and all remaining Exinda Virtual Appliances act as Backup nodes in case the Master fails.
- Page 81 Path two is through the re-directed path invoked by the router (using PBR) to the Exinda virtual appliances. The traffic is received by the Exinda configured as the VRRP Master. In case of acceleration, the Exinda Virtual Appliances have the capability to share load, this happens automatically and requires no user intervention.
- Page 82 In this use case, the Exinda Virtual Appliance is set up to monitor and collect traffic for only reporting only, without installing the appliance in the inline mode. The appliance monitors and reports on all applications presented on the SPAN/mirror port.
- Page 83 In this use-case: The customer has selected Exinda for its monitoring and reporting service. The EXN-V is configured as a virtual machine on a hypervisor or as an ESXi hypervisor (for VMware), on a dedicated NIC2 interface, and dedicated virtual switch SW2.
- Page 84 Switch Port Analyzer (SPAN) Encapsulated Remote SPAN (ERSPAN) VMware versions - 5.5 and 6.0 XenServer EXN-V versions – 7.4.7 The Nexus 1000V is configured and mapped to NIC1, which has a direct connection to the WAN router. Exinda Network Orchestrator 2 Getting started...
- Page 85 The applications (APP1 to 3) are connected to a separate switch port on the Nexus 1000V. VMware High Availability (HA) In this use case, we discuss the recommended configuration and best practices for installing the Exinda virtual appliance where the requirement is for: Exinda firmware –...
- Page 86 This configuration assumes INLINE mode; optionally you can run in out of path mode, but WCCP is required. Downtime for any workload in HA mode is for the duration of the virtual workload and/or the Exinda Virtual Appli- ance to reboot.
- Page 87 Exinda Virtual Appliance active and a second running as a cold standby and Fault Tolerant. Optionally, move the Exinda Virtual Appliance to co-reside on the same hosts as the virtual workloads; however if vMo- tion is a requirement you must provide an external switch and separate NIC to pass the traffic between the workloads and the Exinda Virtual Appliance.
- Page 88 NOTE Any physical NIC interface can be used, NIC1 is used for illustration purposes. VMware software version = 5.5 and 6.0 Exinda Virtual Appliance firmware version = 7.4.7 WANEM Virtual Simulator software = 2.3 http://wanem.sourceforge.net/ You can use your own WAN simulator of choice Four virtual switches have been defined on the ESX/ESXi host: BR_LAN –...
- Page 89 No Silicom Hardware Bypass Card driver support. Exinda is working with our NIC vendor to provide this support. Promiscuous mode is supported, and must be configured via the CLI. You can find the commands in the Exinda Vir- tualization How to Configure Guide, or refer to the Citrix site for XenServer hypervisor configuration guidance.
- Page 90 External storage is supported and recommended for virtual machine workloads, and the Exinda virtual appliance In the diagram below, the Exinda is running in Active/Active mode with a Heartbeat between the two systems. There must be a separate Virtual NIC configured for Heartbeat traffic to transit.
- Page 91 APP2 on ESXi 1 and fails because vSwitch2 mapped to APP2 is not mapped to an external NIC. If an Exinda Virtual Appliance has at least one vSwitch mapped to it, and the vSwitch is not mapped to an external NIC interface, vMotion will not work for Exinda Virtual Appliance or workloads isolated behind it.
-
Page 92: Related Topics
4. Copy the URL of the latest release of the Exinda VMware Virtual Appliance from Exinda.com, and paste it into the Deploy from... field, and click Next . 5. Confirm the OVF template details are correct, and click Next . - Page 93 By default, all Virtual Appliances come configured with two virtual CPUs. Increase the number of CPUs to suit your requirements. NOTE If the memory or hard disk space needs to be adjusted, please contact Exinda Support. 1. Open the VMware vSphere Client . 2. Right-click on the Exinda Virtual Appliance, and select Edit Settings .
- Page 94 Adjusting the NICs available to the Virtual Machine By default, all Exinda Virtual Appliances come with four NICs. Of these, the first NIC is the Management Interface (for managing the Virtual Appliance), the second NIC is the Auxiliary Interface (for HA topologies, clustering and out-of-path deployments), while the remaining two ports are bundled as a bridge for inline deployments.
- Page 95 Convert the first two NICs into a bridge so the Management Interface becomes a LAN Interface, and the Auxiliary Interface becomes a WAN Interface. Start the virtual appliance and then… 1. On your browser, open the Exinda Web UI ( https://Exinda_IP_address ). 2. Key-in the User and Password . 3. Click Login .
- Page 96 LAN and WAN ports are capable of accepting and bridging packets that are not destined for them. 1. Open the VMware vSphere Client . 2. Select the ESXi server, and switch to the Configuration tab. Exinda Network Orchestrator 2 Getting started...
- Page 97 Add Storage to the VMware Virtual Machine By default, all Exinda Virtual Appliances come with a single 50GB (fixed-size) disk. Usually, you will want more storage for features such as WAN Memory and Edge Cache. This is achieved by adding an additional disk to the Virtual Appliance.
- Page 98 4. Specify the size of the additional disk to create. This space will be added to the default 50GB that comes with the Vir- tual Appliance. So if you add a 200GB disk here, the total storage for the Virtual Appliance will be 250GB. Exinda Network Orchestrator 2 Getting started...
- Page 99 5. Click Next . 6. Attach the new disk to the next available SCSI node for best performance. Exinda Network Orchestrator 2 Getting started...
- Page 100 Total: 36.22 Unallocated: 0 10. The output shows that our new 200G disk is called 'sdb' and it's currently not in use. The storage disk add command is used to provision the new disk. Exinda Network Orchestrator 2 Getting started...
- Page 101 The VMware Tools state 'Unmanaged' is normal. This simply means that VMware Tools are installed and running, but are managed by the guest (the Exinda Virtual Appliance) rather than the host. If the first NIC is not able to obtain an address using DHCP, you'll need to use the VMware console to enter the following CLI commands to set a static IP address.
-
Page 102: Related Topics
SSH on the virtual console of the ESXi host. RECOMMENDATION Have your virtual Exinda already installed with the number of interfaces already set, keep it turned off, we will work with it later. 2. Query the existing VIBs. Make sure you are in maintenance mode: # vim-cmd /hostsvc/maintenance_... - Page 103 13. Turn the Exinda ON When the Exinda Appliancecomes back, you should see the bypass capability available and the duplex/speed negotiations pointing to the right values. One vSwitch should have both the LAN interface of the bridge and the bpvm0...
- Page 104 4 interfaces, the first two are standalone interfaces while the last two are for bridging purposes): NOTE From ESXI v6.0, it is possible that after assigning the bpvm0 driver to the “LAN” switch, the driver will not show up as a Physical Adapter (unused) as in the above screenshot.
- Page 105 (SAN). As with any benchmark, IOPS numbers published by storage device manufacturers do not guarantee real-world application performance. IOPS are measured in both Commands per Second (IO operations per second) or Throughput (Megabytes per Second). Exinda Network Orchestrator 2 Getting started...
- Page 106 In the sizing charts for the Exinda virtual appliance (EXN-V) we have represented the measurement in Commands per Second. There are three numbers for IOPS: EC IOPS for Edge Cache IOPS Monitoring IOPS Average IOPS for Optimization IOPS The formula to calculate the IOPS for EXN-V you will add the IOPS for each service:...
- Page 107 8. Review the information and clear the 'Start VM(s) after import' box if you want to add extra NICs or storage, and click Finish to deploy the Virtual Appliance. 9. Select the Exinda virtual machine you are importing, and switch to the Log tab to see the progress and the com- pletion notification.
-
Page 108: Related Topics
14. You will be prompted with a series of questions as part of the initial configuration Wizard. It is recommended you accept the defaults, as you have the option to configure the system later from the Exinda GUI. Press Yes . Use the fol- lowing defaults to complete the wizard configuration. -
Page 109: Related Topics
Before you can make changes to the virtual appliance, you will need to shut it down. If more interfaces are needed, please follow the next procedure (the Exinda appliance will recognize that if two NICs are added they can then be bridged). The following steps describe how to add extra NICs to the Virtual Appliance. In order to create LAN/WAN bridges, you need to add extra NICs in pairs, . - Page 110 2. Choose the network to which to map this new NIC, then click Add . Additional NICs By default, all Exinda Virtual Appliances come with four NICs. The first NIC is the Management Interface (for managing the Virtual Appliance) and the second NIC is the Auxiliary Interface (for use with HA, clustering, and out-of-path deployments).
- Page 111 The following steps describe how to add extra NICs to the Virtual Appliance. You need to add extra NICs in pairs, in order to create LAN/WAN bridges. 1. From the Networking tab in the Exinda Virtual Appliance settings, click Add Interface . 2. Choose the network to map this new NIC to, then click Add .
- Page 112 4. When the Virtual Appliance is next booted, the new NICs will be automatically detected and any additional NIC pairs will be bridged. Below is what the System -> Network -> IP Address page on the Web UI looks like after 2 extra NICs have been added. Exinda Network Orchestrator 2 Getting started...
- Page 113 Add storage to the XenServer virtual appliance By default, all Exinda Virtual Appliances come with a single 50GB (fixed-size) disk. Usually, you will want more storage for features such as WAN Memory and Edge Cache. This is achieved by adding an additional disk to the Virtual Appliance.
- Page 114 Total: 36.22 Unallocated: 0 5. The output shows that our new 200G disk is called 'xvdb' and it's currently not in use. The storage disk add command is used to provision the new disk. Exinda Network Orchestrator 2 Getting started...
- Page 115 XenCenter console. At this point, you can login with the default username admin and password Exinda . If the first NIC is connected to a network that provides addresses using DHCP, the Virtual Appliance should have picked up an IP address.
-
Page 116: Related Topics
(if required) and deploy the Virtual Appliance either in line or out-of-path. Running on Microsoft Hyper-V The following sections describe how to deploy Exinda Virtual Appliance as well as to customize the virtual hardware to suit your requirements. The Exinda Virtual Appliance are available for Microsoft Hyper-V hypervisors. - Page 117 5. Click the Browse button and navigate to and select the local folder where you unzipped the downloaded file. The wizard then recognizes the virtual machine. Exinda Network Orchestrator 2 Getting started...
- Page 118 8. If you prefer not to use the default folders, select the Store the virtual machine… checkbox and for each of the three folder options browse to and select your preferred folder. Exinda Network Orchestrator 2 Getting started...
- Page 119 9. Click Next . The "Choose Folders to Store Virtual Disks" page of the wizard opens. 10. Click the Browse button and select the folder to use. Exinda Network Orchestrator 2 Getting started...
- Page 120 12. Review the settings in the right pane. If they are correct, click Finish . The installation proceeds. When the installation is complete, an entry for the new virtual machine appears in the Virtual Machines pane in the Hyper-VManager . Exinda Network Orchestrator 2 Getting started...
-
Page 121: Related Topics
The Virtual Machine, as supplied by Exinda, may not have all of the configuration options you prefer. For example, the disk storage is confined to 50GB, which is unlikely to be sufficient for your needs. When preparing the Exinda Virtual Appliance for download, it is not possible to know just what hardware is available on the host machine. -
Page 122: Related Topics
Adjusting the number of CPUs available to the Virtual Machine After installing the virtual machine, you may need to adjust the number of CPUs that are available to the Exinda Virtual Appliance. The basic virtual machine configuration includes a minimal number of CPUs, but if you have spare CPUs on the host machine, you may want to make these available to the virtual machine. - Page 123 Consult the Hyper-V documentation for more information on these settings. 5. Click OK . The number of CPUs available to the virtual machine is immediately adjusted. NOTE These instructions also apply to changing the configuration after the virtual appliance has entered service. Exinda Network Orchestrator 2 Getting started...
-
Page 124: Related Topics
After installing the virtual machine, you may need to adjust the amount of RAM that is available to the Exinda Virtual Appliance. There is a basic amount of RAM provided in the Exinda Virtual Appliance, but if you have spare RAM on the host machine, you may want to make this available to the virtual machine. - Page 125 Hyper-V documentation for more information on these settings. 5. Click OK . The amount of RAM available to the virtual machine is immediately adjusted. NOTE These instructions also apply to changing the configuration after the virtual appliance has entered service. Exinda Network Orchestrator 2 Getting started...
-
Page 126: Related Topics
Adjusting the NICs available to the Virtual Machine After installing the virtual machine, you will need to enable the NICs that are available to the Exinda Virtual Appliance. The basic virtual machine configuration does not include the configuration necessary to link the virtual devices to the physical hardware on the host machine. - Page 127 DVD Drives present by default given that these are not needed in the appli- ance. In such a case, Controller 0: Location 1 and Controller 1: Location 0 will also be available for further use. Exinda Network Orchestrator 2 Getting started...
- Page 128 6. Click New . The New Virtual Hard Disk wizard opens. Exinda Network Orchestrator 2 Getting started...
- Page 129 7. Select VHDX as the Disk Format type and click Next . Exinda Network Orchestrator 2 Getting started...
- Page 130 8. In the Choose Disk Type section, select the Fixed Size option and click Next . Exinda Network Orchestrator 2 Getting started...
- Page 131 9. Specify a Name and Location for the virtual hard drive, and click Next . Exinda Network Orchestrator 2 Getting started...
- Page 132 10. Set the Disk Size based on the license you have acquired and then click Next . The minimum recommended sizes are the following: EXNV-2061: 250 GB Total (Add a 200GB Disk) EXNV-3062: 250 GB Total (Add a 200GB Disk) EXNV-4062: 250 GB Total (Add a 200GB Disk) EXNV-6062: 500 GB Total (Add a 450GB Disk)
- Page 133 10. Find the IP address assigned to the management interface by right-clicking on the VM and selecting the Connect option. This provides console access. 11. Log on to the appliance using the default credentials (username: admin, password: exinda). You might need to accept the EULA before proceeding.
-
Page 134: Related Topics
The new space appears as “unallocated storage” inside the “Storage Configuration” section. NOTE Exinda recommends that you resize the “monitor” partition to at least 100GB. If you are licensed for acceleration, you should allocate most of the remaining storage in "wan memory" partition (cache partition for all TCP protocols), but if you are accelerating CIFS/SMB protocols, allow some storage in the "cifs"... -
Page 135: Related Topics
It also provides the option to upgrade the firmware and create the initial set of traffic policies. 1. The Exinda appliance by default picks up an IP Address from DHCP. The IP address is available on the management interface. - Page 136 You can either manually specify these settings or select Autoconf to automatically acquire these settings. The type of auto configuration selected depends on your network. For IPv4 networks select DHCP , for IPv6 use SLAAC . Exinda Network Orchestrator 2 Getting started...
- Page 137 Basic Wizard Step 3 - HTTP Proxy Settings : To allow the appliance to access Exinda's HTTP server for firm- ware updates, license updates, and messages, specify an HTTP proxy. If you have SDP enabled, ensure your proxy supports HTTPS.
- Page 138 Basic Wizard Step 6 - Storage : This screen displays the available disks that can be added to the volume group. Basic Wizard Step 7 - Firmware : This screen displays the status of the firmware running on the Exinda appli- ance. If the appliance has Internet connectivity, the system checks for any newer firmware that may have been released.
-
Page 139: Licensing Information
All Exinda editions subscriptions come Edge Cache, Real Time Monitoring, Interactive Analytics, Reporting and Recommendation Engine. All hardware editions come with a 3 year warranty and Acceleration. For more information about pricing plans, contact your authorized Exinda Inc. reseller. To find a reseller in your area, visit https://www.gfi.com/partners/find-a-partner... - Page 140 If you don't have a GFI Account, create one in one of the following ways: Upgrade a licensed product. Have your Exinda Inc. reseller set up the account. Request a trial of a GFI product.. For more information, see Requesting a product trial.
- Page 141 Unique identifier of each Exinda appliance software. Model Exinda appliance model. SS Expiry Expiry date of Exinda Software Subscription. After this date, you are no longer entitled to support and no new software updates can be installed on the appliance. Maximum monitoring and QoS bandwidth. Bandwidth Optimizer Entitlement for QoS and Acceleration.
- Page 142 Entitlement to Edge Cache Acceleration and the maximum number of edge cache objects. 2. Please contact your local Exinda representative if you wish to enable a feature. To see the last time that the auto-license service checked for a new license 1.
- Page 143 Contact Exinda TAC to re-enable your virtual appliance. To generate a virtual appliance trial license In this step you will go to the Exinda website to create your trial license. Your trial license will be emailed to you after you complete this step.
-
Page 144: Managing Multiple Appliances With The Exinda Management Center
1. In a browser, navigate to the address of your Exinda Virtual Appliance. 2. Log into your Exinda VM. The default user name is admin , and the password is exinda . 3. On the Dashboard > System tab, find the Host ID that the hypervisor created for this virtual machine. You must have your purchase order number that details the type of license and number of licenses you have purchased. -
Page 145: Getting Started With Emc
2.5.2 Deploying Exinda Management Center as a Virtual Machine The Exinda Management Center product is available as a Software-as-a-Service, and as a virtual machine. This topic describes how to deploy the Exinda Management Center as a virtual machine and how to start the VMware virtual machine. - Page 146 2. Open the VMware vSphere client. 3. Select File > Deploy OVF Template . 4. Copy the URL of the latest release of the Exinda VMware Virtual Appliance from Exinda.com, and paste it into the Deploy from... field. Click Next .
-
Page 147: How Emc Fits Into The Appliance Feedback Loop
7. Repeat from step 4. 2.5.4 Exinda Management Center Concepts You may be familiar with managing the Exinda Network Orchestrator appliances and may find it relatively easy working on EMC, but you must also know the new concepts introduced in the Exinda Management Center. - Page 148 Deployment Regardless of the number of Exinda Appliances you are working with, it is very important to test EMC configuration on a single appliance before pushing the configuration onto other appliances. Pull one appliance into the subgroup and push the configuration to the group. To ensure all the configuration and customizations are working as you expect, log on to the appliance and check the Optimizer Policy Tree.
-
Page 149: Configuring The Emc
After you complete the steps, you are ready to create policy and send it to your appliance groups. Step 1: Identify the SDP Location on the Exinda Management Center (if forwarding data to an SDP server). Configure the location of your SDP so that data from the appliances is forwarded to this SDP. - Page 150 To allow an Exinda Appliance to communicate with the EMC, in the Exinda Web UI use the SDP Options to enable and set the location of the EMC system. The data collected by the Exinda Appliance is then forwarded to SDP for report generation.
- Page 151 Screenshot 43: SDP settings To configure the appliances to communicate with Exinda Management Center: 1. In the Exinda Web UI, go to Configuration > System > Setup > SDP . 2. Set the SDP Server to the location of your EMC.
- Page 152 After you have created the tenant, click the tenant in the list to start managing the appliances in the tenancy. Step 5: Add Appliances to Tenants Wait for your appliance(s) to call in. If using the Exinda-hosted service or an on-premises instance with a single tenant, the appliance appears in the Not Deployed group.
-
Page 153: Importing Appliance Configuration
1. Go to Configured Appliances > Appliances . 2. Select an appliance and click Import Configuration . Importing network objects To import your network objects: 1. Click Import Network Objects , or click Next to skip this step. Exinda Network Orchestrator 2 Getting started... - Page 154 If any network objects already exist in the library, a green checkmark appears in front of it. Once used, you will not be able reuse it. 2. Click Add Selected Network Objects to the Library . Importing applications To import any applications that exist in the configuration of the appliance: Exinda Network Orchestrator 2 Getting started...
- Page 155 3. Click Add Selected Virtual Circuits to Library . 4. Click Next . Importing policies To import any policies that exist in the configuration of the appliance: 1. Click Import Policies , or click Next to skip this step. Exinda Network Orchestrator 2 Getting started...
- Page 156 EMC does not import policies that already exist in library or policies linked to a network object that does not exist in the library. Hover over the error icon to see the related error message. 6. Click Add Selected Policies to the Library to successfully add selected policies into the library: Exinda Network Orchestrator 2 Getting started...
- Page 157 To import any service level agreements that exist in the configuration of the appliance: 1. Click Import Service Level Agreements , or click Next to skip this step. 2. Use check-boxes to select the virtual circuits you need to import. Exinda Network Orchestrator 2 Getting started...
-
Page 158: Configuring An Appliance Manually
LAN behind your Network Orchestrator appliance. In the Configured Appliances area, select Local Network Objects in the menu. Click the appliance Exinda Network Orchestrator 2 Getting started... - Page 159 When appliances are moved out of the Configured Appliances group to the Unallocated Appliances group or the Appliance Pool, the configuration that was applied using the edit forms is automatically removed from the appliances upon the next call into the Exinda Management Center. Step 6: Create named Circuit Types The circuit type specifies the intended use of a circuit, for example, "Internet", "Voice", or "MPLS".
- Page 160 Once you move the appliance to a group, and you push configuration to the group, the appliance then receives the updated configuration when it next calls in to the EMC. Screenshot 44: First communication between the appliance and EMC Exinda Network Orchestrator 2 Getting started...
-
Page 161: Configuring A Bridge
Circuit Type as that Circuit. For example, if the circuit is bound to circuit type "Internet", and the appliance bridge(s) is mapped to 'Internet', then that circuit configuration is sent to that appliance bound to the specific bridges. Screenshot 45: Diagram showing bridge configurations. Exinda Network Orchestrator 2 Getting started... - Page 162 Create and map the circuit types to the appliance's bridges 1. Go to Configured Appliances > Bridge/Circuit Type Mapping . 2. Click Host ID or Bridge ID of the appliance to bind the circuit type to the bridge. Exinda Network Orchestrator 2 Getting started...
- Page 163 Why does it say Pending in the Bridge/Circuit Type Mapping column? Pending means that the Exinda Management Center has not received the list of bridges from the appliance yet. The first time the appliance calls in, the Exinda Management Center requests bridge information from the appliance. Note that in general, there should not be much time between the first communication and the second communication with the bridge information.
-
Page 164: Optimizer Policy Tree
If you do not want child appliance groups to inherit the tree, you can stop the inheritance. All the appliances within a group will potentially receive that Policy Tree when the policy is sent. An appliance receives the Policy Tree configuration that corresponds to its bridge/circuit type mapping. Exinda Network Orchestrator 2 Getting started... - Page 165 Go to Configured Appliances > Optimizer Policy Tree . To add a circuit to the Policy Tree 1. Click Create new circuit… . 2. Name the circuit, program the desired bandwidth and bind the circuit to the circuit type. Exinda Network Orchestrator 2 Getting started...
- Page 166 Virtual circuits logically partition the circuit. A virtual circuit defines the traffic that is processed in the partition and the bandwidth it consumes. Each virtual circuit has its own set of policies. 1. Click Create new virtual circuit… Exinda Network Orchestrator 2 Getting started...
- Page 167 Similar to circuits, virtual circuits can be added from the library, if present. To add a policy set to the Policy Tree Polices define what actions are to be taken on different types of traffic. 1. There are two options: Exinda Network Orchestrator 2 Getting started...
- Page 168 Click Add Policy Set from Library… to select a pre-defined policy set template for a different type of traffic. 2. In this example, the Internet outbound policy set is selected and it automatically populates all the policies within this set into the virtual circuit: Exinda Network Orchestrator 2 Getting started...
- Page 169 You cannot delete elements from the Policy Tree if you are looking at a sub appliance group that inherits the Policy Tree. You must edit the Policy Tree in the appliance group that defined the tree. Exinda Network Orchestrator 2 Getting started...
-
Page 170: Sending Configuration Changes To The Appliances
2. Click Stop inheriting Policy Tree . The tree is removed and you can start building up another Policy Tree. 2.5.11 Sending configuration changes to the appliances Changes that you make in the Exinda Management Center are not sent to the appliances until you choose to send them. To do so, click the Send Configuration icon next to the appliance group. - Page 171 Screenshot 48: The life cycle of configuration status Exinda Network Orchestrator 2 Getting started...
-
Page 172: Using
3.7 Service Delivery Point (SDP) 3.1 Defining a network environment One of the first things you do after connecting an Exinda to your network, is define how the Exinda sees your network and its components. As an analogy, imagine walking around your office or data center and placing sticky notes on all the servers, cables and racks to identify them and note what they do. - Page 173 When creating network objects that have location set to "inherit", you can use the CLI command show network-object <name> to show the location. 3. Select whether the traffic for this network object should be shown on the Subnet reports. See For more information, refer to Monitoring subnets (page 284). . Exinda Network Orchestrator 3 Using...
- Page 174 Subnets: 192.168.1.11 /32 EXAMPLE – Head office defining a network object for a remote branch Create a network object that defines the Head Office location, that has a subnet 10.0.100.0/24, where this Exinda appliance is NOT deployed: Name: Head Office Location: External Subnets: 10.0.100.0 /24...
- Page 175 An Exinda appliance must be configured with a DNS server if it is to perform name resolution using FQDN. Each record retrieved has a life cycle equal to the TTL (Time to live) defined for such a record. When the TTL is exceeded, Exinda automatically refreshes the record to verify that the IP address has not changed.
- Page 176 3. Key-in a Name for the object. 4. In the Subnets section, define subnets to include in this network object by IP Network Address and Mask Length or by Fully Qualified Domain Name (FQDN) . Exinda Network Orchestrator 3 Using...
- Page 177 8. Select one or more network objects to add and click Add Network Object to 'Configured Appliances' . 9. To define whether to include monitor information of network objects in subnet reporting, edit the required network objects and check Include in subnet reporting option, within the Reporting section. Exinda Network Orchestrator 3 Using...
- Page 178 LAN on which it operates. The local network objects cannot be deleted. For reporting purposes, hosts and users are defined as internal or external by comparing the IP address with the network objects. Exinda Network Orchestrator 3 Using...
- Page 179 Screenshot 50: Diagram depicting separated local network objects for each appliance. To configure the local network object: 1. Go to Configured Appliances > Local Network Objects . 2. Click Local to Appliance (Host ID ) of the appliance to configure the local network object. Exinda Network Orchestrator 3 Using...
- Page 180 3. Key-in the IP Network Address and Mask Length . Screenshot 51: Defining local network object by subnet. 4. Click Save . Exinda Network Orchestrator 3 Using...
- Page 181 Importing network objects If you have existing appliances that are already configured with network objects, in the Exinda Management Center you can import these network objects into the library (one at a time) from the Not Deployed list. When importing network objects, the importer indicates if the network object already exists in the library (or is included in another network object), or if it conflicts with another network object in the library.
-
Page 182: Working With Dynamically Created Network Objects
3.1.2 Working with dynamically created network objects Dynamic network objects are network objects that are automatically updated and maintained by the Exinda Appliance. They can be used anywhere static network objects are used, however, they cannot be manually modified. - Page 183 This dynamic network object is populated by the hosts that make up Integrate with Active Directory Users that particular Active Directory user or group. For further information, see the and Groups Screenshot 54: Select the desired dynamic network object to show the IP addresses/User Exinda Network Orchestrator 3 Using...
-
Page 184: Working With Users And Groups As Objects
There are two ways the Exinda Appliance can learn about user and group information: Active Directory : The Exinda Appliance can receive user and group information using the Exinda Active Directory Ser- vice, installed on Active Directory Servers. 2. Static Users and Groups: Static users and group information can be only entered using the CLI "networkuser" com- mand. - Page 185 Defining network user objects The Network Users page displays a pre-populated list of users (and their associated IP addresses) from either the Exinda AD Connector, or from static users entered using the CLI. Select which individual users you want to define as dynamic network objects.
-
Page 186: Configuring Vlan Objects
Configuring network user group objects The Network Groups page displays a pre-populated list of groups from either the Exinda AD Connector, or from static groups entered using the CLI. This page allows you to select which groups you want to define as dynamic network objects. - Page 187 Once VLAN Objects are defined, they can be used in Optimizer policies to filter traffic. By default, the Exinda Appliance has a single VLAN defined called ALL , which matches all traffic (regardless if that traffic is part of a VLAN or not).
- Page 188 VLAN. Leaving both fields blank would give the same result. To define a lesser range, type a range somewhere between the maximum range. To define just one priority, type the same value in both the Start and End fields. 4. Click Create . Exinda Network Orchestrator 3 Using...
- Page 189 Also the ALL VLAN object is protected and cannot be deleted. 1. Go to Library > VLANs . 2. In the list of VLAN library objects, find the VLAN you need to delete. 3. In the VLAN object row, click 4. Confirm and click Delete . Exinda Network Orchestrator 3 Using...
-
Page 190: Adding Protocol Objects
Applications based on L7 signature and TCP/UDP port numbers or ranges, which are OR'd together. For example, you could define HTTP based on TCP port 80 OR 'http' L7 signature. Exinda Network Orchestrator 3 Using... - Page 191 Many of the L7 signatures have sub-type classifications, which makes layer 7 visibility much more granular. For instance, for reporting on specific web applications, most vendors can only report on port 80 traffic. Exinda allows a deeper look into Layer 7 applications. For example, by comparison:...
- Page 192 Adding application objects in the EMC The Exinda Management Center provides a comprehensive set of built-in Applications for you to use, These cannot be edited, but you can define Custom Applications. You can add the custom application as part of an ignore policy at the bottom of the optimizer tree that is sent to the appliances.
-
Page 193: Adding And Updating Application Group Objects
The Exinda Appliance comes with a long list of predefined applications used to classify your network traffic. If, however, you want to create your own application, you can create new applications based on L7 signatures, TCP/UDP port numbers and port ranges, or network objects. - Page 194 You may also want to monitor, control, or protect your traffic by grouping a set of applications. For instance, controlling social networking applications as a group in most cases provides adequate granularity. The Exinda Appliance comes with a default set of application groups. You can add new applications to these groups, or create new groups, or delete existing groups.
- Page 195 (page 740). Adding application groups in the EMC The Exinda Management Center provides a comprehensive set of built-in Application Groups for you to use, but you can also define Custom Application Groups. Although an application can be a member of multiple application groups, to prevent conflict it can only be a member of the application group that is currently monitoring traffic.
- Page 196 2. You can configure monitoring status and add or remove applications within this group. 3. You could also view which policies are currently using this application group under In Use . Exinda Network Orchestrator 3 Using...
- Page 197 1. Go to Library > Application Groups and click Create new application group in the library… 2. Provide a name, configure monitoring, if you want this group to be monitored, and add the applications to be part of this group. Exinda Network Orchestrator 3 Using...
- Page 198 By default, all the built-in application groups are enabled for monitoring. On the main Application Groups page, you can view the specific groups that are set for monitoring. You can always change the monitoring configuration by clicking on the application group name and changing it. Exinda Network Orchestrator 3 Using...
-
Page 199: Configuring Anonymous Proxy Detection And Monitoring
The anonymous proxy application is a special application object that is used to detect anonymous proxy websites and services. However, the anonymous proxy service is disabled by default. If the anonymous proxy service is enabled, the Exinda appliance fetches a list of anonymous proxy definitions from the Exinda web servers on a daily basis. - Page 200 To enable the anonymous proxy traffic classification, go to Configuration > System > Setup > Monitoring . To enable the anonymous proxy traffic classification 1. Check the Auto Update Service Enable checkbox. The appliance will communicate with the Exinda web servers daily and fetch any new anonymous proxy definitions.
-
Page 201: Configuring Service Level Agreement Objects
The Service Level Agreement (SLA) objects are used to monitor the availability of a particular IP site. By creating a SLA object, you indicate which IP site to monitor. The Exinda appliance will send one ICMP ping every 10 seconds to the IP address. - Page 202 The Service Level Agreement (SLA) library objects are used to monitor the availability of particular IP addresses. By creating an SLA object, you identify the IP address to monitor. The Exinda Management Center then sends one ICMP ping every 10 seconds to the IP address. You can specify the ping packet size to use. You can also specify when an alert is triggered by defining the ping latency threshold and the duration by which the ping latency threshold was exceeded.
- Page 203 0 – Disabled – this disables the alert 30 seconds 60 seconds 5 minutes 30 minutes 1 hour – the Default setting The default delay is 1 hour. If this setting fits your needs, you do not need to change anything here. Exinda Network Orchestrator 3 Using...
- Page 204 0 – Disabled – this disables the alert 30 seconds 60 seconds 5 minutes 30 minutes 1 hour – the Default setting The default delay is 1 hour. If this setting fits your needs, you do not need to change anything here. Exinda Network Orchestrator 3 Using...
- Page 205 1. Go to Library > Service Level Agreements . 2. In the list of SLA library objects, locate the SLA item you need to delete. 3. In the SLA item row, click Exinda Network Orchestrator 3 Using...
-
Page 206: Creating An Html Response Object
Consider informing your network users that they have exceeded their usage quota. An HTML Response object can be created so that the Exinda appliance will host the webpage. This HTML Response object can then be used in an Optimizer policy to present the webpage. - Page 207 4. Click the Add Response button. The object is added to the list of configured HTML response objects. You can also pre- view the webpage by pressing the Preview button in the list of HTML Response objects. The object is now ready to be used within a policy. Exinda Network Orchestrator 3 Using...
-
Page 208: Configuring Schedule Objects
3.1.11 Configuring schedule objects The Exinda Appliance allows you to automate your network optimization polices for different times of the day and different days of the week. For example, you may wish to lock down your network at night to improve security, while still allowing automated backup services and email to function. - Page 209 Configuring schedule objects in the Exinda Web UI By default, there are three schedule objects defined. Each schedule can be edited or deleted by clicking the appropriate button in the table. The ALWAYS schedule is protected and cannot be edited or deleted.
-
Page 210: Configuring Adaptive Response Limits
The appli- ance then dynamically creates a new network object that keeps track of the IP addresses that have exceeded their limit. Exinda Network Orchestrator 3 Using... - Page 211 IP in the external exception network object. You can also create an alert that sends an email to the Exinda Appliance email recipients when a specified quota threshold has been exceeded. The email will contain all the IP addresses that have exceeded the threshold. Note that the Info Emails checkbox must be checked for each recipient on the email configuration page.
- Page 212 9. If you are ready to make this adaptive response limit rule active, select Yes from the Enable drop-down list. 10. Click the Add New Limit button. The object is added to the list of configured adaptive response limit objects. Exinda Network Orchestrator 3 Using...
- Page 213 Consider an educational institution that has a group of students who have IP addresses in the subnet 192.168.0.0/16. Each student is allowed 10GB data transfer (uploads and downloads) per month. Go to Configuration > Objects > Network > Dynamic and select the appropriate dynamic network object. Exinda Network Orchestrator 3 Using...
- Page 214 Network Object Students-Over-Quota, once 200 MB has been downloaded per day. adaptive limit Students-AR network-object source Students destination Students- Over-Quota adaptive limit Students-AR amount 200 adaptive limit Students-AR duration daily adaptive limit Students-AR direction inbound adaptive limit Students-AR enable Exinda Network Orchestrator 3 Using...
- Page 215 The following examples illustrate how to exclude IP addresses or subnets from the Adaptive Response quota. The first example excludes an internal IP address that exists on the LAN-side of the Exinda Appliance. The second example excludes an entire subnet that exists on the WAN-side of the Exinda appliance.
-
Page 216: Configuring Application Performance Score Objects
With these types of applications, the standard method of calculating the network delays and server delays does not produce an accurate metric. If the application uses a non-transactional protocol, you must specify that when creating APS object. Exinda Network Orchestrator 3 Using... - Page 217 When editing the APS object, you can modify the alert configuration, restart the baselining operation, and modify the threshold values. If you change the network object settings, it is recommended that you re-evaluate the metric thresholds and possibly re-start a baseline. Exinda Network Orchestrator 3 Using...
- Page 218 The scores can focus on specific internal and/or external network objects, or on ALL in one or both categories. Before you begin… If you need to enable alerts, ensure that you have set Email on the Configuration > System > Setup > Alerts page. For more information, see the Exinda Web UI help. Exinda Network Orchestrator 3 Using...
- Page 219 You also need to set up SNMP on the Configuration > System > Network > SNMP page. for more information, see the Exinda Web UI help. Creating an application performance score object in the Exinda Web UI To create the object: 1.
- Page 220 3. Click Name to expand the section. Provide a meaningful name for the new performance score. Screenshot 71: Setting up a performance score for email services. 4. Click Application section to expand. 5. Use the Application drop-down list to select the application you need. Exinda Network Orchestrator 3 Using...
- Page 221 Type an alert level between 0.0 and 10.0. This is a measure of how important is the service the application provides. Threshold For example, an application that provides real-time communications would require a higher alert level than one whose responsiveness is not as critical. Exinda Network Orchestrator 3 Using...
- Page 222 APS to the configured appliances. You can hover over to view details about the issue on a tooltip. 5. Expand the Network Object… section. Exinda Network Orchestrator 3 Using...
- Page 223 The calculation will start at the beginning of the hour the configuration is pushed. For example, if it is pushed at 4:37, the baseline calculation will start at 4:00. If there is no data for that period, it will extend the duration to the next longest period. Exinda Network Orchestrator 3 Using...
- Page 224 1. Go to Configured Appliances > Application Performance Scores . The currently assigned APS items appear on the page. 2. In the Name column, locate the APS item and use the icon on the right to delete. Screenshot 77: Confirming removal 3. Confirm and click Remove . Exinda Network Orchestrator 3 Using...
- Page 225 1. In the EMC interface, click Library > Application Performance Scores . A listing of the currently defined performance scores appears on the right. 2. In the Name column, click on the name of the APS item you need to modify. 3. Do the following, as needed: Exinda Network Orchestrator 3 Using...
- Page 226 If you still want to delete it, you first need to unlink it from the appliances. For more information, refer to Maintaining APS in the EMC configuration library (page 225). Exinda Network Orchestrator 3 Using...
- Page 227 Normalized server delay – the time taken for a server to respond to the request, where the delay is measured independent of the transaction size by assuming a normalized packet size of 1024 bytes Round-trip time – the time taken for a packet to travel from a client through the Exinda appliance to the server and back...
- Page 228 Configuration > System > Network > Email page. Related Topics Creating an Application Performance Score object Manually creating APS thresholds How to know if baselining is in progress How the Performance Metric thresholds are calculated Exinda Network Orchestrator 3 Using...
-
Page 229: Configuring An Application Performance Metric Object
The following metrics are available: bytes lost network delay server delay transaction delay normalized network delay normalized server delay normalized transaction delay round trip time tcp connections aborted tcp connections ignored tcp connections refused tcp connected started. Exinda Network Orchestrator 3 Using... -
Page 230: Before You Begin
If you need to enable alerts, ensure that you have set Email on the Configuration > System > Setup > Alerts page. For more information, see the Exinda Web UI help. You also need to set up SNMP on the Configuration > System > Network > SNMP page. for more information, see the Exinda Web UI help. -
Page 231: Monitoring Your Network
12. Click Add New APM Object . The object is added to the list of configured APM objects. 3.2 Monitoring your network After installing and configuring your Exinda Appliance you can monitor your network, gaining full visibility into the applications users access, inbound traffic, outbound traffic and network throughput. Before customizing the Optimizer, best practices suggest letting the Exinda Appliance collect enough data to help you make informed decisions and policies. -
Page 232: Dashboards
3.2.15 Viewing monitoring statistics 3.2.1 Dashboards The Exinda Web UI provides dashboards you can use to monitor the operation of an Exinda Appliance. One dashboard displays system health and status information about the Exinda Appliance. The other dashboard provides statistical data to show the benefits and impact of the Exinda Appliance in your network. - Page 233 Exinda recommends Every night after midnight, your Exinda Appliance analyzes the traffic it saw during the previous day and, if there was something remarkable or unusual, it makes a recommendation, displays it on the dashboard and sends it to the email addresses configured in Network Setup >...
- Page 234 "remembered" and delivered from the local appliance rather than end-to-end from server to client resulting in a reduction in the amount of data sent across the network. The reduction ratio compares After Exinda to Before Exinda.
- Page 235 A high percentage also means that by turning off optimization there is a higher probability that your critical applications will suffer. Prioritization Ratio = Number of Packets Re-ordered / Number of Total Packets Exinda Network Orchestrator 3 Using...
- Page 236 Exinda recommends that you create a policy to control or protect this traffic.” Every night, the Exinda appliance looks at the top ten applications by data volume and determines if any of the applications are new to the top ten. That is, when looking at the data for the day, have any of the top ten applications not been in the daily top ten for the seven preceding days.
-
Page 237: Monitoring Network Traffic In Real Time
Every night, the Exinda appliance looks at the traffic and determines whether traffic is showing up in any Auto Catch-all virtual circuits. It then reports traffic in the Auto-Catch-all virtual circuit if > 1% of the traffic of your entire appliance is caught in the single Auto Catch-all virtual circuit. - Page 238 Screenshot 82: The Inbound Applications monitor Screenshot 83: The Outbound Applications monitor To find this report: 1. On your browser, open the Exinda Web UI ( https://Exinda_IP_address ). 2. Key-in the User and Password . 3. Click Login . 4. Go to Monitor > Real Time > Applications .
- Page 239 To show the user associated with the internal hosts, check the Show Users checkbox. NOTE Active Directory must be configured on the Exinda Appliances before usernames can be displayed in reports. See For more information, refer to Integrate with Active Directory (page 499).
- Page 240 Highlighting accelerated conversations in yellow and indicating the acceleration technique used Highlighting conversations processed by Edge Cache (in blue) Indicating how the conversations is flowing through the high availability cluster Indicating asymmetric traffic Screenshot 85: The Conversation monitor report displays information about network traffic. Exinda Network Orchestrator 3 Using...
- Page 241 Where do I find this report? 1. On your browser, open the Exinda Web UI ( https://Exinda_IP_address ). 2. Key-in the User and Password . 3. Click Login . 4. Go to Monitor > Real Time > Conversations . Monitoring reports can be exported as a PDF document, saved as a scheduled report, or can be printed directly from the Web UI.
- Page 242 Monitoring edge cache traffic in real time The Realtime Conversations monitor shows the top conversations by throughput observed by the Exinda Appliance during the last 10 seconds. This report answers questions such as:...
- Page 243 You can set the chart to refresh frequently, infrequently, or not at all. Each refresh shows 5 minutes of data ending on the most recent 10 second boundary. That is, if it refreshes at 9:38:17, the chart will show data from 9:33:10 - 9:38:10. Exinda Network Orchestrator 3 Using...
- Page 244 Reduction Ratio = LAN Data - WAN Data / LAN Data Monitoring application response in real time The Realtime Application Response monitor shows the slowest applications by round-trip-time observed by the Exinda Appliance during the last 10 seconds. This report can answer questions such as:...
- Page 245 As well as the APM values, the number of flows and the number of transactions are shown. Display the report in the Exinda Web UI 1. On your browser, open the Exinda Web UI ( https://Exinda_IP_address ). 2. Key-in the User and Password .
- Page 246 Display the report in the Exinda CLI 1. On your browser, open the Exinda Web UI ( https://Exinda_IP_address ). 2. Key-in the User and Password . 3. Click Login . 4. Click Configuration > System > Tools > Console . 5. Type the appliance username and password at the prompts. Do one of the following: To enter privileged EXEC (enable) mode, at the prompt run the command: hostname >...
- Page 247 NOTE A new internal mechanism was implemented in the ExOS 7.4.2 firmware that prevents Exinda Appliances from being affected by DDoS attacks. As a consequence, the “Ignored Connections” historical report is no longer available, but the Realtime Health report includes the number of ignored connections.
- Page 248 6. To display realtime TCP health from the CLI, use the following command: (config) # show realtime apm hosts The following results are displayed: Screenshot 90: Realtime TCP health from the CLI Related topic Monitor the real time application response Exinda Network Orchestrator 3 Using...
-
Page 249: Monitoring Network Interfaces
(s), and the maximum and average throughput rates for the selected time period. NOTE Because this report shows all data on the wire, it may include traffic not seen on the WAN, such as local LAN broadcasts, etc. Exinda Network Orchestrator 3 Using... - Page 250 Screenshot 91: The Interface Throughput report displays inbound and outbound network traffic. Where do I find this report? To access this report: Exinda Network Orchestrator 3 Using...
- Page 251 1. On your browser, open the Exinda Web UI ( https://Exinda_IP_address ). 2. Key-in the User and Password . 3. Click Login . 4. Go to Monitor > Interfaces > Throughput . Monitoring reports can be exported as a PDF document, saved as a scheduled report, or can be printed directly from the Web UI.
-
Page 252: Monitoring Network Throughput
Where do I find this report? To access this report: 1. On your browser, open the Exinda Web UI ( https://Exinda_IP_address ). 2. Key-in the User and Password . 3. Click Login . 4. Go to Monitor > Interfaces > Packets Per Second . - Page 253 Screenshot 93: The Network Summary report displays LAN traffic volume for the top 10 inbound applications. Where do I find this report? To access this report: 1. On your browser, open the Exinda Web UI ( https://Exinda_IP_address ). 2. Key-in the User and Password . 3. Click Login .
-
Page 254: Monitoring Service Levels
To understand how to print the report or schedule the report, see Printing and Scheduling Reports 3.2.5 Monitoring service levels Learn how to view application performance reports, the availability of your ISP, and the health and efficiency of TCP traffic. Exinda Network Orchestrator 3 Using... - Page 255 If an application is not performing well, what might be causing the problem? To access the report: 1. On your browser, open the Exinda Web UI ( https://Exinda_IP_address ). 2. Key-in the User and Password . 3. Click Login .
- Page 256 Exinda Appliance observing the traffic for the period of time to determine a baseline threshold values. The table below the chart indicates the current observed values for these metrics and whether that value is considered good or not.
- Page 257 For example, you can set it to notify you if it drops below 7.0 and stays below 7.0 for 5 minutes. Making the APS chart easier to read by removing score lines You can temporarily remove lines from the APS Scores chart by clearing the checkboxes next to the APS name in the table. Exinda Network Orchestrator 3 Using...
- Page 258 The appropriate thresholds for an application is unique for each network environment. Thresholds can be set manually when configuring an APS object or the Exinda appliance can analyze the traffic for an application for a baseline period and create a recommended set of thresholds.
- Page 259 Availability is the percentage of time a resource is reachable by the Exinda appliance. Latency is the delay in getting an ICMP echo reply for an ICMP echo request generated from the Exinda appliance. It represents both the delay from the local Exinda appliance to a remote host and back again.
- Page 260 Where do I find this report? To access this report: 1. On your browser, open the Exinda Web UI ( https://Exinda_IP_address ). 2. Key-in the User and Password . 3. Click Login . 4. Go to Monitor > Service Levels > Network Response (SLA) .
- Page 261 Screenshot 98: The TCP Efficiency report displays the 50 least efficient applications. Where do I find this report? To access this report: 1. On your browser, open the Exinda Web UI ( https://Exinda_IP_address ). 2. Key-in the User and Password . 3. Click Login .
- Page 262 VERSION INFO A new internal mechanism was implemented in the ExOS 7.4.2 firmware that prevents Exinda Appliances from being affected by DDoS attacks. As a consequence, the “Ignored Connections” historical report is no longer available, but the Real Time TCP Health report still includes the number of ignored connections.
- Page 263 The most unhealthy applications or hosts are shown in the table below the charts. The table shows the number of connections, number of aborted, ignored, and refused connections. You can click the name of the application or host to view the TCP Health details and a graph for that item. Exinda Network Orchestrator 3 Using...
- Page 264 Screenshot 100: The TCP Health report displays the applications with the most connections. Where do I find this report? To access the report: 1. On your browser, open the Exinda Web UI ( https://Exinda_IP_address ). 2. Key-in the User and Password . 3. Click Login .
-
Page 265: Monitoring Applications
The Exinda Appliance is designed to detect network problems, show them to you and help you uncover root causes, so you can take full advantage of the network hardware and capacity your have and only invest in more when it's truly required. - Page 266 More network metrics, such as, round-trip time (RTT), network and server delays, and TCP efficiency can be shown by clicking on the Show Details link in the tables. Screenshot 102: The Application Groups report displays traffic volume from the top application groups. To access this report: Exinda Network Orchestrator 3 Using...
- Page 267 1. On your browser, open the Exinda Web UI ( https://Exinda_IP_address ). 2. Key-in the User and Password . 3. Click Login . 4. Go to Monitor > Applications > Application Groups . Monitoring reports can be exported as a PDF document, saved as a scheduled report, or can be printed directly from the Web UI.
- Page 268 To show all application traffic, to represent the remaining application traffic on your network. Doing this allows the cumulative stack on the throughput chart to represent all the application traffic moving through the appliance. Exinda Network Orchestrator 3 Using...
- Page 269 Where do I find this report? To access the report: 1. On your browser, open the Exinda Web UI ( https://Exinda_IP_address ). 2. Key-in the User and Password . 3. Click Login . 4. Go to Monitor > Applications > Applications .
- Page 270 View the throughput charts as a line chart with the remaining traffic category toggled off. If any of the lines representing the applications have raised flat tops, this may represent that the application is being limited by a policy or the capacity of your pipe. Charting any single application VERSION INFO Exinda Network Orchestrator 3 Using...
- Page 271 Understanding How Charts Relate Drilling into the Data To understand how to drill into the data to find particular filtered data, see Understanding Traffic Direction To understand the difference between inbound and outbound traffic, see Exinda Network Orchestrator 3 Using...
- Page 272 5. Click Monitor > Applications . 6. If unclassified applications are sending traffic through the Exinda Appliance, a link to Discovered Ports is displayed. To display the unclassified applications, click Displayed Ports . The Discovered Ports report is displayed with source and des- tination ports for each unclassified applications.
- Page 273 Screenshot 106: The URLs report displays traffic volume by inbound URL. To access this report: 1. On your browser, open the Exinda Web UI ( https://Exinda_IP_address ). 2. Key-in the User and Password . 3. Click Login .
- Page 274 Click on the Show Details link in the Name column to see more metrics like round-trip time (RTT), network and server delays, and TCP efficiency. Exinda Network Orchestrator 3 Using...
-
Page 275: Monitoring Network Users
Printing and Scheduling Reports To understand how to print the report or schedule the report, see Disabling calculations of application performance metrics Stop the Exinda Appliance from calculating Round Trip Time (RTT), Network and Server Delay, Loss and Efficiency, and TCP Health. IMPORTANT Application performance metrics must be enabled to calculate Application Performance Scores. - Page 276 More network metrics, such as, round-trip time (RTT), network and server delays, and TCP efficiency can be shown by clicking on the Show Details link in the tables. Exinda Network Orchestrator 3 Using...
- Page 277 Screenshot 109: The table on the Users report shows traffic volume metrics broken down by user. To access this report: 1. On your browser, open the Exinda Web UI ( https://Exinda_IP_address ). 2. Key-in the User and Password . 3. Click Login .
-
Page 278: Monitoring Hosts Traffic Volume
After the date range is selected, the graphs and charts are immediately updated. Temporal granularity of stored data The Exinda Appliance stores data for the following time intervals: 2 years of data - this year, previous year & last 12 months 2 months of data - this month, previous month &... - Page 279 Where do I find this report? To access the report: 1. On your browser, open the Exinda Web UI ( https://Exinda_IP_address ). 2. Key-in the User and Password . 3. Click Login .
- Page 280 Drill into the host data by clicking on a host in the Top Listeners or Top Talkers list (located to the right of the graphs). Click a particular host to view the Applications Report for the host that you selected. You can then use the selector on Exinda Network Orchestrator 3 Using...
-
Page 281: Monitoring Network Conversations
3.2.9 Monitoring network conversations The Conversations report shows top conversations by data volume for a selected time period. Traffic inbound to your LAN is reported separately from the outbound traffic. This report answer questions such as: Exinda Network Orchestrator 3 Using... - Page 282 More network metrics, such as, round-trip time (RTT), network and server delays, and TCP efficiency can be shown by clicking on the Show Details link in the tables. To access this report: Exinda Network Orchestrator 3 Using...
- Page 283 1. On your browser, open the Exinda Web UI ( https://Exinda_IP_address ). 2. Key-in the User and Password . 3. Click Login . 4. Go to Monitor > Conversations . To interact with the pie-based reports, you can hover over the pie slices to view the amount of data transferred as well as view the percentage of the pie.
-
Page 284: Monitoring Subnets
Do each of my branches or departments (partitioned by subnet) have the same top applications? Toggle chart components on and off by clicking the buttons at the top of he report. Note when generating a PDF report of this screen, toggle states are taken into account. Exinda Network Orchestrator 3 Using... - Page 285 E.g. For a chart with an hour of data, the intervals are five minutes. Once Network Objects get modified, it can lead to some discrepancies on how Exinda Appliance shows data in the Subnet report. Some sections of the reports may become out of sync when drilling down into conversations, URLs, and hosts.
- Page 286 Top hosts data is mapped to a bar graph. You can brush over any host to view it's IP Address and throughput data. NOTE Toggling the Top Internal Hosts per Subnet and Top External Hosts Per Subnet within this report is available in version 7.0.3 and higher. Exinda Network Orchestrator 3 Using...
- Page 287 How Traffic Direction is Determined and its Implications reating a detailed subnet activity report - invalid topic - NA in v7.4.4 Create a PDF report that lists all network activity for Applications, Conversations, Hosts, URLs, and Users on the selected subnets. Exinda Network Orchestrator 3 Using...
- Page 288 1. On your browser, open the Exinda Web UI ( https://Exinda_IP_address ). 2. Key-in the User and Password . 3. Click Login . 5. Click Report > PDF Reports . 6. Click Add New PDF Report . 7. In the Reports Selection area, select Detailed Subnet Reports .
-
Page 289: Monitoring Virtual Circuits
Drill into the applications for a specific virtual circuit by clicking on the virtual circuit name in the charts or the tables applications graph below the charts. The will be shown filtered for the specified virtual circuit. Exinda Network Orchestrator 3 Using... - Page 290 E.g. For a chart with an hour of data, the intervals are five minutes. Where do I find this report? To access the report: 1. On your browser, open the Exinda Web UI ( https://Exinda_IP_address ). 2. Key-in the User and Password . 3. Click Login .
- Page 291 View the throughput charts as a line chart with the remaining traffic category toggled off so that each virtual circuit has a common zero baseline. Compare the line for the virtual circuit relative to the bandwidth that was assigned to that virtual circuit. To configure a virtual circuit Create a virtual circuit. See Virtual Circuits Exinda Network Orchestrator 3 Using...
-
Page 292: Monitoring The Effects Of Controls
NOTE The Policies report only shows traffic for control and bandwidth shaping policies. Accelerated traffic is not included in this report. VERSION INFO Showing the peak throughput is available in version 7.0.1 Update 1 and later. Exinda Network Orchestrator 3 Using... - Page 293 10-second throughput. Current Rate is the throughput averaged over the last 10 seconds. Utilization is the percentage when you consider the current rate as compared to the maximum bandwidth. Screenshot 117: Control graph for a specified circuit Exinda Network Orchestrator 3 Using...
- Page 294 Screenshot 118: Control graph for a specified virtual circuit When showing a particular policy, the average throughput for the selected policy is shown in the throughput chart. The peak throughput for the virtual circuit is shown as a line. Exinda Network Orchestrator 3 Using...
- Page 295 If the virtual circuit selected is a dynamic virtual circuit, then the following graph will appear above the throughput graph. Screenshot 120: Control graph for a dynamic virtual circuit showing the number of hosts included (Active Hosts) and excluded (Maximum Exceeded) from the virtual circuit Exinda Network Orchestrator 3 Using...
- Page 296 'Maximum Exceeded' line shows the number of hosts that have exceeded the hosts limit for this dynamic virtual circuit. Where do I find this report? To access the report: 1. On your browser, open the Exinda Web UI ( https://Exinda_IP_address ). 2. Key-in the User and Password . 3. Click Login .
- Page 297 Screenshot 121: The Discard tab on the Control report discard packets over time. Where do I find this report? To access the report: 1. On your browser, open the Exinda Web UI ( https://Exinda_IP_address ). 2. Key-in the User and Password . 3. Click Login .
- Page 298 Where do I find this report? To access the report: 1. On your browser, open the Exinda Web UI ( https://Exinda_IP_address ). 2. Key-in the User and Password . 3. Click Login .
-
Page 299: Monitoring Optimization Reports
Monitoring traffic reduction The Optimization Reduction report shows the amount of traffic reduction achieved due to WAN memory techniques. It also shows the amount of reduction per Exinda Appliance peer and per application. This report answers questions such as: Am I achieving the amount of traffic reduction overall that I am expecting? Is a specific application achieving the amount of traffic reduction that was expected? The chart shows traffic reduction over time as either throughput or percentage reduction. - Page 300 Screenshot 123: The Total Reduction Ration graph displays reduction ratios over time. The table below the graphs show reduction statistics broken down by a remote Exinda Appliance peer and by application. Exinda Network Orchestrator 3 Using...
- Page 301 Monitoring reports can be exported as a PDF document, saved as a scheduled report, or can be printed directly from the Web UI. For more information, refer to Exporting, printing and scheduling reports (page 317). How is the reduction ratio calculated? Reduction Ratio = (Data Transfer Size Before Exinda - Data Transfer Size After Exinda Network Orchestrator 3 Using...
- Page 302 Exinda) / Data Transfer Size Before Exinda How do I interact with the interactive flash time graphs? To understand how to get a better look at traffic patterns and to remove clutter on the time graph, see Using Inter- active Time Graphs...
- Page 303 The table shows a summary of Edge Cache reduction for the selected time period. Where do I find this report? 1. On your browser, open the Exinda Web UI ( https://Exinda_IP_address ). 2. Key-in the User and Password . 3. Click Login .
-
Page 304: Monitoring Exinda Appliance System Performance
Printing and Scheduling Reports 3.2.14 Monitoring Exinda Appliance system performance Learn about the reports that provide feedback on the performance of your Exinda Appliance. The reports cover aspects of operational performance like number of concurrent connections, CPU utilization, CPU temperature, memory usage, disk IO and swap space usage. - Page 305 Screenshot 128: The Concurrent Connections graph displays connection statistics over time. Where do I find this report? To access the report: 1. On your browser, open the Exinda Web UI ( https://Exinda_IP_address ). 2. Key-in the User and Password . 3. Click Login .
- Page 306 SNMP trap when the number of connections exceed your licensed limit. To find the report: 1. On your browser, open the Exinda Web UI ( https://Exinda_IP_address ). 2. Key-in the User and Password . 3. Click Login .
- Page 307 To understand how to print the report or schedule the report, see Printing and Scheduling Reports Monitoring Exinda Appliance CPU usage The CPU Usage report shows how hard the CPU is working over time. This report answers questions such as: Are some of the other issues I'm seeing with my traffic due to overworking the appliance? I see the appliance's CPU is highly utilized.
- Page 308 Screenshot 131: The CPU utilization graph shows how hard the Exinda Appliance works over time. Where do I find this report? To access the report: 1. On your browser, open the Exinda Web UI ( https://Exinda_IP_address ). 2. Key-in the User and Password .
- Page 309 See the CPU Usage report to see if the temperature correlates with the processing activity on the appliance. Where do I find this report? To access the report: 1. On your browser, open the Exinda Web UI ( https://Exinda_IP_address ). 2. Key-in the User and Password . 3. Click Login .
- Page 310 Screenshot 132: The RAM Usage chart displays memory consumption over time. Where do I find this report? To access the report: 1. On your browser, open the Exinda Web UI ( https://Exinda_IP_address ). 2. Key-in the User and Password . 3. Click Login .
- Page 311 Monitoring Exinda Appliance Disk IO The Disk IO report shows read and write disk usage for each service in kB/s over time for the selected time period. This report answers questions such as: Has my disk I/O usage suddenly increased or over time? If so, which subsystem is responsible for the increased disk...
- Page 312 1. On your browser, open the Exinda Web UI ( https://Exinda_IP_address ). 2. Key-in the User and Password . 3. Click Login . 4. Go to Monitor > System > Disk IO . Monitoring reports can be exported as a PDF document, saved as a scheduled report, or can be printed directly from the Web UI.
-
Page 313: Viewing Monitoring Statistics
To understand how to print the report or schedule the report, see Printing and Scheduling Reports 3.2.15 Viewing monitoring statistics Your Exinda Appliance provides several ways to view the statistics gathered from monitoring your network. This section provides information about accessing those statistics and interpreting the information provided. Understanding traffic direction Monitored statistics reference the direction of the flow and the side of the appliance where the data is collected. - Page 314 These methods allow you to define a custom time range. Exinda Network Orchestrator 3 Using...
- Page 315 You can also use the zoom controls that appear below the graph. Drag the handles in from the left and/or the right to isolate the data you need. The graph is dynamic, so you can immediately view the data. The handles remain in the Exinda Network Orchestrator 3 Using...
- Page 316 For bar charts, click on an item in the bar chart. You can drill-down into the following details for each of the application types: Application groups > applications > hosts Applications > hosts URLs > hosts Exinda Network Orchestrator 3 Using...
- Page 317 Exporting, printing and scheduling reports Monitoring reports can be exported as a PDF document, saved as a scheduled report, or can be printed directly from the Web UI. The following icons appear on the top-right of the interface: Exinda Network Orchestrator 3 Using...
- Page 318 Scheduled PDF reports can be branded by uploading your logo to be displayed on the title page of the reports. Reports scheduled from the report page, can contain one or more charts in the PDF by selecting any number of charts. Exinda Network Orchestrator 3 Using...
- Page 319 To schedule a new PDF report from the Reporting page 1. Go to Monitor > Schedule Reports > PDF Reports . 2. Click on the Add New PDF Report link at the top of the page. Exinda Network Orchestrator 3 Using...
- Page 320 1. Go to Monitor > Schedule Reports > PDF Reports . 2. The scheduled PDF reports are listed with a description of the charts that will be included in the report and the list of email addresses it will be sent to. Exinda Network Orchestrator 3 Using...
- Page 321 CSV Reporting allows you to configure the export of raw CSV data to be emailed or downloaded either on demand or at scheduled intervals. Exported data can be sent to multiple recipients by comma or semicolon separating email addresses. Exinda Network Orchestrator 3 Using...
-
Page 322: Monitoring Applications With The Exinda Solution Center
To find this functionality, go to Monitor > Schedule Reports > CSVReports . 3.3 Monitoring applications with the Exinda Solution Center The Exinda Solution Center provides a series of predefined monitors you can run to generate network performance reports for applications like FTP, SSH, Salesforce.com, Office365 VoIP and many more. -
Page 323: How Performance Reports Work
Each solution description indicates which Exinda OS version is required to run the solution, shown both in the solution list and in each solution description. You may need to upgrade your Exinda OS version to take advantage of the desired solutions. -
Page 324: Using Application Performance Reports
NOTE The report description lists the minimum version of Exinda OS required to run the report. If your Exinda OS does not meet the requirement, the Run button is not be available. - Page 325 If a user or host displays more bandwidth volume than other users and hosts, that situation may warrant investigation. You can choose to show internal endpoints (LAN-side of an Exinda Appliance), external endpoints (WAN-side of an Exinda Appliance), users only or hosts only. For more information, refer to Monitoring real time application response (page 245).
-
Page 326: Bandwidth Usage
3.3.3 Bandwidth usage bandwidth usage - top apps Knowing how much bandwidth your top applications consume can provide insight into weather controlling particular apps could help effectively reduce your throughput. Screenshot 144: Top App usage graph Exinda Network Orchestrator 3 Using... -
Page 327: Using The Application Performance Monitor Voip Report
The VoIP report monitors and reports on the quality of VoIP transactions in a network. It displays data using telecommunication industry standard measures like MOS and rFactor. Running the Application Performance VoIP report 1. On your browser, open the Exinda Web UI ( https://Exinda_IP_address ). 2. Key-in the User and Password . 3. Click Login . - Page 328 MOS, or Mean Opinion Score, is a measure of all quality. Historically, users would rate their call experience on a five point scale. An Exinda Appliance automates MOS ratings, taking into account network dependency conditions. The scores have the following meanings.
-
Page 329: Recreational Traffic
How to set up this report? The report for recreational traffic can be created on the Exinda Solution Center 1. Go to Solution Center > Show Solution Center . 2. Under Network Governance , click Recreational Traffic > Run . A confirmation screen opens. -
Page 330: Riaa Notice Prevention
RIAA/MPAA notices from their Internet service providers, and the organization must take action to prevent further illegal downloads. To reduce the amount of copyright violations on your network, you can set policies to reduce the ability to use encrypted P2P applications. Exinda Network Orchestrator 3 Using... - Page 331 Screenshot 145: Policies can be used to control traffic Ensure your organization stays compliant with digital copyright laws with Exinda’s RIAA Notice Prevention Solution by creating a policy that will significantly reduce that amount of P2P traffic that is allowed on the network, say to 1-3% of the available bandwidth with a burst priority of 10.
-
Page 332: Using Network Governance Reports
Running the Recreational Traffic report 1. Go to Solution Center > Show Solution Center . 2. Under Network Governance , click Recreational Traffic . 3. Specify any details that the wizard requires. 4. Click Ok . Exinda Network Orchestrator 3 Using... -
Page 333: Answers To Common Questions About Solution Center Application Performance
Also, you can choose to show just internal endpoints, that is, hosts and users on the LAN-side of your appliance, or just external endpoints, that is, hosts and users on the WAN-side of your appliance. You can also choose to show just users, just hosts, or both. Exinda Network Orchestrator 3 Using... -
Page 334: Adding And Deleting Solutions
If no traffic is observed for an application during a baselining period, the baselining process repeats until traffic is observed and thresholds are calculated. The baselining process may not always take an hour if an Exinda Appliance has observed and stored traffic for the application within the hour the baselining process starts. -
Page 335: Setting A New Baseline
If a button is green, the data appears on the page. Determining throughput values for specific points in time in the throughput chart Hover your cursor over the chart. A data brush will appear showing average throughput for the specific point in time. Exinda Network Orchestrator 3 Using... -
Page 336: Investigating A Poor Application Performance Score (Aps)
3.3.15 Deleting an Application Performance report The only way to delete a solution is through the command line. However, for some solutions you need the determine the solution ID from the Web UI before you can remove the solution. Exinda Network Orchestrator 3 Using... -
Page 337: Managing Network Traffic
3.4 Managing network traffic As you monitor your traffic, you may recognize patterns of activity that you need to manage. The Exinda Appliance provides the ability to define policies, based on several criteria, that you can use to control, by either limiting or giving priority to, specified classes of traffic on your network. -
Page 338: The Exinda Policy Tree
3.4.1 The Exinda policy tree All network behavior that you want to modify by using the Exinda Appliance is specified by policies in the optimizer. This includes traffic shaping, prioritization, acceleration, and packet marking. These policies are arranged hierarchically in a tree so that you can assign different policy rules to different types of traffic on your network. - Page 339 If the traffic did not match a given policy in the virtual circuit that was matched, then the traffic would be evaluated against the next policy. Exinda Network Orchestrator 3 Using...
- Page 340 WiFi network. For example, you have policies for P2P, streaming, and web, but you do not have policies for software updates. The system will automatically define a policy for the remaining traffic called Auto Exinda Network Orchestrator 3 Using...
-
Page 341: Circuits
When defining circuits, ensure each bridge is bound to a circuit; otherwise network traffic on any bridge that is not bound to a circuit, will not be affected by policy and will be monitored in a catch-all circuit. Exinda Network Orchestrator 3 Using... - Page 342 WCCP interface. For version 7.0.2 Update 1 and later: A circuit can be bound to any number of bridges or one WCCP interface. Screenshot 150: Circuit form for versions 7.0.2 and earlier Exinda Network Orchestrator 3 Using...
- Page 343 If the traffic is P2P, then that traffic type will be processed by Circuit A and will not be processed by Circuit B. If the traffic is mail, then that traffic type will not match Circuit A. It will attempt to match policy in Circuit B. In this case, it will match the policy for mail. Exinda Network Orchestrator 3 Using...
- Page 344 On an Exinda Appliance, a circuit specifies the named bridge (or bridges) to which it is bound. In the Exinda Management Center, the binding to bridges is through a designated Circuit Type. Circuit Types represent the intended use of a circuit.
- Page 345 For version 7.0.2 and earlier: A circuit can only be bound to one bridge, or all bridges (but not greater than 1 bridge and less than all bridges) or one WCCP interface. For version 7.0.2 Update 1 and later: A circuit can be bound to any number of bridges or one WCCP interface. Exinda Network Orchestrator 3 Using...
- Page 346 Screenshot 152: Circuit form for versions 7.0.2 and earlier Screenshot 153: Circuit form for versions 7.0.2 Update 1 and later Policy Tree Circuits are part of the policy tree. To learn how circuits, virtual circuits, and policies work together, see Exinda Network Orchestrator 3 Using...
- Page 347 Circuit Types are defined in the Configuration Library and are used by circuits and appliance bridge-to-circuit type mappings. The following example will further clarify the concept of circuit types: Exinda Network Orchestrator 3 Using...
-
Page 348: Virtual Circuits
Traffic that does not fall within the virtual circuit is evaluated by the next virtual circuit and so on. Each virtual circuit will have it's own set of policy rules. The following are common use cases for virtual circuits. Exinda Network Orchestrator 3 Using... - Page 349 BEST PRACTICE It is a best practice to create an overflow virtual circuit immediately after a virtual circuit with a connection limit or a host limit, to capture the connections or hosts that were excluded. Exinda Network Orchestrator 3 Using...
- Page 350 How to handle oversubscription in a Virtual Circuit Configuring a Virtual Circuit as a Dynamic Virtual Circuit Sharing bandwidth equally Ensuring minimum bandwidth when sharing equally Capping bandwidth usage per host Capping bandwidth usage per host with minimum bandwidth Exinda Network Orchestrator 3 Using...
- Page 351 Limiting the number of hosts sharing bandwidth Troubleshooting Virtual Circuits Creating a virtual circuit Use the following instruction to create a new virtual circuit (VC). You use VCs to manage bandwidth through the Exinda Appliance. Before you begin… If you need to manage oversubscription to the VC, see the following: How to handle oversubscription in a Virtual Circuit As you create the new VC, you may want to employ the Dynamic Options.
- Page 352 'Internal' network object Outbound Only outbound traffic from the subnets defined as 'internal' by the Network Object. 'External' network object Outbound Only outbound traffic from the LAN to the subnets defined as 'external' by the Network Object. Exinda Network Orchestrator 3 Using...
- Page 353 5. In the Bandwidth section, type the desired bandwidth for this virtual circuit. 6. Also specify how to share bandwidth with other virtual circuits when there is insufficient bandwidth due to over sub- scription.. Exinda Network Orchestrator 3 Using...
- Page 354 7. In the Dynamic Virtual Circuit section, set the options that provide the control you need. NOTE See For more information, refer to Dynamic Virtual Circuits (page 419). for more information about configuring dynamic virtual circuits. Exinda Network Orchestrator 3 Using...
- Page 355 VC C = 0.75 Mbps = 0.75 Mbps VC A = 2/3 * (3 - 0.75) = 1.5 Mbps VC C = 1/3 * (3 - 0.75) = 0.75 Mbps Related Topics Creating a new Virtual Circuit Exinda Network Orchestrator 3 Using...
- Page 356 Both methods can limit the number of hosts, but for when there is spare capacity, you can configure the VC to allow bursting when there are less than the allowed number of hosts. The DVC then allows each active host to gain more Exinda Network Orchestrator 3 Using...
- Page 357 You can specify an automatic calculation of the per host bandwidth and the number of allowed hosts. The system then divides the virtual circuit bandwidth by the number of active hosts. Adding a dynamic virtual in the Exinda Web UI On the Add New Virtual Circuit form, do the following: 1.
- Page 358 Ensuring minimum bandwidth when sharing equally Limiting the number of hosts sharing bandwidth Adding a dynamic virtual circuit in the EMC The options available in the Exinda Management Center appear in the following screenshot: Screenshot 157: Dynamic virtual circuit options Consider the following: While allocating bandwidth usage to each host on the network.
- Page 359 On the Add New Virtual Circuit form, do the following: 1. Select the Dynamic Virtual Circuit checkbox. 2. Set the DVC settings to: Per Host Bandwidth: Automatically Share Per User Max Bandwidth: No burst; set limit to your manual cap value Max Hosts: Auto Exinda Network Orchestrator 3 Using...
- Page 360 = allocated-bandwidth If the allocated bandwidth is less than the virtual circuit bandwidth, then you are making some of the bandwidth inaccessible. Exinda Network Orchestrator 3 Using...
- Page 361 5. If your traffic is falling into the wrong virtual circuit, check the definition of the affected virtual circuits and ensure the most specific virtual circuit is higher in the policy tree. Exinda Network Orchestrator 3 Using...
-
Page 362: Policies Overview
Policies are part of the policy tree. To learn how circuits, virtual circuits, and policies work together, see Related Topics Creating a policy for a specific Virtual Circuit Creating a policy for use with any Virtual Circuit Exinda Network Orchestrator 3 Using... - Page 363 This is true for policies as well. That is, more specific policies need to be ordered higher in the virtual circuit's set of policies as compared to more general virtual circuits. Exinda Network Orchestrator 3 Using...
- Page 364 Configuring a policy to redirect HTTP traffic to an HTTP Response webpage Configuring a policy to redirect HTTP traffic to a URL To create a policy in the Exinda Web UI 1. Go to Configuration > Optimizer . The right side of the screen refreshes.
- Page 365 For the second host, select a network object that filters for the destination of the conversation. If hosts are not specified, ALL network objects are assumed. Traffic direction is relative to the Exinda appliance. ToS/DSCP – Select traffic based on particular ToS/DSCP marks in the IP header.
- Page 366 Creating a policy for a specific Virtual Circuit VERSION INFO Exinda Management Center 1.5.0 does not support policies for HTTP Redirect or HTTP Response. When you create policies, they are added to the Policies Library. If you amend a policy definition, any changes made to it affect all Virtual Circuits that use that policy.
- Page 367 Some applications may not be compatible with all appliance versions. When an application is not compatible, it does not appear in the drop-down list. Creating a policy for a specific virtual circuit in the Exinda Web UI Use the following instructions to create a policy that relates to a specific virtual circuit (VC). While these instructions assume that the policy is intended for a specific VC, it can later be used with other VCs.
- Page 368 For the second host, select a network object that filters for the destination of the conversation. If hosts are not specified, ALL network objects are assumed. Traffic direction is relative to the Exinda appliance. ToS/DSCP – Select traffic based on particular ToS/DSCP marks in the IP header.
- Page 369 Related Topics Creating a policy for use with any Virtual Circuit Configuring a policy to accelerate traffic in the Exinda Web UI Use the following instructions to configure a policy that enables acceleration to the traffic identified by the policy.
- Page 370 How traffic-shaping queue modes work When shaping traffic as specified by the policies, the Exinda Appliance needs to maintain a queue of packets for each policy within their respective virtual circuits. There are three different queuing methods to address the needs of different use scenarios when using a multi-processor appliance.
- Page 371 In this case, the flow is handled by a single CPU and the other CPUs are idle. It then appears that they are getting 1/N of the amount of traffic that they are expecting even though in more realistic use of the network, where the flows can be distributed more evenly, they will get the appropriate amount of bandwidth. Exinda Network Orchestrator 3 Using...
- Page 372 If the circuits are oversubscribed, then the shaping queuing mode will revert to the multi-queue mode . Exinda Network Orchestrator 3 Using...
- Page 373 Screenshot 163: Multi per VC Queue Mode Configuring a policy to discard (block) traffic in the Exinda Web UI Use the following instructions to configure a policy that discards (blocks) identified traffic. 1. From the Action drop-down list, select Discard and optionally check the Discard only the first packet of a con- nection option.
- Page 374 1. From the Action drop-down list, select the Return HTTP Response and select the HTML Response object checkbox. The HTML Response object allows you to "host" a webpage on the Exinda appliance. You create the HTML Response webpage at Configuration > Objects > HTML Response . For more information, refer to...
- Page 375 Reading and writing ToS and DiffServ packet marks Exinda Appliances can read and write ToS/DSCP marks in packets, allowing fine-grained control and classification of applications that are marked with Tos/DSCP values as well as applying marking policies to ensure traffic is treated appropriately by onward network equipment.
- Page 376 DSCP Class Name Binary Value Decimal Value BE (best effort, default) 000000 AF11 (assured forwarding, see RFC 2597) 001010 AF12 001100 AF13 001110 AF21 010010 AF22 010100 AF23 010110 AF31 011010 AF32 011100 AF33 011110 AF41 100010 Exinda Network Orchestrator 3 Using...
- Page 377 Mark Packets with ToS/DSCP Values Matching packets to ToS/DSCP values When defining Optimizer Policies on the Exinda appliance, there is a ToS/DSCP drop down that allows users to match only those packets with the specified ToS/DSCP value. Exinda Network Orchestrator...
- Page 378 Optimizer Policies. Traffic Priority Class IETF DiffServ Traffic Priority Class DSCP Setting Real Time (Gold) Expedited Forwarding Mission Critical (Silver High) Assured Forwarding AF31 Business Critical (Silver Low) Assured Forwarding AF32/33 General Business (Bronze) Best Effort Exinda Network Orchestrator 3 Using...
- Page 379 3. Click Create new policy set 4. In the Name section, key-in a name for the policy. The name must be unique within the tenant. 5. In the Policies section, add policies to the list. Exinda Network Orchestrator 3 Using...
-
Page 380: The Optimizer Wizard
Exinda appliance on the WAN for this to work. Step 4: Do you want to apply QoS? - Selecting YES will apply traffic shaping. You must have another Exinda appli- ance on the WAN for this to work. - Page 381 Screenshot 165: The Optimizer Wizard configuration. This will enable both QoS (traffic shaping) and Application Acceleration. You will need to select the WAN topology that bests represents your deployment and also type the inbound and outbound bandwidths for this Exinda appliance. Scenario 2: QoS Only...
- Page 382 And you will also need to type the inbound and outbound bandwidths for this Exinda appliance. Scenario 3: Acceleration Only Step 3: Do you asymmetric traffic? - YES Step 4: Do you want to enable Optimization? - NO Exinda Network Orchestrator 3 Using...
- Page 383 Limit Low 2%-10% Limit Med 3%-50% Limit High 4%-70% Guarantee Low 5%-100% Guarantee Med 8%-100% Guarantee High 10%-100% Guarantee Critical 15%-100% Guarantee Low 5%-100% - Accelerate Guarantee Med 8%-100% - Accelerate Guarantee High 10%-100% - Accelerate Exinda Network Orchestrator 3 Using...
-
Page 384: Calculating Network Performance Metrics
As each packet is intercepted by the Exinda appliance, it is time stamped with a highly accurate nanosecond resolution clock source. Since the Exinda appliance intercepts the packet after the client sends the packet, the start time is not known and so the RTT is determined by summing the round trip time from the appliance to the server and back (Server RTT), and the round trip time from the appliance to the client and back (Client RTT). - Page 385 The diagram below shows the flow of information between the client, the Exinda appliance, and the server, and identifies the points in the transaction where time stamps are acquired.
- Page 386 When the request passes through the Exinda, the time stamp is noted as the beginning of the request (t1). When the end of the request passes through the Exinda, the time stamp is noted ( t2 ). t2 - t1 = The amount of time it takes the client request to pass through the Exinda appliance.
- Page 387 (t1). When the end of the last data packet passes through the Exinda, the time stamp is noted ( t2 ). t2 – t1 = The amount of time it takes the client to send data through the Exinda appliance.
- Page 388 When the response passes through the Exinda, the time stamp is noted ( t3 ). When the end of the response passes through the Exinda, the time stamp is noted ( t4 ). t4 – t3 = The amount of time it takes the server response to pass through the Exinda appliance.
-
Page 389: Configuring For Common Use Cases And Scenarios
You should note that you should ensure that DNS traffic for the unauthenticated users is not blocked. Since the Exinda Appliance matches traffic to the filters in the policies (and virtual circuits) from the top of the Optimizer policy tree, you need to ensure that the most specific filters appear first in the tree. The policies should appear in the following order. - Page 390 Creating a Virtual Circuit for Authenticated Users Creating a Virtual Circuit for Unauthenticated Users Creating policies to filter for Authenticated Users with no Virtual Circuit available Creating policies that redirect traffic Creating policies that block unwanted unauthenticated traffic Exinda Network Orchestrator 3 Using...
- Page 391 8. Click Add New Virtual Circuit . The page refreshes and the new VC appears on the tab. Related Topics Creating a Virtual Circuit for Authenticated Users Creating policies to filter for Authenticated Users with no Virtual Circuit available Exinda Network Orchestrator 3 Using...
- Page 392 Creating a Virtual Circuit for Unauthenticated Users Creating policies that redirect traffic Creating policies that block unwanted unauthenticated traffic Creating policies that redirect traffic Use the following instructions to create policies that redirect unauthenticated users to an identified URL. Exinda Network Orchestrator 3 Using...
- Page 393 Creating policies that block unwanted unauthenticated traffic Use the following instructions to block any unauthenticated traffic that is not already identified in other policies. To create the policy: 1. Go to Configuration > Optimizer . Exinda Network Orchestrator 3 Using...
-
Page 394: Backhauling Internet Traffic
. Because of the layout, the traffic may go through an Exinda Appliance at the headquarters twice. The traffic flows from the client through the appliance, turns around at a router, and goes back through the appliance to the destination. - Page 395 TCP connection. Normally, the Exinda appliance at the headquarters would send a SYN with an attached TCP option 30 to the server on the Internet just in case there is another Exinda appliance closer to the server. The End Acceleration...
-
Page 396: Setting And Enforcing Quotas
When they have HTTP traffic, you can also choose to redirect them to a webpage that you host or respond with a webpage that the Exinda Appliance hosts. If needed you can combine these, such that the first policy filters for HTTP traffic and then shows a webpage, but then other types of traffic are caught by a second policy that blocks the remaining traffic. - Page 397 2. Create an adaptive response limit object that defines the 10GB limit as well as the destination dynamic network object that will contain the students who exceeded their quota using the Configuration > Objects > Adaptive Exinda Network Orchestrator 3 Using...
- Page 398 Screenshot 179: Setting parameters for a virtual circuit. 4. Create an HTML Response object that defines what the webpage will look like once the shoppers have exceeded 2 hours of usage. See the Configuration > Objects > HTML Response page. Exinda Network Orchestrator 3 Using...
- Page 399 Web traffic matching this policy will be sent back an HTML response with the contents of the HTML Response object, which will cause the a web page to be presented to the client. 3. Type the Filter Rules . Exinda Network Orchestrator 3 Using...
-
Page 400: Creating Applications From Dscp-Marked Traffic (Like Riverbed Accelerated Traffic)
Some times you might find that the Exinda Appliance is located between two other types of network appliances that modify the traffic in a way that obscures the visibility of the Exinda appliance into the traffic. An example of this would be having the Exinda Appliance located between two Riverbed appliances doing acceleration. -
Page 401: Clustering And High Availability
Screenshot 183: A typical clustering topology. In this example, there are two physical links: from Router1 to Switch 1 and from Router2 to Switch2. An Exinda appliance is deployed between each switch and router, and a cable is connected between the two appliances for synchronization. - Page 402 In the event that the Cluster Master fails, is rebooted, or powered off, a new Cluster Master is automatically elected. The offline node (previously the Cluster Master) is treated as a regular offline node. When it comes back online, it does not necessarily become the Cluster Master. Exinda Network Orchestrator 3 Using...
- Page 403 Master IP address when managing a cluster. CAUTION When upgrading the firmware of appliances that are part of a cluster, Exinda recommends that you break the cluster before starting the upgrade (Either by disconnecting the cluster link or by clearing the “Cluster” option for the appropriate interface).
- Page 404 4. In the Cluster Master Settings area, select eth1 and type the external address used to access the appliances. 5. Repeat these steps all each Exinda Appliance joining the cluster. Once these settings are saved, the appliances will auto-discover each other and one will be elected as the Cluster Master.
- Page 405 Screenshot 186: Cluster Master (External) configuration on both Exinda Appliances. In the example above, Exinda 1 has a Management IP of 192.168.0.161 and Exinda 2 has a Management IP of 192.168.0.162. The Cluster External IP is configured as 192.168.0.160 on both appliances – regardless of which of these two appliances becomes the Cluster Master, it will be reachable on the 192.168.0.160 IP address.
- Page 406 Exinda appliance on the active one is offline. In order to do this, you need the appliance that went offline to purposefully break the traffic so the HA protocol can hand it over to the backup link.
- Page 407 3. On the original master appliance, turn clustering back on. This appliance will now be the standby appliance. Configuring Exinda Appliances for clustering Before configuring clustering, the Exinda Appliances must be correctly cabled. It is recommended that each appliance in the cluster be connected and configured with a dedicated management port.
-
Page 408: Controlling Anonymous Proxy Traffic
Cluster node count: 2 ID Role State Host External Addr Internal Addr ----------------------------------------------------------------- 1* master online exinda-A 192.168.0.161 192.168.1.1 2 standby online exinda-B 192.168.0.162 192.168.1.2 3.5.6 Controlling anonymous proxy traffic Users who want to bypass security policies that prevent tools from monitoring what they are doing, typically find an open and anonymous HTTPS transparent proxy. -
Page 409: Managing Exinda Appliances With Emc
The Exinda Appliance can identify traffic that is served through an anonymous proxy and classify it as the Anonymous Proxy application. As such, any anonymous proxy traffic appears on the real-time monitoring screen and on other monitoring reports as"Anonymous Proxy", and can then be controlled by the Optimizer. -
Page 410: Viewing Appliances In The Tenancy
Delivered – configuration has been delivered to the appliance. 3.6.1 Viewing appliances in the tenancy There are several locations in the Exinda Management Center where you can see the list of appliances in your tenancy, each providing a different scope of which appliances are shown. - Page 411 When appliances are moved out of the Configured Appliances group to the Unallocated Appliances group or the Appliance Pool , the configuration that was applied via the edit forms will be automatically removed from the appliances upon the next call into the Exinda Management Center. To move an appliance 1.
- Page 412 3. Type the name of the group to create the group. To delete an appliance group 1. Click the appliance group header menu and click the menu icon of the group that you want to delete. Exinda Network Orchestrator 3 Using...
-
Page 413: Configuration Library
– Represent hosts on a network and can include subnets, single hosts, or groups of both. Once on the appliance, network objects are used to determine if host and user traffic data are internal or external to the LAN behind your appliance. Exinda Network Orchestrator 3 Using... - Page 414 Circuit Types are defined in the Configuration Library and are used by circuits and appliance bridge-to-circuit type mappings. The following example will further clarify the concept of circuit types: Exinda Network Orchestrator 3 Using...
- Page 415 On an Exinda Appliance, a circuit specifies the named bridge (or bridges) to which it is bound. In the Exinda Management Center, the binding to bridges is through a designated Circuit Type. Circuit Types represent the intended use of a circuit.
- Page 416 Create new circuit type in the library to create it. For more information, refer to Circuit types in the EMC (page 414). 6. Click Save . The circuit is added to the Policy Tree and is also saved to the configuration library. Exinda Network Orchestrator 3 Using...
- Page 417 5. In the Bandwidth section, type the desired bandwidth for this virtual circuit. 6. Also specify how to share bandwidth with other virtual circuits when there is insufficient bandwidth due to over sub- scription.. Exinda Network Orchestrator 3 Using...
- Page 418 6. Also specify how to share bandwidth with other virtual circuits when there is insufficient bandwidth due to over sub- scription.. NOTE The bandwidth can be specified in %, Kbps, Mbps or Gbps. 7. In the Dynamic Virtual Circuit section, set the options that provide the control you need. Exinda Network Orchestrator 3 Using...
- Page 419 You can specify an automatic calculation of the per host bandwidth and the number of allowed hosts. The system then divides the virtual circuit bandwidth by the number of active hosts. The options available in the Exinda Management Center appear in the following screenshot: Exinda Network Orchestrator...
- Page 420 By default, though, the EMC can set no less than 10 kbps for any one host, so a hard limit to the maximum number of hosts is the total available bandwidth divided by 10 kbps. This setting allows you set higher bandwidth quotas for a limited number of hosts. Exinda Network Orchestrator 3 Using...
- Page 421 Silverlight. VERSION INFO Exinda Management Center 1.5.0 does not support policies for HTTP Redirect or HTTP Response. When you create policies, they are added to the Policies Library. If you amend a policy definition, any changes made to it affect all Virtual Circuits that use that policy. To learn how circuits, virtual circuits, policy sets, and policy rules work...
- Page 422 If hosts are not specified, ALL network objects are assumed. Traffic direction is relative to the Exinda appliance. ToS/DSCP – Select traffic based on particular ToS/DSCP markings in the IP header. When multiple settings are specified, the intersection of those attributes determines whether the traffic is matched.
- Page 423 If hosts are not specified, ALL network objects are assumed. Traffic direction is relative to the Exinda appliance. ToS/DSCP – Select traffic based on particular ToS/DSCP markings in the IP header. When multiple settings are specified, the intersection of those attributes determines whether the traffic is matched.
-
Page 424: Configuring Network Objects
Library from an appliance. To create and apply a network object To create and apply a network object: 1. Go to Library > Network Objects . 2. Click Create new network object in the library..Exinda Network Orchestrator 3 Using... - Page 425 3. Key-in a Name for the object. 4. In the Subnets section, define subnets to include in this network object by IP Network Address and Mask Length or by Fully Qualified Domain Name (FQDN) . Exinda Network Orchestrator 3 Using...
- Page 426 8. Select one or more network objects to add and click Add Network Object to 'Configured Appliances' . 9. To define whether to include monitor information of network objects in subnet reporting, edit the required network objects and check Include in subnet reporting option, within the Reporting section. Exinda Network Orchestrator 3 Using...
- Page 427 LAN on which it operates. The local network objects cannot be deleted. For reporting purposes, hosts and users are defined as internal or external by comparing the IP address with the network objects. Exinda Network Orchestrator 3 Using...
- Page 428 Screenshot 191: Diagram depicting separated local network objects for each appliance. To configure the local network object: 1. Go to Configured Appliances > Local Network Objects . 2. Click Local to Appliance (Host ID ) of the appliance to configure the local network object. Exinda Network Orchestrator 3 Using...
- Page 429 3. Key-in the IP Network Address and Mask Length . Screenshot 192: Defining local network object by subnet. 4. Click Save . Exinda Network Orchestrator 3 Using...
- Page 430 Importing network objects If you have existing appliances that are already configured with network objects, in the Exinda Management Center you can import these network objects into the library (one at a time) from the Not Deployed list. When importing network objects, the importer indicates if the network object already exists in the library (or is included in another network object), or if it conflicts with another network object in the library.
- Page 431 Configuring applications with the EMC The Exinda Management Center provides a comprehensive set of built-in Applications for you to use, These cannot be edited, but you can define Custom Applications. You can add the custom application as part of an ignore policy at the bottom of the optimizer tree that is sent to the appliances.
- Page 432 3. Select one or more applications to apply to the current appliance group, and then click application to <group_ name> . To use a Custom Application in a policy definition When creating a policy, you can use a custom Application to filter traffic to or from this application. The custom Exinda Network Orchestrator 3 Using...
- Page 433 (page 421). Configuring application groups in the EMC The Exinda Management Center provides a comprehensive set of built-in Application Groups for you to use, but you can also define Custom Application Groups. Although an application can be a member of multiple application groups, to prevent conflict it can only be a member of the application group that is currently monitoring traffic.
- Page 434 2. You can configure monitoring status and add or remove applications within this group. 3. You could also view which policies are currently using this application group under In Use . Exinda Network Orchestrator 3 Using...
- Page 435 1. Go to Library > Application Groups and click Create new application group in the library… 2. Provide a name, configure monitoring, if you want this group to be monitored, and add the applications to be part of this group. Exinda Network Orchestrator 3 Using...
- Page 436 By default, all the built-in application groups are enabled for monitoring. On the main Application Groups page, you can view the specific groups that are set for monitoring. You can always change the monitoring configuration by clicking on the application group name and changing it. Exinda Network Orchestrator 3 Using...
- Page 437 Configuring APS for individual applications in the EMC In the Exinda Management Center you can identify the applications that are important to the operation of the organization. As you identify these applications, you can assign thresholds against their performance scores that can trigger alerts.
- Page 438 Before proceeding, you should consider the type of protocol used by the application. If it uses a non-transactional protocol, you should select the checkbox. For more information, click the button. 6. Click Notification to expand the section. Exinda Network Orchestrator 3 Using...
- Page 439 2. Click Add application performance from the library… link. 3. On the Add Application Performance Score from Library pop-up, expand the Application Performance Score sec- tion. 4. Use the Application Performance Score drop-down list to select the APS you need to apply. Exinda Network Orchestrator 3 Using...
- Page 440 Use the External Network Object drop-down list to select the previously Network Object that fits your needs. When complete, the title of the Network Object section changes to summarize the settings you have made. Exinda Network Orchestrator 3 Using...
- Page 441 1. Go to Configured Appliances > Application Performance Scores . The currently assigned APS items appear on the page. 2. In the Name column, locate the APS item and use the icon on the right to delete. Screenshot 201: Confirming removal Exinda Network Orchestrator 3 Using...
- Page 442 1. In the EMC interface, click Library > Application Performance Scores . A listing of the currently defined performance scores appears on the right. 2. In the Name column, click on the name of the APS item you need to modify. 3. Do the following, as needed: Exinda Network Orchestrator 3 Using...
- Page 443 If you still want to delete it, you first need to unlink it from the appliances. For more information, refer to Maintaining APS in the EMC configuration library (page 442). Exinda Network Orchestrator 3 Using...
- Page 444 The Service Level Agreement (SLA) library objects are used to monitor the availability of particular IP addresses. By creating an SLA object, you identify the IP address to monitor. The Exinda Management Center then sends one ICMP ping every 10 seconds to the IP address. You can specify the ping packet size to use. You can also specify when an alert is triggered by defining the ping latency threshold and the duration by which the ping latency threshold was exceeded.
- Page 445 The default delay is 1 hour. If this setting fits your needs, you do not need to change anything here. 7. Click Create . Setting up a Service Level Agreement directly in the Appliances 1. Go to (desired appliance group) > Service Level Agreements . 2. Click Create new service level agreement… . Exinda Network Orchestrator 3 Using...
- Page 446 0 – Disabled – this disables the alert 30 seconds 60 seconds 5 minutes 30 minutes 1 hour – the Default setting The default delay is 1 hour. If this setting fits your needs, you do not need to change anything here. Exinda Network Orchestrator 3 Using...
- Page 447 1. Go to Library > Service Level Agreements . 2. In the list of SLA library objects, locate the SLA item you need to delete. 3. In the SLA item row, click Exinda Network Orchestrator 3 Using...
- Page 448 Once VLAN Objects are defined, they can be used in Optimizer policies to filter traffic. By default, the Exinda Appliance has a single VLAN defined called ALL , which matches all traffic (regardless if that traffic is part of a VLAN or not).
- Page 449 Also the ALL VLAN object is protected and cannot be deleted. 1. Go to Library > VLANs . 2. In the list of VLAN library objects, find the VLAN you need to delete. Exinda Network Orchestrator 3 Using...
-
Page 450: Configuring Your Appliances Through The Cli
3.6.4 Configuring your Appliances through the CLI You can use the Command Line Interface (CLI) to push specific commands to the current Appliance Group for instances where the Exinda Management Center User Interface does not support such configuration (e.g., adding VLAN to appliances). -
Page 451: Service Delivery Point (Sdp)
The ExindaService Delivery Point (SDP) is a high performance add-on designed for enterprise network environments looking to centrally manage multi-box Exinda deployments. It is available as both a hosted service and a virtual appliance. SDP simplifies the tasks of installing, configuring, monitoring and reporting WAN optimization appliances. It is a key differentiator in the traffic shaping &... -
Page 452: Sdp Web User Interface (Wui) And Features
Update firmware on a single or multiple device(s). Scheduling future firmware update. Central reporting manager Provides access to predefined reports. Custom report wizard enables user creating new reports as well as editing, saving and deleting them. Exinda Network Orchestrator 3 Using... -
Page 453: Getting Started With Sdp
3.7.2 Getting started with SDP Users can register with Exinda SDP via the Exinda web site. Your email address must be the registered 'End User' contact in our database for an Exinda product. The registered email address can be found on the maintenance certificate sent to the end user. -
Page 454: Logging Out
To register a new user 1. Click Register New User . 2. Fill in all fields. 3. Click Save . 4. An email notification with account details will be sent to the new user. Exinda Network Orchestrator 3 Using... - Page 455 2. Select the appliance you would like to allocate to a user. 3. Click Allocate . 4. Select a user from the drop down menu. 5. Click Confirm . NOTE You cannot allocate an appliance to multiple users. Exinda Network Orchestrator 3 Using...
- Page 456 4. Click Deallocate . To change the Admin email 1. Click Change Admin Email . 2. Enter the new email address. 3. Click Save. 4. An email notification will be sent to the new address. Exinda Network Orchestrator 3 Using...
- Page 457 Exinda Website. 4. Enter the release code. Please email on sdp@exinda.com to obtain the release code. 5. Enter a link to the release notes of the new firmware. The release notes can be found on the support section of the Exinda Website.
- Page 458 URLs navigate to Network Settings, enter the new IP and click Save. The firmware links will be automatically updated. To replace an existing exinda hardware 1. You can use this option in case of a hardware failure, where an existing appliance will be replaced by a new one. By following this process all the SDP information of the old unit will be transferred to the new one.
-
Page 459: Network Configuration
To configure the postfix mail server - 1st Option 1. Go to Servers > Postfix configuration . 2. Click Edit Config Files . 3. Scroll down and replace exinda.com with the customer's domain name. 4. Click Save . To configure the postfix mail server - 2nd Option 1. - Page 460 2. Click Factory Default . This action will restore the server to its factory default settings. Any existing data will be erased. To update your SDP license 1. Navigate to Others > Custom commands . Exinda Network Orchestrator 3 Using...
-
Page 461: Changing The Default View Settings In Sdp Wui
The ExindaService Delivery Point (SDP) is a high performance add-on designed for enterprise network environments looking to centrally manage multi-box Exinda deployments. It is available as both a hosted service and a virtual appliance. Use the Setup section to configure the view of Exinda Solution Center: To change the default view settings 1. - Page 462 Then click Users and Groups to create, view or edit a user, user group or device group. To create a new user account (under your profile) 1. Click Setup . 2. Click Users and Groups . 3. Click Create New User . 4. Enter the new user's first and last name Exinda Network Orchestrator 3 Using...
- Page 463 5. Enter the new user's email address 6. Click Save . After creating a new user account, you need to set users privileges. You can select which Exinda devices the user will have access to when logging in and whether read or write access is required.
- Page 464 3. Click Create New Appliance Group . 4. Enter a name for the Appliance Group 5. Select the device(s) you wish to include in this group. Hold the ctrl key down for multiple selections. 6. Click Save . Exinda Network Orchestrator 3 Using...
-
Page 465: Tools
The Tools menu gives the option to search a device's details, such as software subscription (SS) expiration date, firmware version and product/hardware/activation keys. This feature is only available on hosted Exinda SDP. You can also log a configuration recommendation request to Exinda TAC via this page. - Page 466 NOTE The above appliance information is only available on hosted Exinda SDP. The Exinda SDP Appliance offers a limited "Expiry Search" option. The Serial number and SS/HM/PS expity dates are not available. To search an order 1. Click Tools .
-
Page 467: Managing Appliances In Sdp
6. Give a detailed explanation of what you are trying to achieve with the exinda. 7. Click Submit . 8. Exinda TAC will send you recommendations, based on the information you have submitted, within 48 hours. 3.7.5 Managing appliances in SDP Click Appliances on the top menu to enter the device management view. - Page 468 Setup > User and Groups Settings > View Appliance Groups . When selecting a device the following information is displayed. If the device is online you can view the device's config, Edit Config Upgrade Firmware edit it or upgrade it. For more information see Exinda Network Orchestrator 3 Using...
- Page 469 You'll be directed to the Config Log, which will show your request as pending. After 5 minutes go back to the "Show Diagnostics file" page. The diagnostics file will now be available. Send the diag file to Exinda TAC upon request.
- Page 470 When a device is online you can view the config and perform any required changes. The available options depend on the firmware version currently installed in your exinda. The options available on V5 appliances differ to the ones available on v4 appliances.
- Page 471 If an appliance is online, you can upgrade to the latest firmware. To update a device: 1. Go to the Appliances page. 2. Select a device. The device status must be online. 3. Click Update Firmware . 4. Select a firmware upgrade version. Exinda Network Orchestrator 3 Using...
- Page 472 Configuration templates allow for easier and quicker configuration of one or multiple appliances. Templates can be saved and reused at any time. To create a configuration template: 1. Go to the Appliances page. 2. Select the Configuration templates for the V5 tools 3. Click Create New configuration template . Exinda Network Orchestrator 3 Using...
-
Page 473: The Sdp Dashboard
16. Click Save . You can repeat steps 9-16 to include additional components in your dashboard. Use the arrows to arrange all components on your dashboard. Click on the graphs to view complete individual reports. Exinda Network Orchestrator 3 Using... -
Page 474: Viewing Reports In Sdp
Click Reports on the top menu to view or edit existing reports, create new ones and set report schedules. To create a custom report: 1. Click Reports on the top menu to enter the device management view 2. Click Create Custom Report . 3. Enter a Name and Description for the new report. Exinda Network Orchestrator 3 Using... - Page 475 1. Click Reports on the top menu. 2. Select a report that you want to view from the report list. 3. All reports are listed by category. You can also click on any column to sort records by the selected parameter. Exinda Network Orchestrator 3 Using...
-
Page 476: Viewing The Config Log In Sdp
The config log is divided into the access containing the user login and configuration, containing the configuration changes and firmware updates . You can view both log types or select a specific one by checking the appropriate tick box. Exinda Network Orchestrator 3 Using... -
Page 477: Install Sdp As A Virtual Appliance
License the SDP Virtual Appliance License the SDP Virtual Appliance The license for SDP is generated by the Exinda Network Support Services team, based on the Host ID of the virtual appliance. 1. Obtain the host ID of the virtual appliance. - Page 478 3. Open the VMware vSphere client. 4. Select File > Deploy OVF Template . 5. Copy the URL of the latest release of the SDP Virtual Appliance from Exinda.com, and paste it into the Deploy from... field. Click Next .
- Page 479 The following CLI commands should be pasted into the Exinda CLI (configure terminal mode) or uploaded via the System > Maintenance > Import Config page on the Web UI, advanced mode. To install the Exinda SDP Virtual Appliance, first assign a physical interface to the virtual infrastructure so that the virtual machine can have network connectivity.
- Page 480 The following command will add the physical interface specified, to a bridge that can later be attached to virtual machines. You should use a spare, unused interface on the Exinda appliance for this purpose (eth2 is usually a good choice). If the interface specified here is "eth2" for example, the bridge will be called "brvm2". You will need to use this bridge later on when configuring the virtual machine's network interfaces.
-
Page 481: Settings
Interface Settings You need the Exinda appliance and devices that are connected to the appliance to have the same speed and duplex settings for their network interfaces. In most cases the default settings will work as the Exinda is setup to auto-negotiate. - Page 482 Link State Mirroring With link state mirroring, the Exinda appliance will bring down the second port of a bridge if the first port goes down. This feature allows the Exinda appliance to sit between a WAN router and a switch without blocking detection of switch outages by the router.
- Page 483 HW Address - Indicates the MAC address of the interface. 2. Specify the Speed and Duplex at which the Exinda will negotiate with neighboring equipment. Use Auto speed to allow the Exinda appliance to auto-negotiate the speed with neighboring equipment. Use Auto duplex to allow the Exinda appliance to auto-negotiate the duplex with neighboring equipment.
-
Page 484: Ip Address Configuration
4.1.2 IP address configuration The Exinda appliance allows you to configure bridges and network interfaces as required. A bridge consists of a LAN and WAN interface. Bridges can be enabled, and roles can be assigned to an interface (Cluster, Mirror or WCCP) and IP settings applied. - Page 485 Exinda Network Orchestrator 4 Settings...
- Page 486 PBR - One interface may be configured in Policy-based Routing (PBR) mode. PBR allows for acceleration of only the types of traffic specified in the policy. The DHCP option is enabled by default on the Exinda appliance. If a DHCP server is available, an IP address will be automatically assigned. From a web browser go to http://findmy.exinda.com/...
-
Page 487: Routes Configuration
Routing table entries can have multiple sources: static A manually configured route. interface Derived from the addresses assigned to an interface. SLAAC Assigned from SLAAC autoconfiguration. DHCP Assigned from DHCP autoconfiguration. Exinda Network Orchestrator 4 Settings... -
Page 488: Dns And Domain Names Configuration
4.1.4 DNS and domain names configuration The DNS page is used to set a host name for your Exinda appliance and to configure the location of your DNS server(s). You can also configure domain names that can be used to resolve hostnames in other configuration screens. - Page 489 NOTE A valid DNS server is required for Edge Cache, system alerts, scheduled reports, firmware updates, license updates, and Anonymous Proxy updates Exinda Network Orchestrator 4 Settings...
- Page 490 To remove a domain name 1. In the Static and Dynamic Domain Names list, select the domain to remove. Only manually added domain names can be removed. 2. Click Remove Selected . Exinda Network Orchestrator 4 Settings...
-
Page 491: Http Proxy Configuration
4.1.5 HTTP proxy configuration Specify a HTTP proxy if you would like the appliance to access Exinda's server via HTTP proxy. Access to Exinda's HTTP server is required for firmware updates, license updates, and Anonymous Proxy updates. If you have SDP enabled, please ensure your proxy supports HTTPS. - Page 492 Configuring SMTP server settings Use the following instruction to configure the SMTP server settings. Exinda Network Orchestrator 4 Settings...
- Page 493 The types of emails being received by a user cannot be modified. To change which emails a user receives, you must first delete the user, and then add the email address again with the appropriate types of notifications selected. Exinda Network Orchestrator 4 Settings...
-
Page 494: Snmp Configuration
3. Click Remove Recipients . The user is removed from the list, and will no longer receive email notifications. Related Topics Testing the SMTP configuration Adding notification email recipients 4.1.7 SNMP configuration The Exinda appliance allows data export to SNMP systems. Configure the SNMP settings or download the Exinda SNMP MIB. Exinda Network Orchestrator 4 Settings... - Page 495 To disable or enable SNMP traps for system alerts, see For more information, refer to Alerts (page 577). . Configuring SNMP Use the following instructions to configure SNMP. 1. Go to Configuration > System > Network > SNMP > SNMP Configuration . Exinda Network Orchestrator 4 Settings...
- Page 496 When the Read-only community is changed to have a value that does not match an existing community, a new SNMP community is added to the list. 7. Click Apply Changes . Removing an unwanted SNMP Community Use the following instructions to remove an unwanted SNMP community. Exinda Network Orchestrator 4 Settings...
- Page 497 Use the following instructions to download the SNMP MIB file. The file contains additional monitoring information. 1. Go to Configuration > System > Network > SNMP . 2. Under SNMP Configuration , click Download SNMP MIB . The EXINDA-MIB.txt file downloads to the loc- ation you specify. Changing SNMP authentication for Admin user Use the following instructions to change the SNMP authentication for the Admin user.
- Page 498 2. In the Trap Sinks area, select the server from the list and click Remove Server . Defining SNMP trap destinations Use the following instructions to define where SNMP traps are sent. 1. Go to Configuration > System > Network > SNMP . Exinda Network Orchestrator 4 Settings...
-
Page 499: Integrate With Active Directory
4.1.8 Integrate with Active Directory NOTE You can configure the options in the Active Directory tab only after the Exinda AD Connector is installed and configured on a designated network server that has access to the Active Directory Server. You will see the Active Directory Server details on this tab only when the configuration is completed successfully. - Page 500 To integrate Active Directory with the Exinda Appliance, you need to install the Exinda AD Connector service on a Windows server that can then connect to the Active Directory server. Each Exinda AD Connector can talk to up to 20 Exinda appliances.
- Page 501 You can download the Active Directory Connector from the Configuration > System > Network > Active Directory tab on the Exinda Appliance. Click on the Microsoft Installer Executable link and save the installer to a location that can be accessed by all Windows servers in the network.
- Page 502 2. Find the entry for the Exinda AD service. 3. Right click on it and select Properties . 4. On the Log On tab, click Browse and select the domain and administrator account. NOTE The domain and slash (\) are required.
- Page 503 (page 500). To install the Connector Service 1. On the server where the Exinda Active Directory Connector should be installed, run the installation file. 2. Read and accept the end-user license agreement, and then proceed through the screens, making the selections indicated below, and clicking Next where needed: Specify the directory where the Exinda Active Directory Connector should be installed.
- Page 504 IMPORTANT When installing the Exinda AD Connector on a server that is not a domain controller, ensure that the account in charge of running the service is an Active Directory domain admin account. See To ensure the Exinda AD service has the appropriate permissions below.
- Page 505 Specify what information is sent between the Active Directory server and the Exinda appliance. When you first install the Exinda AD Connector, it may take a while to complete all user to IP address mappings as each user needs to logon.
- Page 506 2. To send a list of users and groups to Exinda appliances when the service starts, select Send Active Directory user and group information to Exinda appliances . The list of users and groups that is sent to the appliance can be used to cre- ate user or group-based policy.
- Page 507 1. From the Start menu select Control Panel > Administrative Tools . 2. Double-click Services , and verify the status of the Exinda AD service. If the service is stopped, restart the service. 3. In the Windows Logs > Application area, a “Service started successfully” message should be displayed from Exinda Networks Active Directory Connector.
- Page 508 Exclude specific usernames from reports You may have user accounts that should not be linked to IP addresses when reporting on the Exinda appliance, such as the account used for signing SMB traffic. Configure the Exinda AD Connector to prevent the IP address to username mapping being sent to the Exinda Appliance.
- Page 509 Because the Citrix XenApp server is treated as a single IP address by the Exinda appliance, and the IP address of the clients connecting to the server are ignored, the Exinda Appliance cannot include the names of users who are accessing the applications on the XenApp server.
- Page 510 When a user on a client computer logs into a Citrix XenApp server (1), their IP address and user name are captured by the Exinda Citrix XenApp Plugin and sent on to the Exinda AD Connector (2). The connector then sends the user name and IP address of the XenApp user to the Exinda Appliance to include in reports (3).
- Page 511 Capture the Exinda Citrix XenApp Plugin Activity in a Log File Depending on the logging level selected, the Exinda Citrix XenApp Plugin records various types of data in a log file. The available log levels include Error, Warning, Info, and Verbose. By default, the log sensitivity is Warning. The location of the log file and the level of detail recorded in the log file are configurable.
- Page 512 Request Updated User Information from the Exinda Citrix XenApp Plugin If the synchronizations of the user data between the Exinda Citrix XenApp Plugin and the Exinda AD Connector are infrequent, trigger the Exinda Citrix XenApp Plugin to send the data to the Exinda AD Connector immediately.
- Page 513 EXAMPLE To create an application object that matches traffic to and from the Exinda.com website, in the L7 Signature field, select http ---> , host , and type exinda.com . 5. In the Ports/Protocols controls, specify either TCP ports/port ranges, UDP ports/port ranges, or a layer 3 protocol. Mul- tiple ports and port ranges can be specified at the same time by comma separating values.
- Page 514 The keywords for HTTP are: host, file, user_agent, content_type, method, content_ len and encoding Examples: (url =% "index" or file =% "login") and host =% "example.org" and content_type.case = "MyContentType" (host =% "facebook.com" and file !% "cgi-bin/abcd") or host =% "facebook2.com" Exinda Network Orchestrator 4 Settings...
- Page 515 Allows you to define an Application Object based on the 'codec' used in a RTP stream. windowsmedia host Allows you to define an Application Object based on the 'host' field in the HTTP header (where windowsmedia is running over http). Exinda Network Orchestrator 4 Settings...
- Page 516 Top Internal and External Users on the Network The Network - Users (Internal) and Users (External) reports displays the top users sending traffic through the network. 1. On your browser, open the Exinda Web UI ( https://Exinda_IP_address ). 2. Key-in the User and Password .
- Page 517 This means that traffic may go through your Exinda appliance at headquarters twice: from the source through the Exinda appliance, turning around at a router, back through the Exinda appliance, and on to the destination. This is problematic for accelerated traffic because you do not want to re-accelerate the traffic. The dual bridge bypass feature allows each bridge to treat traffic differently, so that the traffic is accelerated on one bridge on the way in and bypasses the acceleration handling from the second bridge on the way out.
- Page 518 If you have two circuits configured on the Exinda such that traffic between the headquarters appliance and the branch appliance goes through one circuit and the traffic between the headquarters appliance and the internet goes through a second circuit, then the traffic for a single flow will be counted in the appropriate virtual circuit for each circuit.
-
Page 519: Ipmi Configuration
ToS/DSCP or Application traffic to be affected. 9. Click Create New Policy . NOTE Once the desired policies are in place on all Exinda appliances, restart the Optimizer. On the appliance status bar, click Restart . 4.1.9 IPMI Configuration The Intelligent Platform Management Interface (IPMI) is a specification for remote server management. - Page 520 The appliance can be managed on the specified IPv4 address either from another Exinda appliance or by a connection to the specified IPv4 address (e.g. http://10.0.100.238, assuming a web interface is supported). When a web interface is not supported, a command line tool such as ipmitool may be used.
- Page 521 3. Enable and type the VLAN ID , if desired. The VLAN ID should be an 802.1Q VLAN ID. 4. Click Apply Changes . To change the IPMI username and password 1. Enter the Administrator User Name . 2. Enter the New Password and then type it again in the Confirm Password field. Exinda Network Orchestrator 4 Settings...
- Page 522 Manage Power Settings on an IPMI Enabled Appliance Manage Power Settings on an IPMI Enabled Appliance To use an Exinda appliance to manage the power settings of another appliance that has IPMI enabled, navigate to Configuration > System > Tools > IPMI .
-
Page 523: Overview Of Qos By Host
QoS calculations. The Exinda Appliance enables greater system throughput, up to 10GB, by using multiple queues to handle the traffic. The multiple queues are based on the licensed bandwidth, but the multiple queues are used when the licensed bandwidth exceeds 1.8GB per second. - Page 524 The following examples describe various Dynamic Virtual Circuit configurations. Name: Example 1 Internal Users i s a Network Object that defines all hosts on the LAN side of the Exinda appliance: Bandwidth:1024 If there is 1 user, the user gets the full 1024 kb/s.
- Page 525 Max Hosts: 16 Name: Example 4 Internal Users i s a Network Object that defines all hosts on the LAN side of the Exinda appliance. "Citrix" is an Bandwidth: Application that defines Citrix traffic. This VC will match all Internal User's Citrix traffic: 1024kbps If there is 1 user, the user gets 64kbps for their Citrix traffic and cannot burst.
- Page 526 "Average Rate" is the average policy throughput for the time specified in the time range. The "Current Rate" is the policy throughput averaged over the last 20 seconds. 1. On your browser, open the Exinda Web UI ( https://Exinda_IP_address ). 2. Key-in the User and Password .
- Page 527 The number of hosts that have exceeded maximum allowed hosts for this Dynamic Virtual Circuit is represented by the blue Maximum Exceeded line. Limit Bandwidth Per Host EXAMPLE Limit bandwidth to 100 kbps for each internal host. Exinda Network Orchestrator 4 Settings...
- Page 528 With Max Hosts set to "Auto", a maximum of 5000 hosts can fall into this Dynamic Virtual Circuit. This is calculated by assuming each host is entitled to a minimum bandwidth of 10 kbps as "Automatically Share" is selected. Exinda Network Orchestrator 4 Settings...
- Page 529 P2P applications on the WAN. The per host bandwidth is 100 kbps, but the P2P policy caps bandwidth at 32 kbps which will be fairly shared between each user. So we would expect to see P2P traffic per user at approx 320 bps. Limit Application Bandwidth EXAMPLE Limit P2P to 20 kbps. Exinda Network Orchestrator 4 Settings...
- Page 530 In the P2P Dynamic Virtual Circuit, each host is limited to 20 kbps of P2P traffic. With Max Hosts set to Auto , a maximum of 500 hosts can fall into this Dynamic Virtual Circuit. Additional hosts will share bandwidth allocated in the P2P Overflow Virtual Circuit. Exinda Network Orchestrator 4 Settings...
- Page 531 Screenshot 211: P2P Overflow Virtual Circuit Exinda Network Orchestrator 4 Settings...
- Page 532 Screenshot 212: Dynamic Virtual Circuit To Share Remaining Bandwidth Create a Dynamic Virtual Circuit using the remaining bandwidth. Each user is limited to a maximum bandwidth of 100 kbps for all other applications. Exinda Network Orchestrator 4 Settings...
- Page 533 Guarantee Application Bandwidth EXAMPLE Guarantee 30 kbps per host, for the Citrix application. Citrix typically requires 20 to 30 kbps of bandwidth to work effectively. Exinda Network Orchestrator 4 Settings...
- Page 534 In this example, each user is guaranteed 30 kbps for Citrix. Furthermore, each user can burst up to 100% of the Dynamic Virtual Circuit bandwidth. With Max Hosts set to Auto , a maximum of 333 hosts can fall into this Dynamic Virtual Circuit. Additional hosts will share bandwidth allocated in the second Dynamic Virtual Circuit. Exinda Network Orchestrator 4 Settings...
- Page 535 The WAN Dynamic Virtual Circuit has Per Host Bandwidth set to Automatically Share . Each user will be allocated a percentage of the Dynamic Virtual Circuit bandwidth. This is calculated by dividing the Dynamic Virtual Circuit bandwidth by the number of active hosts. Exinda Network Orchestrator 4 Settings...
- Page 536 EXAMPLE Restrict users in the Active Directory 'Students' group to 100 kbps. 1. Using the Web UI - Advanced Mode, go to Configuration > Objects > Users & Groups . Edit the "Students (DEV)" group. Exinda Network Orchestrator 4 Settings...
- Page 537 2. Each host is limited to a maximum bandwidth of 100 kbps. With Per Host Bandwidth set to Automatically Share , a maximum of 400 hosts can fall into this Dynamic Virtual Circuit. 3. Create a Network Object from the Active Directory group. Exinda Network Orchestrator 4 Settings...
- Page 538 Screenshot 216: Map AD Group 'Students' To Network Object 'Students' 4. The Network Object "Students" can now be used in a Dynamic Virtual Circuit. Exinda Network Orchestrator 4 Settings...
- Page 539 5. Each host in the "Students" Network Object is limited to 100 kbps. With Max Hosts set to "Auto", a maximum of 2400 hosts can fall into this Dynamic Virtual Circuit. Additional hosts will share bandwidth allocated in the "Students Overflow" Virtual Circuit. Exinda Network Orchestrator 4 Settings...
- Page 540 Screenshot 218: Students Overflow Virtual Circuit Exinda Network Orchestrator 4 Settings...
- Page 541 Screenshot 219: Dynamic Virtual Circuit For Remaining Bandwidth 6. Another Dynamic Virtual Circuit can be created to share the remaining bandwidth for other hosts. In this example, each host is guaranteed 100 kbps with No Bursting Allowed . Exinda Network Orchestrator 4 Settings...
- Page 542 2. Using the Web UI - Advanced Mode, go to Configuration > Objects > Adaptive Response . 3. Create a new Adaptive Response rule based on the Students Network Object. Each host is allowed to download 100 MB per day before being placed into the Students_Shaped Network Object. Exinda Network Orchestrator 4 Settings...
- Page 543 Dynamic Virtual Circuit. 5. Each host is limited to a maximum bandwidth of 100 kbps. With Per Host Bandwidth set to Automatically Share , a maximum of 400 hosts can fall into this Dynamic Virtual Circuit. Exinda Network Orchestrator 4 Settings...
- Page 544 Screenshot 221: Students Dynamic Virtual Circuit 6. Additional hosts will share bandwidth allocated in the Students Overflow Virtual Circuit. Exinda Network Orchestrator 4 Settings...
- Page 545 Screenshot 222: Students Overflow Virtual Circuit Exinda Network Orchestrator 4 Settings...
- Page 546 Screenshot 223: Virtual Circuit To Share Remaining Bandwidth 7. Other users and students who have not used their 100MB daily quota will share 45 Mbps of bandwidth in the WAN Virtual Circuit. Exinda Network Orchestrator 4 Settings...
-
Page 547: System Setup
4.2.1 Date and Time Configuration It is important to accurately set the date and time of your Exinda appliance so that all time-based functions use the appropriate time. It is highly recommended to set the date and time using an NTP server. This is particularly important if you have multiple Exinda appliances where you need to correlate or aggregate the monitoring data or if you need the exported NetFlow records to be synchronized with NetFlow records from other network appliances. - Page 548 1000 seconds or approximately 15 minutes), then it is recommended that you force the appliance to jump to the correct time using the ntpd command from the command line. Where do I find this configuration? Go to Configuration >System > Setup > Date and Time . Exinda Network Orchestrator 4 Settings...
- Page 549 The change is applied only if you accept the Restart Message to restart the UI. Any of the NTP servers can be disabled, re-enabled, or removed by clicking the appropriate button - Disable Server , Enable Server , Remove Server . Exinda Network Orchestrator 4 Settings...
-
Page 550: Ui Access Configuration
If desired, you can also choose to disable the web UI altogether. You can specify whether CLI access is through telnet or SSH. NOTE Once you disable the Web UI, you can only re-enable it via the CLI. Exinda Network Orchestrator 4 Settings... - Page 551 3. To enable HTTPS access, check the HTTPS Access checkbox and specify the HTTPS Port number to use. The default port number is 443. 4. Click Apply Changes . To disable the Web UI 1. Uncheck the Web UI Enable checkbox. 2. Click Apply Changes . Exinda Network Orchestrator 4 Settings...
-
Page 552: Sdp Configuration
In order to use this feature, SQL access needs to be configured on the Exinda appliance, and an ODBC driver needs to be installed and configured on a client. ODBC aware applications running on the client will then be able to query the Exinda appliance's internal monitoring database. - Page 553 Apply the changes. The SQL access will be made available immediately. A successfully configured appliance would look something like: Once remote SQL access has been configured on the Exinda appliance, the next step is to create an ODBC data source on the client.
- Page 554 (User DSN) or all users (System DSN). Then click Add..This will start a wizard that allows you to create a new data source. 3. Select MySQL ODBC Driver and click Finish . You will be prompted to enter details about the SQL access using the form below: Exinda Network Orchestrator 4 Settings...
- Page 555 Description Server Enter the IP address of the Exinda appliance. User Enter the username you specified when enabling SQL access on the Exinda appliance. Password Enter the password you specified when enabling SQL access on the Exinda appliance. Database Once the above fields are configured, press the 'Test' button. If the connection attempt is successful, the 'Database' drop down will be populated with a list of available databases.
- Page 556 Click OK . This will add the 'Exinda SQL Database' to the list of available data sources that can be used by 3rd party applications on this client. Exinda Network Orchestrator 4 Settings...
- Page 557 Select the User DSN tab or the System DSN tab depending on weather you wish the SQL data to be made available to only the current user (User DSN) or all users (System DSN). Then click Add..This will start a wizard that allows you to create a new data source. Exinda Network Orchestrator 4 Settings...
- Page 558 Select MySQL ODBC Driver and click Finish . You will be prompted to enter details about the SQL access using the form below: Data Source Enter a descriptive name for the DSN. E.g. 'Exinda SQL Database'. Name / Description Exinda Network Orchestrator...
- Page 559 'Database' drop down will be populated with a list of available databases. Select 'monitor'. Here is what a successful configuration looks like: Click OK . This will add the 'Exinda SQL Database' to the list of available data sources that can be used by 3rd party applications on this client.
- Page 560 From the Data tab in Excel, select From Other Sources > From Microsoft Query . You will be presented with a dialog box that allows you to select the DSN you created in the previous chapter. Exinda Network Orchestrator 4 Settings...
- Page 561 Select the Exinda SQL Database DSN. This will allow you to choose from the available tables and select the columns to query. Select a table and click the > button to move that table's fields into the list of columns to query.
- Page 562 The Exinda appliance will now be queried and the data will be returned to the Excel spreadsheet. SQL Schema There are a total of 10 tables available for access via SQL. Name Description flows_hourly Flow records at an hourly resolution, that is, information for each flow is stored hourly, on the hour.
- Page 563 Exinda appliance) of the flow. IPv4 addresses are represented as IPv4 mapped format. in_port unsigned The TCP or UDP port number on the internal side (the LAN side of the Exinda appliance) of the flow.1 24-bit integer ex_port unsigned...
- Page 564 32-bit integer bytes_ unsigned The number of bytes lost due to retransmissions (WAN -> LAN).2 lost_in 64-bit integer bytes_ unsigned The number of bytes lost due to retransmissions (LAN -> WAN).2 lost_out 64-bit integer Exinda Network Orchestrator 4 Settings...
- Page 565 Application Performance Score. A measure of an applications performance on the network.2 64-bit integer in_port and ex_port are only defined when the IP protocol is TCP (6) or UDP (17) and the Exinda was unable to classify the flow (so the app_id is 0). For more information, refer to Using Application Performance reports (page 324).
- Page 566 Type Description in_port unsigned 24- The TCP or UDP port number on the internal side (the LAN side of the Exinda appliance)1 bit integer ex_port unsigned 24- The TCP or UDP port number on the external side (the WAN side of the Exinda appliance)1...
- Page 567 The number of bytes lost due to retransmissions (LAN -> WAN).2 lost_out bit integer in_port and ex_port are only defined when the IP protocol is TCP (6) or UDP (17) and the Exinda was unable to classify the flow (so the app_id is 0). For more information, refer to Using Application Performance reports (page 324).
-
Page 568: Monitoring Configuration
Maximum URL Size - Sets the maximum length of URLs displayed on the Real Time report tables. Graph Display Options - Specifies whether the graphs display in Flash or non-Flash format. The default is flash. Exinda Network Orchestrator 4 Settings... - Page 569 Go to Configuration > System > Setup > Monitoring tab - ASAM form. The Exinda appliance analyzes traffic and attempts to match it against criteria specific to the traffic type. The criteria for matching traffic is defined within Application Specific Analysis Modules (ASAM). Enable and disable the modules that are important for your network.
- Page 570 The collection of global application statistics also will not be collected since the global application statistics are derived from the virtual circuit stats. Note that application reporting within a subnet is not affected by this Exinda Network Orchestrator 4 Settings...
- Page 571 All Detailed Monitor Records - Deletes all detailed data, that is, deletes all the drill down data for applications, hosts, URLs, users, conversations. Summary information, that is, the totals for the entire appliance will still be available. Exinda Network Orchestrator 4 Settings...
-
Page 572: Netflow Configuration
1. Use the form below to configure these Netflow targets. Property Description Specify the IP Address of the Netflow target. The Exinda appliance will export Netflow data to this IP Address. Address Port Specify the Port number of the Netflow target. The Exinda appliance currently supports Netflow export on UDP ports. - Page 573 Exinda Network Orchestrator 4 Settings...
- Page 574 Export VoIP MoS and Export MoS and rFactor values for VoIP calls. rFactor Export Extra Exports extra flow information, such as domain name for HTTP flows, published application name for Information Citrix. Export traffic class Export traffic class. Exinda Network Orchestrator 4 Settings...
-
Page 575: Create A Scheduled Job
Export lost bytes count. Export APS Score Export APS score. 4.2.7 Create a Scheduled Job Cache pre-population, reboots, and firmware installations can be scheduled to run at a specific date and time, and at a set frequency. Exinda Network Orchestrator 4 Settings... - Page 576 5. If the job should be completed, even if one or more commands fail to execute, set Fail-Continue to Yes . 6. Set the schedule of the job. Jobs can be set to run Once, Daily, Weekly, Monthly, or Periodically. Exinda Network Orchestrator 4 Settings...
-
Page 577: Alerts
The job is added to the list, and is now available for selection in the Pre-population Object, if desired. 4.2.8 Alerts Alerts will notify you when there are issues or potential issues with either the Exinda appliance system (such as CPU utilization and memory paging) or with your traffic (such as an application performance score dropped).The alerts can either be sent by email or by SNMP traps. - Page 578 Connection Limiting – Alert raised when one or more Virtual Circuits has connection limits enabled, and the threshold was reached. Max Accelerated Connections Exceeded – Alert raised when the number of accelerated connections exceeds the licensed limit. Connections over the licensed limit pass through the appliance and are not accelerated. Exinda Network Orchestrator 4 Settings...
- Page 579 Bridge Link – Alert raised when one of the links on an enabled bridge is down. Bridge Direction – Alert raised when the appliance cabling is incorrect. In most cases, it indicates the Exinda WAN interface has been incorrectly plugged into the LAN and vice versa.
-
Page 580: Control Configuration
4.2.10 Disk Storage Explained The Exinda appliance can dynamically change the amount of storage allocated to system services. The Storage Configuration page allows you to see how much disk storage is currently allocated to each system service, as well as the re-size amount currently in use. - Page 581 NIC Configuration The Disk Storage Map Service – Services using disk storage Status – the status of that storage; the disk storage may be in one of several states, depending on which operation has been selected: Exinda Network Orchestrator 4 Settings...
- Page 582 Resize and format operations are not permitted on encrypted volumes. CLI: Bypass NIC Set- Put the Exinda Appliance into bypass before changing the partition size of wan-memory. See, tings Storage size can be specified in terms of kilobytes (K), megabytes (M), gigabytes (G), or percentage (%). Use % when entering a storage size to indicate a storage amount as a percentage of free space available.
- Page 583 Important notes In case you wish to switch back to a previous version of Exinda that does not support the encryption of log, monitor and users services, make sure that all these services are not encrypted before trying to boot the previous product ver- sion.
- Page 584 Screenshot 228: Disk storage encryption options Enabling Encryption To enable encryption: 1. On your browser, open the Exinda Web UI ( https://Exinda_IP_address ). 2. Key-in the User and Password . 3. Click Login . 4. Go to Configuration > System > Setup > Storage .
- Page 585 To redistribute the Logs, CIFS and wan-memory storage, first shrink the amount of storage allocated to these services to the minimum. The minimum size for each service is shown in the table below: Service Minimum Size cifs 1 GB edge cache 1 GB Exinda Network Orchestrator 4 Settings...
- Page 586 363.91M free of 512M total wan-memory: available - 4879.63M free of 5120M totalDisks: sda9 (internal): in use - 914.22 GBTotal: 219.02GUnallocated: 12M The status field can be referred while the resize operation is in progress. When the operation is complete, the status will change to available. Exinda Network Orchestrator 4 Settings...
-
Page 587: Certificates
NOTE Certificates and keys are stored securely on the Exinda appliance. It is not possible to export or view the private key once it has been imported. If you lose the configuration or need to migrate the configuration to another appliance, you must manually load the private key again. - Page 588 NOTE The interface for importing both Certificates and CA Certificates is the same. NOTE The interface for generating both Certificates and CA Certificates is the same. Exinda Network Orchestrator 4 Settings...
- Page 589 4. If the key is password protected, in the Key Passphrase field type the password. 5. In the Certificate File field, click Choose File and navigate to the file to be uploaded to the Exinda Appliance. 6. If the PEM format is selected, the private key must be uploaded. In the Private Key File field, click Choose File and nav- igate to the private key file.
-
Page 590: View All Certificates And Private Keys
2. To return to the list of certificates, click the Back button below the table. To export a certificate If an SSL certificate is only available on one appliance, export the certificate so it can be imported onto the other Exinda appliances on the network. -
Page 591: Optimization Services
To export a certificate If an SSL certificate is only available on one appliance, export the certificate so it can be imported onto the other Exinda appliances on the network. 1. In the All Certificates and Keys table, locate the certificate in the list, and click Export . - Page 592 Optionally an IP address corresponding to one of the appliances can be sent. In addition to this, each appliance must keep a list of the host IP/appliance ID pairs, which indicates which Exinda appliance terminates the acceleration for conversations with a given host IP.
- Page 593 Exinda Community A group of Exinda appliances in a network is referred to as a community. Exinda appliances that are part of the same community can accelerate to and from each other. The community is generally those Exinda appliances that were automatically discovered.
-
Page 594: Configuring The Optimization Services
When an appliance receives an auto-discovery option from a source that the Exinda community does not know about, it can notify the community which will establish a connection to that appliance, and add it to the community. 1. The appliances may have established communities already. -
Page 595: Universal Acceleration Service
Configure Exinda Appliance Community A group of Exinda appliances in a network is referred to as a community. Exinda appliances that are part of the same community can accelerate to and from each other. Generally, Exinda appliances automatically discover each other when attempting application acceleration, however, if an appliance is not automatically discovered, you can manually add the Exinda appliance to the community. - Page 596 Manually adding an Exinda appliance to the community 1. Go to Configuration > System > Optimization > Community . 2. In the Manually Add New Community Node area, type a Name and the IP Address for the Exinda appliance. Exinda Network Orchestrator...
- Page 597 3. Modify the name or IP address of the appliance. 4. Click Apply Changes . Removing manually added Exinda appliances from the community 1. Go to Configuration > System > Optimization > Community . 2. To remove individual appliances, on the Manually Added Community Nodes panel, find the appliance and click the...
- Page 598 3. To remove all appliances from the community, click Remove all community peers from system . WAN Memory WAN Memory is the data deduplication module of Exinda's Application Acceleration Technology. It is a bi-directional and universal byte-level cache that stores repetitive patterns on the Exinda appliances's hard disk drive and uses these patterns to compress accelerated traffic between two or more Exinda appliances.
-
Page 599: Protocol-Specific Acceleration
Only traffic to servers that are explicitly configured is SSL accelerated. Any SSL traffic that the Exinda appliance sees that does not belong to a configured server is ignored. - Page 600 Also TCP option 30 which historically has been used to indicate Exinda acceleration, has been assigned to indicate multi-path TCP. Exinda now uses both option 30 and option 230 to indicate Exinda acceleration. You can specify which option code should be used in acceleration. Your choice will depend on the Exinda appliance version you are using and whether you are seeing multi-path TCP traffic in your network.
- Page 601 When you know that a particular Exinda is always at the end of an acceleration chain, you can indicate that it is the end and therefore should not pass through option 30 packets. This is useful when the traffic is transported to a server or firewall that does not know how to handle option 30 packets or when the traffic is forwarded to the Internet.
- Page 602 Congestion Control – Indicates which congestion control algorithm should be used. The most common congestion control algorithms are listed together with their intended usage. Set this according to the type of WAN the Exinda appli- ances are deployed into. This setting only affects outbound traffic to the WAN, so the same setting should be applied to all Exinda appliances on the WAN.
- Page 603 30, it will return a SYN/ACK without an option 30. Enabling this setting allows the server- side Exinda to know that it is the last appliance in the chain and so it will not send out a SYN with option 30 and it terminates the acceleration connection.
- Page 604 SSL Acceleration ignores that traffic until the issue is resolved. The traffic may still be accelerated, just not SSL-accelerated. NOTE The SSL Acceleration service uses port 8018 to communicate between Exinda Appliances. Please ensure this port is open for proper functionality Exinda Network Orchestrator...
- Page 605 IMPORTANT Before a server with an SNI extension can be added to the Exinda Appliance, the server must be added to the appliance without the SNI extension. A server without an SNI extension can be used as a fallback in event that the client is unable to process the SSL certificate with SNI.
- Page 606 Any — SSL Acceleration accepts and processes the connection if the server's certificate matches any cer- tificate (CA or non-CA) that is loaded on to the Exinda appliance. 8. If Certificate is selected as the Validation type, select the certificate to validate against.
- Page 607 The difference is that a warning is shown to the client for each server when using self-signed certificates, whereas when using a self-signed CA certificate to sign multiple other certificates, the warning will only be Exinda Network Orchestrator 4 Settings...
- Page 608 How Exinda accelerates the SSL protocol For SSL acceleration, a server-side Exinda appliance and a client-side appliance is put in line for this SSL traffic. The traffic between these appliances are accelerated. The benefits that can be gained by generic application acceleration on encrypted data are limited.
- Page 609 SSL Acceleration Servers is offered in the section. 3. Check that the Exinda community feature has distributed the certificates and SSL Acceleration Server configuration properly to your appliance. They will appear as remote . Create policies to accelerate SSL traffic The default policies that are created as a result of running the policy configuration wizard captures SSL traffic in a QoS only policy, meaning no attempt is made to accelerate any SSL traffic by default.
- Page 610 If the storage for WAN memory is encrypted, a green check-mark is shown in the Encrypted column. Screenshot 232: Disk Storage settings To enable encryption for wan-memory: 1. On your browser, open the Exinda Web UI ( https://Exinda_IP_address ). 2. Key-in the User and Password . 3. Click Login .
- Page 611 Create self-signed certificates for each site requiring Server Name Indication site. See, Identify the certificate to be used by each website Export SSL certificates from Windows Server 2012 Managing Certificates and CA Certificates Configure SSL Acceleration Servers Exinda Network Orchestrator 4 Settings...
- Page 612 2. Open a command prompt and navigate to C:\Program File (x86)\IIS Resources\SelfSSL . 3. At the prompt type the parameters for the certificate, ensuring you specify the site ID for the site requiring Server Name Indication. For example: Exinda Network Orchestrator 4 Settings...
- Page 613 9. Repeat this task for each site configured on the server. Export SSL certificates from Windows Server 2012 Export the certificates from the Windows server so they can be imported onto the Exinda Appliance. 1. In the Server Manager , and click IIS .
- Page 614 1. Navigate to /etc/apache2/sites-enabled and open the folder for the secure site. 2. Open the <site_name>.conf file in an editor. 3. Add the <virtualhost> block for the secure server. The block will look similar to this: <VirtualHost *:443> ServerName "secure2.example.com" ServerAdmin webmaster@example.com DocumentRoot /home/demo/public_html/secure1.example.com/public ErrorLog /home/demo/public_html/secure2.example.com/log/error.log Exinda Network Orchestrator 4 Settings...
- Page 615 File Download (Read) – The SMB client is reading a file from an SMB server. The server-side Exinda proactively requests future read events and passes the read information to the client-side Exinda so that it is available locally and immediately to the SMB client.
- Page 616 SMB server are often opened from a SMB client. The Exinda SMB Acceleration addresses slow downloads by pre- fetching the file data and populating it on the client side Exinda. Consequently, all SMB client requests for the file data are served from the client side Exinda at LAN speeds.
- Page 617 The primary goal of Exinda SMB acceleration is to reduce the overall accumulated latency introduced by the "chattiness" of the SMB protocols. Each Exinda appliance can act on behalf of an SMB client and server to make the interaction Exinda Network Orchestrator...
- Page 618 Reading ahead of the data stream is an optimization by which the appliance pre-fetches the contents of a file ahead of the client that is attempting to read it. When the Exinda Appliance detects a client attempting to perform a sequential bulk read of a file, the appliance fabricates read requests to the server on behalf of the client.
- Page 619 This means that for large data centric operations like reading and writing a file, the appliance is actually operating on large blocks of data as opposed to individual packets of fragmented data. In doing so, Exinda passes off these large blocks of data to our WAN memory framework.
- Page 620 Turn off MAPI encryption in Microsoft Outlook Exinda recommends that encryption of contents and attachment for output messages should be disabled to maximize reduction, as each user will encrypt files with a different key. MAPI Encryption is a client side configuration parameter in Outlook.
- Page 621 Ensure the Encrypt data between Microsoft Outlook and Microsoft Exchange checkbox is not selected. f. To close the dialog and save the settings, click OK . g. To close the Server Settings dialog, click Next and Finish . Exinda Network Orchestrator 4 Settings...
- Page 622 Disable encryption on the Exchange server For 2007, 2010, and 2013 Exchange servers, Exinda recommends that encryption of the MAPI protocol should be disabled to maximize reduction, as each user will encrypt files with a different key. You must disable encryption on all Microsoft Outlook clients as well as the Exchange server to maximize the benefit.
- Page 623 View MAPI Acceleration Results Conversations in Real Time Compare compression of MAPI traffic The following two tests compare the performance of Exinda's compression and WAN Memory technologies to Microsoft Outlook and Exchange compression. Exchange Results 1 recipient: 3.3MB was compressed to 3MB – 10% reduction 2nd and subsequent recipients: 3.3MB was compressed to 3MB –...
- Page 624 Exinda devices: 2 × Exinda 4800 appliances View MAPI Acceleration Results View the reduction in MAPI traffic on the network. 1. On your browser, open the Exinda Web UI ( https://Exinda_IP_address ). 2. Key-in the User and Password . 3. Click Login .
-
Page 625: Data Caching
YouTube, Google Video, Vimeo. NOTE The Acceleration feature (including universal & protocol-specific acceleration) is licensed separately. Edge Cache is also licensed separately. Please contact your local Exinda representative if you wish to enable either of these features. Related topics How Edge Cache Works... - Page 626 Caching Internet-based Content To cache web traffic, a client-side Exinda appliance is put in line with the traffic. When a network user visits a URL with cacheable content, Edge Cache first determines if the content is available in its cache. If not, Edge Cache retrieves the content from the URL.
- Page 627 The next time a client requests the same content, the same negotiation happens where the client requests a secure communication channel with the server, the Exinda appliance intercepts and forms a secure communication channel with the server, forges the certificate and establishes a secure communication channel with the client (on behalf of the server).
- Page 628 0. For more information, refer to Licensing information (page 139). Please contact your local Exinda representative if you wish to enable this feature. Overview - Configuration & Usage To use Edge Cache,you'll need to ensure all the required configuration is set.
- Page 629 Whitelisting is only available for HTTPS caching. You can specify your whitelist and blacklist as source IP, destination IP, source domain, or destination domain. Domains are resolved using the DNS. Exinda Network Orchestrator 4 Settings...
- Page 630 For versions prior to 7.0.2, you will need to restart Edge Cache for the changes to take effect. Go to Configuration > System > Optimization > Services , and click the Edge Cache Restart button. Exinda Network Orchestrator 4 Settings...
- Page 631 1. In the Add URL/Domain area, type the HTTP URL or domain that will be excluded from the Edge Cache. 2. Click the Add URL button. 3. Repeat until you have your desired blacklist. 4. Remove an HTTP URL or domain from the list by clicking the Delete button for the specified URL/domain. Exinda Network Orchestrator 4 Settings...
- Page 632 All https traffic can be cached according to the policy except those sites listed in the blacklist. Screenshot 239: Enabling HTTPS caching with blacklisted sites 1. In the HTTPS Caching area, select the Enable caching of HTTPS content checkbox. Exinda Network Orchestrator 4 Settings...
- Page 633 8. Remove an HTTPS URL or domain from the list by clicking the Delete button for the specified URL/domain. To only allow specified whitelisted (encrypted) HTTPS URLs Only https traffic specified in the policy and in this whitelist will be cached. Exinda Network Orchestrator 4 Settings...
- Page 634 5. In the Add IP or Domain area, specify the type of traffic you want on the whitelist and the Value (IP or domain name) for that type of traffic. You can specify Source IP , Destination IP , Source Domain , or Destination IP . Exinda Network Orchestrator 4 Settings...
- Page 635 When Edge Cache appliance peers are specified, if the requested content is not available in the appliance's cache, Edge Cache can request the content from it's appliance peers. Screenshot 241: To add a new peer appliance for Edge Cache Exinda Network Orchestrator 4 Settings...
- Page 636 -out myCompanyCA.key 2048 openssl req -x509 -new -key myCompanyCA.key -out myCompanyCA.cer -days 1000 -subj /CN="myCompany CA” This will generate two files: a.key file and a .cer file that can be uploaded in the CA certificates UI. Exinda Network Orchestrator 4 Settings...
- Page 637 Edge Cache over SSL. You will need to export the certificate from the appliance and import it to the desired computers. To export the certificate from the appliance: Exinda Network Orchestrator 4 Settings...
- Page 638 Chrome and Explorer on Windows machines Both Chrome and Internet Explorer on Windows Machines use the Windows certificate store to trust the Exinda Edge Cache SSL certificate. Two methods are available to distribute the certificates: using a domain controller or using a manual method.
- Page 639 3. Click View Certificates . 4. Click Import . 5. Navigate to the certificate you generated and exported from the Exinda appliance and import it. MAC OS If installing the certificate on a MAC, you must use the Keychain Access program. To start the Keychain Access program,double-click certificate file.
- Page 640 4. Create the filter rules for the policy, ensuring that HTTP (or HTTPS) or an application based on protocol, port, network object, or dscp is selected from the application list. 5. Click Add New Policy . To apply Edge Cache to a subset of the network Exinda Network Orchestrator 4 Settings...
- Page 641 Create a pre-population job in the Exinda Web UI Add and configure pre-population jobs in the Exinda Web UI. SMB traffic can be stored in SMB object cache and WAN memory cache, and HTTP can be stored in either WAN memory cache or Edge cache depending on the configuration of your policies.
- Page 642 13. To begin pre-populating the selected cache, in the list of configured pre-population jobs click Start . The content from the specified location begins to populate the cache. 14. To view the communication between the server and the Exinda appliance, click Monitor > Real Time > Con- versations .
- Page 643 Schedule a Pre-population Job in the CLI Scheduling a pre-population job can be done from the Exinda Web UI or through the CLI. The following example schedules a pre-population request daily at 12:30AM for the “Documentation” job configured in an earlier section of this guide.
-
Page 644: Authentication
7. To enter configuration mode, type enable then configure terminal . The prompt exinda-appli- ance (config) # is displayed. 8. To schedule the pre-population job type the following commands: exinda-appliance (config) # job <job_number> command <command_number> "acceleration prepopulate <prepopulation_name> start"... -
Page 645: Aaa
1. To configure AAA, navigate to Configuration > System > Authentication > AAA on the Web UI, advanced mode. 2. Specify the order in which users are authenticated. When a user logs in, the Exinda appliance will try to authenticate them using the authentication methods specified here, in the order they are configured. -
Page 646: Ldap Authentication
5. Click Apply Changes . 4.5.4 LDAP Authentication LDAP authentication allows you to configure the Exinda appliance to authenticate user login attempts with a remote LDAP (including Active Directory) server. 1. On your browser, open the Exinda Web UI ( https://Exinda_IP_address ). -
Page 647: Radius Authentication
9. Click Add New LDAP Server . 10. To remove an LDAP servers from the Exinda appliance, select the checkbox for the server and click Remove Server . To save the changes to the configuration file, in the status bar click the Unsaved changes menu and select Save configuration changes. -
Page 648: System Maintenance
10. Click Add New TACACS+ Server . 11. To remove TACACS+ servers from the Exinda appliance, select the checkbox for the server and click Remove Server . To save the changes to the configuration file, in the status bar click the Unsaved changes menu and select Save configuration changes. - Page 649 Firmware upgrade Generally users configure Exinda once and the configuration file doesn't have to be changed over and over again. Hence simply use the steps below to save the configuration file locally. If for any reason a backup is required periodically, you can also schedule a job for the same.
- Page 650 Use the form below to execute a batch of CLI commands on the Web UI. The CLI commands will be executed in order and any configuration changes will be applied to the running configuration. Exinda Network Orchestrator 4 Settings...
-
Page 651: Factory Defaults
4.6.2 Factory Defaults The Factory Defaults screen allows you to restore the configuration of the Exinda appliance to factory default settings. This includes removing any system logs, WAN Memory cache, and monitoring statistics. NOTE To restore Factory Defaults, navigate to Configuration > System > Maintenance > Factory Defaults on the Web UI, advanced mode. - Page 652 CAUTION Any unsaved configuration changes will be lost if the Exinda appliance is rebooted or shutdown without saving the changes first. 1. On your browser, open the Exinda Web UI ( https://Exinda_IP_address ). 2. Key-in the User and Password .
-
Page 653: System Tools
4.7.6 iPerf Server 4.7.1 Ping Use the Ping Tool to test network connectivity from the Exinda appliance to other hosts on the WAN or Internet. 1. On your browser, open the Exinda Web UI ( https://Exinda_IP_address ). 2. Key-in the User and Password . -
Page 654: Traceroute
7. Click Ping . It may take a few seconds for the ping operation to complete and display the results. 4.7.2 Traceroute Use the Traceroute Tool to determine the network hops from the Exinda appliance to other hosts on the WAN or Internet. -
Page 655: Query A Remote Ipmi Exinda Appliance
7. Click Lookup . It may take a few seconds for the operation to complete and display the results. 4.7.4 Query a remote IPMI Exinda appliance Use the IPMI Tool to query the power status, power cycle/power off, or reset a remote Exinda appliance via IPMI. The enabled IPMI access... -
Page 656: Iperf Client
One device plays the role of the server and the other plays the role of the client. In Exinda, there is a Web User Interface option to configure an Exinda appliance as an... -
Page 657: Iperf Server
One device plays the role of the server and the other plays the role of the client. In Exinda, there is a Web User Interface option to configure an appliance as an iPerf... - Page 658 -h, --help print this message and quit -v, --version print version information and quit For instance, if the Iperf server is to listen to UDP packets on port 319, then you must use the following options: -u –p 319 Exinda Network Orchestrator 4 Settings...
- Page 659 Server listening on TCP port 5001 TCP window size: 85.3 KByte (default) ------------------------------------------------------------ [ 4] local 10.10.1.200 port 5001 connected with 10.2.6.228 port 58665 [ ID] Interval Transfer Bandwidth [ 4] 0.0-10.1 sec 112 MBytes 93.2 Mbits/sec Exinda Network Orchestrator 4 Settings...
-
Page 660: Troubleshooting
5.6 Troubleshoot issues with Active Directory configuration 5.7 Troubleshooting Edge Cache 5.8 Topology troubleshooting 5.1 Diagnostics Learn the various diagnostics tools available on your Exinda Appliance, You can use these tools to help troubleshoot issues you might encounter. 5.1.1 Diagnostics Files 5.1.2 Acceleration Diagnostics 5.1.3 Monitor... -
Page 661: Acceleration Diagnostics
Exinda TAC for further troubleshooting. NOTE Valid SMTP and DNS settings are required for diagnostics to be sent to Exinda TAC. 5.1.2 Acceleration Diagnostics Acceleration diagnostics aid in troubleshooting TCP Acceleration, SMB Acceleration and WAN Memory issues by displaying the current configuration for those areas. - Page 662 All subsequent attempts to validate credentials of a signed connection against the IP address of the server are marked as Exinda Network Orchestrator 5 Troubleshooting...
- Page 663 2. From the Module drop-down, select TCP Acceleration . The configuration settings and statistics for TCP acceleration appear. EXAMPLE Viewing WAN Configuration and Statistics Use the following instructions to view the WAN configuration and operational statistics. Exinda Network Orchestrator 5 Troubleshooting...
-
Page 664: Monitor
2. From the Module drop-down, select WAN Memory . The configuration settings for WAN memory acceleration appear. EXAMPLE 5.1.3 Monitor The monitor diagnostics display the current monitor settings and the status of monitor and collector processes. Exinda Network Orchestrator 5 Troubleshooting... -
Page 665: Nic Diagnostics
The first lines show a summary of installed network adapters. Detailed information is available from the CLI "show diag" command. NOTE To configure NIC settings, navigate to Configuration > System > Network > NICs on the Web UI, advanced mode. Exinda Network Orchestrator 5 Troubleshooting... -
Page 666: Optimizer Diagnostics
5.1.5 Optimizer Diagnostics The optimizer diagnostics display the current optimizer status and the optimizer configuration. Exinda Network Orchestrator 5 Troubleshooting... -
Page 667: Raid Diagnostics
5.1.6 RAID Diagnostics The RAID diagnostics page is available on models that support Redundant Storage. A summary of the logical volume status is shown as well as details for RAID adapters, logical volumes and physical drives. Exinda Network Orchestrator 5 Troubleshooting... -
Page 668: Tcp Dump
5.1.7 TCP Dump A TCP Dump captures packets being transmitted or received from the specified interfaces and can assist in troubleshooting. A TCP Dump may be requested by Exinda TAC. Run a TCP Dump from the Exinda appliance Click Configuration > Diagnostics > TCP Dump . - Page 669 To collect traffic to / from a subnet net <IP subnet> Example: net 1.2.3.0/24 To collect traffic between two subnets src net <IP subnet> and dst net <IP subnet> Example: src net 1.2.3.0/24 and dst net 1.2.4.0/24 Exinda Network Orchestrator 5 Troubleshooting...
-
Page 670: View The Status Of An Alert
Alert raised when one of the links of an enabled bridge is down. Bridge Direction Alert raised when the appliance cabling is incorrect. In most cases, it indicates the Exinda WAN interface has been incorrectly plugged into the LAN and vice versa. -
Page 671: View The Status Of The Community
Route Detection goes out through another interface or node. MAPI Encrypted Alert raised when encrypted MAPI traffic to a Microsoft Exchange server is detected on an Exinda Appliance. Connections Encrypted MAPI traffic cannot be accelerated. 5.1.9 View the status of the community Display the state of the community and details of the individual hosts that have joined. -
Page 672: Open A Case With Exinda Networks Support Services
After the case is submitted, a confirmation message containing a case number is sent to the email address identified in the case. 5.2 Log Files Learn about the various log files stored on an Exinda Appliance, and how you can use these logs in your efforts to troubleshoot issues that you might encounter. 5.2.1 Viewing System Log Files 5.2.2 Live Log... -
Page 673: Viewing System Log Files
1. Go to Configuration > System > Logging > View . 2. Select the log file to view. By default, the Current Log is displayed. The Exinda appliance periodically archives log files. These archived log files can also be viewed by selecting them from the Logfile list. -
Page 674: System Logging Configuration
To save the changes to the configuration file, in the status bar click the Unsaved changes menu and select Save configuration changes. Add a remote syslog server Add remote syslog servers to the Exinda appliance, allowing you to forward system log entries at a defined severity level to one or more remote syslog servers. Exinda Network Orchestrator... -
Page 675: Troubleshoot Problems With Mapi Acceleration
Remove a remote syslog server To stop forwarding system log entires to a remote syslog server, remove the server from the Exinda appliance. 1. On your browser, open the Exinda Web UI ( https://Exinda_IP_address ). 2. Key-in the User and Password . -
Page 676: Outlook Cannot Connect To The Exchange Server
Troubleshoot other areas of your network to find the problem. 2. If Microsoft Outlook can connect to the Exchange server while the Exinda Appliance is in bypass mode, collect a sys- dump and packet captures while attempting to connect Microsoft Outlook to the Exchange server, and contact Exinda Support. -
Page 677: Reduction Ratio For Mapi Is Different Between Client-Side And Server-Side Exindas
If you have a mix of 7.4, 7.0, 6.4.3, and pre-6.4.3 appliances, perhaps the Acceleration TCP Option Mode is not set cor- rectly. Exinda had used option 30 to indicate acceleration but needed to change this when option 30 was assigned to indicate multi-path TCP. -
Page 678: Troubleshoot Issues With Active Directory Configuration
Solution 1. On each instance of the Exinda AD Connector, check whether the Send Active Directory user and group inform- ation to Exinda appliance(s) at startup option is selected. -
Page 679: Wmi Service Is Not Running
5.6.2 WMI Service is not running Problem When I try to access the Exinda AD Connector, a message opens that states “The installer has detected that WMI Service is not running. Consult Windows Help files to find information on how to start WMI Service.”. -
Page 680: Excluded Users Still Appear On The Exinda Appliance
To fix this: 1. The Exinda AD Connector requires .NET version 4.0 for it to run successfully on a server other than the Active Directory server. Ensure .NET 4.0 or later is installed on the server running the Exinda AD Connector. -
Page 681: The Ip Addresses Are Not Being Mapped To The Ad Users And Groups
5.6.8 The IP addresses are not being mapped to the AD users and groups Problem When integrating the AD client with the Exinda appliance, the IP addresses are not being mapped to the users and groups on the Exinda appliance. -
Page 682: Troubleshooting Edge Cache
5. In the policy list on the right, click on Audit logon events and ensure that Success is checked. 6. On the Exinda appliance, go to Configuration > System > Network > Active Directory . 7. Click the Renumerate button. - Page 683 If Edge Cache is not rendering layouts as expected, the problem is likely due to the certificate format. Using the Certificate generator of the Exinda appliance lets you export PEM and DER Certificate formats, but some formats require a PKCS12 certificate and these cannot be exported from the Exinda appliance. To correct the problem, use openssl to generate Certificates and import them into the appliance: 1.
-
Page 684: Topology Troubleshooting
2x straight Ethernet cables, while others may require 2x cross-over Ethernet cables. My network traffic is blocked after deploying the Ensure the speed/duplex settings are correct on both the Exinda appliance and Exinda appliance in line, after I have booted it any neighboring equipment. -
Page 685: Exinda Command Line Interface (Cli)
3. Telnet 4. Serial Console Interface Use this tool to connect to the Exinda appliance's Command Line Interface (CLI) from the Web UI. This tool connects to the appliance via the web interface and does not require SSH access. Exinda Network Orchestrator... -
Page 686: Cli Configuration Jumpstart
1. On your browser, open the Exinda Web UI ( https://Exinda_IP_address ). 2. Key-in the User and Password . 3. Click Login . 4. Click Configuration > System > Tools > Console . 5. Type the appliance username and password at the prompts. Do one of the following: To enter privileged EXEC (enable) mode, at the prompt run the command: hostname >... -
Page 687: Configure Command Line Options
Allow insecure (unverified certificate) SSL (Y/N)? 13. Do you want to check for a new license online (Y/N)? - Enter 'Y' to have the Exinda appliance check for a newer license on the Exinda website (if the Exinda appliance has Internet connectivity). If a newer license is found, you will be asked if you wish to install it. - Page 688 3. To enable or disable paging use the following command: hostname (config)# [no] cli default paging enable 4. Use the show cli command to see current CLI settings. 5. To save the running configuration, type configuration write . Exinda Network Orchestrator 6 Exinda Command Line Interface (CLI)
-
Page 689: Copyright
PTY LTD, all rights reserved. The software remains the sole and exclusive property of Exinda at all times. Limited warranty : Exinda warrants that for a period of thirty (30) days from the date of shipment from Exinda: (i) the software will be free of defects in workmanship under normal use, and (ii) the software substantially conforms to its published specifications. -
Page 690: Gnu General Public License (Gpl)
No other warranties : None of the Exinda parties warrant that the software is error free. Except for the "limited warranty" in section 4 ("limited warranty"), the Exinda parties disclaim all other warranties with respect to the software, either express or implied. -
Page 691: Terms And Conditions
A “Standard Interface” means an interface that either is an official standard defined by a recognized standards body, or, in the case of interfaces specified for a particular programming language, one that is widely used among developers working in that language. Exinda Network Orchestrator 7 Copyright... - Page 692 License along with the Program. You may charge any price or no price for each copy that you convey, and you may offer support or warranty protection for a fee. Exinda Network Orchestrator 7 Copyright...
- Page 693 A “User Product” is either (1) a “consumer product”, which means any tangible personal property which is normally used for personal, family, or household purposes, or (2) anything designed or sold for incorporation into a dwelling. In Exinda Network Orchestrator 7 Copyright...
- Page 694 Requiring indemnification of licensors and authors of that material by anyone who conveys the material (or modified versions of it) with contractual assumptions of liability to the recipient, for any liability that these contractual assumptions directly impose on those licensors and authors. Exinda Network Orchestrator 7 Copyright...
- Page 695 (including a cross-claim or counterclaim in a lawsuit) alleging that any patent claim is infringed by making, using, selling, offering for sale, or importing the Program or any portion of it. Exinda Network Orchestrator 7 Copyright...
- Page 696 For example, if you agree to terms that obligate you to collect a royalty for further conveying from those to whom you convey the Program, the only way you could satisfy both those terms and this License would be to refrain entirely from conveying the Program. Exinda Network Orchestrator 7 Copyright...
-
Page 697: Bsd
Program, unless a warranty or assumption of liability accompanies a copy of the Program in return for a fee. 7.3 BSD 2.0 The BSD 2.0 License Copyright (c) 2009 Kontron America, Inc. All rights reserved. Exinda Network Orchestrator 7 Copyright... - Page 698 (including negligence or otherwise) arising in any way out of the use of this Software, even if advised of the possibility of such damage. Exinda Network Orchestrator 7 Copyright...
-
Page 699: Safety And Compliance
Operation of this equipment in a residential area is likely to cause harmful interference in which case the user will be required to correct the interference at his own expense. Exinda Network Orchestrator 8 Safety and Compliance... -
Page 700: Safety Guidelines
Wear an ESD-preventive wrist strap, ensuring that it makes good skin contact. If no wrist strap is available, ground yourself by touching the metal part of the chassis. Periodically check the resistance value of the antistatic strap, which should be between 1 and 10 megohms (Mohms). Exinda Network Orchestrator 8 Safety and Compliance... -
Page 701: Predefined Applications And Application Groups
9 Predefined Applications and Application Groups This section provides information about the predefined applications and application groups that your Exinda Appliance (s) is pre-configured to manage. http://go.gfi.com/?pageid=exos_ To see a list of predefined applications and application groups navigate to help#cshid=pre_apps 9.1 Predefined Applications and Supported L7 Signatures... - Page 702 Ariel Armagetron Audiko Audiogalaxy Audiogalaxy iOS Audiogalaxy Android AURP AVG Antivirus Avira Antivirus Avira Backweb Baidu Battlefield BattleNet Bebo Biff bini Bitdefender BitTorrent BitTorrent-plain BitTorrent-encrypted Acquisition Anatomic P2P Arctic Torrent Ares Exinda Network Orchestrator 9 Predefined Applications and Application Groups...
- Page 703 Bits on Wheels BitSpirit BitSticks BitTornado BitTorrent/Mainline BitTyrant Blizzard Downloader BtManager burst! CTorrent Deluge FlashGet Freeloader FrostWire G3 Torrent Gnome BitTorrent Halite KTorrent LimeWire MLDonkey MonoTorrent MooPolice Opera Pando qBittorrent QTorrent rTorrent Rufus Exinda Network Orchestrator 9 Predefined Applications and Application Groups...
- Page 704 WizBit Xtorrent ZipTorrent BitTorrent-UTP BitTorrent-UTP-encrypted Blackberry Blackberry-encrypted Blackberry-email Blackberry-messenger ORB-client BlackBerry Internet Service BlackBerry Management Center BlackBerry Messenger Unknown Blackberry Mail Blackberry Messenger Bluejeans BOLT Bolt Android Booking Com BootPC Burner Exinda Network Orchestrator 9 Predefined Applications and Application Groups...
- Page 705 CIFS CiscoDiscovery Citrix Citrix-application Citrix-priority Citrix-user CloudME Club Penguin clussvc CNTV ComodoUnite Comodo EasyVPN Constant Contact CORBA Crashplan Pro Crime City Crossfire CtiTV CUDev CVSpserver CyberGhost Dailymotion dameware Daytime DDM-SSL Deezer Exinda Network Orchestrator 9 Predefined Applications and Application Groups...
- Page 706 DHCP DHCPv6 Diameter DICOM DICOM TLS DiDi IM DiDi Voice DirectConnect DirectConnect-hub DirectConnect-peer DirectConnect-adc-peer ApexDc++ BCDC++ CZDC DC++ DCTC Dolda Connect Elise fulDC GtkDC LDCC LinuxDC++ Microdc Microdc2 Revconnect SababaDC ShakesPeer Exinda Network Orchestrator 9 Predefined Applications and Application Groups...
- Page 707 163pan.com 1-clickshare.com 1clickshare.net 1fichier.com 1-upload.com 1-upload.to 2shared.com 4fastfile.com 4share.ws 4shared.com 4shared.vn 4us.to adrive.com alldrives.ge allshares.ge annonhost.net badongo.net banashare.com bestsharing.com bigfilez.com biggerupload.com bitshare.com boosterking.com cash-file.net chinamole.com cobrashare.sk coolshare.cz cramit.in crocko.com cum.com czshare.com Exinda Network Orchestrator 9 Predefined Applications and Application Groups...
- Page 708 Exinda Network Orchestrator 9 Predefined Applications and Application Groups...
- Page 709 Exinda Network Orchestrator 9 Predefined Applications and Application Groups...
- Page 710 Exinda Network Orchestrator 9 Predefined Applications and Application Groups...
- Page 711 Exinda Network Orchestrator 9 Predefined Applications and Application Groups...
- Page 712 Discard Dofus Doom3 Doook Dota 2 Dota Legend DriveLock Dropbox Exinda Network Orchestrator 9 Predefined Applications and Application Groups...
- Page 713 Hydranode Jubster Lphant MLDonkey Morpheus Shareaza WinMX MP3 XoloX Endomondo enLegion Eset Evernote ExindaAD ExindaCom ExindaSSL ExindaWM F-Prot Facebook Facetime Feidian FiCall FiCall iOS Exinda Network Orchestrator 9 Predefined Applications and Application Groups...
- Page 714 QuickFIX Flash Flash-host Flickr Florensia Forfone Foursquare Freenet Friendster FTP-control FTP-data Fring Fring-unknown Fring-video Fring-voice Fring Android Fring Symbian Fring iOS FTP-SSL Funshion Funshion Fuze Meeting Gadu-Gadu Gadu-Gadu-server Gadu-Gadu-file-transfer Gadu-Gadu-voice Gadu-Gadu-video Exinda Network Orchestrator 9 Predefined Applications and Application Groups...
- Page 715 GameKit Gmail Gnutella Acqlite Acquisition Apollon BearFlix Cabos CocoGnut DM2FrostWire Filepipe giFT Gluz Gnucleus Gtk-gnutella iMesh Light KCEasy Kiwi Alpha LimeWire Morpheus Mutella Phex Poisoned Qtella Shareaza Swapper.NET Symella WinMX MP3 Exinda Network Orchestrator 9 Predefined Applications and Application Groups...
- Page 716 Google Play Music Google Plus Google Talk Google Talk-file-transfer Google Talk-unknown Google Talk-video Adium Ayttm GMX Multimessenger iChat Instantbird Miranda Pidgin (previously Gaim) Kopete Pidgin Proteus Qnext Trillian/Trillian Pro Web.de Multimessenger Google Talk-voice Exinda Network Orchestrator 9 Predefined Applications and Application Groups...
- Page 717 Groupwise GTP-control GTP-prime GTP-user-data GuildWars H323 Ekiga NetMeeting OpenH.323 XMeeting Half-Life 2 HamachiVPN LogMeIn Hamachi HiDrive Hike Messenger HiNet Hotmail HTTP HTTP-advanced HTTP-content type HTTP-file HTTP-host HTTP-method HTTP-referer HTTP-x_forwarded_for HTTP-ALT HTTPS Exinda Network Orchestrator 9 Predefined Applications and Application Groups...
- Page 718 Kiax LoudHush PURtel YakaPhone ZiaxPhone ICAP Icecast iCloud Orkut iOS ICMP ICMPv6 ICQ Webchat ident IDrive IEC61850 IEC61850-goose IEC61850-manufacturing message IEC61850-sampled values IGMP iHeart Radio iLeader iLive.to IM+ Android IM+ Blackberry Exinda Network Orchestrator 9 Predefined Applications and Application Groups...
- Page 719 IMO Browser Applet IMO for iPad IMO iOS Instagram Intralinks IOS OS Update IP mobility iPerf IPIP iPlayer iPlayer iOS IPSEC IPSEC-control Cisco VPN Client HotSpot Shield iOS IPSEC-data IPSEC over UDP Exinda Network Orchestrator 9 Predefined Applications and Application Groups...
- Page 720 Mibbit Web IRC Miranda mIRC Pidgin IRC-unknown IRC-SSL isakmp iSkoot iTunes iTunes Radio ITV-stream ITV-web ITV Player iOS iWow systex Jabber Jabber-encrypted Jabber-file-transfer Jabber-unknown Jabber-voice Jabber-video Adium Ayttm GMX Multimessenger iChat Instantbird Exinda Network Orchestrator 9 Predefined Applications and Application Groups...
- Page 721 JAP/JonDo Java-RMI JBK3000 JD.com JDENet Kakao Kakao-generic Kakao-kakaotalk Kakao Talk Kaspersky Kaspersky Antivirus Kazaa-Fasttrack Apollon Filepipe iMesh Light Kazaa Kazaa Lite Mammoth Kerberos Kik Messenger Kontiki L2TP OpenL2TP Label Distribution Protocol Exinda Network Orchestrator 9 Predefined Applications and Application Groups...
- Page 722 Line-generic Line-video LinkedIn Live.com LiveJasmin LivePerson LLMNR lockd LotusNotes LoveFilmLync Lync-audio Lync-file-transfer Microsoft Lync Lync-unknown Lync-video Lync macfile Magine TV MagV MagV Kids Manolito Blubster Piolet MAPI MapleStory MATIP McAfee mDNS Exinda Network Orchestrator 9 Predefined Applications and Application Groups...
- Page 723 Microsoft Dynamics NAV Microsoft Exchange Microsoft Exchange-generic Microsoft Exchange-outlook web acess Microsoft Media Server Mig33 mig33 Android Mitake Windows Media Player Modern War Mojo Move Player Moves MPEG Jupster Screamerradio Winamp MPlus Exinda Network Orchestrator 9 Predefined Applications and Application Groups...
- Page 724 Fire GMX Multimessenger Instantbird Kopete Mercury Microsoft Messenger Mac Miranda Pidgin Pidgin (previously Gaim) Web.de Multimessenger Qnext Trillian/Trillian Pro Windows Live Windows Live iOS MSRP Blink MSRPC mstask Mute MyBook MyCard Exinda Network Orchestrator 9 Predefined Applications and Application Groups...
- Page 725 MyVideo Stream Jupster Screamer Radio Winamp nat-t National Baseball Naver Net2Phone NETBIOS Netbus Netflix Netflix-generic Netflix-video Netflix iOS Netflow Netlogon NetMotion Next TV Nike+ Nimbuzz Nimbuzz Android Nimbuzz Blackberry Nimbuzz Mac Exinda Network Orchestrator 9 Predefined Applications and Application Groups...
- Page 726 Open FT OpenVPN Hotspot Shield MyFreedom Opera Mini Opera Mini Symbian Opera Mini Android Opera Mini Blackberry Opera Mini iOS Oracle Oracle DB Oracle-SSL ORB-server ORB-client ORB-client-3gp ORB-client-flash Exinda Network Orchestrator 9 Predefined Applications and Application Groups...
- Page 727 Windows Phone Oscar Oscar-file-transfer Oscar-picture-transfer Oscar-unknown Oscar-video AIM Android AIM for Mac AIM for iPad AIM iOS Adium Ayttm Fire Oscar-voice GMX Multimessenger iChat ICQ Android ICQ Mac OS X ICQ iOS Exinda Network Orchestrator 9 Predefined Applications and Application Groups...
- Page 728 Web.de Multimessenger OSPF Paltalk Paltalk-file-transfer Paltalk-server Paltalk-video Paltalk Android Paltalk iOS Paltalk-voice Panda Security Pando Pandora Path PCanywhere PCoIP PDProxy PeerEnabler Periscope PinkFong Pinterest PlayTales Pochta Rossii Poison Ivy POP-encrypted POP-plain POP-SSL Exinda Network Orchestrator 9 Predefined Applications and Application Groups...
- Page 729 PPStream Ubuntu PPStream iOS PPTP Print pubu bookbuffet QIP.RU QQ-file-transfer QQ-unknown QQ-voice QQ-video Instantbird QQ HD iOS QQ International QQ iOS QQ for Mac QQ for Pad Android QQ Games QQLive Exinda Network Orchestrator 9 Predefined Applications and Application Groups...
- Page 730 Quake HalfLife Qualsys QUIC QuickTime Quicktime-host iTunes Quotd QVOD Radius radmin Rally RC5DES Rdio RealDataTransport RealMa RealMedia RealMediaPlayer Redmine RedTube Remote Telnet Remote Web Workplace Renren Replify rFactor Rhapsody rlogin RSVP rsync Exinda Network Orchestrator 9 Predefined Applications and Application Groups...
- Page 731 SAP.MCAST.NET SCTP Scydo Scydo Android Scydo iOS Second Life SecureSight SecureSight-SSL Shell-SSL Shoutcast Fishradio iTunes Silverlight Silverfast-host Simfy Sina Weibo SinaTV SIP-audio SIP-gadu-gadu SIP-ichat-facetime SIP-MagicJack SIP-mplus SIP-msn SIP-oscar SIP-oscar-video SIP-unknown SIP-video Exinda Network Orchestrator 9 Predefined Applications and Application Groups...
- Page 732 Skinny Skout SkyDrive Skyking Skype Skype-chat Skype-file transfer Skype-out Skype-unknown Skype-video Skype Android Skype for iPad Skype iOS Skype Linux Skype Symbian Skype-voice Skype for Business – File Transfer Skype Video Exinda Network Orchestrator 9 Predefined Applications and Application Groups...
- Page 733 Socks v5 SoftEthernet Sohu SOPCAST Soribada Soulseek iSoul Nicotine Plus SolarSeek SoulSeeX pySoulSeek SoundCloud SPDY Speakaboos Speedtest SpiderOak SplashFighter Spotify Spotify Android Spotify iOS Spotify Mac Spreecast Spreed SPTG TV sqidproxy Exinda Network Orchestrator 9 Predefined Applications and Application Groups...
- Page 734 SSL-common name SSL-organization name SSL-SPDY SSTP StealthNet Steam StreamWorks StreetVoice STUN Sudaphone Sudaphone Android Sudaphone iOS SugarSync SunRPC svrloc Sybase Syncplicity SyncServer-SSL syslog T.120 Taaze TACACS Tango Tango-audio Tango-file-transfer Tango-im Tango-unknown Exinda Network Orchestrator 9 Predefined Applications and Application Groups...
- Page 735 TeamViewer for Meetings iPad TeamViewer iOS TeamViewer for Meetings iOS Telegram Telnet Telnet-generic Telnet-tn3270 Telnet-SSL Teredo textPlus TFTP Three Bamboo Threema Thrift Tibia TigerText Timbuktu Time Server Timely TV TMall TN3270 Exinda Network Orchestrator 9 Predefined Applications and Application Groups...
- Page 736 TTPoD Tudou Tumblr TVAnts TVBS TVUPlayer TVUPlayer Android TVUPlayer Mac TVUPlayer iOS Twitch Twitter Ubuntu One UltraBac UltraSurf Unreal UppTalk Usenet iLoad UseNeXT uucp UUSee vBulletin Vcast Ventrilo VeohTV VeohTV-generic VeohTV-flash Exinda Network Orchestrator 9 Predefined Applications and Application Groups...
- Page 737 Vippie Android Vippie iOS VoIP Tunnel Voxer VPN-X VRRP VTUN VyprVPN WAP TLS Warcraft 3 Watchever Wealth God WebDAV Cadaver Goliath Webex WebEx Meeting Center Applet Webex for iPad Webex iOS WebQQ Exinda Network Orchestrator 9 Predefined Applications and Application Groups...
- Page 738 Whois Wickr Windows Azure Windows Phone OS Update Windows Updates WindowsMedia WindowsMedia-host WinMX XNap WINNY Wins Workout Trainer World of Kung Fu World of Warcraft Wowza WSM Server WSM Server-SSL Wuala Exinda Network Orchestrator 9 Predefined Applications and Application Groups...
- Page 739 Yahoo-webmail Adium Ayttm GMX Multimessenger Instantbird Kopete Miranda Pidgin Pidgin (previously Gaim) Qnext Trillian/Trillian Pro Web.de Multimessenger Yahoo Messenger Yahoo Messenger Android Yahoo Messenger for Mac Yahoo Messenger iOS Yahoo Games Exinda Network Orchestrator 9 Predefined Applications and Application Groups...
-
Page 740: Predefined Application Groups
Zynga 9.2 Predefined Application Groups The Exinda appliance includes predefined groups of applications that can be used when setting policy for the appliance and for monitoring. Custom application groups can also be defined, and custom applications can be added to existing application groups. - Page 741 Battlefield Call of Duty Club Penguin Crime City Crossfile Destiny Dofus Doom3 Dota 2 Dota Legend Fiesta Florensia Game of War Gamekit GuildWars Half-Life 2 King of Pirates MapleStory Modern War Exinda Network Orchestrator 9 Predefined Applications and Application Groups...
- Page 742 World of Kung Fu World of Warcraft xbox-live Zynga Instant Messaging Blackberry Messenger DiDi IM eBuddy enLegion FETnet Google Talk Hike Messenger ICQ Webchat iMessage Jabber Kik Messenger Live Person Meebo Exinda Network Orchestrator 9 Predefined Applications and Application Groups...
- Page 743 PalTalk Path Telegram textPlus TigerText Vibe Voxer WebQQ WeChat WhatsApp Wickr Yahoo IM Interactive echo Remote Telnet rlogin Telnet Time Server TN3270 Mail Blackberry Mail GMail Hotmail IMAP IMAP-SSL LotusNotes MAPI Exinda Network Orchestrator 9 Predefined Applications and Application Groups...
- Page 744 BitTorrent Edonkey Feidian Filetopia Gadu-Gadu Gnutella Kazaa-Fastrack Kontiki OFFSystem Open FT POPO PPLive PPSteam QQLive Soulseek StealthNet UUSEE Webthunder ZATTOO Recreational Anonymous Proxy Audiko Audiogalaxy DirectDownload Duokan Endomondo Facebook Flash Flickr Exinda Network Orchestrator 9 Predefined Applications and Application Groups...
- Page 745 Mig33 Mojo Moves MyFitnessPal MySpace National Baseball Nike+ Orkut Pinterest PlayTales RealMedia Run Keeper Runtastic Sina Weibo Snapchat Sohu Speakaboos Spotify SPTG TV TTPod Tumblr UltraSurf Vine VoIP Tunnel Watchever WindowsMedia Exinda Network Orchestrator 9 Predefined Applications and Application Groups...
- Page 746 L2TP LDAP-SSL MS Global Catalogue SSL NNTP-SSL Oracle-SSL Orbix2000 SSL POP-SSL PPTP SecureSight Shell-SSL SIP-SSL SyncServer-SSL Tacacs Telnet-SSL WAP TLS WSM Server-SSL Social Networking aimini Bebo Doook Facebook Flickr Foursquare Friendster Exinda Network Orchestrator 9 Predefined Applications and Application Groups...
- Page 747 Yik Yak YouTube Software Updates Adobe Updates Android OS Update Antivirus Lab Apple Updates Avira Bitdefender Eset F-Prot Grisoft iOS OS Update Kaspersky McAfee Norton Antivirus Panda Security Windows Phone OS Update Exinda Network Orchestrator 9 Predefined Applications and Application Groups...
- Page 748 Ciaomobile HDTV CNTV CtiTV Dailymotion Deezer Demand 5 Flash Funshion Google Play Music Grooveshark Hulu Icecast iHeartRadio iLive.to iPlayer IPTV iTunes Radio last.fm LoveFilm Move Player MPEG MyMusic TW MyVideo Netflix Octoshape Exinda Network Orchestrator 9 Predefined Applications and Application Groups...
- Page 749 RealMedia Rhapsody RTSP Shoutcast Silverlight Simfy SinaTV Soribada SoundCloud Spreecast Timely TV TTPod TuDou TVBS VeohTV Vimeo Watchever WindowsMedia Youku Thin Client AdobeConnect Citrix GoToMeeting GoToMyPc PCAnywhere PCoIP Spreed TeamViewer Webex Exinda Network Orchestrator 9 Predefined Applications and Application Groups...
- Page 750 Fring Goober Lync ooVoo Scydo Tango Truphone UppTalk Ventrilo Voice Burner DiDi Voice Facetime H323 Megaco H.248 MGCP Net2Phone Nimbuzz RTCP Skinny Skype Skype Video Skype Voice Sudaphone Vippie CpmodoUnite CyberGhost Exinda Network Orchestrator 9 Predefined Applications and Application Groups...
- Page 751 IPSEC over UDP isakmp L2TP NetMotion OpenVPN PDProxy PPTP SoftEthernet SSTP Teredo VPN-X VyprVPN Baidu BOLT Google Google Cloud Google Drive Google Encrypted HTTP HTTP-ALT HTTPS Live.com Naver OperaMini SPDY squidproxy WebDAV WebSocket Exinda Network Orchestrator 9 Predefined Applications and Application Groups...
Need help?
Do you have a question about the EXNV-3062 and is the answer not in the manual?
Questions and answers