Table of Contents

Related Manuals for Miele ProLine CSDA 1010


Summary of Contents for Miele ProLine CSDA 1010
- Page 1 Operating and installation instructions CombiSet downdraft extractor To prevent the risk of accidents or damage to the appliance, it is essential to read these instructions before it is installed and used for the first time. en-AU, NZ M.-Nr. 10 454 340...
-
Page 2: Table Of Contents
Contents Warning and Safety instructions................ 3 Caring for the environment ................ 12 Description of the functions ................ 13 Guide to the appliance .................. 14 Operation...................... 17 Switching the fan on....................17 Fan run-on after cooking ..................17 Energy saving tips .................... 18 Cleaning and care .................... -
Page 3: Warning And Safety Instructions
The downdraft extractor must only be used to extract vapours and remove odours from cooking. Any other usage is at the owner's risk. Miele cannot be held liable for damage resulting from incorrect or improper use or operation. ... - Page 4 Repairs and other work by unqualified persons could be dangerous. Installation, maintenance work and repairs to electrical appliances must only be carried out by a Miele approved service technician. The downdraft extractor must only be installed and operated in combination with those CombiSets specified by Miele.
- Page 5 The manufacturer's warranty will be invalidated if the appliance is not repaired by a Miele approved service technician. Faulty components must only be replaced by genuine Miele spare parts. The manufacturer can only guarantee the safety of the appliance when Miele replacement parts are used.
- Page 6 Warning and Safety instructions – the mains circuit breaker has been switched off, or – the screw-out fuse is removed (in countries where this is applicable), or – it is switched off at the wall socket and the plug is withdrawn from the socket.
- Page 7 Warning and Safety instructions Using at the same time as other heating appliances that depend on the air from the room Warning - danger of toxic fumes! Great care should be taken when using the downdraft extractor at the same time and in the same room or area of the house as another heating appliance which depends on the air in the room.
- Page 8 Warning and Safety instructions In order to ensure safe operation, and to prevent gases given off by the heating appliances from being drawn back into the room when the downdraft extractor and the heater are in operation simultaneously, an underpressure in the room of 0.04 mbar (4 pa) is the maximum permissible.
- Page 9 Warning and Safety instructions Correct use Never use an open flame beside the downdraft extractor. To avoid the danger of fire, do not flambé or grill over an open flame. When switched on, the downdraft extractor could draw flames into the filter.
- Page 10 Warning and Safety instructions Correct installation Please refer to the "Installation" section of this booklet when fitting the downdraft extractor. All ducting, pipework and fittings must be of non-flammable material. These can be obtained from builders' merchants. The appliance must not be connected to a chimney or vent flue which is in current use for exhausting fumes from appliances burning gas or other fuels.
-
Page 11: Cleaning And Care
Accessories Use only genuine original Miele spare parts. If spare parts or accessories from other manufacturers are used, the warranty will be invalidated, and Miele cannot accept liability. -
Page 12: Caring For The Environment
Caring for the environment Disposal of the packing Disposing of your old material appliance The transport and protective packing Electrical and electronic appliances has been selected from materials which often contain materials which, if are environmentally friendly for handled or disposed of incorrectly, disposal, and can normally be recycled. -
Page 13: Description Of The Functions
Description of the functions Depending on the model of the downdraft extractor, the following options are available: Air extraction mode The air is drawn in and cleaned by the grease filter and directed outside. Recirculation mode (DUU 1000 conversion kit required) The air is drawn in and then cleaned by the grease filter. -
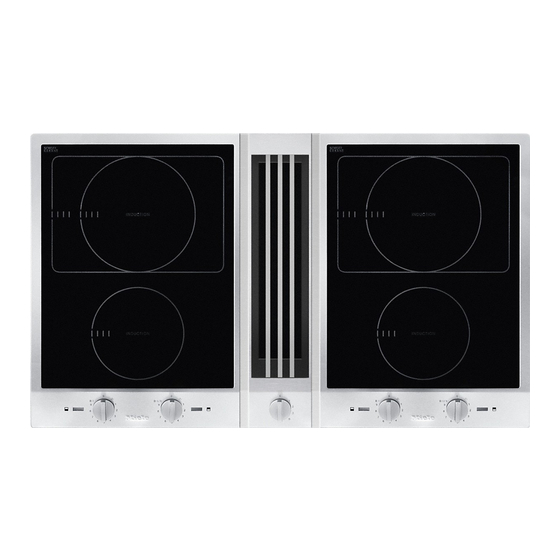
Page 14: Guide To The Appliance
Guide to the appliance... - Page 15 Guide to the appliance Further building in examples...
- Page 16 Guide to the appliance a Extraction grille b Grease filter c Cover strips d Control for selecting the fan power setting e Motor unit f Removable tray. This collects any moisture which is drawn through the extraction grille. g Exhaust connection h DUU 1000 recirculation box (special accessory for recirculation mode) The diagrams show building in examples.
-
Page 17: Operation
Operation Switching the fan on For light to heavy cooking vapours, select from power levels 1 to 3. For short periods of strong vapours and cooking odours, e.g. whilst searing meat, select the B Booster setting. Turn the dial from 0 to the required power level. -
Page 18: Energy Saving Tips
Energy saving tips This downdraft extractor operates very efficiently and economically. The following will help you to save even more energy when using it: – Ensure that there is sufficient ventilation in the kitchen when cooking. In extraction mode if there is insufficient air flow, the downdraft extractor cannot operate efficiently and this causes increased operating... -
Page 19: Cleaning And Care
For instructions on how to clean the specifically for use on stainless steel, CombiSet appliances, please refer to e.g. Original Miele ceramic and their separate operating instructions. stainless steel cooktop cleaner. To help prevent re-soiling, a... -
Page 20: Moisture Collection Tray
Cleaning and care Moisture collection tray Grease filter and extraction grille The moisture collection tray should be cleaned if liquids boil over or are spilled The extraction grille and the reusable into the grille of the downdraft extractor. metal grease filter collect solid matter from kitchen vapours (grease, dust etc.) ... -
Page 21: Recirculation Mode
Cleaning and care Cleaning the extraction grille and Depending on the cleaning agent grease filter by hand used, cleaning the grease filter in a dishwasher can cause permanent Clean the extraction grille and the discolouration to the internal surfaces grease filter with a soft nylon brush in of the filter. -
Page 22: Problem Solving Guide
Problem solving guide Problem Possible cause and remedy Liquid has entered the Due to boiling over or spillage, liquid has made its downdraft extractor. way through the extraction grille into the downdraft extractor. The base of the grease filter can hold approx. 250 ml of liquid. -
Page 23: Installation
Installation Before installation All dimensions in this instruction booklet are given in mm. Before installation, it is important to read the information given on the Assembly parts following pages as well as the "Warning and Safety instructions" at the beginning of this booklet. ... -
Page 24: Appliance Dimensions
Installation Appliance dimensions... - Page 25 Installation a Fan on right-hand side, exhaust connection at rear (default position). b Fan on right-hand side, exhaust connection on the right (conversion necessary). c Fan on left-hand side, exhaust connection on the left (conversion necessary). d Centre of cut-out e Exhaust connection f Removable moisture collection tray.
-
Page 26: Building-In Dimensions
Installation Building-in dimensions The drawing is not to scale. a Safety distance from the back edge of the CombiSet to a vertical surface. b Safety distance right or left from the edge of the CombiSet to a wall, tall unit or combustible niche cladding: 40 mm for the induction cooktop (CS 1222) 50 mm for the TepanYaki (CS 1327) - Page 27 Installation c Maximum building-in depth of the CombiSet: CS 1222 (induction cooktop): 73 mm (see e) CS 1327 (TepanYaki): 78 mm d To ensure sufficient ventilation, a minimum safety distance is required between the underside of an induction cooktop and an oven, interim shelf or a drawer below it.
-
Page 28: Changing The Exhaust Direction/Fan Position
Installation Rotating the fan Changing the exhaust direction/fan position By modifying the downdraft extractor, it is possible to change the position of the fan and the exhaust connection. Pull the connection cable through the holder a little to allow the fan to be rotated unhindered. - Page 29 Installation Unscrew the four screws from the Place the downdraft extractor onto fan, lift off the fan and rotate it 90°. the moisture collection tray again and Feed through the cable and screw the secure the tray using the latches. fan back on.
- Page 30 Installation Rotating the housing If the fan is to be positioned on the left- hand side, the housing also needs to be rotated. Rotate the upper housing 180°, insert it into the lower housing again, and screw it into place. ...
-
Page 31: Installation Notes
Installation Tiled worktop Installation notes Seal between the CombiSet and the worktop Grout lines and the hatched area underneath the CombiSet frame must be smooth and even. If they are not the CombiSet will not sit flush with the worktop and the sealing strip Do not use sealant between the underneath the top part of the CombiSet and the worktop. -
Page 32: Installing The Downdraft Extractor
Installation Preparing the worktop Installing the downdraft extractor Make the worktop cut-out as shown in the "Building-in dimensions". Install the downdraft extractor first and Observe the safety distances in all of then the CombiSets. the applicable CombiSet operating and installation instructions. Wooden worktops ... - Page 33 Installation The downdraft extractor is secured in the cut-out with two spacer bars. Initially only the bar on the fan side is installed in the cut-out. Right mounted fan: Install the bar to the Remove the covers from the spacer right of the centre of the cut-out.
- Page 34 Installation Feed the mains connection cable down through the cut-out. Hold the spacer bar for the other side underneath the top of the downdraft extractor. Ensure the spacer bar is installed with the marking at the front of the cut-out. ...
-
Page 35: Installing The Combisets
Installation Installing the CombiSets Push the second spacer bar against the downdraft extractor and secure it with the screws supplied. Secure the four outer spring clamps in the cut-out. Feed the mains connection cable down through the cut-out. ... -
Page 36: Fitting The Cover Strips
Installation Do not use sealant (e.g. silicone) as an additional means for sealing the CombiSet. If the seal does not meet the worktop correctly on the corners, the corner radii (≤ R4) can be carefully scribed to suit. Fitting the cover strips ... -
Page 37: Connection For Air Extraction
Connection for air extraction Remember that any constriction of Before installation, it is important the airflow will reduce extraction to read the following information. performance and increase operating This is particularly crucial when using noise. the downdraft extractor at the same time as a heating appliance that relies on oxygen from the same room, which could result in the build-... -
Page 38: Electrical Connection
The electrical connection should be Danger of injury! made via a switched socket. This will Miele cannot be held liable for make it easier for service technicians unauthorised installation, should the appliance need to be maintenance and repair work as this repaired. -
Page 39: After Sales Service And Warranty
After sales service and warranty In the event of a fault which you cannot remedy yourself, please contact Miele. The contact details for Miele are given at the back of these instructions. When contacting Miele, please quote the model and serial number of your appliance. - Page 43 Level 2, 10 College Hill Head Office Melbourne: Freemans Bay, Auckland 1011 1 Gilbert Park Drive Knoxfield, VIC 3180 Telephone: 0800 464 353 (0800 4 MIELE) www.miele.co.nz www.miele.com.au Miele (Hong Kong) Limited Malaysia 41/F - 4101, Manhattan Place Miele Sdn Bhd...
- Page 44 CSDA 1000, CSDA 1010, CSDA 1020 en-AU, NZ M.-Nr. 10 454 340 / 01...