
Related Manuals for Easy@Home DV-888DC


Summary of Contents for Easy@Home DV-888DC
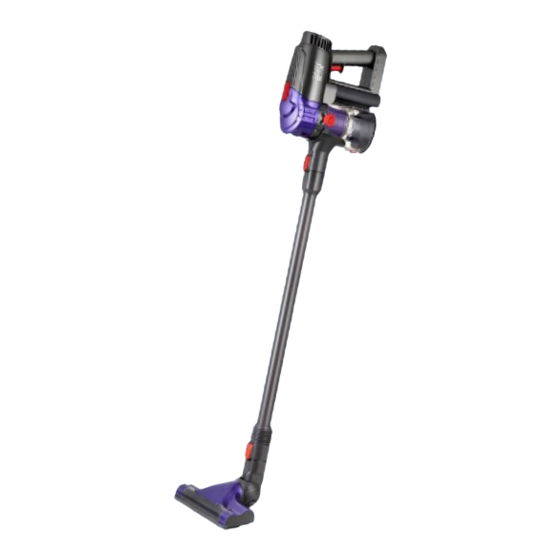
- Page 1 User Manual Manual del usuario CORDLESS CYCLONIC STICK VACUUM ASPIRADORA ESCOBA CICLÓNICA SIN CABLE English……Page 3 Español…..Página 18...
-
Page 2: Table Of Contents
Contents Parts list ..............3 Contents ............... 4 Assembly .............. 5 General information ..........7 Safety instructions ..........9 User instructions ............. 10 Troubleshooting ..........14 Cleaning and maintenance ........15 Other useful information ........16 Technical specifications ........16 Storing .............. -
Page 3: Parts List
Parts list Main parts 1. Main body 2. Turbo brush head 3. 2-in-1 crevice/brush tool 4. Connecting joint 5. Power adapter 6. Extension pole 7. Pole attachment release button [Main body disassembled] 8. Dust container lid 15. Main body attachment 9. -
Page 4: Contents
Contents Contents of packaging Turbo brush head Pole Main body Connecting joint 2-in-1 crevice/brush tool Power adapter Instruction manual Assembly NOTE: All attachments must align to fit together properly. Attach the turbo brush head to the extension pole & main body ... -
Page 5: Assembly
Assembly Attach the turbo brush head to the main body Insert the turbo brush head (#2) into the main body (#1) until you hear an audible clicking noise. To disassemble the turbo brush head from main body, press the red main body attachment release button (#15) then remove the turbo brush head. - Page 6 Assembly Attached the 2-in-1 crevice/brush tool to the main body Insert the 2-in-1 crevice/brush tool (#3) into the connecting joint (#4). It does not click into place. Insert the connecting joint into the main body (#1) until you hear an audible clicking noise. ...
-
Page 7: General Information
General information General information When using the Cyclonic Stick Vacuum, basic safety precautions should be observed. PLEASE READ AND SAVE ALL INSTRUCTIONS BEFORE USING THE CYCLONIC STICK VACUUM. 1. Close supervision is necessary when any appliance is used near children. The Cyclonic Stick Vacuum is not intended for use by children. - Page 8 General information 15. Never use accessories which are not recommended by the manufacturer. They could constitute a danger to the user and risk damage to the Cyclonic Stick Vacuum. 16. DO NOT let the adapter cord hang over the edge of a table or counter or touch hot surfaces.
-
Page 9: Safety Instructions
Safety instructions Safety instructions WARNING: Read and understand all instructions. Failure to follow all instructions listed below may result in electric shock, fire or serious personal injury. The warnings, cautions, and instruction discussed in this instruction manual cannot cover all possible conditions and situations that may occur. It must be understood by the operator that common sense and caution are a factor which cannot be built into this product, but must be supplied by the operator. -
Page 10: User Instructions
User instructions User instructions Unpack all parts from the box. NOTE: Powdery material such as flour may not be picked up easily with this unit. How to use the main body The main body makes it possible to easily clean stairways, auto interiors and other hard-to-reach areas of the home by attaching the turbo brush head or accessories to the main body. - Page 11 User instructions Place the dust container over a garbage bin and press the red dirt release button (#16) to empty the remaining of the dust container. Close the bottom flap of the dust container. How to reassemble the filter and dust container ...
- Page 12 User instructions Place the dust container lid (#8) over the filters and filter assembly and turn lid counterclockwise to ‘Lock’ into place. How to attach the dust container to main body Line up the hook on the bottom of the main body with the notch on the bottom of the dust container.
- Page 13 User instructions Plug the other end of the power adapter into a working outlet. The indicator light (#17) will flash red until the battery is fully charged. Once the red indicator light stops flashing, the vacuum is ready for use. ...
-
Page 14: Troubleshooting
Troubleshooting Troubleshooting Problem Possible reason Possible solution Does not turn on The battery is not charged Connect and charge the main body Suction is weak 1. Dust container may be full 1. Empty dust container 2. Battery is not charged 2. -
Page 15: Cleaning And Maintenance
Cleaning and maintenance Cleaning and maintenance CAUTION: Always be sure that the Cyclonic Stick Vacuum is unplugged before cleaning or attempting to store the item. NEVER IMMERSE main body in water or any other liquid. It is important to clean your Cyclonic Stick Vacuum thoroughly after each use to prevent sticky build ups that are difficult to clean later. -
Page 16: Other Useful Information
Other useful information Other useful information Technical specifications Model Number DV-888DC Rating Voltage 22.2V Nominal Power 130W Run Time when Fully Charged Approx. 20 – 25 min. Storing Allow the Cyclonic Stick Vacuum to cool completely before storing. ... - Page 17 Other useful information Contenido Lista de componentes ..........18 Contenido ............19 Ensamblaje ............19 Información general ..........22 Instrucciones de seguridad ......... 24 Modo de empleo ............. 25 Resolución de problemas ........29 Limpieza y mantenimiento ........30 Información adicional de utilidad ......31 Especificaciones técnicas ........
-
Page 18: Lista De Componentes
Lista de componentes Componentes principales 1. Cuerpo principal 2. Cabezal con cepillo turbo 3. Herramienta para resquicios/cepillo 2 en 1 4. Junta de conexión 5. Adaptador de alimentación 6. Tubo alargador 7. Botón de liberación del accesorio alargador [Cuerpo principal desmontado 8. -
Page 19: Contenido
Contenido Contenido del empaque Cabezal con cepillo turbo Poste Cuerpo principal Junta de conexión Herramienta para resquicios/cepillo 2 en 1 Adaptador de alimentación Manual de instrucciones Ensamblaje NOTA: Todos los accesorios deben alinearse para conectarse correctamente. Conexión del cabezal con cepillo turbo al tubo alargador y al cuerpo principal ... - Page 20 Contenido Conexión del cabezal con cepillo turbo al cuerpo principal Inserte el cabezal con cepillo turbo (#2) en el cuerpo principal (#1) hasta escuchar un chasquido. Para desmontar el cabezal con cepillo turbo del cuerpo principal, presione el botón de liberación de color rojo del cuerpo principal (#15) y a continuación quite el cabezal con cepillo turbo.
- Page 21 Contenido Conexión de la herramienta para resquicios/cepillo 2 en 1 al cuerpo principal Inserte la herramienta para resquicios/cepillo 2 en 1 (#3) en la junta de conexión (#4). Esta herramienta no emite un chasquido al insertarse. Inserte la junta de conexión en el cuerpo principal (#1) hasta escuchar un chasquido. ...
-
Page 22: Información General
Información general Información general Al utilizar la aspiradora escoba ciclónica, es necesario seguir unas precauciones de seguridad básicas. POR FAVOR, LEA Y GUARDE TODAS LAS INSTRUCCIONES ANTES DE USAR LA ASPIRADORA ESCOBA CICLÓNICA. 1. Es necesaria una atenta supervisión cuando el aparato se usa cerca de los niños. - Page 23 Información general 13. Utilice la batería que se incluye en el paquete. Utilizar una batería no proporcionada por el fabricante dañará el motor y podría causar lesiones. 14. No inserte las manos o utensilios en la aspiradora escoba ciclónica cuando esté...
-
Page 24: Instrucciones De Seguridad
Instrucciones de seguridad Instrucciones de seguridad ADVERTENCIA: Lea y comprenda todas las instrucciones. Si no se cumplen todas las instrucciones indicadas a continuación se pueden producir descargas eléctricas, incendios o lesiones graves. Las advertencias, precauciones e instrucciones que se detallan en este manual de instrucciones no cubren todas las condiciones y situaciones posibles que podrían suceder. -
Page 25: Modo De Empleo
Modo de empleo Modo de empleo Saque todas las piezas de la caja. NOTA: Algunas sustancias en polvo, como la harina, pueden ser difíciles de aspirar con esta unidad. Cómo usar el cuerpo principal El cuerpo principal permite limpiar con facilidad las escaleras, el interior de los automóviles y otras zonas de difícil acceso dentro del hogar con la ayuda del cabezal con cepillo turbo u otros accesorios. - Page 26 Modo de empleo Coloque el depósito de polvo (#14) boca abajo, sobre un cubo de basura, para vaciarlo. Coloque el depósito de polvo sobre un cubo de basura y presione el botón de liberación del polvo de color rojo (#16) para vaciar los contenidos restantes del depósito de polvo.
- Page 27 Modo de empleo Coloque la tapa del depósito de polvo (#8) sobre los filtros y el conjunto del filtro, y gire la tapa en sentido contrario a las agujas del reloj para ‘asegurarlo’ en su lugar. Cómo acoplar el depósito de polvo al cuerpo principal ...
- Page 28 Modo de empleo La luz indicadora (#17) parpadeará de color rojo hasta que la batería se cargue completamente. Una vez que la luz roja deje de parpadear, la aspiradora está lista para usarse. Si bien la aspiradora puede dejarse enchufada entre usos, se recomienda desenchufarla si no va a utilizarse durante periodos de tiempo prolongados.
-
Page 29: Resolución De Problemas
Resolución de problemas Resolución de problemas Problema Posible motivo Posible solución No se enciende La batería no está cargada Conecte y cargue el cuerpo principal Poder de succión 1. El depósito de polvo 1. Vacíe el depósito de reducido puede estar lleno polvo 2. -
Page 30: Limpieza Y Mantenimiento
Limpieza y mantenimiento Limpieza y mantenimiento PRECAUCIÓN: Asegúrese siempre de que la aspiradora escoba ciclónica esté desenchufada antes de limpiarla o guardarla. NO SUMERJA NUNCA el cuerpo principal en agua o cualquier otro líquido. Es importante limpiar la aspiradora escoba ciclónica a fondo después de cada uso para evitar acumulaciones pegajosas que son difíciles de limpiar después. -
Page 31: Información Adicional De Utilidad
Información adicional de utilidad Información adicional de utilidad Especificaciones técnicas Número de modelo DV-888DC Voltaje de funcionamiento 22.2 V Potencia nominal 130 W Tiempo de funcionamiento con Aprox. 20 – 25 min. la batería cargada Almacenamiento Deje que la aspiradora escoba ciclónica se enfríe completamente antes de guardarla. -
Page 33: Warranty Card
Description of malfunction: AFTER SALES SUPPORT Return your completed warranty card to: 49066 888 367 7373 Wachsmuth & Krogmann, Inc. help@myproduct.care 1015 Hawthorn Drive MODEL: DV-888DC 12/2016 Itasca, IL 60143 Customer Service Phone Hours: Monday – Friday help@myproduct.care 10:00am – 5:00pm EST... - Page 34 ALDI INC. FULL WARRANTY CONDITIONS Dear Customer: The ALDI warranty is a fully warranty offering you the following benefits: Warranty period: 2 years from date of purchase. 6 months for movable parts and consumables under normal and proper conditions of use (e.g. rechargeable batteries). Costs: Free repair/exchange or refund.
- Page 35 Envíe la tarjeta de garantía completada a: 49066 888 367 7373 Wachsmuth & Krogmann, Inc. help@myproduct.care 1015 Hawthorn Drive NO. DEL MODELO: DV-888DC 12/2016 Itasca, IL 60143 Horario de Servicio al cliente de lunes a viernes de 10:00a.m. – 5:00p.m.
- Page 36 CONDICIONES DE LA GARANTÍA COMPLETA DE ALDI INC. Estimado cliente: La Garantía ALDI es una garantía completa que le ofrece los siguientes beneficios: Período de garantía: 2 años a partir de la fecha de la compra. 6 meses para las piezas de recambio y consumibles en condiciones normales y adecuadas de uso (por ejemplo, baterías recargables).
- Page 38 DISTRIBUTED BY • DISTRIBUIDO POR: ALDI INC., BATAVIA, IL 60510 WWW.ALDI.US 49066 MODEL: DV-888DC 12/2016...
Need help?
Do you have a question about the DV-888DC and is the answer not in the manual?
Questions and answers