Table of Contents
Advertisement
Advertisement
Table of Contents

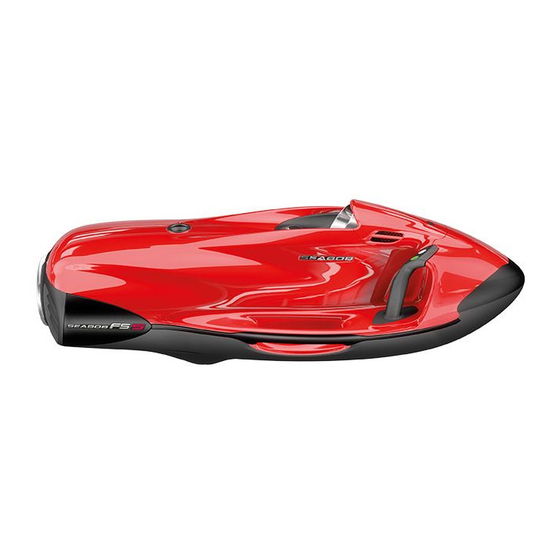
Summary of Contents for CAYAGO seabob f5 S
- Page 1 | Online Version | | Online Version | User manual...
- Page 2 SEABOB better. CAYAGO AG constantly works to optimise its products to keep pace with the advance of technology. As a result, CAYAGO AG reserves the right to change or modify the product characteristics specified in this Operation Manual at any time without prior notice.
-
Page 3: Table Of Contents
| Online Version | | Online Version | Contents 5.7 Diving to a depth of more than 2.5 m ....................... 46 1. Safety information ............................ 6 5.7.1 Setting the maximum diving depth ......................46 1.1 Special safety information ........................... 7 5.7.2 Adjusting the buoyancy of the SEABOB ....................... -
Page 4: Safety Information
"air transport / storage" • Do not burn! to avoid an irreparable total discharge • Use only chargers supplied by CAYAGO AG and for each respective specific of the valuable High-Energy Li-Ion SEABOB model! accumulator cells. -
Page 5: General Safety Information
| Online Version | | Online Version | 1.2 General safety information • Observe instructions on charging, discharging, storage and transport! General safety information concerning the user • If instructions are ignored, flammable gases can be discharged causing serious injury! •... - Page 6 | Online Version | | Online Version | • For better visibility, wear diving goggles. Attention! Despite every precaution General safety information concerning the SEABOB taken, it is still possible for diving goggles to come off during operation of the •...
- Page 7 Not doing so may result in • Use the securing device only for the pilot belt system developed by CAYAGO AG. serious injury or death. Always be prepared for a sudden change in the weather.
- Page 8 | Online Version | | Online Version | • To brake, hold on to both SEABOB Controlgrips securely, and release the • Stay away from aquatic plants and floating objects such as pieces of string, rope, Trigger in your right hand. The motor will stop, and the resistance of the plastic or wood to prevent the motor, impeller, stator and jet channel from being water will slow you down.
-
Page 9: Safety Information For Diving To A Depth Of More Than 2.5 M
| Online Version | | Online Version | 1.3 Safety information for diving to a depth of up to 2.5 m 1.4 Safety information for diving to a depth of more than 2.5 m In addition to the safety information provided above, be sure to observe the following information when In addition to the safety information provided above, be sure to observe the following information when diving to a depth of up to 2.5 m: diving to a depth of more than 2.5 m:... -
Page 10: Safety Information Concerning The Accumulators
Operation Manual (see Chapter 5.2 "Charging the SEABOB"). • Regardless of whether you are using the SEABOB while scuba diving, you should • Only use chargers supplied by CAYAGO AG and for each respective specific always adhere to the recommended descent and ascent rates and maximum div- SEABOB model. -
Page 11: Proper Use
| Online Version | | Online Version | 2. Proper use The following regulations apply to operation of the • Carry out charging in a place in the shade that is dry, cool and well ventilated. SEABOB: When using the SEABOB, it is imperative that you Ensure that the device is sufficiently protected from the sun. -
Page 12: Registration Papers / Driving Licence
1. SEABOB F5 S only the charger supplied by CAYAGO AG or the option- licence regulations, age limits or operating restrictions. up to, and including, wind force 4 and significant wave ally available quick charger to charge the SEABOB. -
Page 13: Description Of The Device
| Online Version | | Online Version | 4. Description of the device 4.2 Right Controlgrip 4.1 SEABOB housing 1. Trigger 2. Green button 3. Silver button 4.3 Left Controlgrip 1. SEABOB housing 2. SEABOB bow 1. Red button 3. Jet channel (water intake) 2. -
Page 14: Right Controlgrip
"air transport / storage". Use for each respective specific SEABOB model. at least 10 A. only the charger supplied by CAYAGO AG or the option- During the charging process, do not place any objects ally available quick charger to charge the SEABOB. -
Page 15: Operation
| Online Version | | Online Version | the SEABOB do not have a memory effect. This makes it Before charging, always dry the connection port and possible to charge the SEABOB regardless of its charge connector using a soft, clean cloth and / or cotton swab, state and without having to discharge it beforehand. -
Page 16: Operating The Seabob
| Online Version | | Online Version | 5.3 Operating the SEABOB 5.3.1 Controls and display panel 5.3.2 Arrangement of the controls 5.3.3 Using the controls Never run the motor out of the water for longer 1. Green button = plus button or scroll up The buttons used on the SEABOB are high-quality, water- than approx. -
Page 17: Information Display
| Online Version | | Online Version | 5.3.4 Information display In the event of a malfunction, additional symbols may Time Display: Timer: appear in the middle field. Below is a list of these sym- The graphic display is divided into three fields. Dur- Tap the blue button on the right Controlgrip while the Tap the blue button on the right Controlgrip while the bols and their descriptions:... -
Page 18: Off Mode (Air Transport / Storage) – Switching On / Off
| Online Version | | Online Version | 5.3.5 Off mode (air transport / storage) – 5.3.6 Sleep mode / On mode – switching For this reason, you should follow the instruc- Manual switching off to Sleep mode: tions given in Chapter 5.10 "Storing the SEABOB" switching on / off on / off You can also switch the SEABOB to Sleep mode manually. -
Page 19: Charge Mode
| Online Version | | Online Version | 5.3.7 Charge mode 5.3.8 Charge display 5.3.9 Displaying serial numbers 6. If programmed to partial charging for air transport / storage, an aircraft symbol will appear when the cor- The charger is connected to the device and is supplying 1. -
Page 20: Settings (Menu)
| Online Version | | Online Version | 5.3.10 Entering PIN (Owner-PIN / User- 5.3.11 Settings (menu) To enter the PIN, you must use the four buttons and 4. Switch between the menu items (upper menu level) confirm your entry with the Trigger: with the green or red button. -
Page 21: Operation
| Online Version | | Online Version | 5.3.12 Operation 5.4 Before starting For safety reasons, the depth limit ("diving Charge the SEABOB after each use (within 24 depth") is automatically reset to the default set- hours) to at least the charge state "air transport / 1. -
Page 22: Operation On The Water Surface
| Online Version | | Online Version | 5.5 Operation on the water surface 5.5.1 How to navigate your SEABOB 7. After a successful function check, tap the red button Always start in the lowest gear and move off from on the left Controlgrip once, until the power is dis- a stationary position with a maximum power of Both before and during operation, observe... -
Page 23: Seabob Charge State And Emergency Reserve
| Online Version | | Online Version | 5.5.2 SEABOB charge state and 5.6 Diving to a depth of 2.5 m 5.6.1 How to dive with your SEABOB Practise turning the craft at low speeds until you are able to control the SEABOB with ease. Danger emergency reserve In addition to the safety information and in- 1. -
Page 24: Diving To A Depth Of More Than 2.5 M
| Online Version | | Online Version | 5.7 Diving to a depth of more than 2.5 m 5.7.1 Setting the maximum diving depth 5.7.2 Adjusting the buoyancy of the For safety reasons, the factory-set depth limit of 2.5 m can only be changed by first entering SEABOB Be sure to read the safety information and The diving depth limit is factory set to 2.5 m (depth limit... -
Page 25: After Use
| Online Version | | Online Version | 5.8 After use 5.9 Switching off the SEABOB to Sleep 5.10 Storing the SEABOB When cleaning the SEABOB, never stand it upright on the front bumper or on the water outlet of the mode 1. -
Page 26: Air Transport / Transport Of The Seabob
| Online Version | | Online Version | 5.11 Air transport / transport of the 8. You can now disconnect the charger from the SEABOB Irrespective of the trickle charge, the status of the SEABOB for air transport / transport. A partially filled (first pull the mains plug from the mains socket, then charging process must be checked at least every charge symbol will appear in the centre of the display... -
Page 27: Switching Off The Seabob For Storage Or Transport
| Online Version | | Online Version | 5.12 Switching off the SEABOB for for partial charging by running the SEABOB to empty in motor vehicle or boot. If exposed to heat, flammable a controlled fashion. Operate the SEABOB (while in the gases can be discharged causing serious injury. -
Page 28: Cleaning The Seabob
| Online Version | | Online Version | 6. Care 6.1 Cleaning the SEABOB 6.2 Changing the screw cap leaving any scratches on the sealing surfaces or con- tact surfaces. Clean and dry off sealing / contact sur- When cleaning the SEABOB, never stand it upright Even minute damage or dirt on the screw cap can Repairs and maintenance work on the SEABOB faces by blowing them out or using a soft cloth and /... -
Page 29: Troubleshooting
| Online Version | | Online Version | 7. Troubleshooting 7.1 SEABOB cannot be switched on 7.2 Motor does not run 7.3 Warning and error message of the electronics If you cannot switch on the SEABOB, either the SEABOB • Check the charge state of the SEABOB by checking Repairs and maintenance work on the SEABOB is completely discharged / run to empty or it has been to see if the display functions. -
Page 30: Impeller Does Not Turn (No Thrust)
| Online Version | | Online Version | 7.4 Impeller does not turn (no thrust) 7.5 Trigger does not function properly 7.6 Moisture present in connection port 7.7 SEABOB cannot be charged Check whether any foreign objects such as aquatic 1. -
Page 31: Technical Specifications
| Online Version | | Online Version | 8. Technical specifications Special motor sealing case Accumulators Dimensions • Multiple-stage sealing rings for redundant seal ef- High-Energy Lithium-Ion accumulator cells; approx. L x W x H: 1,152 mm x 507 mm x 372 mm All specifications are only intended for use in describing fect throughout the sealing system 1.8 kWh;... - Page 32 Bezeichnung, Typ oder Modell, Los- oder Seriennummer / Name, type or model, batch or serial number: Care SEABOB F5 S No special maintenance is required if the instructions mit den Vorschriften folgender Europäischer Richtlinie(n) übereinstimmt / complies with the requirements of the following European...
-
Page 33: Replacement Parts
End users are obliged by law to return used batteries. Devices with accumulators which are faulty or no longer provide adequate power may be returned free of charge to CAYAGO AG for proper disposal and recycling. Please send returns to: CAYAGO AG Produktion Leibnizstr. -
Page 34: Service
| Online Version | 11. Accessories 12. Service For service or repairs, please contact • Quick charger CAYAGO AG: (wide range input 100-240 V; 51 V; 28 A) • SEABOB Bag • by e-mail at service@seabob.com • SEABOB Rack • by phone at +49 (0)52 22- 8 03 50- 11 / -41 •... -
Page 35: Imprint
+49 (0)7 11- 99 33 97-33 info@seabob.com www.seabob.com As of 07/2014 © 2014 CAYAGO AG Copying, transmitting, storing or translating this Opera- tion Manual in any shape or form, whether in part or whole, is not permitted without the prior written consent of CAYAGO AG. - Page 36 | Online Version | www.seabob.com...
Need help?
Do you have a question about the seabob f5 S and is the answer not in the manual?
Questions and answers