Table of Contents
Advertisement
LUVOX
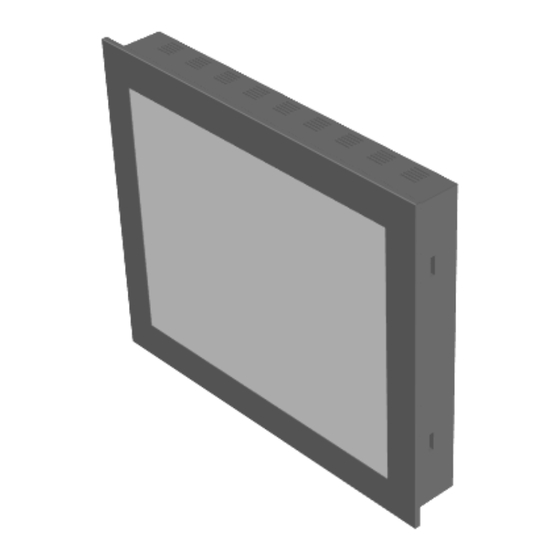
LCD MONITORS
ALL-IN-ONE SYSTEMS
INFORMATION GUIDE
REVISION 0.08 - JV April 27, 2010
Menu
Cleaning
Precautions
OSD functions
Connector layout
5. LCD Monitor Product Specifications
6. All-In-One systems
Description
Connector layout
Accessing main board area
AIO (default) BIOS settings
Storage setups
7. LUVOX Panel Mount Installation
Securing with Front Mount Brackets
Securing with Side Skirt Bolts
8. LUVOX optional features
ProLine
IP65 front
Rack Mount Bezel
Rear Mount Brackets
9. LUVOX Product Identification
Appendix: LUVOX Dimensional Drawings
- 1 -
Page.3
Page.3
Page.3
Page.5
Page.5
Page.7
Page.11
Page.14
Page.16
Page.16
Page.17
Page.18
Page.19
Page.23
Page.25
Page.25
Page.26
Page.32
Page.32
Page.34
Page.40
Page.43
Page.50
Page.53
Page.54
Advertisement
Table of Contents

Summary of Contents for Luvox F100
-
Page 1: Table Of Contents
Connector layout Page.17 Accessing main board area Page.18 AIO (default) BIOS settings Page.19 Storage setups Page.23 7. LUVOX Panel Mount Installation Page.25 Securing with Front Mount Brackets Page.25 Securing with Side Skirt Bolts Page.26 8. LUVOX optional features Page.32 ProLine Page.32... -
Page 2: Important Information Page.2
Introduction Important Safety Instructions Description Congratulations on the purchase of your new LUVOX device. Each LUVOX professional LCD monitor or All-In-One system features a color active matrix thin-film-transistor (TFT) liquid crystal display Caution: To prevent electric shock, please do not remove any to provide superior display performance with resolutions from covers or any internal components. -
Page 3: Standard Product Features Page.4
If the equipment is not used for a long time, disconnect it • delivered as documentation with your LUVOX all-in-one system. from the power source. More detailed information about ELO and the optionally integrated touch screen technologies can be found on the ELO website: www.elotouch.com... -
Page 4: Lcd Monitor Control Functions Page.6
2. Press UP / DOWN to navigate 3. Press SELECT to adjust value with UP / DOWN LUVOX F100 & F120 LCD monitor series control keys: 4. return to previous level with MENU (menu – select – power – down – up) - Page 5 4. return to previous level with MENU Miscellaneous Hue: Adjusts NTSC phase (NTSC only) 1. In the main menu select MISCELANNEOUS Saturation: Adjusts color level (NTSC & PAL) 2. Press UP / DOWN to navigate 3. Press SELECT to adjust value with UP / DOWN Sharpness: Calibrate image focus (NTSC &...
-
Page 6: Osd Overview Page.10
USB or RS232 port (for touch monitors only): ports to be connected to your PC for touch functionality. NOTE: LUVOX professional monitors have a broad range of optional features available. This means your monitor could have extra connectors available for different purpose. -
Page 7: Driver Installation Page.12
Driver installation Touch Alignment (Calibration) Each LUVOX device can be equipped with an ELO touch screen. The touch response must be aligned to the video image (this is called calibration). Normally this is done when the touch drivers The 4 ELO touch technologies adapted in LUVOX devices are: are initially installed. -
Page 8: Lcd Monitor Specifications
LCD Monitor Specifications Specification/Model Standard F100 Standard F120 Standard F150 Standard F170 Standard F190 Panel Type VGA TFT SVGA TFT XVGA TFT SXVGA TFT SXVGA TFT Recommended Res. 640x480 800x600 1024x768 1280x1024 1280x1024 15.0 17.0 19.0 Screen Diagonal Size 10.4 12.1... - Page 9 LUVOX AIO (All-In-One) systems (Chapter applies to standard LUVOX All-In-One systems only) Description LUVOX models F150, F170 and F190 can be equipped with a MINI-ITX embedded industrial grade motherboard. This creates major advantages compared with traditional setups of PC and monitors connected over VGA like smaller application designs and reduced hardware costs.
- Page 10 Accessing main-board area LUVOX AIO Default BIOS settings Although a LUVOX AIO system contains no user serviceable parts It is important to know what to understand under default BIOS inside, it may be desired for users to have access to the main settings.
- Page 11 [None] and ‘Halt On’ should be toggled to [No Errors] RAM). In order to have the internal LCD functioning you must define the LCD panel type that is integrated. A LUVOX AIO F150 ‘Panel Number’ should be [6] for newer devices or [3] for devices made before February 2006.
- Page 12 Storage setups The Hard disk / Storage configuration of a LUVOX AIO device is available in 4 setups. 1. 80GB Internal Hard Disk Drive (IDE) 2. 4GB Internal Flash Drive (Single Internal TrueIDE mode Compact Flash socket & 4GB industrial grade TrueIDE mode UDMA CF Card included) No Hard Disk Drive 3.
- Page 13 Open the main-board area as described on page 19. Once you have removed the cover you can access the internal CF Socket: LUVOX devices are designed as panel mount devices. This means the device is inserted into the dedicated cutout from the front side of the enclosure and subsequently secured from the backside.
- Page 14 We advice this way of securing when the enclosure’s material is sheet metal or any other material with a thickness between 1 and 3 mm. Use the free M3 holes in the side skirts of your LUVOX device to secure the device.
- Page 15 LUVOX F120 Panel Mount Cutout LUVOX F150 Panel Mount Cutout - 28 - - 29 -...
- Page 16 LUVOX F170 Panel Mount Cutout LUVOX F190 Panel Mount Cutout - 30 - - 31 -...
- Page 17 (applies to models F150, F170 & F190 only, AIO systems & LCD Monitor) LUVOX devices are kept on stock in large quantities for each standard model. This way we are able to ship standard models within 10 workdays max. However, some optional features require...
- Page 18 *NOTE: IP65 fronts for models F100 and F120 may exist but are to creep currents, come in contact with live parts or coils only produced in project based custom series.
- Page 19 LUVOX devices with IP65 front are designed to be even more LUVOX F150 IP65 Layout tough and rugged, the IP65-rated fronts are ideal for use in harsh, wet and dusty environments or high hygienic , such as: Food and beverage •...
- Page 20 LUVOX F170 IP65 Layout LUVOX F190 IP65 Layout NOTE: Use cutout of 462 x 394mm and 20 x ø 7mm holes NOTE: Use cutout of 413 x 350mm and 16 x ø 7mm holes (3D) CAD drawings available on request .
- Page 21 Installation LUVOX F150 and F170 devices (AIO and LCD monitors) are Rack-mount bezels for LUVOX devices are retrofit options and are configurable with a retro-fit black powder coat finished rack- user-assembled.
- Page 22 LUVOX devices are designed as panel mount solutions. Although, help users touching in corners. Rounding or chamfering the when allowed by the application in terms of space, LUVOX (AIO edges of the aperture will also increase touching comfort. and LCD monitors) devices can be mounted in a rear mount...
- Page 23 LUVOX F100 Rear-Mount Layout LUVOX F120 Rear-Mount Layout NOTE: Advised aperture size in front panel: 186 x 247.5mm NOTE: Advised aperture size in front panel: 160 x 212.5mm - 44 - - 45 -...
- Page 24 LUVOX F150 Rear-Mount Layout LUVOX F170 Rear-Mount Layout NOTE: Advised aperture size in front panel: 230 x 306mm NOTE: Advised aperture size in front panel: 272 x 340mm - 46 - - 47 -...
- Page 25 LUVOX F190 Rear-Mount Layout LUVOX Product Identification Each LUVOX device (monitors and All-In-One systems) is identified uniquely. Next labels always refer to your device: LUVOX device Label LUVOX Box label MS Windows Certificate of Authenticity (Optional for AIO systems) NOTE: Advised aperture size in front panel: 303 x 378mm...
- Page 26 • consistent rule followed by a set of numbers and characters. The Standard(N) or ProLine(E). intent should be, that every party is able to identify a LUVOX The 10 column is the operating voltage of the device (please, •...
-
Page 27: Luvox Service Information
Warranty period is standard 1 year from date of purchase for all LUVOX devices sold before 31/12/2009. This warranty period is extended to 3 years standard from date of purchase for all LUVOX devices sold after 01/01/2010. Warranty is only valid when the device is judged to be defective by reason of improper workmanship and/or materials. - Page 28 - 54 - - 55 -...
- Page 29 NOTE: LUVOX AIO devices increase 30mm in depth NOTE: LUVOX AIO devices increase 30mm in depth - 56 - - 57 -...
- Page 30 NOTE: LUVOX AIO devices increase 30mm in depth - 58 -...
Need help?
Do you have a question about the F100 and is the answer not in the manual?
Questions and answers