
Related Manuals for Vision Fitness T60


Summary of Contents for Vision Fitness T60
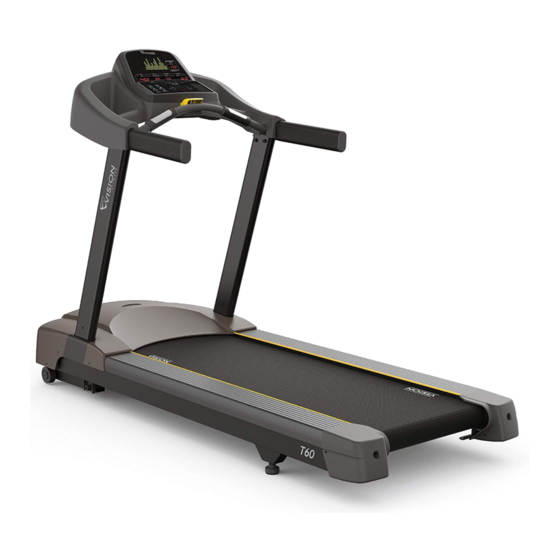
- Page 1 IT ALL STARTS WITH A VISION IT ALL STARTS WITH A VISION FITNESS™ T 6 0 T R E A D M I L L S E R V I C E M A N U A L...
-
Page 2: Table Of Contents
TABLE OF CONTENTS CHAPTER 1: SERIAL NUMBER LOCATION ..............CHAPTER 2: IMPORTANT SAFETY INSTRUCTIONS Before Getting Started ....................2 Read and Save These Instructions ................3 Electrical Requirements .................... 4 CHAPTER 3: PREVENTATIVE MAINTENANCE Maintenance and Cleaning Tips ................5 Centering and Tensioning the Running Belt ............. - Page 3 TABLE OF CONTENTS Motor Control Board (MCB) Replacement ..............35 Motor Replacement ....................36 7.10 Incline Motor Replacement ..................37 7.11 Console Replacement ....................38 7.12 Emergency Stop Assembly Replacement ..............39 7.13 Console Frame Replacement ..................40 7.14 Heart Rate Board Replacement ................. 41 7.15 Testing the Treadmill ....................
-
Page 4: Chapter 1: Serial Number Location
CHAPTER 1: SERIAL NUMBER LOCATION 1.1 SERIAL NUMBER LOCATION... -
Page 5: Chapter 2: Important Safety Instructions
Please do not place the Vision Fitness T60 Treadmill in an area of high humidity, such as the vicinity of a steam room, indoor pool, or sauna. Exposure to intensive water vapor or chlorine could adversely affect the electronics, as well as other parts of the machine. -
Page 6: Read And Save These Instructions
CHAPTER 2: IMPORTANT SAFETY INFORMATION 2.2 READ AND SAVE THESE INSTRUCTIONS To ensure proper use of the Vision Fitness T60 Treadmill, make CAUTION! If you experience chest pains, nausea, dizziness, sure that all users read this manual. Remind the users that before... -
Page 7: Electrical Requirements
2.3 ELECTRICAL REQUIREMENTS The Vision Fitness T60 Treadmill requires a dedicated line sized according to the electrical configurations listed in the chart below. It is particularly important that no sensitive electrical equipment, such as a computer or a TV shares the same circuit. -
Page 8: Chapter 3: Preventative Maintenance
3.1 MAINTENANCE AND CLEANING TIPS The Vision Fitness T60 Treadmill is built for use in the light commercial environment (up to 8 hours a day, 7 days a week). However, as a club manager or owner, you are responsible for cleaning and maintaining the unit's integrity. If you fail to maintain the treadmill as described below, it could affect or void the Johnson Limited Warranty. -
Page 9: Centering And Tensioning The Running Belt
CENTERING THE BELT: The Vision Fitness T60 is built with a crowned roller to ensure proper tracking of the belt in the center of the deck. When you run or walk, you may push off harder with one foot than the other. This uneven deflection can cause the belt to move off center. Occasionally, the belt may need further adjustment to keep it centered. -
Page 10: Auto Calibration Procedure
AUTO CALIBRATION PROCEDURE: The Vision Fitness T60 should be auto calibrated after assembly, the replacement of any electronic component, or the replacement of the incline motor. Follow the procedure below to run auto calibration. If the auto calibration fails, contact Vision Fitness Customer Technical Support. -
Page 11: Chapter 4: Console Overlay And Workout Description
CHAPTER 4: CONSOLE OVERLAY AND WORKOUT DESCRIPTION 4.1 CONSOLE DESCRIPTION CONSOLE DISPLAY A. Workout Profile Window: During a workout, intervals, hills, and valleys appear in this window as rows of lights stacking in columns. The number of lit rows within a column corresponds to an incline percentage. B. -
Page 12: Workout Tips
WORKOUT TIPS * Vision Fitness strongly recommends seeing a physician for a complete medical exam before undertaking an exercise program. If at any time while exercising, the user experiences faintness, dizziness, pain, or shortness of breath, he or she must top immediately. -
Page 13: Workout Overview
CHAPTER 4: CONSOLE OVERLAY AND WORKOUT DESCRIPTION 4.3 WORKOUT OVERVIEW WORKOUT OVERVIEW PROGRAM DESCRIPTION DEFAULT PROMPT PROGRAM TIME INPUT CONTROL QUICK START Quick Start is the fastest way to begin exercising and bypasses the setup prompts. After pressing the Quick Start key, a constant level workout begins, and the speed and incline do not change automatically. -
Page 14: Chapter 5: Manager Mode
CHAPTER 5: MANAGER MODE 5.1 USING MANAGER MODE The Manager Mode allows the owner to customize the treadmill for the club. 1) To enter Manager Mode, press and hold down the INCLINE DOWN and SPEED DOWN keys at the same time for 3-5 seconds (Figure A). 2) The display will read Manager Menu. - Page 15 CHAPTER 5: MANAGER MODE 5.1 USING MANAGER MODE - CONTINUED CUSTOM SETTINGS DEFAULT MINIMUM MAXIMUM DESCRIPTION MAX TIME This option enables fitness club managers to set the program max workout duration limits during peak and non- peak hours of the club traffic. Active variable displayed in the Time display after change.
-
Page 16: Chapter 6: Troubleshooting
CHAPTER 6: TROUBLESHOOTING 6.1 ELECTRICAL DIAGRAMS... - Page 17 CHAPTER 6: TROUBLESHOOTING 6.1 ELECTRICAL DIAGRAMS P23 - Digital Communication Wire...
-
Page 18: Lcb Wiring Instructions
CHAPTER 6: TROUBLESHOOTING 6.2 MCB WIRING INSTRUCTIONS MCB WIRING INSTRUCTIONS W - Motor Wire (black) V - Motor Wire (white) U - Motor Wire (red) L - Power Input (black) N - Power Input (white) JP3 - Console Cable JP4 - Elevation Motor Cable... -
Page 19: Mcb Led Placement And Definitions
CHAPTER 6: TROUBLESHOOTING 6.3 MCB LED PLACEMENT AND DEFINITIONS PWM - Console PWM signal light (when the motor is running, the light should flash). COM - Digital communication light. FAULT - The machine has stopped due to any C class error. UP / DOWN (FF) - Incline motor status light. -
Page 20: Ucb Wiring Instructions
CHAPTER 6: TROUBLESHOOTING 6.4 UCB WIRING INSTRUCTIONS UCB WIRING INSTRUCTIONS J5 - Hand Pulse Receiver J6 - Built In Heart Rate Receiver J17 - Emergency Stop Key J19 - Digital Communication Wire Port... -
Page 21: Troubleshooting - Error Messages On The Console
CHAPTER 6: TROUBLESHOOTING 6.5 ERROR MESSAGES ON THE CONSOLE Class Error Description Conditioned Solution Level Code 0140 Incline motor operation fail. When the elevation is supposed to move, 1. Check connection of the elevation motor. it does not. When the error happens, the 2. -
Page 22: Troubleshooting - Error 0140 / 01A0
CHAPTER 6: TROUBLESHOOTING 6.6 TROUBLESHOOTING - ERROR 0140 / 01A0 ERROR 0140 / 01A0 POSSIBLE CAUSES: 1) Elevation motor has failed. SOLUTION: 1) Check the elevation motor cable connection at the MCB. 2) Press and hold INCLINE DOWN and SPEED DOWN to enter Manager Mode. a. -
Page 23: Troubleshooting - Error 01A4 / 01A5 / 01A6
CHAPTER 6: TROUBLESHOOTING 6.7 TROUBLESHOOTING - ERROR 01A4 / 01A5 / 01A6 ERROR 01A4 / 01A5 / 01A6 POSSIBLE CAUSES: 1) 01A4 - Main motor U phase disconnected. 2) 01A5 - Main motor V phase disconnected. 3) 01A6 - Main motor W phase disconnected. SOLUTION 1) Check the connection of the motor cable at the MCB. -
Page 24: Troubleshooting - Error 01A8 / 01Ad / 02B6 / 02B7 / 02B8
CHAPTER 6: TROUBLESHOOTING 6.8 TROUBLESHOOTING - ERROR 01A8 / 01AD / 02B6 / 02B7 / 02B8 ERROR 01A8 / 01AD / 02B6 / 02B7 / 02B8 POSSIBLE CAUSES: 1) 01A8 - Main motor over current (7 Amps). 2) 01AD - Inner electron over temperature. Motor over loading. 3) 02B6 - Speed up is over current. -
Page 25: Troubleshooting - Error 02A0 / 02A8
CHAPTER 6: TROUBLESHOOTING 6.10 TROUBLESHOOTING - ERROR 02A0 / 02A8 ERROR 02A0 / 02A8 POSSIBLE CAUSES: 1) 02A0 - Main motor failure. The belt does not move when it is supposed to. 2) 02A8 - Inverter circuit of the drive motor failed. Motor resistance is closed. SOLUTION 1) Check the connection of the motor cable at the MCB (Figure A). -
Page 26: Troubleshooting - Error 02A1 / 02A2
CHAPTER 6: TROUBLESHOOTING 6.11 TROUBLESHOOTING - ERROR 02A1 / 02A2 ERROR 02A1 / 02A2 POSSIBLE CAUSES: 1) 02A1 - Over AC power input voltage. 2) 02A2 - Over / low DC bus voltage. SOLUTION: 1) Check the incoming power to the treadmill. 2) Replace the MCB. -
Page 27: Troubleshooting - Error 02B5
CHAPTER 6: TROUBLESHOOTING 6.13 TROUBLESHOOTING - ERROR 02B5 ERROR 02B5 POSSIBLE CAUSES 1) 02B5 - Inverter senses the normal rated current is over 10.5 Amps for at least 60 seconds. SOLUTION: 1) Check the 3 wires of the motor cable for resistance. With a multi-meter set for Ohms, place the terminals on pins 1 & 2, 2 & 3, and 3 & 1 of the motor cable. -
Page 28: Troubleshooting - Error 02B9 / 02Ba / 02Bc / 02Bd
CHAPTER 6: TROUBLESHOOTING 6.14 TROUBLESHOOTING - ERROR 02B9 / 02BA / 02BC / 02BD ERROR 02B9 / 02BA / 02BC / 02BD POSSIBLE CAUSES: 1) 02B9 - The inner memory IC data write error. 2) 02BA - The inner memory IC data read error. 3) 02BC - Ground connection or fuse error. -
Page 29: Troubleshooting - Heart Rate Issues
CHAPTER 6: TROUBLESHOOTING 6.16 TROUBLESHOOTING - HEART RATE ISSUES HEART RATE ISSUES POSSIBLE CAUSES: a. HR grips are bad causing no heart rate. b. HR board or ground is bad causing no or high heart rate. SOLUTION: a. With a multi meter set for DC Voltage, place one prong of the multi meter on each of the HR plates on the handlebar (Figure A). A correctly connected HR grip will have a DC Voltage reading of between 0.5 and 2.0. -
Page 30: Troubleshooting - No Power To The Console
CHAPTER 6: TROUBLESHOOTING 6.17 TROUBLESHOOTING - NO POWER TO THE CONSOLE NO POWER TO THE CONSOLE POSSIBLE CAUSES: 1) The unit is not getting power from the outlet. 2) The MCB is not getting power from the power receptacle. 3) The MCB LEDs are lit, but there is no power to the console. SOLUTION: 1-2) Remove the front cover and check to see if LED 12V is lit on the MCB (Figure A). -
Page 31: Chapter 7: Part Replacement Guide
CHAPTER 7: PART REPLACEMENT GUIDE 7.1 MOTOR COVER REPLACEMENT 1) Turn off power and disconnect the cord from the unit. 2) Remove the 8 screws holding the motor cover to the frame (Figures A & B). FIGURE B FIGURE A 3) Pull up on the motor cover and remove it (Figure C). -
Page 32: Rear Roller Replacement
CHAPTER 7: PART REPLACEMENT GUIDE 7.2 REAR ROLLER REPLACEMENT 1) Remove both rear roller end caps using a Phillips screwdriver (Figures A & B). FIGURE A FIGURE B 2) Remove both roller adjustment screws using an 8mm Allen Wrench (Figure C). 3) Remove the rear roller from the running belt (Figure D). -
Page 33: Side Rail Replacement
CHAPTER 7: PART REPLACEMENT GUIDE 7.3 SIDE RAIL REPLACEMENT 1) Remove the motor cover as outlined in Section 7.1. 2) Remove the rear roller end cap using a Phillips screwdriver (Figures A & B). FIGURE A FIGURE B 3) Remove the rear roller end cap bracket using a 3mm Allen Wrench (Figure C). 4) Slide the side rail off the back of the treadmill (Figure D). -
Page 34: Front Roller Replacement
CHAPTER 7: PART REPLACEMENT GUIDE 7.4 FRONT ROLLER REPLACEMENT 1) Remove the motor cover as outlined in Section 7.1. 2) Use a hook or loop of wire to remove the spring from the drive belt tensioner (Figure A). 3) Remove the mounting bolt of the tension wheel set using a 5mm Allen Wrench (Figure B). Be careful to hold the tension wheel set as it will drop once the mounting bolt is removed. -
Page 35: Deck Replacement
CHAPTER 7: PART REPLACEMENT GUIDE 7.5 DECK REPLACEMENT 1) Remove the motor cover as outlined in Section 7.1. 2) Remove the side rails as outlined in Section 7.3. 3) Remove the 4 deck screws using a 5mm Allen Wrench (Figure A). 4) Remove the deck from the running belt (Figure B). -
Page 36: Running Belt Replacement
CHAPTER 7: PART REPLACEMENT GUIDE 7.6 RUNNING BELT REPLACEMENT 1) Remove the motor cover as outlined in Section 7.1. 2) Remove the rear roller as outlined in Section 7.2. 3) Remove the front roller as outlined in Section 7.4. 4) Remove the deck as outlined in Section 7.5. 5) Remove the running belt and replace it with a new belt (Figure A). -
Page 37: Deck Elastomer Replacement
CHAPTER 7: PART REPLACEMENT GUIDE 7.7 DECK ELASTOMER REPLACEMENT 1) Remove the deck as outlined in Section 7.4. 2) Hold the elastomer bolt with a 5mm Allen Wrench while loosening the elastomer nut with a 13mm wrench and remove the deck elastomer (Figure A). -
Page 38: Motor Control Board (Mcb) Replacement
CHAPTER 7: PART REPLACEMENT GUIDE 7.8 MOTOR CONTROL BOARD (MCB) REPLACEMENT 1) Turn off power and remove the power cord from the unit. 2) Remove the motor cover as outlined in Section 7.1. 3) Cut any wire ties that are secured to the MCB frame (Figure A). 4) Remove the wire connections to the MCB (Figure B). -
Page 39: Motor Replacement
CHAPTER 7: PART REPLACEMENT GUIDE 7.9 MOTOR REPLACEMENT 1) Turn off power and remove the power cord from the unit. 2) Remove the motor cover as outlined in Section 7.1. 3) Use a hook or loop of wire to remove the spring from the drive belt tensioner (Figure A). 4) Remove the mounting bolt of the tension wheel set using a 5mm Allen Wrench (Figure B). -
Page 40: Incline Motor Replacement
CHAPTER 7: PART REPLACEMENT GUIDE 7.10 INCLINE MOTOR REPLACEMENT 1) Turn off power and remove the power cord from the unit. 2) Remove the motor cover as outlined in Section 7.1. 3) Lift up the treadmill and support the front end so that the front wheels are off of the floor (Figure A). The treadmill could also be tipped on its side. -
Page 41: Console Replacement
CHAPTER 7: PART REPLACEMENT GUIDE 7.11 CONSOLE REPLACEMENT 1) Turn off power and remove the power cord from the unit. 2) Remove the 4 screws holding the console faceplate to the frame (Figure A). 3) Pull up on the console faceplate (FIgure B). FIGURE A FIGURE B 4) Disconnect the console cable, emergency stop wire, and heart rate wiring from the defective console and remove it (Figure C). -
Page 42: Emergency Stop Assembly Replacement
CHAPTER 7: PART REPLACEMENT GUIDE 7.12 EMERGENCY STOP SWITCH REPLACEMENT 1) Turn off power and remove the power cord from the unit. 2) Remove the console as outlined in Section 7.11. 3) Remove the 2 screws holding the yellow emergency stop key to the emergency stop frame (Figure A). 4) Remove the 2 screws holding the emergency stop frame to the console frame (Figure B). -
Page 43: Console Frame Replacement
CHAPTER 7: PART REPLACEMENT GUIDE 7.13 CONSOLE FRAME REPLACEMENT 1) Turn off power and remove the power cord from the unit. 2) Remove the console as outlined in Section 7.11. 3) Remove the emergency stop switch set as outlined in Section 7.12. 4) Remove the 8 screws holding the console frame to the handlebar frame (Figure A). -
Page 44: Heart Rate Board Replacement
CHAPTER 7: PART REPLACEMENT GUIDE 7.14 HEART RATE BOARD REPLACEMENT 1) Turn off power and remove the power cord from the unit. 2) Remove the 4 screws holding the console faceplate to the frame (Figure A). 3) Pull up on the console faceplate to locate the heart rate board on the back of the faceplate (Figure B). FIGURE A FIGURE B 4) Disconnect the wires from each side of the heart rate board (Figure C). -
Page 45: Testing The Treadmill
CHAPTER 7: PART REPLACEMENT GUIDE 7.15 TESTING THE TREADMILL ONCE THE TREADMILL OR REPLACEMENT PART IS FULLY INSTALLED AND ASSEMBLED, USE THE FOLLOWING INSTRUCTIONS TO SETUP AND TEST THE MACHINE. 1) If the treadmill was just assembled, or if any electronic component was replaced (or the console cable was unplugged for any reason), the treadmill must be auto calibrated. -
Page 46: Chapter 8: Treadmill Specifications And Assembly Guide
CHAPTER 8: TREADMILL SPECIFICATIONS AND ASSEMBLY GUIDE 8.1 TREADMILL SPECIFICATIONS CONSOLE Display Screen Workout Profile Window - 10 x 14 green LED dot matrix display Display Readout Time, Pace, Incline, Distance, Speed, Level, Calories, METs, Target HR, Actual HR, Profile Programs Manual, Interval, Goal+ (Time Goal, Distance Goal, Calories Goal), Random, Heart Rate+ (Target HR, Weight Loss - BMI Test), Fitness... -
Page 47: Unpacking The Treadmill
8.2 UNPACKING THE TREADMILL The T60 is carefully inspected before it is packaged. Carefully unpack the unit and dispose of the box material. CAUTION: This unit weighs 330 lbs / 150 kg. To avoid injury, be sure to have proper assistance to remove and move the unit. -
Page 48: Assembly Instructions
CHAPTER 8: TREADMILL SPECIFICATIONS AND ASSEMBLY GUIDE 8.3 ASSEMBLY INSTRUCTIONS STEP 1 - Remove the motor cover. Unscrew the left and right side screws (Z53) and lift the motor cover off the treadmill and set it aside. - Page 49 CHAPTER 8: TREADMILL SPECIFICATIONS AND ASSEMBLY GUIDE 8.3 ASSEMBLY INSTRUCTIONS - CONTINUED STEP 2 - Secure the left and right console mast. a. Attach the left console mast by placing it on the console mast support bracket and aligning with the mounting holes. b.
- Page 50 CHAPTER 8: TREADMILL SPECIFICATIONS AND ASSEMBLY GUIDE 8.3 ASSEMBLY INSTRUCTIONS - CONTINUED STEP 2 - Secure the left and right console mast - Continued...
- Page 51 CHAPTER 8: TREADMILL SPECIFICATIONS AND ASSEMBLY GUIDE 8.3 ASSEMBLY INSTRUCTIONS - CONTINUED STEP 3 - Attach the console to the console mast. a. Route the console cable through the right console mast and pull it out of the hole in the side of the console mast near the frame. Ask and assistant to hold the console in place while you route the cable through the console mast.
- Page 52 CHAPTER 8: TREADMILL SPECIFICATIONS AND ASSEMBLY GUIDE 8.3 ASSEMBLY INSTRUCTIONS - CONTINUED STEP 4 - Replace the motor cover a. Replace the motor cover on the treadmill using button head cross screws (Z53) to secure it. b. In order to prevent the power cord from being pressed down when the treadmill elevates up and down, it is recommended to tie up the power cord to the motor cover (shown in the picture below).
- Page 53 CHAPTER 8: TREADMILL SPECIFICATIONS AND ASSEMBLY GUIDE 8.3 ASSEMBLY INSTRUCTIONS - CONTINUED STEP 5 - FINAL ASSEMBLY - Once the assembly is complete, follow the instructions in Sections 3.2 and 7.15 to test the treadmill for function.
-
Page 54: Stabilizing The Treadmill
CHAPTER 8: TREADMILL SPECIFICATIONS AND ASSEMBLY GUIDE 8.4 STABILIZING THE TREADMILL STABILIZING THE VISION FITNESS T60 TREADMILL After positioning the Treadmill in its intended location, check its stability by attempting to shake it side to side. Shaking or wobbling indicates that your Treadmill needs to be leveled. -
Page 55: Chapter 9: Software Upgrade Guide
CHAPTER 9: SOFTWARE UPGRADE GUIDE 9.1 SOFTWARE UPGRADE INSTRUCTIONS PARTS NEEDED: 1. MSP-FET430 Gang Programmer 2. Part # MTOOL-039 3. Software A: 14 Pin B: Power Supply Specification 8-15V 300MA MSP-FET430 TOOLS 1) Connect the MSP-GANG430 hardware, PC, and console as shown in Figure A. FIGURE A... - Page 56 CHAPTER 9: SOFTWARE UPGRADE GUIDE 9.1 SOFTWARE UPGRADE INSTRUCTIONS - CONTINUED 2) Click on the GANG430 icon located in the program group specified during installation of the software (the default group is ADT430). The MSP430 FLASH Gang Programmer GUI is shown in Figure B as displayed on the screen. FIGURE B The status message in the GUI displays the message "MSP-GAMG430 Gang Processor connected."...
- Page 57 CHAPTER 9: SOFTWARE UPGRADE GUIDE 9.1 SOFTWARE UPGRADE INSTRUCTIONS - CONTINUED 4) After the first console installation is finished, you can remove the RS232 cable from the PC to MSP-GANG430 as shown in Figure D. Upgrade the other consoles using MSP-GANG430 as shown in Figure E. Press the MSP430 Start button, the "MODE" LED will glitter for about 10 seconds.
- Page 58 NOTES...
- Page 59 IT ALL STARTS WITH A VISION™ V IS ION F ITN E S S S Y STE MS C OR P. 1 6 1 0 LA N D MA R K D R IVE C OTTA GE GR O V E W I 5 35 27 U S A w w w.
Need help?
Do you have a question about the T60 and is the answer not in the manual?
Questions and answers