Table of Contents
Advertisement
Quick Links
© Copyright 2016
EVERTZ MICROSYSTEMS LTD.
5292 John Lucas Drive,
Burlington, Ontario, Canada
L7L 5Z9
Phone:
Sales Fax:
Tech Support Phone:
Tech Support Fax:
Version 1.5, June 2016
The material contained in this manual consists of information that is the property of Evertz Microsystems and is intended
solely for the use of purchasers of DreamCatcher. Evertz Microsystems expressly prohibits the use of this manual for any
purpose other than the operation of the master control switcher.
All rights reserved. No part of this publication may be reproduced without the express written permission of Evertz Microsystems
Ltd. Copies of this guide can be ordered from your Evertz products dealer or from Evertz Microsystems.
All rights reserved. No part of this publication may be reproduced without the express written permission of Evertz
Microsystems Ltd. Copies of this guide can be ordered from your Evertz products dealer or from Evertz Microsystems.
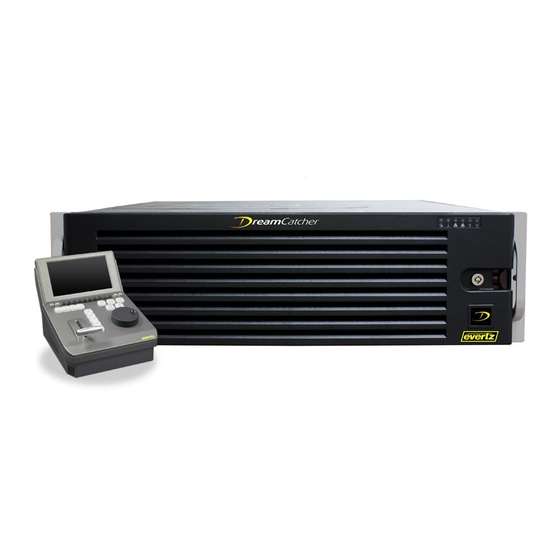
DREAMCATCHER
Replay System
Installation Guide
+1 905-335-3700
+1 905-335-3573
+1 905-335-7570
+1 905-335-7571
Internet:
Sales:
Tech Support: service@evertz.com
Web Page:
sales@evertz.com
http://www.evertz.com
Advertisement
Table of Contents

Related Manuals for evertz DreamCatcher


Summary of Contents for evertz DreamCatcher
- Page 1 The material contained in this manual consists of information that is the property of Evertz Microsystems and is intended solely for the use of purchasers of DreamCatcher. Evertz Microsystems expressly prohibits the use of this manual for any purpose other than the operation of the master control switcher.
- Page 2 This page left intentionally blank...
-
Page 3: Important Safety Instructions
IMPORTANT SAFETY INSTRUCTIONS The lightning flash with arrowhead symbol within an equilateral triangle is intended to alert the user to the presence of uninsulated “Dangerous voltage” within the product‟s enclosure that may be of sufficient magnitude to constitute a risk of electric shock to persons. The exclamation point within an equilateral triangle is intended to alert the user to the presence of important operating and maintenance (Servicing) instructions in the literature accompanying the product. - Page 4 WARNING Changes or Modifications not expressly approved by Evertz Microsystems Ltd. could void the user‟s authority to operate the equipment. Use of unshielded plugs or cables may cause radiation interference. Properly shielded interface cables with the shield connected to the chassis ground of the device must be used.
-
Page 5: Table Of Contents
INSTALLATION ......................... 3 2.1. UNPACKING ........................3 2.1.1. Equipment shipped with every DreamCatcher Server......... 3 2.1.2. Equipment shipped with every DreamCatcher Controller ........3 2.2. POWER CONSUMPTION ....................3 2.3. DREAMCATCHER SERVER CONNECTION OVERVIEW ..........4 2.4. DREAMCATCHER PANEL CONNECTION OVERVIEW ..........5 2.5. - Page 6 Figure 3-15: Touch Screen Configuration Menu ..................... 31 Figure 3-16: Web Configuration main Page ....................32 Figure 3-17: DreamCatcher Server Settings and Diagnostics Widget ............33 Figure 3-18: DreamCatcher Controller Settings and Diagnostics Menu ............34 Figure 3-19: DreamCatcher Controller Engineering Menu ................34 Figure 3-20: Data Management Section ......................
-
Page 7: Revision History
Evertz products are for informational use only and are not warranties of future performance, either expressed or implied. The only warranty offered by Evertz in relation to this product is the Evertz standard limited warranty, stated in the sales contract or order confirmation form. - Page 8 DreamCatcher Replay System This page left intentionally blank Page iv Revision 1.13...
-
Page 9: Welcome To The Revolution
Non Linear Editing software such as Final Cut Pro, AVID and Adobe Premier. This enables the user to simply extract content, edit the video using one of the NLE‟s and bring it back into DreamCatcher. Pioneer of 4K Zoom: Go tighter on the action while keeping a crystal clear picture. Deliver an immersive experience using DreamCatcher‟s advanced capture and zoom technology. -
Page 10: Dreamcatcher System Overview
DreamCatcher Replay System DREAMCATCHER SYSTEM OVERVIEW An example of a basic single server/controller setup: IMPORTANT: Ensure Ethernet 0 is always initialized and ONLY DreamCatcher Servers and DreamCatcher Controllers are connected to this network. Monitor Touch Monitor USB B Display Port 1... -
Page 11: Installation
2.1.2. Equipment shipped with every DreamCatcher Controller 1. 1x DreamCatcher Controller 2. 1x Power Cables 2.2. POWER CONSUMPTION DreamCatcher‟s power consumption maximum is 1500W with an average draw of 750W. DreamCatcher controller‟s power consumption is 65W. Page 3 Revision 1.13... -
Page 12: Dreamcatcher Server Connection Overview
DreamCatcher Replay System 2.3. DREAMCATCHER SERVER CONNECTION OVERVIEW Error! Reference source not found.1 below shows the available connections for DreamCatcher 1. Redundant power supplies 2. Serial Port - Currently unused 3. IPMI Port - Currently unused 4. 4x USB 2.0 Ports 5. -
Page 13: Dreamcatcher Panel Connection Overview
DreamCatcher Replay System Dream Catcher 2.4. DREAMCATCHER PANEL CONNECTION OVERVIEW Figure 2-2 below shows the available connections for DreamCatcher‟s Controller 1. Power supply 2. PS2 Mouse 3. PS3 Keyboard 4. Serial Port – Currently unused 5. VGA Port 6. DVI Port 7. -
Page 14: Network Connection
Cat5/Cat5e/Cat6 Cables Procedure: Use Figure 2-1, Figure 2-2, Figure 2-3 and Figure 2-4 as reference. Connect Ethernet 0 on DreamCatcher to Ethernet A/0 on the Controller directly or through a 1G Network Switch. (Optional) DC-LOGGER ETH 0 1G Isolated... -
Page 15: Distributed Systems
Connect Ethernet 2 on all DreamCatcher Servers to the IPX 10G switch. If you are distributing only 2 DreamCatcher Servers it is possible to connect the servers directly over the Ethernet 2 10G port. Page 7 Revision 1.13... -
Page 16: Figure 2-5: Distributed Dreamcatcher Control Networking
Use Figure 2-1, Figure 2-2 and Figure 2-6 as reference. If DreamCatcher needs to interact with other infrastructure equipment (i.e. routers, production switcher and engineering PCs) add a second 1G Ethernet switch. Connect Ethernet 1 on all DreamCatcher servers to the 1G Infrastructure switch. -
Page 17: Figure 2-6: Distributed Infrastructure Networking
DreamCatcher Replay System Dream Catcher DreamCatcher DreamCatcher ETH 1 ETH 1 Server 1 Controller 1 1G Infrastructure Network Switch ETH 1 DreamCatcher ETH 1 DreamCatcher Server 2 Controller 2 Figure 2-6: Distributed Infrastructure Networking Page 9 Revision 1.13... -
Page 18: Displays
DreamCatcher Replay System 2.6. DISPLAYS 2.6.1. Single Server with a Single Controller, Standard Setup Required equipment: DreamCatcher Server DreamCatcher Controller 2x Displays or Optional Touch Displays DreamCatcher Server 1 Display Port 1 Monitor Touch Monitor USB B... -
Page 19: Genlock
INPUT/OUTPUTS DreamCatcher‟s Inputs and Outputs can be dynamically configured using the web configuration application. For this reason the labelling on the back of DreamCatcher may not be accurate. Using Figure 2-1, follow these general rules for cabling inputs and outputs. -
Page 20: Figure 2-9: Din Connectors
DreamCatcher Replay System The remaining outputs will connect incrementally following output 1. The first input connection will be connected to the DIN immediately following the last output. Use Figure 2-9 and Table 2-1, Table 2-2 and Table 2-3 below for all possible Input/Output configurations. -
Page 21: Table 2-1: Possible Configurations In 720P And 1080I
For this reason the labelling on the back of DreamCatcher may not be accurate. With a high density system you have 2 sets of DIN connections. The left side represents the inputs and right side represents the outputs. The reference DIN connections Page 13 Revision 1.13... - Page 22 DreamCatcher Replay System remain the bottom two DIN. The most that can be done are 10in x 4out in a HD setup, and 8in x 2out on 1080P setup, Using 2-4, follow these general rules for cabling inputs and outputs.
- Page 23 DreamCatcher Replay System Dream Catcher 10X4 10x4 11x3 12X2 12x1 12x0 LEFT DIN IN 12 IN 12 IN 12 IN 11 IN 11 IN 11 IN 11 IN 10 IN 10 IN 10 IN 10 IN 10 IN 10 IN 9...
- Page 24 DreamCatcher Replay System LEFT DIN IN 8 IN 8 IN 8 IN 8 IN 7 IN 7 IN 7 IN 7 IN 7 IN 6 IN 6 IN 6 IN 6 IN 6 IN 6 IN 5 IN 5 IN 5...
-
Page 25: Timecode
2.10. TIMECODE DreamCatcher accepts LTC over the RS422 connector in Figure 2-1. The pin mapping is detailed in Table 2-6: LTC Pin out below. To check the status of the LTC signal follow the setup in section 3.3.1 and section 3.4.2.1 to get to DreamCatcher‟s Configuration page. -
Page 26: Configuration
Use Figure 2-1 as reference. Ensure DreamCatcher is powered off. Connect a USB keyboard into one of the 4 USB ports at the back of DreamCatcher. Connect a monitor into the DVI connector at the back of DreamCatcher. ... -
Page 27: Figure 3-3: Network Configuration Menu
You should now see the Network Configuration Menu as shown in Figure 3-3 Figure 3-3: Network Configuration Menu Ethernet 0 is reserved for the primary 1G DreamCatcher communication network used by DreamCatcher Servers and DreamCatcher Controllers. IMPORTANT: Ensure Ethernet 0 is always initialized and ONLY DreamCatcher Servers, DreamCatcher Controllers and DC-LOGGERs are connected to this network. -
Page 28: Figure 3-4: Network Configuration Menu
1G network. Ensure Ethernet 1 is initialized. Ethernet 2 will be used as primary 10G network for distributed DreamCatcher systems. If multiple DreamCatcher are being used in a distributed model this IP must be initialized. ... -
Page 29: Dreamcatcher Controller Network Configuration
DreamCatcher Replay System Dream Catcher Referring back to the Displays section in 2.6, connect your monitors to DreamCatcher now. Once all DVI, Display Port and USB connections are connected power your DreamCatcher server back on. 3.1.2. DreamCatcher Controller Network Configuration ... -
Page 30: Figure 3-6: Engineering Menu
DreamCatcher Replay System Enter the Engineering Menu by pressing the corresponding F key on the controller or using the controller touch screen. Enter the DC-RCP10 menu. Figure 3-6: Engineering Menu Next enter the Network Interfaces menu Page 22... -
Page 31: Figure 3-7: Dc-Rcp10 Settings Menu
Figure 3-7: DC-RCP10 Settings Menu Configure the eth0 (Eth A on rear of DreamCatcher Controller) menu and set all associated network settings, make sure to save using the controller “enter” key or by pressing save on the controller touch screen. -
Page 32: Dreamcatcher Controller System Configuration
Figure 3-9: DreamCatcher Server IP Menu Set Dreamcatcher‟s Server IP to the corresponding Eth 0 IP of the server for this Controller and save. Exit the IP Address of Server Menu and enter the Keyboard and Mouse Control menu Page 24 Revision 1.13... -
Page 33: Dreamcatcher Server System Configuration
Dream Catcher Figure 3-10: Keyboard and Mouse Control Settings Menu If the displays are being hosted off of DreamCatcher, set the IP Address value for keyboard and mouse controls to Dreamcatcher‟s IP and save. If a display is being hosted off of the Controller set the IP Address value for keyboard and mouse controls to 0.0.0.0. -
Page 34: Figure 3-11: Dreamcatcher Clip View
DreamCatcher Replay System Figure 3-11: DreamCatcher Clip View Page 26 Revision 1.13... -
Page 35: Figure 3-12: Dreamcatcher Clip View Part B
DreamCatcher Replay System Dream Catcher Figure 3-12: DreamCatcher Clip View part b Press CTRL-E on the keyboard to enter the Edit Mode, the system options should appear on the left side of the left most monitor as shown with Figure 3-13. -
Page 36: Figure 3-13: Dreamcatcher Edit Mode
DreamCatcher Replay System Figure 3-13: DreamCatcher Edit Mode Page 28 Revision 1.13... - Page 37 Click on the Systems Menu tab at the bottom right of the system options menu. At the top of the Systems Menu you should see a DreamCatcher Panel system, click on this item. Once in the Panel menu, enter the corresponding DreamCatcher Controller IP for the current DreamCatcher Server.
-
Page 38: Figure 3-14: Dreamcatcher Server System Menu
DreamCatcher Replay System Figure 3-14: DreamCatcher Server System Menu Page 30 Revision 1.13... -
Page 39: Touch Screen Configuration
DreamCatcher Replay System Dream Catcher 3.2. TOUCH SCREEN CONFIGURATION Ensure all USB connection and Displays are properly connected. Press SHIFT-CTRL-F11 on the keyboard to bring up the touch screen configuration dialog as shown in Figure 3-15. IMPORTANT: If your keyboard does not have a F11 key press SHIFT-CTRL-FN-F1 to... -
Page 40: Configuration Interfaces
This section is meant to show the user the 3 unique interfaces that can be used to modify system configuration. The user can log in through a web browser on the Infrastructure Network, use the Controller or change the configuration using DreamCatcher‟s user interface. 3.3.1. -
Page 41: Dreamcatcher Controller Settings And Diagnostics Menu
Press and hold the “Menu” button located at the top left of the Controller. In a moment the Settings and Diagnostics Menu should appear as shown in Figure 3-18. Once in the Settings and Diagnostics Menu select the Engineering Menu, followed by DreamCatcher‟s Server Menu. Page 33... -
Page 42: Figure 3-18: Dreamcatcher Controller Settings And Diagnostics Menu
DreamCatcher Replay System Figure 3-18: DreamCatcher Controller Settings and Diagnostics Menu Figure 3-19: DreamCatcher Controller Engineering Menu Page 34 Revision 1.13... -
Page 43: System Operation
To clear record trains without clearing clipped content select the Clear Record Trains item and confirm the clear. To clear record trains and all clipped content select the Clear DreamCatcher Data and Record Trains item and confirm clear. ... -
Page 44: Operating Video Standard And Capture Bit Rate
To clear the record trains without clearing any clipped content choose the Clear Record Trains item and confirm the clear. To clear the record trains and all clipped content choose the Clear DreamCatcher Data and Record Trains item and confirm the clear. ... -
Page 45: Figure 3-21: Dreamcatcher Configuration
Tight VNC to view these. Tight VNC allows the user to see/operate the VUE off a separate machine. On a laptop or PC connected to the DreamCatcher network, open Tight VNC. You will load the server IP address (see Figure 3-22) and it will connect you to the server and show you a VUE layout of the system (See Figure 3-23). - Page 46 DreamCatcher Replay System Figure 3-22: Tight VNC Figure 3-23: Tight VNC VUE layout Page 38 Revision 1.13...
- Page 47 DreamCatcher Replay System Dream Catcher SPLIT PANEL SYSTEM SET UP Required equipment: 1x DreamCatcher Server 2x DreamCatcher Controllers 3x Monitors 1G Ethernet Switch (Control Network) 2x DVI to DVI cables 2x USB A to B cables ...
- Page 48 On the panel, under „ENGINEERING/DC-RCP10/NETWORK INTERFACES‟, set a desired IP address (ex. 127.0.0.1) See figure 4-1. Under DREAMCATCHER SERVER SETTINGS, make sure the IP ADDRESS is set to the IP of the PRIMARY SERVER you are using. To have KEYBOARD and MOUSE control set to the IP of the SECOND Controller.
- Page 49 On Controller #2, with keyboard, mouse and MONITOR #3 connected, make sure you can access the VUE settings through „Ctrl + E‟. Navigate to „System Settings‟ and “ADD A NEW SYSTEM” (DreamCatcher Server) that points to DREAMCATCHER CONTROLLER #2 (DCRemote_1). See Figure 4-3.
- Page 50 DreamCatcher Replay System Configuring Second Server: Figure 4-4: Romote Server Setup Configuration Page 42 Revision 1.13...
- Page 51 DreamCatcher Replay System Dream Catcher Make sure there is a panel added, and that it‟s IP is set (ex. 100.100.100.116) See Figure 4-5 Figure 4-5: Panel IP address Once the above configuration is complete, you can visit the web page to set permissions for the local and remote users.See Figure 4-6.
- Page 52 DreamCatcher Replay System IMPORTANT: The Main User will have the permissions to use the Montage outputs. That is why the remote user’s montage availability is is absent. Once configured, the main user will need to load a layout. If you load „DUAL DISPLAY 4x4‟, you‟ll need to go to outputs 3 and 4, edit the settings so that the REMOTE USER is the user controlling them, and edit them so that they see output 3 and output 4.
- Page 53 DreamCatcher Replay System Dream Catcher Figure 4-7: Layout and Input/Output settings Now, access outputs 3 and 4 with the Remote Panel, as well as routing different inputs to those outputs. The system setup will now be complete. Page 45...
- Page 54 On the server, enter the Vue menu (CTRL + E) and click on the systems widget at the bottom. See Figure 4-2. Add 2 servers and change the user names (i.e. Dreamcatcher Server 1, Dreamcatcher Server 2,) See Figure 4-3 and Figure 4-4.
- Page 55 Back on the Server Multi-viewer, you need to assign Inputs and Outputs, via CTRL + E, double click the window and assign windows. (Dreamcatcher Server 1 then Output 1). See Figure 4-7. o All UMD’s and progress bars need to be assigned. Make sure you have only one clip view selected.
- Page 56 In order to use the „zoom‟ function in DreamCatcher 4K mode, you have to first ensure that your outputs are configured correctly. You‟ll need one output window set up with the proper tools for performing the actual zoom, and a second output window for showing the result of the zoom. Here...
- Page 57 In a typical 4K setup, we will have each of the FOUR quadrants coming from the 4K source (in this case, a live camera), and each of quadrants 1 – 4 will feed the DreamCatcher to INPUT 1 – 4.
- Page 58 Figure 5-2: DreamCatcher Web Configuration 5.1.1 Using Dreamcatcher in 4k mode To load the „4K‟ Dreamcatcher layout, press ‘Ctrl + e’ on the keyboard to open the „VUE Settings‟ dialogue (see Figure 3-13) Select „Load Layout‟ and double click the „4K‟ layout 5.1.2 4K Zoom Output...
- Page 59 DreamCatcher Replay System Dream Catcher Figure 5-3: Zoom control Settings Once you have set the output settings you can begin using the zoom feature. See Figure 5- The zoom features are listed below: See Figure 5-4 for Output Window View.
- Page 60 DreamCatcher Replay System o Linear: Straight line to/from keyframes o Bezier: Curved line that arches through all keyframes o Smooth: Rounds at all keyframes. 6. Key Frame A point in the record train that has been designated as part of a tracking path that has been created.
- Page 61 DreamCatcher Replay System Dream Catcher Figure 5-4: 4K Output Window Page 53 Revision 1.13...
- Page 62 DreamCatcher Replay System 6.0 DC-Logger 6.1 Unpacking Carefully remove the equipment from the boxes and check against the Packing List supplied with each unit. This shows what items have been shipped against your order and includes all options. Any error should be reported to your supplier immediately.
- Page 63 DreamCatcher Replay System Dream Catcher Figure 6-1: DC-Logger Connections - Front Figure 6-2: DC-Logger Connections – Back Page 55 Revision 1.13...
- Page 64 To connect to an infrastructure (1G Network Switch), use the USB to CAT 5 dongle though the USB Port connection. IMPORTANT: Similar to the DreamCatcher server setup, Ensure Ethernet 0 is always initialized and ONLY DC-Logger is connected to this network. Figure 6-3: DC-Logger Setup Page 56 Revision 1.13...
- Page 65 DreamCatcher Replay System Dream Catcher 6.3.2 DC-LOGGER NETWORK CONFIGURATION Use Figure 6-1 & 6-2 as reference. Ensure DC-Logger is powered off. Connect a USB keyboard into one of the 4 USB ports at the front or back of DC-Logger.
- Page 66 You should now see the Network Configuration. Menu as shown in Figure 6-6. Figure 6-6: Network Configuration Menu Ethernet 0 is reserved for the primary 1G DreamCatcher communication network used by DreamCatcher Servers and DreamCatcher Controllers. Ethernet 1 is set aside for all other infrastructure communication including router control, system monitoring, web configuration and network access across a 1G network.
- Page 67 Dream Catcher Figure 6-7: DC-Logger Output and Clip VUE Enter the Settings and Diagnostics section, under “Engineering”, under “DreamCatcher Server” you will need add the DC-Logger Local Host IP 127.0.0.1 address. See Figure 6-8. Figure 6-8: DC-Logger IP settings Page 59 Revision 1.13...
- Page 68 DreamCatcher Replay System Press CTRL-E on the keyboard to enter the Edit Mode, the system options should appear on the left side of the left most monitor as shown with Figure 6-9 Figure 6-9: DC-Logger Edit Mode Click on the Systems Menu tab at the bottom right of the system options menu.
- Page 69 DreamCatcher Replay System Dream Catcher Enter DC-Logger‟s system menu as shown in Figure 6-10 and set a unique “Username”, and 127.0.0.1 IP in the “Host” slot. Scroll down to the bottom of the menu and click save before exiting the menu.
- Page 70 10G network. The DC-Logger will now need to have a the connected DreamCatcher added to it. Go to “Settings and Diagnostics” menu and select “ Remote DreamCatcher Servers”. See Figure 6-12. Figure 6-12: DreamCather server settings Page 62 Revision 1.13...
- Page 71 Dream Catcher Here you will add the IP address of the DreamCatcher server you want to connect to. See Figure 6-13. This will now allow the DC-Logger and DreamCatcher server to speak to eachother. Figure 6-13: Remote DreamCatcher Settings Page 63 Revision 1.13...
Need help?
Do you have a question about the DreamCatcher and is the answer not in the manual?
Questions and answers