BenQ GW2470H Service Manual
Hide thumbs
Also See for GW2470H:
- User manual (44 pages) ,
- User manual (43 pages) ,
- User manual (39 pages)
Table of Contents
Advertisement
Applicable Country & Regions: Global
Service Manual for BenQ:
GW2470H
9H.LDMLA.TB*
Applicable for All Regions
Notice:
For RO to input specific "Legal Requirement" in specific NS regarding to responsibility and
liability statements.
Please check BenQ's eSupport web site, http://esupport.benq.com, to ensure that you have
the most recent version of this manual.
Second Edition (June. 2016)
©
Copyright BenQ Corporation 2016. All Right Reserved.
nd
Version: 2
Date: 6-22-2016
1
Advertisement
Table of Contents

Related Manuals for BenQ GW2470H


Summary of Contents for BenQ GW2470H
- Page 1 Notice: For RO to input specific “Legal Requirement” in specific NS regarding to responsibility and liability statements. Please check BenQ’s eSupport web site, http://esupport.benq.com, to ensure that you have the most recent version of this manual. Second Edition (June. 2016) ©...
-
Page 2: Table Of Contents
Content Index Abbreviations & Acronyms ............................3 1. About this Manual ..............................5 1.1 Important ................................5 1.2 Trademark ................................5 2. Introduction ................................6 2.1 RoHS (2002/95/EC) Requirements – Applied to all countries require RoHS............. 6 2.2 Safety Warning and Notice ..........................6 2.3 Compliance Statement ............................ -
Page 3: Abbreviations & Acronyms
Abbreviations & Acronyms Analog to Digital Converter Automatic Frequency Control: control signal used to tune to the correct frequency BenQ BenQ Corporation BTSC Broadcast Television System Committee Central Process Unit CVBS Composite Video Blanking and Synchronization Digital Light Processing / Texas Instruments®... - Page 4 Not Connected Non Volatile Memory: IC containing TV related data (for example, options) On Screen Display Personal Computer Printed Circuit Board (or PWB) Remote Control transmitter Red, Green and Blue. The primary color signals for TV. By mixing levels of R, G and B, all colors (Y/C) are Read Only Memory Data signal on I...
-
Page 5: About This Manual
Service Manual that provide repair engineer various choice. 1.1 Important Only trained service personnel who are familiar with this BenQ Product shall perform service or maintenance to it. Before performing any maintenance or service, the engineer MUST read the “Important Safety Information”. -
Page 6: Introduction
2. Introduction This section contains general service information, please read through carefully. It should be stored for easy access place. 2.1 RoHS (2002/95/EC) Requirements – Applied to all countries require RoHS. The RoHS (Restriction of Hazardous Substance in Electrical and Electronic Equipment Directive) is a legal requirement by EU (European Union) for the global electronics industry which sold in EU and some counties also require this requirement. -
Page 7: Compliance Statement
BenQ service center for assistance. 6. To avoid possible electric shock, do not dissemble or repair the monitor. 7. If a bad smell or an abnormal sound appears to come from the monitor, contact your nearest BenQ service center for assistance immediately. -
Page 8: General Description
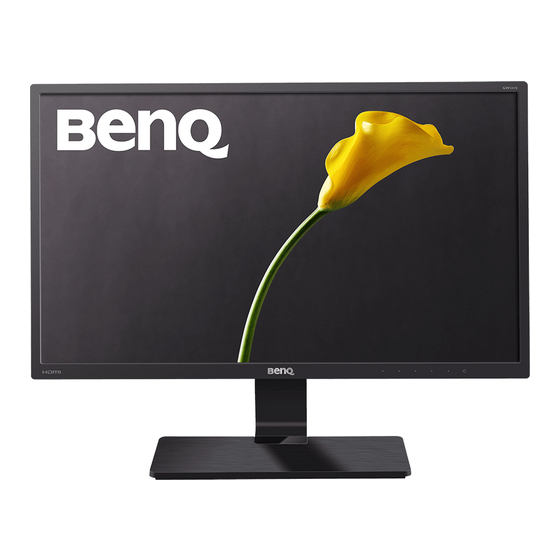
3. General Description This new LED (light-emitting diode) monitor BenQ GW2470H offers numerous features and functions, for example: Panel Type: AMVA+ LED Minimal space requirements thanks to slim casing Optimum ergonomic characteristics (totally distortion-free, excellent picture definition and color purity right into the corners) ... -
Page 9: Product Overview
5. Product Overview 5.1 Monitor Specifications GW2470H D-sub + HDMI 1.4*2 Panel Type (TN / VA / IPS) AMVA+ LED Panel Model AUO M238HVN01.0 (SNB) Panel Size 23.8"(16:9) Display Area 527.04(H)mm x 296.46(V)mm Max. Resolution 1920x1080 Pixel Pitch 274.5(H) um x 274.5(V) um Brightness (Typ.) - Page 10 On-line Gamma calibration DC Dimmer Low Blue Light+ Low Blue Light Accessories Bundle Refer to sku list Label OSD Low Blue Light label Follow BenQ UI OSD UI New UI Regulation Regulation Approvals See RR table Approvals Others Bundle Software...
- Page 11 5.1.1 Certification Document provide Apply BenQ Apply by Sample Document Region Country Certification Level Standard Information Target Actual Vendor Request Type BenQ & Request Date Date IEEE 2015/06/ EPEAT Silver Certificate 1680.1 IEEE 2015/06/ EPEAT Silver Reports 1680.1 UL60950- 1& CSA For both US USA &...
- Page 12 Label German ISO9241-30 ISO9241-3 2015/06/ Certificate German ISO9241-30 ISO9241-3 2015/06/ Reports MPR II: German 2015/06/ MPRII Certificate 1990: 8 / MPR1990: MPR II: German 2015/06/ MPRII Reports 1990: 8 / MPR1990: Russia, 2015/06/ Certificate Belarus Safety & 2015/06/ Ukraine Certificate EMC DoC 60950-1 CISPR22;...
- Page 13 Ministry of Knowledg 2015/06/ Korea e-Standby Certificate Economy Notificatio n No. 2008-116 Ministry of Knowledg 2015/06/ Korea e-Standby Reports Economy Notificatio n No. 2008-116 For safety 2015/06/ Korea Certificate K60950-1 approval KN22, KN24, K00022 2015/06/ Korea Certificate (CISPR22) , K00024 (CISPR24) KN22, KN24,...
- Page 14 ENERGY STAR Internati Internati Program 2015/06/ Energy Star Reports onal onal Requirem ents for Displays 2011/65/E RoHS & Internati Internati U & 2015/06/ BenQ GP Evidence onal onal SUP-QM- Guideline 07-02 Internati Internati 2015/06/ Certificate Certified onal onal Displays 6...
-
Page 15: Panel Inspection Specification
5.2 Panel Inspection Specification Inspection Standards for LCD Modules... -
Page 22: Level 1 Cosmetic / Appearance / Alignment Service
Level 1 Cosmetic / Appearance / Alignment Service Visual Inspection & Cleaning Cleaning Always unplug your monitor from the wall outlet before cleaning. Clean the LED monitor surface with a lint-free, non-abrasive cloth. Avoid using any liquid, aerosol or glass cleaners. Slots and openings on the back or top of the cabinet are for ventilation. - Page 23 2.Connection 3.Install USB driver. 3.1. When insert the USB cable to PC USB port, will pop up a Hardware Wizard to help you install the USB driver if you use this ISP board first time. You can install it successfully as the below instruction step by step.
- Page 24 Click “Finish” to complete the USB serial port driver installation.
- Page 25 4. Update the Software. 4.1. Double-click to run the ISP tool. 4.2. Connect to the monitor. Click “Connect”. If the tool communicate with monitor successfully, the tool will detect the flash type of monitor.
- Page 26 4.3. Load the F/W you want to upgrade. 4.4. Set the restore address. (1)The monitor has DVI port, you need to set restore address for HDCP key to avoid re-program HDCP key. HDCP KEY Start Address 07F000 (4KB)
- Page 27 4.5. Set parameter in “Auto” window. If you have set “Restore address”, please tick “Restore Data”. 4.6.Processing of upgrade. After clicking “Run”, the tool start to program. It is forbided to power off monitor or switch off connection during programming. 4.7.Successful upgrade.
- Page 28 (3) Service Page and Verify the software version...
-
Page 29: Factory Mode
5.2. Do Reset All in user menu. 5.3 The way to open BenQ factory menu (1)Connect signal source and power cable to monitor and DC off it. (2) Press “Enter” key and “Exit” key as below figure at the same time and then Press “Power “ Key to turn on the monitor. - Page 30 6. Troubleshooting. 6.1. “Can’t Entry ISP Mode!!” or “Can’t Find the Device Type” Error. Method: (1) Check the cables and ISP JIG are connected fluently. (2) Click the “Dis Con” and click “Connect” again. (3) AC off the monitor for a while and retry it. (4)Change ISP JIG or cable.
- Page 32 Upgrade by 715GT034-B EDID writing SOP by VGA single port LPT cable (male to male) VGA cable 12V DC adapter TPV P/N: N/A TPV P/N: 089G728 GAA DB TPV P/N: ADPC12416BEP ISP JIG: 715GT034-B Monitor LPT port driver ISP tool EDID...
- Page 33 4.1. Change the EDID files name as below rule. VGA EDID WA.dat HDMI EDID WH.dat HDMI2 EDID WH2.dat 4.2. Copy these files to one folder named as BENQ GW2470 which must contains “config.ini” file. 4.3. Copy BENQ GW2470 to DDC folder and put DDC and ISP tool together.
- Page 34 5. Run the ISP tool 5.1. Double-click the icon to open the tool. 5.2. Select the EDID folder.
- Page 35 5.3. Load EDID successful. 5.4 Tick the “Only connect VGA”, and “Write SN” then click “Debug Imformayion”.
- Page 36 5.5 type in the date and the 13 digit S/N. 5.6. Start to writing. Click “write EDID” to start writing. When The green “PASS” appear, the process is finished. 6. Troubleshooting. 6.1. Can’t write! (1) AC on the monitor and turn on it.(Restart the monitor) (2)Take apart the monitor and connect the 7pin of EEPROM to GND to diable write protection then write EDID one by one.
-
Page 37: Adjustment / Alignment Procedure
Adjustment / Alignment Procedure The Control Panel... - Page 38 Basic menu operation All OSD (On Screen Display) menus can be accessed by the control keys. You can use the OSD menu to adjust all the settings on your monitor. Press any of the control keys. The hot key menu is displayed. The left three controls are custom keys and are designated for particular functions.
- Page 39 OSD icon OSD in hot key Function in main menu menu • Custom Key 2 By default, the key is the hot key for Input. • For Down/Decrease adjustment. • Custom Key 3 By default, the key is the hot key for Brightness.. •...
- Page 40 Display menu Available menu options may vary depending on the input sources, functions and settings. Menu options that are not available will become grayed out. And keys that are not available will be disabled and the corresponding OSD icons will disappear. For models without certain functions, their settings and related items will not appear on the menu.
- Page 41 Item Function Range Adjusts the horizontal position of the screen image. 0 to 100 H. Position Adjusts the vertical position of the screen image. 0 to 100 V. Position Adjusts the pixel clock frequency timing to 0 to 100 Pixel Clock synchronize with the analog input video signal.
- Page 42 Picture menu Available menu options may vary depending on the input sources, functions and settings. Menu options that are not available will become grayed out. And keys that are not available will be disabled and the corresponding OSD icons will disappear. For models without certain functions, their settings and related items will not appear on the menu.
- Page 43 Item Function Range • 1 Adjusts the tone luminance. The default value is 3 (the Gamma standard value for Windows). • 2 • 3 • 4 • 5 Color Allows video and still photographs to be viewed with Normal natural coloring. This is the factory default color. Temperature Applies a cool tint to the image and is factory pre-set Bluish...
- Page 44 Picture Advanced menu Available menu options may vary depending on the input sources, functions and settings. Menu options that are not available will become grayed out. And keys that are not available will be disabled and the corresponding OSD icons will disappear. For models without certain functions, their settings and related items will not appear on the menu.
- Page 45 Item Function Range For viewing multimedia files. -30% Multimedia For web surfing. -50% Surfing For office works or office environment. -60% Office For reading e-books or documents. -70% Reading For viewing videos. Movie For playing video games. Game For viewing still images. Photo For better color matching representation with the sRGB...
- Page 46 Item Function Range Color Determines the color space (RGB or YUV) based on the detected video signal. Format You might need to manually set the Color Format if colors shown on the monitor screen do not display properly. If the input source is HDMI, color format is not selectable. In other words, Color Format is automatically set depending on the input video source.
- Page 47 Audio menu (selected models only) Available menu options may vary depending on the input sources, functions and settings. Menu options that are not available will become grayed out. And keys that are not available will be disabled and the corresponding OSD icons will disappear.
- Page 48 System menu Available menu options may vary depending on the input sources, functions and settings. Menu options that are not available will become grayed out. And keys that are not available will be disabled and the corresponding OSD icons will disappear. For models without certain functions, their settings and related items will not appear on the menu.
- Page 49 Item Function Range • Language Sets the OSD menu language. English Settings • Français The language options displayed on • your OSD may differ from those shown Deutsch on the right, depending on the product • Italiano supplied in your region. •...
- Page 50 Item Function Range • Allows the monitor settings to be set through the software on the DDC/CI • DDC/CI, short for Display Data Channel/Command Interface, which was developed by Video Electronics Standards Association (VESA). DDC/CI capability allows monitor controls to be sent via the software for remote diagnostics.
- Page 51 NP: None Preset Mode FS: Fail Save Mode (show “out of range”, but still can see picture) O: Out of Range (only show “out of range”, without picture) Pixel H-syn Panel Native Resolution V-sync BenQ clock Preferr Reso Mode lution Numb...
- Page 52 832x 57.27 49.71 74.53 800x BenQ 29.5 29.74 59.476 800x 36.00 35.16 56.25 800x DMT-4 40.00 37.88 60.32 800x 50.00 48.08 72.19 800x DMT-5 49.50 46.88 75.00 800x DMT-6 56.25 53.67 85.06 DMT-2 848x 33.75 31.02 60.00 848x 31.50 29.83 59.66...
- Page 53 1024 DMT-8 78.75 60.02 75.03 x768 1024 DMT-9 94.50 68.68 85.00 x768 1152 66.75 44.86 x720 1152 94.50 63.85 70.01 x864 DMT-1 1152 108.00 67.50 75.00 x864 1152 119.65 GTF-7 77.09 85.00 x864 1152 100.00 68.68 75.06 x870 1152 92.94 61.80 65.95 x900...
- Page 54 1280 106.6 62.795 74.934 x800 1280 122.5 71.55 84.88 x800 1280 108.00 60.00 60.00 x960 1280 148.50 85.94 85.00 x960 1280 DMT-1 x10² 108.00 63.98 60.02 1280 x102 126.99 74.88 69.85 1280 x102 124.90 74.40 70.00 1280 x102 134.60 77.90 72.00 1280 DMT-1...
- Page 55 1400 x105 179.50 93.88 84.96 1440 DMT-2 x900 88.75 55.496 59.901 DMT-2 1440 106.5 55.935 59.887 x900 1440 136.75 70.6 x900 1600 X900 1600 x100 108.5 61.648 59.910 1600 CVT-1 x100 132.25 62.14 59.87 1600 x100 169.25 78.356 74.83 1600 CVT-2 x120 130.25...
- Page 56 1680 DMT-2 x10⁵ 119.00 64.67 59.88 1680 DMT-2 x10⁵ 146.25 65.29 59.95 1680 x105 82.306 1600 CVT2. x128 171.75 79.5 59.9 1792 CVT2. X134 203.25 83.57 59.9 41M3 1792 CVT2. 105.29 X134 257.75 75.00 41M3 1856 CVT2. X139 217.25 86.485 59.934 58M3 1856...
- Page 57 timing Nvidia 1920 100Hz x108 113.8 timing Nvidia 1920 110Hz x108 125.7 timing Nvidia 1920 120Hz x108 137.8 timing 1920 X120 127.75 61.418 49.974 0-R5 CVT2. 1920 30MA- X120 154.00 74.04 59.95 1920 X120 193.25 74.56 59.89 1920 X120 245.25 94.04 74.93 CVT2.
- Page 58 CVT3. 2048 15M3- x153 209.25 94.7 59.9 2048 CVT3. x153 267.25 95.4 59.9 15M3 2560 x144 241.5 88.787 59.951 CVT4. 2560 10MA- x160 268.5 98.713 59.972 2560 4.10M x160 348.5 99.4 59.9 2560 DMT-4 125.35 x160 443.25 74.972 2560 DMT-4 142.88 x160 505.25...
- Page 59 Additional Support timing for HDMI port: (If with HDMI interface) HDMI CEA-861D General Paramters Horizontal V-Sync Parameters Pixel Clock H-Sync V-Sync Freq. Code HDMI (unit:MHz) (unit:KHz) (unit:Hz) Total Active Blank Total Active Blank Prog 25.175 31.469 59.940 Prog 27.000 31.469 59.940 Prog 74.176...
- Page 60 7. Selected items: DVI/HDMI 10M on/off item HDMI HPD on/off item 8. Add BenQ logo on/off item, the default is “on” 9. Add the auto power on item, the default is “on” 10. Panel type define need to have the panel version 11.
-
Page 61: Level 2 Circuit Board Or Standard Parts Replace Ment
Level 2 Circuit Board or Standard Parts Replace ment Product Exploded View Note: The parts information listed below are for reference only, and are subject to change without notice. Please go to http://cs.tpv.com.cn/hello1.asp for the latest information. Item Description Unit BEZEL SPONGE KEY BOARD... - Page 62 MAIN/POWER BOARD& MAINFRAME 0M1G 930 6120 MAIN BOARD & MAINFRAME 0M1G3030 6 47 CR3 REAR_COVER/ HINGE 0Q1G2030 6120 STAND/ HINGE,BASE/BKT_BASE Q01G700100A004 HINGE/BASE/BKT_BASE ART. Item Part No. Description Unit CUSHION-T L238W-Ybenq1-s1 Q44GK1491010YD Non-region(Gl CUSHION-B L238W-Ybenq1-s1 Q44GK1492010YD Non-region(Gl Q44GK14988101A00JA ARTWORK CARTON GW2470H WW...
-
Page 63: Six Angles' View
Six Angles’ View... -
Page 64: Product Disassembly/Assembly
Product Disassembly/Assembly Disassembly Remove the stand base Remove the base; Remove the screw to remove the base. Remove the stand; Press the hole; pull at the stand strongly at the same time. The hole... - Page 65 2) Remove the rear cover Remove the screws in red to remove the rear cover. Pull apart bezel & rear cover. Note: Be careful, the BEZEL CLIP is easy to break. Bellow picture for reference.
- Page 66 Note: The positions of the clips on the rear cover are as follow. There are some small gaps between CLIPS. It’s suggested to separate bezel and rear cover from the gaps. Example: You can separate the bezel and rear cover from here. 3) Remove the main frame from the panel Remove the black rubberized fabric and aluminum foil.
- Page 67 Pull out the wire to remove the mainframe. Note: When you assembled the LCD, you must tidy the wire as follow picture. The mainframe 4) Remove the boards from the main frame. Remove Mylar from power board. Remove the main board. The main board...
- Page 68 Pull out the wires from the main board. 5) Remove the panel Note:Be course the panel is easy to broken, when we remove the panel, we should hold the iron on the panel edge use two hands at the same time, and should avoid touching the panel surface.
- Page 69 6) The bezel and Key board.
- Page 70 Assembly 1) Assemble key board to bezel. 2) Assemble the panel into bezel...
- Page 71 3) Assemble the main board and power board on the main frame. Connect main board and power board; assemble the wire (the power board to main board) and FFC cables (the Wire from main board will connect to panel). Lock the main board and power board on the mainframe. The main board Put Mylar onto power board...
- Page 72 4) Assemble the main frame Connect key board and main board, panel and power board, panel and main board. Note: When you assembled the LCD, you must tidy the wire as follow picture. The mainframe...
- Page 73 5) Assemble the rear cover. Assemble the rear cover and lock the screws. 6) Assemble the stand base. Push the stand as follow picture. Lock the screw to assemble the base.
-
Page 74: Troubleshooting
Troubleshooting Frequently asked questions (FAQ) The image is blurred: Read the instructions on the link "Adjusting the Screen Resolution" on the CD, and then select the correct resolution, refresh rate and make adjustments based on these instructions. How do you use a VGA extension cable? Remove the extension cable for the test. - Page 75 “NO” in the “OSD Lock” submenu from the “OSD Settings” menu (under SYSTEM), and all OSD controls will be accessible. If your problems remain after checking this manual, please contact your place of purchase or e-mail us at: Support@BenQ.com...
- Page 76 No Power No power Check power cable is Re-plug the power cable tightened? Check Power “On/Off” Turn on the Power “On/Off” switch is “On”? Check the LED Check the AC power indicates is OK? Replace the power board Replace main board and check connections Replace key board and check connections...
- Page 77 No Video (Power LED YELLOW) No Video (Power LED YELLOW) Press the power Replace the main board button is OK? Replace the power The end board Replace the main The end board and connection Replace the LVDS/FFC Check the LVDS/FFC cable or panel cable or panel Replace the key board...
- Page 78 DIM (image overlap, focus or flicker) Reset in factory mode The end Set to the optimal The end frequency, select the recommended frequency Readjust the phase and pixel The end clock in the user mode Pull out signal cable and Check the signal cable check “Self Test Feature Check”...
- Page 79 Color is not optimal Color is not optimal Color shift Miss color Reset the factory mode Replace the signal cable In the user mode, set the” color settings” until customer satisfy The end Pull out the signal cable and check the screen color display is normal? Replace the signal cable or PC Replace the main board...
-
Page 80: Appendix 1 - Screw List / Torque
Appendix 1 – Screw List / Torque Part No. Type Description Quantity Torque Q01G6019 1 Q3*6 KEY BOARD& KEY 6 ± 1kgf.cm QM1G11400601200AXL M4*6 POWER BOARD & MAINFRAME 6 ± 1kgf.cm 0D1G1030 6120 D3*6 MAIN/POWER BOARD& MAINFRAME 6 ± 1kgf.cm 0M1G 930 6120 MAIN BOARD &...
Need help?
Do you have a question about the GW2470H and is the answer not in the manual?
Questions and answers