
Related Manuals for Haivision Kraken


Summary of Contents for Haivision Kraken
- Page 1 ™ Kraken H.264/HEVC Video Encoder/Transcoder User’s Guide Version 2.6 HVS-ID-UG-KRAK-26 Issue 02...
- Page 2 Trademarks The Haivision logo, Haivision, and certain other marks used herein are trademarks of Haivision. All other brand or product names identified in this document are trademarks or registered trademarks of their respective companies or organizations. HDMI, the HDMI logo and High-Definition Multimedia Interface are trademarks or regis-...
-
Page 3: Safety Guidelines
In accordance with the European Union (EU) WEEE Directive, Haivision products that fall within the scope of the WEEE, are labeled with the above symbol, and customers are encouraged to responsibly recycle their equipment at the time of disposal. -
Page 4: Table Of Contents
New Features in Kraken v2.6 ..................11 Chapter 1: Introduction Product Overview ........................13 Kraken Enterprise – Distributing Streams for Enterprise ..........15 Kraken ISR – Intelligence, Surveillance, and Reconnaissance........16 Kraken Features ........................17 SRT (Secure Reliable Transport) ..................18 Console User Interface (Appliance Only)................ - Page 5 Table of Contents Changing Your Password ....................... 31 Password Requirements ....................32 Logging Out..........................33 Chapter 3: Managing Kraken from the Web Interface Configuring Streams ....................... 35 Streams List View ......................35 Configuring Stream Parameters ..................37 Stream Settings......................... 39 Stream Statistics .......................
- Page 6 Networking ........................... 118 Management.......................... 118 Physical..........................119 Kraken Server Base System (S-KR-BASE)..............119 Kraken Server Premium System (S-KR-PREMIUM) ........... 119 Kraken Server Ultra System (S-KR-ULTRA) ............... 120 Kraken CR (S-KR-CR-KLV)..................120 Appendix B: Warranty Information Haivision One (1) Year Limited Warranty ................121 EXCLUSIONS AND LIMITATIONS................
-
Page 7: About This Guide
Welcome to the User’s Guide for Kraken H.264/HEVC Video Encoder/Transcoder, Version 2.6. This guide describes how to set up, configure, and manage Kraken to transcode live HD video. For information on installing and connecting to your Kraken appliance, please refer to the Quick Start Guide. -
Page 8: About Haivision
About Haivision About Haivision Haivision is a global leader in delivering advanced video networking, digital signage, and IP video distribution solutions. Haivision offers complete end-to-end technology for video, graphics, and metadata to help customers to build, manage, and distribute their media content to users throughout an organization or across the Internet. -
Page 9: Related Documents
● Makito X Hardening Guide Service Support Haivision is committed to providing the service support and training needed to install, manage, and maintain your Haivision equipment. For more information regarding service programs, training courses, or for assistance with your support requirements, contact Haivision Technical Support via our Support Portal on our website at: https://support.haivision.com... -
Page 10: Safety Information
The definitions and symbols for CAUTION and WARNING comply with ANSI Z535.2, American National Standard for Environmental and Facility Safety Signs, and ANSI Z535.4, Product Safety Signs and Labels, issued by the American National Standards Institute. Kraken User’s Guide, v2.6, Issue 02... -
Page 11: New Features In Kraken V2.6
IP address. Only streams originating from the specified source IP will be forwarded to Kraken. This allows Kraken to quickly and easily select an input stream in environments with many sources sharing a common multicast IP. - Page 12 1: Introduction HAPTER This chapter provides a brief overview of Haivision’s Kraken Video Encoder/Transcoder, along with a description of the main hardware components for the appliance. Topics In This Chapter Product Overview ..........13 Kraken Enterprise –...
-
Page 13: Chapter 1: Introduction Product Overview
Haivision’s Kraken Video Encoder/Transcoder delivers performance IP video transcoding. Kraken is designed for Transport Stream to Transport Stream in enterprise or satellite video distribution applications. The base model redistributes digital video broadcasts over enter- prise networks. Kraken ISR (with ISR firmware option) provides low latency transcoding for metadata-rich applications, such as within military Intelligence, Surveillance, and Reconnaissance (ISR) full motion video applications. - Page 14 Introduction Product Overview Figure 1-3 Kraken CR Front view Figure 1-4 Kraken CR Rear view Kraken User’s Guide, v2.6, Issue 02...
-
Page 15: Kraken Enterprise - Distributing Streams For Enterprise
Product Overview Kraken Enterprise – Distributing Streams for Enterprise Kraken is used to groom high bandwidth broadcast streams for various destinations on the network. It provides a solution to IP video deployments that capture digital video broad- casts for redistribution over the LAN to enterprise viewers. For example, a set-top box such as Haivision’s Stingray may consume 6 Mbps HD H.264 multicast streams, whereas a... -
Page 16: Kraken Isr - Intelligence, Surveillance, And Reconnaissance
Product Overview Kraken ISR – Intelligence, Surveillance, and Reconnaissance Kraken ISR is designed to collect, process, and disseminate information for full motion video applications. This includes passing through MISP-compliant metadata, typically in KLV (Key-Length-Value) format. Kraken ISR is optimized to disseminate information in the formats required by downstream systems, networks, and viewers, while preserving any required metadata with frame accurate synchronization. -
Page 17: Kraken Features
Kraken Features Kraken Features Kraken is designed to be used by consumers of HD video who are contending with high bitrate / high quality streams that are either too big to transport over some network segments or too costly for users’ end points to render the video smoothly. -
Page 18: Srt (Secure Reliable Transport)
Gateway. Console User Interface (Appliance Only) A Console UI is available for Kraken appliances which may be accessed directly by connecting a keyboard and monitor to the appliance (either from the front or the back of the appliance), or through SSH. The Console UI allows administrators to perform basic system administration tasks and network tests, as follows: ●... -
Page 19: Appliance Options
Kraken CR was designed to harmonize the user experience and functionalities between Kraken and the Makito X platform. With the introduction of baseband capture and addi- tional metadata functionalities, ISR customers can use Kraken not only as a GCS (Ground Control Station) transcoder, but also as a source encoder. -
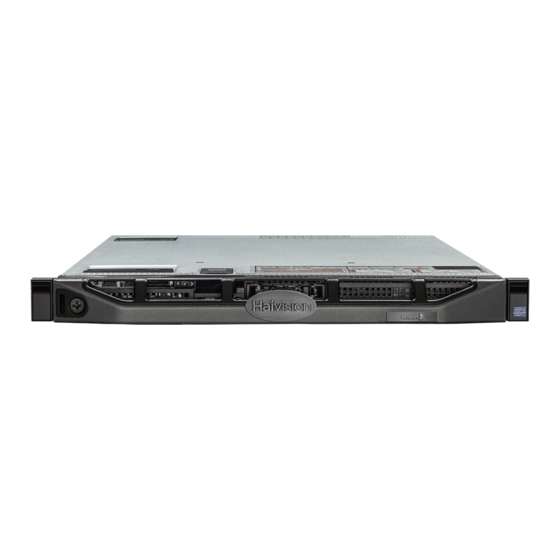
Page 20: Physical Description (Kraken Server)
Physical Description (Kraken Server) Kraken Server comes delivered as an enterprise-ready, ultra-compact appliance made for single-tier architectures. Following is a description of the Kraken appliance interfaces and LED status indicators. For information on installing and connecting to your Kraken appliance, please NOTE refer to the Quick Start Guide. - Page 21 Introduction Physical Description (Kraken Server) Figure 1-9 Ethernet Connections (Ultra System Appliance) Ethernet Connection (Nic1) Kraken User’s Guide, v2.6, Issue 02...
-
Page 22: Led Status Indicators
Back View Blue See Front Panel description (above). System Status Figure 1-10 LED Status Indicators - Base System Appliance (Front panel TOP/Rear view BOTTOM) Power-On indicator System Status indicator System Status indicator Kraken User’s Guide, v2.6, Issue 02... -
Page 23: Premium System Appliance Leds
LCD panel displays an error code followed by descriptive text Figure 1-11 LED Status Indicators - Premium System Appliance (Front panel TOP/Rear view BOTTOM) Power-On indicator LCD Menu buttons System ID button LCD panel System Identification button System Identification Connector Kraken User’s Guide, v2.6, Issue 02... -
Page 24: Chapter 2: Getting Started With The Web Interface
LED Status Indicators - Ultra System Appliance (Front panel TOP/Rear view BOTTOM) Power-On indicator LCD Menu buttons System ID button LCD panel System Identification Connector System Identification button Related Topics ● “Getting Started with the Web Interface” on page 25 Kraken User’s Guide, v2.6, Issue 02... -
Page 25: Web Interface
Before proceeding, make sure that the appliance is set up correctly and the NOTE network connection is established. For information on installing and connecting to your Kraken appliance, please refer to the Quick Start Guide. Topics In This Chapter Logging in to the Web Interface . -
Page 26: Logging In To The Web Interface
The appliance’s IP address will be set by Haivision prior to delivery. Please refer to NOTE the Important Notice included in the packaging of your Kraken for the IP address and administrative user information. For the software-only Kraken, you will need to append the https://IpAddress:4043/ port to the IP address. -
Page 27: Role-Based Authorization
NOTE Help information, see “Online Help” on page 30. Role-based Authorization Kraken uses role-based authorization control to secure the Web interface and provides three predefined user accounts to assign privileges to users, as described following. Account Default Privileges Username Viewer viewer Read-only access to the system. -
Page 28: Exploring The Web Interface
After logging in to the Web configuration interface, you will have access to the appliance configuration settings. Navigational Menus Once you have successfully logged in, the Kraken Web interface opens to the Streams List View (as shown in the following example). Your account information is displayed on the toolbar (along the top). - Page 29 Getting Started with the Web Interface Exploring the Web Interface Kraken User’s Guide, v2.6, Issue 02...
-
Page 30: Online Help
Getting Started with the Web Interface Exploring the Web Interface Online Help Clicking on the toolbar will launch the Kraken online help. The following figure shows a sample Welcome page. Navigation pane Content pane Kraken User’s Guide, v2.6, Issue 02... -
Page 31: Changing Your Password
If you are logged in as a non-administrative user, you can change your own password from the My Account page, as described in this section. This is useful when logging into a Kraken on which the factory defaults have not been changed. Operator... -
Page 32: Password Requirements
Your system may have in place security policies that determine the minimum password length as well as other requirements such as minimum number of upper case characters, digits, and symbols. In this case, you will be prompted to modify your password to comply with these policies. Kraken User’s Guide, v2.6, Issue 02... -
Page 33: Logging Out
Getting Started with the Web Interface Logging Out Logging Out After you finish using the Kraken, be sure to log out. To do so, select from the OGOUT Main Menu. Logging out prevents misuse and unauthorized access to the appliance. - Page 34 ..........77 Kraken User’s Guide, v2.6, Issue 02...
-
Page 35: Chapter 3: Managing Kraken From The Web Interface Configuring Streams
A Kraken stream typically consists of a user-defined stream Name, Input, Transcoder, Output(s), and (optionally) Metadata source(s). From the Streams pages, you can define an unlimited number of Kraken streams. However, the number of active streams supported by Kraken depends on your Kraken hardware and Haivision licensing applied to that hardware. - Page 36 Managing Kraken from the Web Interface Configuring Streams Click link to open Detail View ● To add a stream, click ● To view details or modify the components of a stream, click a line in the table to open the Streams Detail View.
-
Page 37: Configuring Stream Parameters
Managing Kraken from the Web Interface Configuring Streams Configuring Stream Parameters You must first define the Inputs, Transcoders, Outputs, and (optionally) Metadata NOTE sources before you can define a Stream. The Inputs, Transcoders, Outputs, and Metadata sources that you have previously defined will be selectable when you add or modify a stream. - Page 38 Managing Kraken from the Web Interface Configuring Streams The changes will take effect immediately but will not be saved and will be lost after a reboot. You must click in order for your changes to take effect. However, your NOTE Apply changes will not be saved and will be lost after a reboot.
-
Page 39: Stream Settings
Managing Kraken from the Web Interface Configuring Streams Stream Settings The following table lists the Kraken Stream settings: Stream Setting Description/Values Name Enter a unique name for the stream. Mode “Stream Routing” Select the stream routing mode: page 35 ●... -
Page 40: Stream Statistics
Managing Kraken from the Web Interface Configuring Streams Stream Statistics The Streams Statistics page shows statistics for the Input, Decoder, Encoder, and Output for the selected stream. Kraken User’s Guide, v2.6, Issue 02... -
Page 41: Configuring Inputs
(depending on your hardware setup), you may select an SDI or Analog Composite input. Inputs List View The Inputs List view displays a summary of defined inputs for Kraken, including the Input Name, Connection (source) URL, and Status for each input. It also provides an option for you to delete an input. -
Page 42: Configuring Input Parameters
Managing Kraken from the Web Interface Configuring Inputs ● To delete an existing input, check the checkbox next to the item in the list and click Delete To apply your changes, click Apply Configuring Input Parameters To view and configure Input parameters: From the Inputs List view, click or click any line in the table. - Page 43 SRT Settings. See “SRT Input Settings” on page 46. On the Kraken CR, you may select an SDI (DeckLink) or Analog Composite (Analog Capture) input and then select the DeckLink or Capture Mode. See “DeckLink Mode” “Analog Capture Mode”...
-
Page 44: Input Settings
Enter a unique name for the input. This name will be selectable from the list of Inputs when you define a stream. The Input name is not required. Kraken will use the NOTE: Input URL as the name if none is provided. - Page 45 IP address. Only streams originating from the specified source IP will be forwarded to Kraken. This allows Kraken to quickly and easily select an input stream in environments with many sources sharing a common multicast IP.
- Page 46 SRT Input Settings Mode Selects the SRT Connection Mode: ● Caller: Kraken acts like a client and connects to a server listening and waiting for an incoming call. ● Listener: Kraken acts like a server and listens & waits for clients to connect to it.
- Page 47 Input Setting (Cont.) Description/Values (Cont.) Latency Specifies how long Kraken will buffer received packets. The size of this buffer adds up to the total latency. A minimum value must be 3 times the round-trip-time (RTT). Range = 20 - 8000 ms...
-
Page 48: Input Statistics
Managing Kraken from the Web Interface Configuring Inputs Input Statistics The Input Statistics page shows statistics for the selected SDI (DeckLink) or Analog Capture encoding input. Kraken User’s Guide, v2.6, Issue 02... -
Page 49: Configuring Transcoders
Configuring Transcoders Transcoders List View The Transcoders List view displays a summary of defined transcoders for Kraken, including the Transcoder Name, Resolution, Video Bitrate, Group of Pictures (GOP) size, Audio enable setting, and State for each transcoder. It also provides an option for you to delete a transcoder. -
Page 50: Configuring Transcoder Parameters
Managing Kraken from the Web Interface Configuring Transcoders Configuring Transcoder Parameters You must first define one or more Transcoders before you can define a Stream. Each Transcoder is a user-defined set of parameters to apply when re-encoding the audio/video. Transcoder Settings include the Video Resolution, Frame Rate, GOP size, Video Bitrate, Audio Bitrate, Stream Shaping, and Output Pacing. - Page 51 Managing Kraken from the Web Interface Configuring Transcoders Type in a unique name for the transcoder. Select or enter values in the fields to define the transcoder. See the following section, “Transcoder Settings”. (Optional) If Transport Stream Shaping is enabled (under Advanced Parameters), you can define additional parameters, as shown in the following example.
-
Page 52: Transcoder Settings
Managing Kraken from the Web Interface Configuring Transcoders Transcoder Settings The following table lists the Kraken Transcoder settings: Transcoder Setting Description/Values Basic Parameters Transcoder Name Enter a unique name for the transcoder. This name will be selectable from the list of Transcoders when you define a stream. - Page 53 Managing Kraken from the Web Interface Configuring Transcoders Transcoder Setting Description/Values (Cont.) Resolution Select the resolution for the outbound stream: ● Auto (Detect Continuously) (default) ● Auto (Detect on Stream Start) ● Custom: Type in a horizontal and vertical (W x H) resolution, for example, 1280x720.
- Page 54 Select the number of B-frames and B reference frames per P-Frames to allow in the output stream: ● Auto (default): The Kraken software decides how many B-Frames and B reference frames to allow. ● IP: I and P frames only (lowest delay; lowest quality) ●...
- Page 55 Encoding Profile Select the desired quality level between PEED . This allows you to adjust the quality setting, if UALITY the one selected by Kraken is insufficient for the required use case. ● VBR (AVC Video Format only, default): Variable bit rate ●...
- Page 56 Output Pacing is used to make the traffic more NOTE: or less smooth on the network, to allow the stream traffic to leave the Kraken in a more even manner. When pacing is enabled, you can set the Output Pacing Buffering Interval (see below).
- Page 57 Managing Kraken from the Web Interface Configuring Transcoders Transcoder Setting Description/Values (Cont.) Interleave Adjustment (Optional) Type in the number of milliseconds to delay audio before multiplexing (“muxing”). -5000, 5000ms Range = ● (the default) leaves it up the transcoder to decide.
-
Page 58: Advanced Shaping Settings
For example, to use a 1 Mbps KLV stream, you should increase the Maximum TS Bitrate by 800 kbps to allocate enough room in the Kraken output stream for the KLV, Audio and Video. If the encoder is overrunning the ceiling bitrate and... - Page 59 Managing Kraken from the Web Interface Configuring Transcoders Advanced Setting Description/Values (Cont.) Shaping Video Max Type in the maximum video bitrate for shaping the Bitrate outbound stream, as a percentage. 50% - 150% Range = Increasing this above 80% will increase the...
- Page 60 Managing Kraken from the Web Interface Configuring Transcoders Advanced Setting Description/Values (Cont.) This is the depth of the CBR buffer in the decoder TIP: VBV model in milliseconds. A value that you should strive for is 1000ms; lower values may decrease the rate at which the encoder overruns the network buffers at lower bitrates.
- Page 61 The Kraken will automatically: ● Insert a silent audio stream into the Kraken output when the input source has no audio. ● Utilize an audio stream from the source, should one become available after the transcoder session has started.
-
Page 62: Configuring Outputs
Configuring Outputs Outputs List View The Outputs List view displays a summary of defined outputs for Kraken, including the Output Name, Destination (output) URL, and Status for each output. It also provides an option for you to delete an output. -
Page 63: Configuring Output Parameters
SAP listeners will listen on the well known SAP address and learn of all the sessions being announced. When SAP is enabled, the Kraken sends an SAP signal out to the player when it starts streaming. Any player that supports the SAP protocol will provide the end user an automatic playlist when the Kraken is streaming. - Page 64 Managing Kraken from the Web Interface Configuring Outputs Type in a unique name for the output. Select or enter values in the fields to define the output. See the following section, “Output Settings”. The parameters vary depending on the output destination selected. The default output is TS over UDP.
- Page 65 Managing Kraken from the Web Interface Configuring Outputs To configure SRT output, select TS over SRT for the source and then complete the additional fields under SRT Settings. See “SRT Output Settings” on page 67. To apply your changes, click Apply The new output is added to the Outputs List.
-
Page 66: Output Settings
Enter a unique name for the output. This name will be selectable from the list of Outputs when you define a stream. The Output name is not required. The Kraken will NOTE: use the Output URL as the name if none is provided. - Page 67 SRT Output Settings Mode Selects the SRT Connection Mode: ● Caller: Kraken acts like a client and connects to a server listening and waiting for an incoming call. ● Listener: Kraken acts like a server and listens & waits for clients to connect to it.
- Page 68 Caller or Rendezvous) The UDP source port for the SRT stream, which is the unique port over which Kraken will be sending the SRT stream. You can (optionally) specify the UDP source port. If not filled in, an ephemeral source port will be assigned (between 32768 and 61000).
-
Page 69: Configuring Metadata Capture
NOTE or via a field upgrade by installing a license file. From the Metadata pages, you can configure the Kraken to capture either KLV (Key Length Value) or CoT (Cursor on Target) metadata and then incorporate data information within the metadata elementary stream of the standard MPEG Transport Stream. -
Page 70: Metadata List View
Configuring Metadata Capture Metadata List View The Metadata List View displays a summary of defined metadata sources for Kraken, including the Source Name, Type (Input Method), Data Format (KLV or CoT), and Param- eters (Network Settings) for each source. It also provides an option for you to delete a source. -
Page 71: Configuring Metadata Parameters
Managing Kraken from the Web Interface Configuring Metadata Capture Configuring Metadata Parameters To view and configure Metadata source parameters: From the Metadata List view, click or click any line in the table. The Metadata Detail View opens, as shown in the following example. - Page 72 Managing Kraken from the Web Interface Configuring Metadata Capture To capture CoT or KLV metadata from the serial port: Select Serial for the Input Method. Select the serial port from the drop-down list or type in the text box. If CoT has been installed, select CoT for the Data Format (under Input Settings) and fill in the “Max AirCraft-SPI Delta”...
- Page 73 Managing Kraken from the Web Interface Configuring Metadata Capture To apply your changes, click Apply The new source is added to the Metadata List. To configure network input: Select Network (UDP) for the Input Method. If CoT has been installed, select CoT for the Data Format (under Input Settings) and fill in the “Max AirCraft-SPI Delta”...
-
Page 74: Configuring Cot Retransmission
Managing Kraken from the Web Interface Configuring Metadata Capture Configuring CoT Retransmission From the Metadata Detail View, you can configure CoT retransmission of COT metadata received over the Serial or UDP interface. The metadata will be retransmitted as a CoT/UDP unicast or multicast stream so that multiple CoT listeners can access the source CoT data. -
Page 75: Configuring Klv Metadata Insertion
(up to 6) (using the proper ISO 3-letter country code). In both cases, the mission ID or security data will get replaced or inserted with the ones created by the Kraken based on the configuration. To configure insertion of static KLV objects: From the Metadata List View, click the link for the metadata source to define static KLV objects. - Page 76 Managing Kraken from the Web Interface Configuring Metadata Capture (Optional) To enable the update/generation of the security data set in UAS messages, toggle the Security Data Set Insertion button to (as shown in the following example). Fill in the remaining fields and click Apply Kraken User’s Guide, v2.6, Issue 02...
-
Page 77: Metadata Settings
Managing Kraken from the Web Interface Configuring Metadata Capture Metadata Settings The following table lists the Kraken Metadata settings: Metadata Setting Default Description/Values Name Enter a unique name for the metadata source. Input Method HD-SDI Select the input interface for the source, either: ●... - Page 78 Managing Kraken from the Web Interface Configuring Metadata Capture Metadata Setting Default Description/Values (Cont.) “Configuring CoT Retransmission” CoT Relaying (See on page 74) CoT Relaying When set to On, the system will retransmit received CoT/UDP or CoT/Serial metadata on,off to up to 8 other hosts over UDP.
-
Page 79: Chapter 4: System Administration
Before proceeding, make sure that the appliance is set up correctly and the NOTE network connection is established. For information on installing and connecting to your Kraken appliance, please refer to the Quick Start Guide. Topics In This Chapter Administration Monitoring the System Status . -
Page 80: Monitoring The System Status
The Status page displays system status information about the Kraken such as the version, system load, system uptime, and licensed capacity. You can also reboot the Kraken and take a system snapshot from the Status page. To view status information: Click the icon on the toolbar. -
Page 81: Status Settings
“Taking a System Snapshot” page 82. Status Settings The following table lists the Status settings. Status information can be useful for trou- bleshooting and may be forwarded to Haivision Technical Support if you are request- ing technical support. Status Setting Description/Values CPU Usage The combined CPU usage (across all cores). -
Page 82: Rebooting Kraken
DMINISTRATION On the Status page, click Reboot Kraken will reboot and you will be returned to the Login page. If you did not save your configuration/presets, you will end up with the default configuration with no streams at all. Taking a System Snapshot Taking a system snapshot can be useful for troubleshooting and may be forwarded to Haivision Technical Support if you are requesting technical support. - Page 83 System Administration Monitoring the System Status Kraken User’s Guide, v2.6, Issue 02...
-
Page 84: Saving And Loading Presets
Saving and Loading Presets Saving and Loading Presets Each Kraken is configured by users’ selecting and setting values of applicable system settings, such as encoder and stream settings and the stream destination. Although these configuration settings are not automatically saved, presets provide a way for you to save groups of settings and recall these configurations settings to apply to other streams. - Page 85 Save Startup To save the preset as a text file to view or export to other Kraken encoders, click the preset name and save it in the Save As dialog. Note that the file is in Unix format. To import a preset, for example, from another Kraken encoder, click Import select the file in the Open File dialog box.
- Page 86 To select a different preset file, click Change. To remove the selection, click To delete one or more presets, check the checkbox next to one or more preset names (or check ) and click on the Content toolbar. Delete Kraken User’s Guide, v2.6, Issue 02...
-
Page 87: Installing Firmware Upgrades
When you first receive the Kraken, the necessary firmware is pre-installed on it. Upgrades of the firmware are issued through Haivision’s Download Center on our website at: https://support.haivision.com. - Page 88 Wait for the file to be uploaded. Remain on this page and do not click IMPORTANT anything else in the Kraken Web interface during the upload. When the file is uploaded, the upgrade will start automatically. You must remain on this page until the system completes the process of CAUTION unpacking the firmware.
-
Page 89: Configuring Network Settings
Network Settings page will show the number of the available NICs depending on whether you have the High Density or Standard Density Kraken appliance. The Kraken can then be configured to input streams from and/or send streams out on any of the available NICs. - Page 90 Configuring Network Settings Select or enter the new value(s) in the appropriate field(s). See “Network Settings” page 91. To enable SNMP alerts, toggle the button to and specify the read-only SNMP community string and trap server(s). Kraken User’s Guide, v2.6, Issue 02...
-
Page 91: Network Settings
Apply To apply your saved changes, click Reboot The Kraken will reboot. You need to refresh the page after approximately five minutes to see the Login page again. Network Settings The following table lists the Kraken Network settings:... - Page 92 Check this checkbox to disable (i.e., bypass) transcoding. This may be useful in the following cases: ● Monitoring: Kraken's NICs are often used over multiple network segments, where it routes inbound traffic from one NIC to a second one with transcoding involved during the process.
- Page 93 IP Address, Netmask & Gateway Address. IP Address Displays the IP Address for the Kraken. This is a unique address that identifies the unit in the IP network. If DHCP is disabled, you may enter an IP address NOTE: in dotted-decimal format.
-
Page 94: Updating The System License
Updating the System License Updating the System License You can update your Kraken license directly from the Web Interface. Updating a license is typically required to expand the feature set or capabilities of the system, for example, to upgrade from SD to HD, enable KLV data, or obtain more input streams or unique transcodes. -
Page 95: Setting Up The Rest Api
For details on the API, please see the Kraken API Inte- grator’s Guide. From the REST API page, you perform two steps required to use the Kraken API. First, you must enable API access. Second, because OAuth uses a key pair authentication mechanism, you need to generate the credential (i.e., a key and secret pair). -
Page 96: Managing User Accounts
The My Account page is available to users assigned either NOTE “Changing Your Password” accounts. See on page 31. Kraken provides three predefined user accounts to assign privileges to users. For the “Role-based Authorization” privileges assigned to accounts, see on page 27. To view and configure the user accounts: On the Administration page, click from the sidebar menu. - Page 97 To reset the password for the accounts, skip to the following step #4. Type the new password in the New Password field and again in the Confirm New Password field. Click Apply Kraken User’s Guide, v2.6, Issue 02...
- Page 98 5: Accessing the Console UI HAPTER This chapter provides the information you need to know to use the Console UI on Kraken appliances. The Console UI provides a non-Web interface to perform basic system admin- istration tasks and network tests.
-
Page 99: Logging In To The Console Ui
Logging in to the Console UI Logging in to the Console UI To log in to the Console UI: If you have connected with a keyboard and monitor to the Kraken, you will see the Login screen for the Console UI. -or- Initiate a Secure Shell (SSH) connection to the server with the User “... -
Page 100: Console Ui Menus
● Press Enter to save your changes or Escape to cancel and close the screen. To display system status information about the Kraken appliance, press Enter while the General Info menu line is highlighted (as shown in the figure above). -
Page 101: System Status
Accessing the Console UI System Status System Status The General Info screen displays system status information about the Kraken appliance, such as the firmware Version, system Uptime, Memory Usage, and CPU Usage (as shown in the following example). This is a read-only screen. -
Page 102: Network Settings
Accessing the Console UI Network Settings Network Settings To display the network interface settings for the Kraken appliance, scroll down to the Network Settings menu line (as shown in the figure below). To display and edit the network settings, press Enter. - Page 103 Use the Up and Down Arrow keys to scroll through the lines. For each setting to change, backspace to delete existing settings and then type in your modifications. Press Enter to save your changes and close the screen. Kraken User’s Guide, v2.6, Issue 02...
-
Page 104: Test Network
Accessing the Console UI Test Network Test Network To test the network connectivity for the Kraken, scroll down to the Test Network menu line and press Enter. Use the Up and Down Arrow keys to scroll through the lines. The Test Network screen provides four possible network tests (described in the following table). - Page 105 Accessing the Console UI Test Network The ping results will be displayed on the screen (as shown on the following example) Kraken User’s Guide, v2.6, Issue 02...
-
Page 106: System Logs
Accessing the Console UI System Logs System Logs To view the system logs for the Kraken appliance, scroll down to the System Logs menu line and press Enter. The available System Logs include the Upgrade log, Linux messages, Haivision log, and Console UI log. -
Page 107: Change Password
Accessing the Console UI Change Password Change Password To change the password for the Kraken Console UI current user, scroll down to the Change Password (Current User) menu line and press Enter. Type in the new password. Press Tab or the Down Arrow and type the password again in the Confirm new password line. -
Page 108: Terminal
Accessing the Console UI Terminal Terminal To launch a terminal session from the Kraken Console UI, scroll down to the Terminal menu line and press Enter. To cancel the session or close the active session, type ctrl x Any unauthorized modification to this system may void all warranties IMPORTANT and support. -
Page 109: Reboot/Shutdown
Accessing the Console UI Reboot/Shutdown Reboot/Shutdown To reboot or shut down the Kraken appliance, scroll down to the Reboot/Shutdown menu line and press Enter. ● To reboot the appliance, press Enter while the Reboot menu line is highlighted. ● To shut down the appliance, scroll down to the Shutdown line and press Enter. -
Page 110: Log Out
Log Out To log out of the Console UI, scroll down to the Log Out menu line and press Enter. To confirm that you want to log out, type . Or type to cancel. Kraken User’s Guide, v2.6, Issue 02... -
Page 111: Appendix A: Glossary Of Terms
The video frame rate per second. Furnace Haivision’s IP video management server. Group of Pictures. In relation to Kraken, the GOP size specifies how often an I-Frame is sent. HEVC High Efficiency Video Coding. Also known as H.265 and MPEG- H Part 2. - Page 112 Personal Identification Number. Program Map Table, a collection of PIDs available in a transport stream. Resolution The stream output resolution, i.e., the number of lines per frame and pixels per line to be transcoded. Kraken User’s Guide, v2.6, Issue 02...
- Page 113 The number of bits used per unit of time to represent a video stream. Measured in kilobits per second (kbps). Video On Demand. An interactive technology that allows users to select and view programming in real time or download programs and view them later. Kraken User’s Guide, v2.6, Issue 02...
- Page 114 Glossary of Terms XML Entity An XML opening and closing tag in combination with its payload, e.g., the “demo” entity refers to: <demo> <id>myID</id> <name>myName</name> <value>myValue</value> </demo> XML Tag A named XML entity, e.g. <demo>. Kraken User’s Guide, v2.6, Issue 02...
- Page 115 A: Technical Specifications PPENDIX This appendix lists the technical specifications for the Kraken. Topics In This Appendix Transcoding ........... 116 Video Processing .
-
Page 116: Appendix A: Technical Specifications Transcoding
Up to Level 4.2 (1080p60) Transport Stream 0 kbps - 20 Mbps CBR, VBR Input MPEG-2 MainProfile@MainLevel (SD) MainProfile@HighLevel (HD) Transport Stream Up to 20 Mbps CBR, VBR Input Audio MPEG1 layer 2 AAC 2 channel and 5.1 Kraken User’s Guide, v2.6, Issue 02... - Page 117 Audio Sync Preserved Metadata Pass-through (Supported Standards) Closed Captioning (EIA-608 & EIA-708) KLV with support of both Asynchronous and Synchronous KLV Support of MISB Standard 0601 Support of MISB Standard 0604 SMPTE 336M-2007 Data Encoding Protocol Kraken User’s Guide, v2.6, Issue 02...
-
Page 118: Video Processing
Single Program Transport Stream (SPTS) Multi Program Transport Stream (MPTS) inputs are not supported. NOTE: Unicast/Multicast TS over UDP Session Announcement (SAP) Management Management Interfaces Web User Interface (HTTPS only) REST API Console UI Kraken User’s Guide, v2.6, Issue 02... -
Page 119: Physical
Dimensions (H x W x D): Dimensions without faceplate (1RU): 1.68” x 17.09” x 23.9” (in) 42.8 mm x 434.0 x 607 (mm) Weight: 43.87 lbs. (19.9 kg) Power: 2x Redundant 100-240 VAC 550 W Power Supplies Kraken User’s Guide, v2.6, Issue 02... -
Page 120: Kraken Server Ultra System (S-Kr-Ultra)
213.87 x 124.97 x 44.45 mm Weight: 2.6 lbs. (1.18 kg) Power: 100-240 VAC External locking power supply 12-28 VDC, 45W Temperature: Operating: 0° to 50°C (32° to 122° F) Non-Operating: -40° to 50°C (-40° to 122° F) Kraken User’s Guide, v2.6, Issue 02... -
Page 121: Appendix B: Warranty Information
ONE (1) YEAR from the date of equipment shipment (“Warranty Period”). If a hardware defect arises and a valid claim is received within the Warranty Period, at its option and to the extent permitted by law, Haivision will either... -
Page 122: Obtaining Warranty Service
The Authorized Reseller or Haivision will help determine whether your product requires service and, if it does, will inform you how Haivision will provide it. You must assist in diagnosing issues with your product and follow Haivision’s warranty processes. -
Page 123: Software End User License Agreement
Product, but none so significant as to warrant classification as an Upgrade, which may be provided by Haivision to fix critical or non-critical problems in the Product on a scheduled, general release basis. Updates to the Product (“Version”) are denoted by number changes to the right of the decimal point for a version and revision number (for example, going from 2.0.0 to 2.1.0). - Page 124 You and not, by implication or otherwise, to any parent, subsidiary or affiliate of Yours without Haivision’s specific prior written consent. This license is for the limited use of the Product by You for the purpose of creating, managing, distributing and viewing IP Video assets. This license does not grant any license for content whatsoever.
- Page 125 Termination; Effect; Survival. All license rights granted hereunder shall terminate; You shall immediately pay to Haivision all amounts due and outstanding as of the date of such termi- nation or expiration; and You shall return to Haivision all Product and all Haivision Reference Manuals or certify that all such Product and Reference Manuals have been destroyed.
- Page 126 Haivision, which approval shall not be unreasonably withheld. If any Product is, or in the opinion of Haivision may become, the subject of any Claim for infringe- ment, then Haivision may, or if it is adjudicatively determined that any of the Product infringes in...
- Page 127 You (if any) related to the Product. Haivision may use this information, as long as it is in a form that does not personally identify You, to improve its products or to provide services or technologies to You.
- Page 128 Third Party Content. Haivision does not warrant or endorse and does not assume and will not have any liability or responsibility to You or any other person for any Third Party content.
- Page 129 Entitlement (or to such other address as may be designated by a party from time to time in accordance with this Section 6.16. If you have questions, please contact Haivision Systems Inc., at 4445 Garand, Montréal, Québec, H4R 2H9 Canada or legal@haivision.com.
Need help?
Do you have a question about the Kraken and is the answer not in the manual?
Questions and answers