Advertisement
www.workoutwarehouse.com
Model No. GGEX62410.0
Serial No.
USER'S MANUAL
Write the serial number in the
space above for reference.
Serial Number
Decal
QUESTIONS?
If you have questions, or if parts
are damaged or missing, DO NOT
CONTACT THE STORE; please
contact Customer Care.
IMPORTANT: Please register this
product (see the limited warranty
on the back cover of this manual)
before contacting Customer Care.
CALL TOLL-FREE:
1-877-776-4777
Mon.–Fri. 6 a.m.–6 p.m. MT
Sat. 8 a.m.–4 p.m. MT
ON THE WEB:
www.workoutwarehouse.com
CAUTION
Read all precautions and instruc-
tions in this manual before using
this equipment. Keep this manual
for future reference.
Advertisement
Table of Contents

Related Manuals for Gold's Gym GGEX62410.0


Summary of Contents for Gold's Gym GGEX62410.0
- Page 1 Model No. GGEX62410.0 Serial No. USER’S MANUAL Write the serial number in the space above for reference. Serial Number Decal QUESTIONS? If you have questions, or if parts are damaged or missing, DO NOT CONTACT THE STORE; please contact Customer Care.
-
Page 2: Table Of Contents
TABLE OF CONTENTS WARNING DECAL PLACEMENT ............. . . 2 IMPORTANT PRECAUTIONS . -
Page 3: Important Precautions
IMPORTANT PRECAUTIONS WARNING: To reduce the risk of serious injury, read all important precautions and instructions in this manual and all warnings on your exercise bike before using your exercise bike. ICON assumes no responsibility for personal injury or property damage sustained by or through the use of this product. -
Page 4: Before You Begin
BEFORE YOU BEGIN Thank you for selecting the new GOLD’S GYM ® reading this manual, please see the back cover of this CYCLE TRAINER 310 exercise bike. Cycling is an manual. To help us assist you, note the product model effective exercise for increasing cardiovascular fitness, number and serial number before contacting us. -
Page 5: Assembly
ASSEMBLY • To hire an authorized service technician to assem- • In addition to the included tool(s), assembly ble the exercise bike, call 1-800-445-2480. requires the following tools: one Phillips screwdriver • Assembly requires two persons. one adjustable wrench • Place all parts in a cleared area and remove the packing materials. - Page 6 2. Attach the Rear Stabilizer (8) to the Frame (1) with two M8 x 35mm Carriage Bolts (52) and two M8 Locknuts (62). 3. Orient the Handlebar Post (5) as shown. Loosen the indicated Adjustment Knob (21) on the front of the Frame (1) and pull it outward. Then, insert the Handlebar Post (5) into the Frame.
- Page 7 5. Orient the Seat Post (2) as shown. Loosen the indicated Adjustment Knob (21) on the Frame (1) and pull it outward. Then, insert the Seat Post into the Frame. Move the Seat Post (2) upward or downward to the desired position, release the Adjustment Knob (21) into an adjustment hole in the Seat Post, and then tighten the Adjustment Knob.
- Page 8 7. Identify the Right Pedal (15), which is marked with an “R.” Using an adjustable wrench, firmly tighten the Right Pedal (15) clockwise into the Right Crank Arm (14). Tighten the Left Pedal (not shown) counter- clockwise into the Left Crank Arm (not shown). 8.
- Page 9 10. Slide the Console (20) onto the Console Mount (19). Connect the wire on the Console to the Reed Switch Wire (47) in the Frame (1). Wire 11. Make sure that all parts are properly tightened before you use the exercise bike. Note: After assembly is completed, some extra parts may be left over.
-
Page 10: How To Use The Exercise Bike
HOW TO USE THE EXERCISE BIKE HOW TO ADJUST THE SEAT HOW TO ADJUST THE SEAT POST You can adjust the angle of the seat to the position that For effective exercise, the seat should be at the proper is most comfortable. You can also slide your seat for- height. -
Page 11: Fcc Information
HOW TO USE THE PEDALS HOW TO LEVEL THE EXERCISE BIKE To use the pedals (see the drawing on page 4), If the exercise bike rocks slightly on your floor during insert your shoes into the toe cages and pull the ends use, turn one or both of the leveling feet on the front or of the toe straps. - Page 12 FEATURES OF THE CONSOLE 3. Select one of the modes. The easy-to-use console features six modes that pro- Scan mode—To select the scan mode, press vide instant exercise feedback during your workouts. the Mode button repeatedly until the word SCAN appears in the display.
-
Page 13: Exercise Guidelines
EXERCISE GUIDELINES Aerobic Exercise—If your goal is to strengthen your WARNING: cardiovascular system, you must perform aerobic Before beginning this exercise, which is activity that requires large amounts or any exercise program, consult your physi- of oxygen for prolonged periods of time. For aerobic cian. -
Page 14: Part List
PART LIST Model No. GGEX62410.0 R0711C Key No. Qty. Description Key No. Qty. Description Frame Resistance Pad Seat Post Pad Bracket Seat Carriage Large Spacer Seat Small Spacer Handlebar Post D-bracket Handlebar T-bracket Front Stabilizer Stud Rear Stabilizer Seat Clamp... -
Page 15: Exploded Drawing
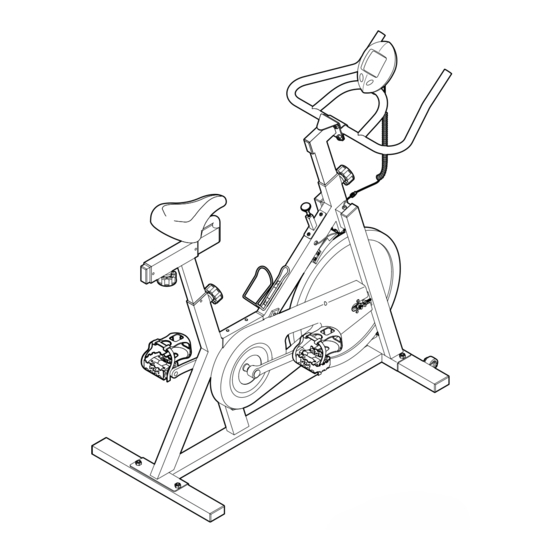
EXPLODED DRAWING Model No. GGEX62410.0 R0711C 21 55... -
Page 16: Ordering Replacement Parts
ORDERING REPLACEMENT PARTS To order replacement parts, please see the front cover of this manual. To help us assist you, be prepared to provide the following information when contacting us: • the model number and serial number of the product (see the front cover of this manual) •...
Need help?
Do you have a question about the GGEX62410.0 and is the answer not in the manual?
Questions and answers