Table of Contents
Advertisement
Quick Links
Advertisement
Table of Contents

Related Manuals for Torrey W-LABEL 40L


Summary of Contents for Torrey W-LABEL 40L
- Page 1 TORREY SCALES W-LABEL SERIES USER MANUAL Rev. 0.
-
Page 2: Table Of Contents
INDEX W-LABEL 1. - INTRODUCTION..........................5 2.- TECHNICAL SPECIFICATIONS DESCRIPTION................ 5 3. - LABEL WEIGHING SCALE PARTS & THERMAL PAPER ROLL......... 6 3.2. - TICKET PLACEMENT MODE OF SALE.................. 8 4. - USAGE RECOMENDATIONS......................9 4.1.-INFORMATION OF PRODUCT TYPES. - Page 3 16.-MEMORY SETTINGS........................39 16.1.- DELETE SALES........................... 39 16.2.- DELETE PRODUCTS......................... 40 16.2.- DELETE ALL..........................40 17.-LANGUAGE SETTINGS........................ 41 18.-SCALE INFORMATION........................ 42 19.- SCALE’S OPERATION ......................... 43 19.1.- ADJUST TO ZERO........................43 19.2- TARE FUNCTION........................43 19.3.- AGENT SELECTION.
- Page 4 - 4 -...
-
Page 5: Introduction
1. - INTRODUCTION. The newest labeling scale W-LABEL offers a weighing method and a very easy way to sell products precisly. Users will be able to monitor their sales behavior, returns and efectiveness of your workers. It also has a remote administration system and the capacity to connect to several scales at the same time. Charasteristics: ... -
Page 6: Label Weighing Scale Parts & Thermal Paper Roll
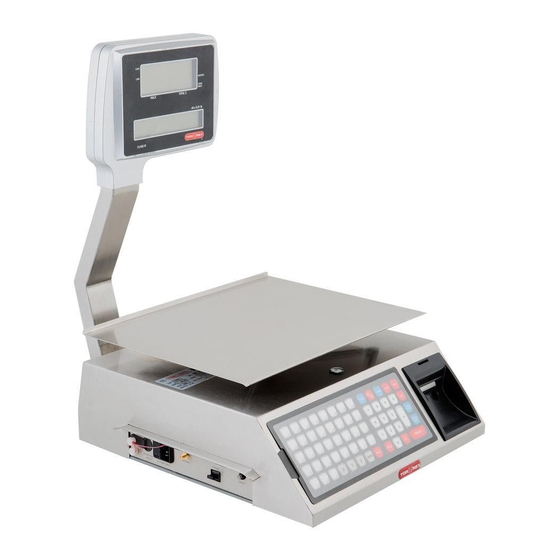
3. - LABEL WEIGHING SCALE PARTS & THERMAL PAPER ROLL. Within the scale’s package W-Label you will find the following: 1 Scale W-LABEL. 1 Power Cable. 1 Termic paper roll. 1 rollo con 750 etiquetas térmicas. ... - Page 7 3.1. - LABELING PRE-PACKING MODE * Printer Opening: Pull the release lever on the right side of the scale toward the front of the scale as shown in the image on the left. * Closing the Printer: Once the roll of labels or tickets has been installed, lift the lock lever on the front of the scale.
-
Page 8: Ticket Placement Mode Of Sale
3.2. - TICKET PLACEMENT MODE OF SALE. * Printer Opening: Pull the release lever on the right side of the scale toward the front of the scale as shown in the image on the left. * Printer Close: Once the roll of labels or tickets has been installed, lift the lock lever on the front of the scale. -
Page 9: Usage Recomendations
4. - USAGE RECOMENDATIONS. Avoid installing the scale in unstable places. Place the scale only on rigid, flat and level surfaces. Avoid energizing the scale in unregulated outlets. Avoid placing fans or heaters directed at the scale. ... -
Page 10: Displays Description
5. - DISPLAYS DESCRIPTION. The W-LABEL scale consists of the operator display and the customer display both show the same information to both operator and customer. 5.1. - OPERATOR AND CUSTOMER’S DISPLAY These displays are the main interface between the operator, customer and the scale as it is here that shows the information regarding the current operation, in addition to displaying advertising messages. -
Page 11: Touchpad Description
6. - TOUCHPAD DESCRIPTION. This section shows the scale keys as well as the special functions. Alphanumeric keyboard: Opens the list of sellers registered and allows to select some to register their transactions. Allows the output of a label or a small stretch of thermal paper (ticket). Activates the Change operation, for more information, see Section 24. - Page 12 Enter the configuration menu with the user code. (Default 123456). It takes the numeric value entered as a PLU number, searches it in the Database and, if found, displays it on the display. In case of no The beacon will only emit a beep and will not show anything.
- Page 13 Change to lowercase letters or vice versa. Delete previous character. Space bar. Displays special symbols that are not on the keyboard. GO / ENTER. The alphabetic keyboard when in PRODUCT ENTRY mode (enabled) is used to enter the name of the product while a sale is being made.
-
Page 14: Entering The Setup Menu
7. - ENTERING THE SETUP MENU. This operation will be performed each time the user needs to modify any parameters previously set. 1.- Press the PROG button the word PASS will immediately appear in the advertising display: At this point, press the 123456 sequence and then press ENTER to enter the configuration menu. -
Page 15: Scale Configuration In Pre-Pack (Label) Mode Or Point Of Sale
8.2. - SCALE CONFIGURATION IN PRE-PACK (LABEL) MODE OR POINT OF SALE (TICKET). This section shows the steps to configure the WLABEL scale to print labels or tickets. Enter the GENERAL 1 submenu following the steps described in section 7 entered the setup menu page. -
Page 16: Miscellaneous Product Configuration
9.- MISCELLANEOUS PRODUCT CONFIGURATION. The various products are those of which a sale is made without having to be programmed in the scale previously, by enabling the function of VARIOUS PRODUCTS is allowing to enter products from the keyboard that normally are not entered in the memory of the scale. At the time of printing the sale of a product various weighable the predefined description will be that of "Item lb". -
Page 17: Fixed Price Setting
10.- FIXED PRICE SETTING. The fixed price setting prevents a product price (PLU) from being modified by the seller during the sales process. When the price lock is enabled the scale will ask for the administrator password (123456 by default) to accept the new price (this price will not be stored in the scale memory). -
Page 18: Keyboard Mode Settings
11.- KEYBOARD MODE SETTINGS. The keyboard has two setup options, DIRECT ACCESS mode and PRODUCT INPUT mode. In the DIRECT ACCESS mode it will not be possible to enter new products during the sales operation. In PRODUCT ENTRY mode it is possible to enter a new product during the sales operation but they can’t be stored in the product memory. -
Page 19: Products Configuration
12.-PRODUCTS CONFIGURATION. In the “2 PRODUCTS” submenu you can create new products, edit the existing products or delete any of them. 1.- Enter the 2 PRODUCTS submenu following the steps described in section 7 entered the configuration menu p.14 2.- Using the arrow key select the option 2 PRODUCTS and press ENTER within this sub-menu you can find the following: CREATE PRODUCT, EDIT PRODUCT and DELETE PRODUCT. - Page 20 5.- Press ENTER Choose with the arrows pad the type of product and then press ENTER 6.1- The scale by default assigns a new 6.-Press: ENTER code for the product, but this can be changed by the user once he presses ENTER.
-
Page 21: Edit A Product
12.2.- EDIT A PRODUCT. 1.- To edit a product get into the “Edit Product” option and follow section 12 steps 1.1.- Press ENTER to get into the option. You will only use the arrow keys to move around the options. ENTER key and the red letter C. - Page 22 9.-The ID code is not editable, 9.1- To go back to the edit menu To watch it press: ENTER press: ENTER 12.1- Wait for a few seconds till the scale finishes saving 12.- To save changes press changes and you will be thrown ENTER back to the submenu CANCEL: To cancel a product changes use the arroe keys to go to the cancel...
-
Page 23: Delete A Product
12.3.- DELETE A PRODUCT. 1.- To delete a product go into the option “DELETE PRODUCT” and follow section 12 steps. 1.- Get into the option pressing ENTER 2.- Product’s code and name are shown in the menu and can be watched by moving around with the arrow keys and once you select. -
Page 24: 13-Red Settings
13-RED SETTINGS. The network option helps you choose the network type of your scale for connectivity with third party apps. 1.- Go into the NETWORK menu option from the main menu configuration p 14. 2.- With the arrow keys select the options 3 Then press ENTER. -
Page 25: Ethernet Info
Shows the IP Address of the scale. Shows the Network MASK. Shows the scale’s data gateway. 13.1.2. ETHERNET INFO. Into this option you will see the Ethernet option. 1.- Follow section 13 steps and select Network Info 2.- Press ENTER to get into the menu. And with the arrow keys to see the different options that it has such as: (ETHERNET, STATUS- CONNECTED/ DISCONNECTED, RED- SCALE_LINK_#, IP#, MASK#, GATEWAY-#). -
Page 26: 3- Network Info Adhoc
Shows the scale’s Gateway. To be out of the menu just press the back button 4 times 13.1.3- NETWORK INFO ADHOC <HOT SPOT> Inside this option you’re able to see the whole network information of ADHOC Connection. 1.- Follow section 13th steps into this option. 2.- Press ENTER to get into this menu option. - Page 27 Shows the Network Mask. Shows data gateway of the scale. To be off the menu just press the back button 4 times. - 27 -...
-
Page 28: Type Of Connection Configuration
13.2.- TYPE OF CONNECTION CONFIGURATION. 1.- Follow section 13 instructions to know your way into this menu. 1.1- Press ENTER to get into the menu. And move around with the arrow keys to see all the different options: WIFI (Only for scales with wifi anthenna) ETHERNET, ADHOC <HOT SPOT>, to get into any of these press ENTER. -
Page 29: Wifi Connection Configuration
13.2.1.- WIFI CONNECTION CONFIGURATION. (Only for Scales with WIFI Connectivity Available). 1.- Follow section 13th steps and then select WIFI by pressing ENTER. 2- Wait a few seconds while the scale configures this options and saves changes, once it ends it goes automatically into the “Look for network” option but if you wish you can use the arrow keys to select for advance settings. -
Page 30: Ethernet Configuration
Scale will reboot after a successful connection. After rebooting the scale will be back into the submenu NETWORK INFO Once you press ENTER you’ll be able to see the network characteristics already stablished: Network Type, Conection Status, Network Name, IP Address, Network Mask, Gateway. - Page 31 3.1.- When choosing DYNAMIC IP the scale configures automatically the necesary parameters for it to work dinamically on the scale. 3.1.1.-Once done 3.1.2.-The scale will It will show reboot by itself ***READY** and go into CONFIGURATION. 3.2.- When choosing STATIC IP, it should assign it’s IP automatically, it’ll show the message Type IP 3.2.1.- By default the IP address is 192.168.106.20 with the arrow keys you can move around it’s...
-
Page 32: Adhoc
13.2.3.- ADHOC <HOT SPOT> CONECTION CONFIGURATION. 1.- Follow the steps on section 13.2 type of connection configuration P.28 and choose ADHOC <HOT SPOT> by pressing ENTER. 2- Wait a few seconds while the scale activates this function and saves changes, once done, it goes automatically into SETTINGS. 3.- The conection indicator will go off, see reference (section 4.1 p.Conection Configuration -
Page 33: Printer Configuration
3.1.2.- Press ENTER to place an 8 character long password 3.1.3.- You can use letters and numbers on this one. The CAPS key allows you to go from capitalized letters to normal and viceversa, You can erase characters by using the DEL key or the C key, With the arrow keys you can move around the digits. -
Page 34: Auto Print Settings
14.1.- AUTO PRINT SETTINGS. AUTO PRINT is a label exclusive option, this function saves you time packing a product. 1.- Follow the steps on section 14 type of connection configuration P.33 and choose AUTO PRINT by pressing ENTER. 2.- Press ENTER to go into the option. And with the arrow keys you can see the parametters ENABLED, DISABLED. -
Page 35: Printer Contrast Settings
14.2.- PRINTER CONTRAST SETTINGS. On this option you can configure the printer contrast. Level 1 it’s the clearest and level 10 it’s the darkest. 1.- Follow section 14 steps P.33 and choose CONTRAST 2.- Press ENTER to go into this option and by using the arrow keys you can go onto the contrast levels. -
Page 36: 15-Date And Time Settings
15-DATE AND TIME SETTINGS. This menu option will help you be synchronized with your business and it makes it easier to manage a business. 1.- Go into the menu option 5 DATE AND TIME by followinf section’s 7 steps p. 14 2.- Using the arrow keys select the option 5 DATE AND TIME, and press ENTER Inside this menu you can find the following options: SEE DATE AND TIME, SET DATE, SET TIME,... -
Page 37: Set Time
4.- Use the arrow keys to move around the digits and replace any of the digits with the number pad or press the DEL key or C key to erase a digit. Once you’re done with the month press ENTER to go to DAY. 5.- Use the arrow keys to move around the digits and replace any of the digits with the number pad or press the DEL key or C key to erase a digit. -
Page 38: Date Format Settings
15.4.-DATE FORMAT SETTINGS. This menu option allows you to change the date format shown on scale. (MM/DD/AAAA or DD/MM/AAAA) 1.- Follow section 15 steps P.36 and choose DATE FORMAT. 2.-Press ENTER to get into this option. 3.- Choose the format you like the most with the arrow keys and press ENTER to select it, the scale will save this selected format. -
Page 39: Memory Settings
16.-MEMORY SETTINGS. The memory settings allows you to erase products en sales. 1.- Get into the 6 MEMORY menu option following section 7 steps p. 14 2.- With the arrow keys go to 6 MEMORY and press ENTER to go into it. Inside this menu option you can find the following options: DELETE SALES, DELETE PRODUCTS, DELETE EVERYTHING. -
Page 40: Delete Products
16.2.- DELETE PRODUCTS. This option allows you to delete all the products saved in the scale’s memory. 1.- Get into the 6 MEMORY menu option following section 7 steps p. 14 and choose DELETE PRODUCTS. 2.- Press ENTER to go into the option. 3.- The scale will show you a message saying: DELETE ALL PRODUCTS? If you want to cancel this operation press the RETURN key or the C key to go... -
Page 41: Language Settings
4.-The scale will ask you for the user’s password(usually 123456) to proceed with the operation. 5.-After erasing all data from scale it will reboot and take you tio the main screen. 17.-LANGUAGE SETTINGS. This option configures the menu language, home screen remains the same. 1.- Follow section’s 7 steps p. -
Page 42: Scale Information
18.-SCALE INFORMATION. 1.- Follow section 7 steps to go into this option p. 14 2.- With the arrow keys go the the 8th option and press ENTER. Inside this menu option you can find the different messages: SERIAL NUMBER, SOFTWARE VERSION. -
Page 43: Scale's Operation
19.- SCALE’S OPERATION 19.1.- ADJUST TO ZERO. To assure the nnew cero reference make sure the scale doesnt have any weight on it and press the CERO key: 19.2- TARE FUNCTION. Tare function is used when a product has a conteiner that adds weight to the product. To use this function place the empty container on the plate and press : The weight display will return to zero and the ZERO... -
Page 44: Agent Selection
19.3.- AGENT SELECTION. To select an agent from the scale press the VEND key on the scale’s keyboard and it will show a menú that shows the agents list : Use the arrow keys to move around the list and press ENTER to select the agent on the scale. -
Page 45: Paper Feed
19.5.- PAPER FEED. This function allows you to have a portion of the paper or a label in blank. To actívate this function just press the ADVANCE PAPER button and the display will show the NEG indicator. 20.- PLU SELECTION. Follow section 11 steps p. -
Page 46: Non Plu Non Weightable Sale
22.- NON PLU NON WEIGHTABLE SALE. Follow section 9 steps p.16. and choose ENABLE. 1-. Get the weight off the scale and use the numeric pad to type in the product’s Price on the scale. Press the PIECES key on the scale followed by the quantity to sale. -
Page 47: Pre-Packing Mode - Non Weighable Products Sale
2.- wait till the weight on the scale is stable and the Screen shows 0.000. 3.- If you dont want to repeat the las steps over and over you can press STATIC PRICE to work with the same product and price: 23.2.- PRE-PACKING MODE –... -
Page 48: Pre-Packing Mode - Sell Of Several Weighable Products
23.3.- PRE-PACKING MODE – SELL OF SEVERAL WEIGHABLE PRODUCTS. To sell several product you must follow these steps: Follow section 11 steps p. 18. 1.- Type the non plu name on the scale and then press ENTER then the display will show the product’s name on the publicity display 2.- Type in the Price of the new product and then place the product on the scale’s plate, if you remove the weight off the scale the scale will go back to zero and the product’s information would be gone. -
Page 49: Point Of Sale Mode - Weighable And Non Weighable Products Sale
23.5.- POINT OF SALE MODE – WEIGHABLE AND NON WEIGHABLE PRODUCTS SALE. To sell several products at once and mix products by their weight or by piece follow the next steps. Follow section 8.2 steps. 1.- Type the code asigned to the plu example 101, once done the display will show the product’s price, after this press PLU. -
Page 50: Apply Discounts
24.- APPLY DISCOUNTS. This function allows the user apply discounts to the products they’re selling: To apply a discount there most be at least 2 products on list to sell. Press the –D/DEV PLU key. By using the arrows keys you can either choose the discount to apply or select to cancel the sale. -
Page 51: Returns
25.- RETURNS. This operation allows you to make returns of a product before been charged to the customer ore ven after been charged. 25.1 IMMEDIATE RETURN. To make an immediate return follow the these steps: To apply this function on the scale there must be at least a producto n list to sell and not been charged yet or printed the ticket of the sale. -
Page 52: Later Return
25.2 LATER RETURN To apply this return there must be at least a producto n the list of the sale and it should be charged to the customer already. To achieve a later return follow these steps: Place the product on the scale. Type in the plu number of the product to be returned. -
Page 53: Change Operation (Ticket)
26.- CHANGE OPERATION (TICKET). This function allows you to calculate the change to give to the customer. Once you have the sale ready to be charged to the customer and you need to calculate how much you have to give back to the customer follow the next steps: On the image you have 3 items on the list and a total amount of 493.75, to know how much change you have to give press the plus key followed by the blue change button. -
Page 54: Ios Scale Link App V1.0.0
27.- IOS SCALE LINK APP V1.0.0 Download the app from the Apple App Store, you can find it as Scale Link. 27.1.- SET CONNECTION WITH IOS DEVICE. 1.- Select the type of connection on the WLABEL scale. ADHOC<HOT SPOT> Following section 13.2.3 Select Network Info and look for the network’s name and the ip address and sabe them to use... -
Page 55: Initial Scale's Configuration On The Ios Device
Your iOS device will use the scale’s ip address as well as the nework’s name to connect to it. On your iOS device select the network that your scale created. When initializing the app you must type in the ip address on the section: Select connect to: Scale Then press: Register... -
Page 56: General Settings From The Ios Device
27.2.1 GENERAL SETTINGS FROM THE IOS DEVICE. 27.2.1.1 TORRET’S DISPLAY MESSAGES. Within this section you can edit up to 5 messages of no more than 34 charachters including spaces on each one of the text fields. These messages are shown on the publicity display. Save changes by pressing the Save button.. -
Page 57: Administrator And Supervisor Passwords
27.2.1.3 ADMINISTRATOR AND SUPERVISOR PASSWORDS. Users can change the administrator and supervisor passwords of the scale. Once you finish changing the passwords you can press SAVE. 27.2.1.4 .TIME AND DATE FORMATS. The different types of date formats are: dd/MM/yyyy This can be understood as Day/month/year. MM/dd/yyy This can be understood as month/day/year. -
Page 58: Headlines
27.2.2. HEADLINES. This section allows you to modify the messages appearing on sale tickets or labels. DESCRIPTION: Place here the message for the ticket’s headline where usually goes the business name. ALIGN: Allows you to set the position of the message on the ticket/label. SIZE: User can use this parameter to alter the headline’s size using up to 6 different sizes. - Page 59 Weight’s Text: This text gets printed on top of the weight indicator. It’s Weight lb by default. Price Text: this text gets printed on top of the Price indicator. By default is “ Price $/lb”. Total Text: this text gets printed on top of the total amount on the ticket. By default is“Total $”. Agent text: Is the text that gets printed on top of the Agent’s name.
-
Page 60: Printing Format
27.2.3 PRINTING FORMAT. The following Screen shows you the parameters to print : 27.2.3.1 BARCODE CONFIGURATION This Screen allows you to choose from 2 predefined formats base don the type of paper on the scale. - Choose the fbarcode format you feel more comfortable with. - 60 -... - Page 61 - Barcode gets composed by the following parameters: Letter Meaning Recomendation AGENT CONSECUTIVE Product’s code Product’s weight Total Department Product’s number Prefix Not read digit Checker(non editable – automatic) - Code Format – Weight: EAN13: P C C C C C C W W W W W V UPC12: X C C C C C C W W W W W V - Code Format –...
Need help?
Do you have a question about the W-LABEL 40L and is the answer not in the manual?
Questions and answers