Table of Contents
Advertisement
Quick Links
Advertisement
Table of Contents

Related Manuals for Hytera VM685


Summary of Contents for Hytera VM685
- Page 1 Preface Welcome to the world of Hytera and thank you for purchasing this product. To derive optimum performance from the product, please carefully read this manual before use. This manual is applicable to the following product: VM68x Remote Video Speaker Microphone...
- Page 2 Warning Copyright Information Hytera is the trademark or registered trademark of Hytera Communications Corporation Limited (the Company) in the People's Republic of China (PRC) and/or other countries or area. The Company retains the ownership of its trademarks and product names. All other trademarks and/or product names that may be used in this manual are properties of their respective owners.
- Page 3 4.The device complies with RF specifications when the device used at 0cm form your body. Body SAR: 0.231 W/Kg 5.Declaration of Conformity We, Hytera Communications Corporation Limited hereby, declare that the essential requirements compliance with the Directive 2014/53/EU. have been fully fulfilled on our product with indication below: Product Name: RVM (Remote Video Speaker Microphone)
- Page 4 -Reorient or relocate the receiving antenna. -Increase the separation between the equipment and receiver. -Connect the equipment into an outlet on a circuit different from that to which the receiver is connected. -Consult the dealer or an experienced radio/TV technician for help. Specific Absorption Rate (SAR) information: This RVM (Remote Video Speaker Microphone)
- Page 5 l'émetteur et votre corps. Cet appareil et sa ou ses antennes ne doivent pas être co-localisés ou fonctionner en conjonction avec tout autre antenne ou transmetteur.
-
Page 6: Packing List
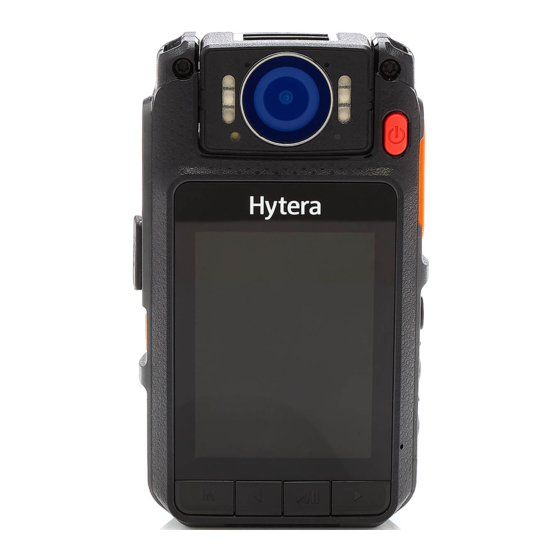
1. Packing List Item Qty. Remote Video Microphone (RVM) Battery Belt Clip USB Cable Power Adapter Documentation Kit... - Page 7 2. Product Introduction 2.1 Product Layout Part Name Part Name Push-to-Talk (PTT) Key Microphone 1 Video Recording Key Speaker Audio Recording Key Accessory Interface (10-pin) Photo Taking Key Battery Latch Light Sensor USB Connector Infrared (IR) LED Emergency Alarm Key LED Indicator On/Off Key Microphone 2...
-
Page 8: Led Indicators
Part Name Part Name Lens Microphone 3 Keys (Menu/Back Key, Left Key, Light Compensator Play/Pause/Confirm Key, Right Key) 2.2 LCD Icons Icon Description WLAN is enabled. WLAN hotspot is enabled. BT Feature is enabled. The wireless connection is established. The remaining capacity of the TF card is less than 2 GB. The TF card is full. -
Page 9: Specifications
LED Indication Description Call idle. You can press and hold the PTT key to speak. Glows orange Flashes orange rapidly Idle status in Emergency Alarm mode. Flashes red once every five The battery runs low. Please recharge or replace the battery in time. seconds Flashes red slowly The product is recording video. - Page 10 Display Type TFT-LCD 262K color display Standard: 16 GB Built-in Storage Capacity Optional: 32 GB/64 GB/128 GB Video Format Video Encoding Format H.264 Video Resolution VGA, 720P, 1080P Video Frame Rate 30FPS/60FPS Audio Format AAC (Advanced Audio Coding) Photo Format 4608 x 1296 (16-megapixel), 3072 x 1728 (5-megapixel), 2304 x 1296 Picture Resolution...
- Page 11 Operating Temperature –30°C to +60° C Storage Temperature –40°C to +85°C System Compatibility Windows XP/Windows 7/Windows 8/Windows 10 Compatible Radio Hytera Radio Power Adapter Input 110 V – 240 V AC, 50 Hz – 60 Hz Output 5 V DC, 1A...
- Page 12 3.1 Attaching the Battery Caution Use only the Hytera standard or optional battery. Polarity reverse and use of other batteries may result in explosion and fire hazards. The following figure shows how to install the battery. To remove the battery, turn off the product, and then go through the following steps reversely.
- Page 13 3.3 (Optional) Connecting the Accessory Connection Cable Note Skip this section if you have not purchase the accessory connection cable. The following figure shows how to connect the accessory connection cable. To disconnect the cable, press both sides of the cable connector and remove the connector with proper force.
- Page 14 3.4 Charging the Product The LED indicator flashes once every five seconds, indicating that the battery is low. To charge the product, do as follows: The LED indicator tells you the charging status of the product. See 0 Description for details.
- Page 15 4. Basic Functions and Operations 4.1 Turning the Product On or Off Turning the Product On Press and hold the On/Off key for 3s to enter the Live View mode. Turning the Product off Press and hold the On/Off key for 3s. 4.2 Basic Settings Basic settings allow you to set the BT, WLAN, WLAN hotspot, language, screen, volume, silent mode, night vision, and other features.
- Page 16 and view the IP address. To enable WLAN, do as follows: Press the Play/Pause/Confirm key to enter the Hotspot On/Off screen. Press the Left key or the Right key to select On, and then press the Play/Pause/Confirm key. You can press the Left key or the Right key to select the Network List or IP Address to view detailed information.
-
Page 17: Sleep Mode
Press the Left key or the Right key to select the desired language, and then press the Play/Pause/Confirm key. 4.2.5 Display Brightness To adjust the display brightness, do as follows: Press the Left key or the Right key to select Screen, and then press the Play/Pause/Confirm key. Press the Left or the Right key to select Brightness, and then press the Play/Pause/Confirm key. - Page 18 Note The Sleep Mode starts when no operation is detected. 4.2.6 Volume This feature allows you to adjust the volume for the alert, video playback, and audio playback. To adjust the volume, do as follows: Press the Left key or the Right key to select Volume, and then press the Play/Pause/Confirm key. Press the Left key or the Right key to select High, Medium, Low or Silent, and then press the Play/Pause/Confirm key.
- Page 19 4.3 Waking Up the Product To wake up the product after it enters the Sleep Mode, press the On/Off key. 4.4 Turn the Display on or off Turn the Display On To turn the display on, press any key except PTT. Turn the Display Off To turn the display off, press the On/Off key.
- Page 20 Post-recording This feature allows you to record the video for a predefined time period after pressing the Video Recording key to finish recording. To enter post-recording mode, do as follows: Press the Video Recording key to start recording normal video, or press the Emergency Alarm key or Menu/Back key to start recording important video.
- Page 21 4.11 Taking Photos When Recording Videos To take photos when recording videos, press the Photo Taking key. 4.12 Preview and Playback You can preview and play videos, audios, and photos in the similar way. This section takes video preview and playback as an example.
-
Page 22: Adjusting The Volume
4.15 Adjusting the Volume Note This feature is available only when the product is wirelessly connected to the multi-mode advanced radio. To adjust the call volume during a call, press the Left key to decrease the volume, press the Right key to ... - Page 23 4.19 Initiating Emergency Alarm When the product is wirelessly connected to the portable radio, pressing the Emergency Alarm key can initiate an emergency alarm to ask for help from your companion or the control center, and start important video recording simultaneously. Note The emergency alarm has the highest priority.
-
Page 24: Troubleshooting
5. Troubleshooting Phenomena Analysis Solution battery improperly Remove the battery and attach it again. installed. The product cannot be The battery may run out. Recharge or replace the battery. powered on. The radio battery and the charging probes are in poor contact due to Clean the battery contacts. - Page 25 The IR LED has not been The Night Vision feature is not Enable the Night Vision feature. turned on automatically enabled. when product recording videos in the dark. The product gives no The Silent Mode is enabled. Disable the Silent Mode. alert;...
- Page 26 6. Care and Cleaning To guarantee optimum performance as well as a long service life of the product, please follow the tips below. Product Care Do not pierce or scrape the product. Keep the product away from substances that can corrode the circuitry. ...
-
Page 27: Optional Accessories
7. Optional Accessories Caution Use the accessories specified by the Company only; otherwise, we shall not be liable for any losses or damages arising out of the use of any unauthorized accessories. Contact your local dealer for the optional accessories of the product.
Need help?
Do you have a question about the VM685 and is the answer not in the manual?
Questions and answers