Advertisement
Advertisement
Table of Contents

Related Manuals for STOVES 700GR


Summary of Contents for STOVES 700GR
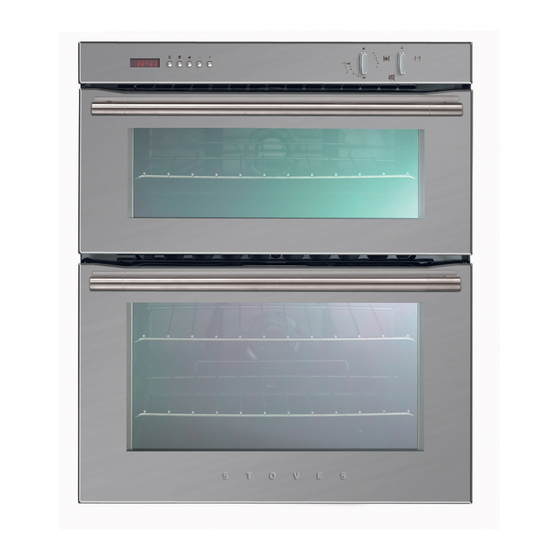
- Page 1 700 R 700mm Rotostar Gas Double Oven & Grill Natural Gas User & Installation Instructions...
- Page 2 IMPORTANT NOTICE Please note the cooling fan fitted to this appliance is an integral part of its safety and functionality. When the appliance is installed care must be taken that the cooling fans perfor- mance is not impeded by any objects coming into contact with it. (Installation pipes, leads etc) Care must also be taken that there is sufficient air flow at the rear of the appliance for the cooling fan to run at its optimum efficiency.
- Page 3 Stoves Customer Care Thank you for choosing this British built appliance from Stoves. We hope you enjoy many years of trouble free cooking with this oven. Should you need to contact us however, please call the number below and our Customer Care Centre staff will be pleased to help in any way they can.
-
Page 4: Table Of Contents
Technical Data ........37 Stoves Customer Care ......Back cover If you smell gas: Do not try to light any appliance. -
Page 5: Introduction
The 700GR is designed to fit into a To replace an oven light bulb standard 600mm wide housing unit Switch off the electricity supply to the... - Page 6 INTRODUCTION Gas & Electrical connection Condensation Please refer to installation instructions When hot and cold air meet, for the Gas & Electrical Safety Regulations condensation forms. The outer door is and the Ventilation Requirements. air cooled and the inner door gets hot, so some condensation might form;...
- Page 7 Should any glass panel be Warning: Do not use the oven(s) if damaged, Stoves strongly recommend the fan is not working. that it is replaced immediately. Environmental Protection The Gas Consumer Council (GCC) is...
-
Page 8: Be Safe - Not Sorry
BE SAFE - NOT SORRY When you are cooking, keep • Do not place items on the drop- children away from the vicinity down doors when they are open. of the appliance. • Do not use aluminium foil to cover This product is designed as a domestic the grill pan, or put items wrapped cooking appliance for the preparation... -
Page 9: Using The Grill
USING THE GRILL Caution: Accessible parts may Preheating be hot when the grill is used. For best cooked results, the grill should Young children should be kept be preheated until the green ready away. light appears (about 3 minutes). Using the Grill Grill ignition Push the grill pan towards the back Open the grill door. - Page 10 USING THE GRILL Detachable grill pan handle grid grill pan handle position handle indicators Place the handle over the edge of the grill pan, at the narrow side edges. Slide the handle to the centre, and locate between the handle position indicators.
-
Page 11: Using The Top Oven
USING THE TOP OVEN When you are cooking keep Note: children away from the vicinity As part of the cooking process, hot air of the oven. is expelled through a vent at the top of The top oven can be used generally, the oven(s). -
Page 12: Using The Main Oven
USING THE MAIN OVEN When you are cooking keep Main oven ignition children away from the vicinity Turn the control knob anticlockwise to of the oven. the required gas mark. Manual operation To turn off, return the control knob to The oven cannot be used manually the “off”... -
Page 13: Using The Ovens
USING THE OVENS Oven furniture Oven shelves The oven shelf must be positioned with the upstand at the rear of the oven and facing upwards. Position baking trays and roasting tins on the middle of the shelves, and leave one clear shelf position between shelves, to allow for circulation of heat. -
Page 14: Programmer / Clock
Programmer / Clock The Programmer Buttons Manual operation minute minder cook time ready time minus plus To set the programmer to manual operation at any time (cancelling any automatic setting), press the cook time and To set the “Time of Day” ready time buttons simultaneously. - Page 15 Programmer / Clock 1. A (Auto) symbol appears. Semi-automatic cooking (example) You have started cooking a meal or dish in the oven, and want to set the time for the oven to switch off. Press the cook time button, then use the plus and minus buttons to set the display to show the length of cooking time required, eg;...
- Page 16 Programmer / Clock Fully automatic cooking (example) For use when a delayed start time is required. You want to set the length of cooking 5. A (Auto) symbol appears. time, and the time for the oven to switch off. The programmer will automatically calculate the cooking start time.
- Page 17 Programmer / Clock 9. A (Auto) symbol will flash. The oven will automatically switch off at 18.00 hours (6.00 pm) and the alarm will sound (9). To switch off the alarm press the minute minder button (10). When the oven has switched off, 11.
- Page 18 Automatic cooking - hints Automatic cooking Do not • Never place warm food in the These notes below are to help you with oven for delayed cooking - eg; using the automatic cooking facility. stews prepared by frying meat first Please make sure that you read them must be thoroughly cooled before carefully before you start using the...
-
Page 19: Cleaning
CLEANING Caution: Any cleaning agent Caution: Most types of cleaning used incorrectly may damage agent will damage these surfaces. the appliance. Only use a few drops of washing up Always let the oven cool before liquid in hot water. Wipe the surfaces cleaning. - Page 20 CLEANING Glass parts Important: if the inner door glass panel is removed for cleaning, it must & FACIA PANEL DOOR PANELS be replaced the right way up as Use a mild cream cleaner. Rinse thor- shown, and pushed fully in to the oughly and dry with a soft cloth.
- Page 21 CLEANING Stainless Steel surfaces (stainless steel finish models only) FACIA PANEL HANDLES DOOR PANELS Only use a clean cloth wrung out in hot soapy water, and dry with a soft cloth. Stubborn marks can be removed using stainless steel cleaner. We recom- mend that you clean the whole of the stainless steel area to maintain a uni-...
-
Page 22: Micro-Computer Operation
Customer Care. non exists, chiefly when first turning on. The 700GR double oven & grill unit uses a built in micro-computer to control the oven It may be necessary to reset the micro- temperature. -
Page 23: Installation Instructions
INSTALLATION INSTRUCTIONS Before start: Please read For installation in countries other than the instructions. Planning your installation will UK, the appliance must be connected in save you time and effort. accordance with all local gas and electrical regulations. In the Republic of Ireland, Prior to installation, ensure that the local Installers should refer to IS813 Domestic distribution conditions (nature of the gas and... - Page 24 INSTALLATION INSTRUCTIONS Before you start - please read the If this appliance is to be installed near to a instructions carefully - planning your corner where the adjacent cabinets run at installation will save you time and effort. right angles forward of the appliance, there must be a gap of at least 90 mm Look at the different ways the appliance between the appliance and the cabinets,...
- Page 25 INSTALLATION INSTRUCTIONS Method 1: Without housing unit 1. Take the 6 No 8 x 12mm (silver) (between 2 base units) self tapping screws from the polythene bag, and use them to fit Before installing the appliance, check one runner to each side of the the internal dimensions as shown.
- Page 26 INSTALLATION INSTRUCTIONS Method 1: Without housing unit (between 2 base units) Shown with fixing kit min 550mm 598 - 602mm 710mm sidetrim runners 50mm...
- Page 27 INSTALLATION INSTRUCTIONS Method 1: Without housing unit (between 2 base units) Shown without fixing kit min 550mm 598 - 602mm sidetrim...
- Page 28 INSTALLATION INSTRUCTIONS Method 2: To fix the runners (if required) Housing unit with internal height less than 710mm. 1. Take the side trims, hold it against Note: You will not need the 2 side the side of the base unit, and use trims (687mm long) or the appliance it to mark off the 687mm from the runners for this installation.
- Page 29 INSTALLATION INSTRUCTIONS Method 2: Housing unit with internal height less than 710mm Shown with fixing kit min 550mm 560 - 570mm 710mm runners 50mm...
- Page 30 INSTALLATION INSTRUCTIONS Method 2: Housing unit with internal height less than 710mm Shown without fixing kit min 550mm 560 - 570mm...
- Page 31 INSTALLATION INSTRUCTIONS Method 3: Housing unit with internal Remove any fixings that may prevent height 710mm or more entry of the oven into housing, or obstruct the gas inlet pipe. Note: You will not need the 4 runners cabinetry should be kept structurally and 2 trims that are packed with the sound by fixing to adjacent cabinets, oven for this installation.
- Page 32 INSTALLATION INSTRUCTIONS Step 3: Connect to the electricity As the colours of the wires in the mains supply lead for the appliance may not correspond with the coloured markings This appliance must be connected by identifying the terminals in your spur a competent person, using fixed box, proceed as follows: wiring via a double pole switched...
- Page 33 INSTALLATION INSTRUCTIONS Step 3: Connect to the gas supply 5. Natural Gas - Flexible connections should be to BS 669. Parts of the 1. The inlet to the appliance is pipe appliance likely to come into contact thread ISO RP ”...
- Page 34 INSTALLATION INSTRUCTIONS Step 4: Check edging strip cabinet - ensure that it is engaged over the top of the side runners. The edging strip is factory fitted to the front side edges of the appliance Method 3: Insert appliance into cabinet. front frame.
- Page 35 INSTALLATION INSTRUCTIONS Step 7: Commissioning Ignition The automatic ignition will continue to spark for a short time after the burner Burner aeration flame has lit, until the flame is established. All burners have fixed aeration and no adjustment is possible. Grill 1.
-
Page 36: Fault Finding
FAULT FINDING Method of operation Electrical faults When the control knob is rotated from These may be either component failure the ‘OFF’ position, a microswitch or wiring / connector faults. Should closes and allows the gas control any disconnections be made, it is solenoids to be energised;... - Page 37 FAULT FINDING Typical faults assuming all wiring is correct (ensure programmer is set to manual): Symptom Fault HLO on switching On mains Component fault on main PCB, incorrect wiring HLO on turning On oven/grill Fault on control board / potentiometer, incorrect wiring, open circuit solenoid.
- Page 38 FAULT FINDING Symptom Fault Oven fan does not start Faulty fan or connections. burner lights, oven lamp lights Oven fan does not start Component failure on main board. lamps do not light Cooling fan fails to start 1. Faulty fan. ‘ON’...
-
Page 39: Technical Data
TECHNICAL DATA Data Badge Grill Abbreviated data badge located on Burner: Surface combustion. front frame. Full data badge located Spark gap: 3 - 4mm. on rear panel. Top Oven Gas Category Burner: Rotary surface combustion. This appliance is factory set for use on Spark gap: 3 - 4mm. -
Page 40: Stoves Customer Care
Stoves Customer Care Please keep this handbook in a safe place as the information inside may be of use should you sell, or pass on the appliance. Please fill in the model number and serial number in the spaces provided below as they will assist us should you need to call.
Need help?
Do you have a question about the 700GR and is the answer not in the manual?
Questions and answers