Table of Contents
Advertisement
Quick Links
Advertisement
Table of Contents

Related Manuals for HMS eWON Flexy 205


Summary of Contents for HMS eWON Flexy 205
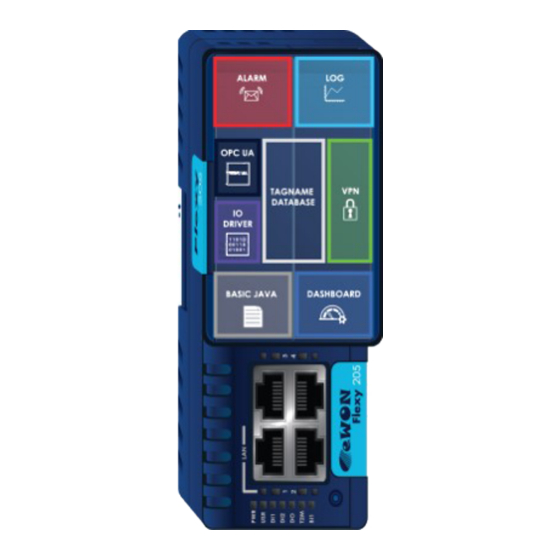
- Page 1 Hands on the Flexy 205 USER MANUAL UM-0002-00 1.0 ENGLISH...
-
Page 2: Important User Information
Important User Information Liability Every care has been taken in the preparation of this document. Please inform HMS Industrial Networks SA of any inaccuracies or omissions. The data and illustrations found in this document are not binding. We, HMS Industrial Networks SA, reserve the right to modify our products in line with our policy of continuous product development. -
Page 3: Table Of Contents
Table of Contents Page Preface ..........................3 About This Document.....................3 Document history......................3 Related Documents .......................3 Trademark Information ....................3 Requirements........................4 Hardware ........................4 Software ........................4 Get in Touch with the Flexy 205................... 5 Assigning an IP Address ....................5 Accessing the Web Configuration Interface ..............5 Quick Launch Wizard ..................... - Page 4 Table of Contents Historical Logging ......................18 Historical Logging Configuration..................18 Historical Logging Graph ....................18 Historical Logging Table ....................18 10 Files Transfer Page ....................... 19 11 Task Planner ........................20 11.1 Configure FTP Server Settings..................21 12 Tag Publishing ....................... 22 13 Data Management ......................23 14 NAT 1:1..........................
-
Page 5: Preface
3 (34) Preface About This Document This guide presents the features of the eWON Flexy 205 and explains briefly the steps to take to get a functional Flexy 205. For additional related documentation and file downloads, please visit www.ewon.biz/support. Document history... -
Page 6: Requirements
Requirements 4 (34) Requirements Hardware This guide presents the features of the Flexy 205 which can be combined with optional exten- sion cards if needed. Without extension cards, the Flexy 205 provides Remote Access and Remote Data Services to Ethernet devices over the local Ethernet network. Extension cards permit the Flexy 205 to communicate to a wider range of field devices including USB and serial devices and to use additional Internet connectivity technologies such as Wi-Fi and cellular modems. -
Page 7: Get In Touch With The Flexy 205
Get in Touch with the Flexy 205 5 (34) Get in Touch with the Flexy 205 Assigning an IP Address The first communication with the Flexy 205 can be established using the companion tool eBuddy (check Software, p. 4 for more details about eBuddy). To change the IP address of the Flexy 205: Connect the port labeled LAN (port #1) of the Flexy 205. -
Page 8: Quick Launch Wizard
Quick Launch Wizard 6 (34) Quick Launch Wizard The Quick Launch Wizard makes it easy to configure the initial system and communication set- tings for the Flexy 205. Fig. 1 Quick Launch Wizard Button It passes sequentially through the System Wizard, the Internet Wizard and the VPN wizard: •... -
Page 9: Internet Wizard
Quick Launch Wizard 7 (34) Additional users can be added from Setup > Users menu. More information about adding addi- tional users is described later in this document. Click Next to proceed to the second screen. The second screen of the System wizard configures the date & time settings. For Talk2M com- munication, the date of the Flexy 205 must be correct. -
Page 10: Vpn Wizard
Quick Launch Wizard 8 (34) Click Next to proceed to the next screen. Check the Enabled checkbox to make a test connection to the Internet. If this network uses a proxy server or if port 80 is closed for outbound connections, leave this checkbox unchecked. Click Next to apply the configuration changes. -
Page 11: Remote Access
Remote Access 9 (34) Remote Access The Flexy 205 can be used to allow remote access to a wide variety of PLCs. Under most circumstances, completing the Quick Launch Wizard successfully configures the Flexy 205 for remote access. In addition, there may be additional configuration steps required in the programming software of the field device. -
Page 12: Create Tags And Monitor Values
Create Tags and Monitor Values 10 (34) Create Tags and Monitor Values The tags are variables monitored by the Flexy 205. The tag values can change over time and can come from a variety of data sources including external devices such as PLCs. These data sources are called IO Servers. - Page 13 Create Tags and Monitor Values 11 (34) Fig. 2 Change from VIEW to SETUP Mode to Create a Tag. On the Tag Setup screen, there are several key fields that identify a tag and its data source. Every tag must have a “Tag Name” which uniquely identifies the tag on the Flexy 205. An op- tional “Tag Description”...
- Page 14 Create Tags and Monitor Values 12 (34) Fig. 4 Tag Creation — MEM. Fig. 5 Tag Creation — Siemens. The Flexy 205 supports four data types for tags: Floating Point, Boolean, Integer and DWord. If the Automatic data type is selected, the Flexy 205 will store the tag value in a default data type based on the IO server and tag address as described in the General Reference Guide for the Flexy 205 from the Related Documents, p.
-
Page 15: Monitor Tags
Create Tags and Monitor Values 13 (34) Monitor Tags 6.4.1 Tag Display The VIEW mode of the Tags > Values page shows the last read value for the tags. The contents of the page refreshes at the rate shown in the Autorefresh field in the bottom of the page. -
Page 16: Alarm Management
Alarm Management 14 (34) Alarm Management The Flexy 205 makes it easy to monitor current alarms, to acknowledge alarms, to notify users throughout the alarm cycle and record past alarm events. Configure Alarm Settings for a Tag Alarming is configured on a tag by tag basis. On the tag configuration page of the Tags >... -
Page 17: Alarm History
Alarm Management 15 (34) Fig. 9 Alarm Summary Page Alarm History The Alarm History shows the full alarm cycle of both currently active alarms and past alarms. The Alarm History is accessible from Tags > Alarms > History. Alarm Actions For every tag with alarms enabled, the Flexy 205 can be configured to perform different actions when the alarm cycle state changes. - Page 18 Alarm Management 16 (34) Fig. 10 Example of SMTP Server Settings. More information about using the Talk2M Email and SMS relay is available in the Email & text message (SMS) relaying using Talk2M reference from the Related Documents, p. Information about configuring connections to different SMTP servers is available in the General Reference Guide for the Flexy 205 from the Related Documents, p.
-
Page 19: Real-Time Logging
Real-time Logging 17 (34) Real-time Logging Real-time logging records how a tag value changes over time. Tag values are logged in a circular buffer in volatile memory at regular intervals to show trends over a user defined period of time. Since the values are only stored in memory, they are lost after a reboot. -
Page 20: Historical Logging
Historical Logging 18 (34) Historical Logging Historical logging stores tag changes for a longer period in a first-in-first-out file in flash file sys- tem. Since the values are stored in non-volatile memory, they are not lost after a reboot. Logging can be triggered by events such as significant data value changes, on a simple interval basis or a combination of the two. -
Page 21: Files Transfer Page
Files Transfer Page 19 (34) Files Transfer Page Many of the files on the Flexy 205 including the current tag values, the Alarm Summary, the Alarm History, and Historical Logs are available to download from Diagnostic > Files Transfer. More information about all the available files is in the General Reference Guide for the Flexy 205 from the Related Documents, p. -
Page 22: Task Planner
Task Planner 20 (34) Task Planner With the Task Planner, the Flexy 205 can perform different actions at specified times or at fixed intervals. These actions are the same as tag Alarm Actions and include sending an email, sending an SMS, putting a file on an FTP server and sending an SNMP trap. -
Page 23: Configure Ftp Server Settings
Task Planner 21 (34) 11.1 Configure FTP Server Settings Before any files can be put on an FTP server through the Task Planner, the Flexy 205 must have a working Internet connection and it must be configured to communicate with an FTP server. -
Page 24: Tag Publishing
Tag Publishing 22 (34) Tag Publishing In addition to polling tags from external devices, the Flexy 205 can publish tag values. With this feature, external software and devices can read tag values from the Flexy 205. The Flexy 205 supports tag publishing tag values over Modbus TCP, SNMP, and OPCUA. Check Related Documents, p. -
Page 25: Data Management
Data Management 23 (34) Data Management The Flexy 205 supports exporting data to a variety of data management platforms. If the Flexy 205 is configured to connect to Talk2M, the DataMailbox (feature of Talk2M) makes it easy to share data with many different platforms. Fig. -
Page 26: Nat 1:1
NAT 1:1 24 (34) NAT 1:1 Under some circumstances, devices on the WAN or VPN network of the Flexy 205 could need access to devices on the LAN network of the Flexy 205. By enabling the NAT 1:1 feature, ad- dresses on one network can be mapped to addresses on the other. -
Page 27: Custom Web
Custom Web Pages 25 (34) Custom Web Pages The Flexy 205 has a web server to host its own internal web pages. In addition, the Flexy 205 can support user created web pages. The Flexy 205 can host custom HTML pages including special forms and server side includes that allow users to display and interact with tags and other data of the Flexy 205. -
Page 28: Backup And Restore
Backup and Restore 26 (34) Backup and Restore Backups can be created and restored using the eBuddy companion tool. To create or restore a backup: Open eBuddy and select Backup/Restore from the menu bar. On the following window, select backup or restore and click Next. On the eWON Identification window, specify the serial number or IP address of the appro- priate Flexy 205 and enter its appropriate administrator credentials. -
Page 29: Other Configuration Mechanisms
Other Configuration Mechanisms 27 (34) Other Configuration Mechanisms The Flexy 205 can be configured through its web interface or by restoring a backup of a previ- ously saved configuration with eBuddy. In addition, the Flexy 205 can be configured through other mechanisms including FTP and using an SD card. -
Page 30: Export Block Descriptors
Export Block Descriptors 28 (34) Export Block Descriptors Export Block Descriptors can be used to export data from the Flexy 205. For example:, they can be used with Alarm Actions or Task Planner entries to include informa- tion such as historical logs and current tag values inside or attached to an email. An Export Block Descriptor is a string of characters describing the data to export using a prede- fined syntax. -
Page 31: Scripting
Scripting 29 (34) Scripting The Flexy 205 supports custom programs using scripting language similar to BASIC with many specific extensions. With scripting, users can: • Create customized reports. • Let users acknowledge alarms by SMS. • Dynamically adjust communication parameters such as the Internet interface. •... -
Page 32: User Management
User Management 30 (34) User Management At initial configuration, a Flexy 205 has a single user with username adm. This user has full ad- ministrator rights on the Flexy 205. However, the Flexy 205 can support multiple users with their own unique user rights. Users are added, modified, and deleted from Setup >... -
Page 33: Troubleshooting
Troubleshooting 31 (34) Troubleshooting The Flexy 205 provides a number of tools for quickly troubleshooting problems that may occur. 21.1 Summary Page The Summary page shows at a glance information about the health and status of the Flexy 205. Its current Internet connection and VPN connection status, date and time, and firmware ver- sions are all displayed. -
Page 34: Scheduled Actions
Troubleshooting 32 (34) 21.3 Scheduled Actions The Scheduled Actions log shows the states of the last 20 outgoing actions like SendMail, putFTP, getFTP, NTPSyncro, SendSMS, and SNMPTrap. If an error occurs during an action, the Scheduled Actions record will include an error code to help identify the source of the problem. - Page 35 This page intentionally left blank...
- Page 36 © 2018 HMS Industrial Networks AB Box 4126 300 04 Halmstad, Sweden info@hms.se UM-0002-00 1.0.6998 / 2018-01-17...
Need help?
Do you have a question about the eWON Flexy 205 and is the answer not in the manual?
Questions and answers