Table of Contents
Advertisement
Support
Thank you for purchasing this NETGEAR product. You can visit
www.netgear.com/support
register your product, get help, access the latest downloads and user manuals, and join our
community. We recommend that you use only official NETGEAR support resources.
Trademarks
© NETGEAR, Inc., NETGEAR and the NETGEAR Logo are trademarks of NETGEAR, Inc.
Any non‑NETGEAR trademarks are used for reference purposes only.
Compliance
For the current EU Declaration of Conformity, visit
http://support.netgear.com/app/answers/detail/a_id/11621/.
For regulatory compliance information, visit
http://www.netgear.com/about/regulatory/.
See the regulatory compliance document before connecting the power supply.
NETGEAR, Inc.
350 East Plumeria Drive
San Jose, CA 95134 USA
October 2015
to
Quick Start
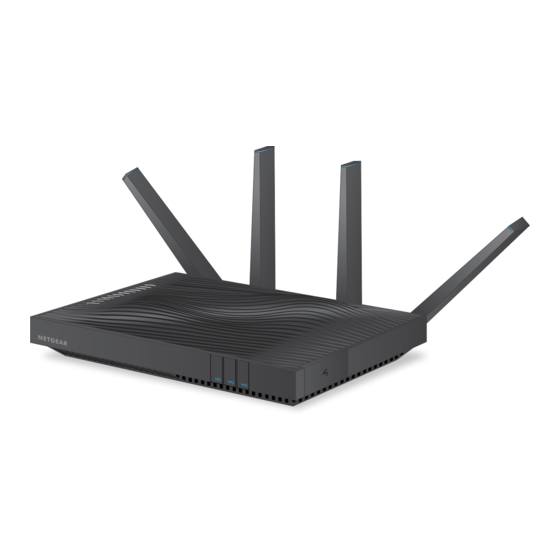
Nighthawk X8
AC5300 Tri-Band WiFi Router
Model R8500
Package Contents
The package contains the following items.
Router
Ethernet cable
In some regions, a resource CD is included in the package.
Power adapter
(varies by region)
Advertisement
Table of Contents

Related Manuals for NETGEAR R8500


Summary of Contents for NETGEAR R8500
-
Page 1: Package Contents
The package contains the following items. community. We recommend that you use only official NETGEAR support resources. Trademarks Quick Start © NETGEAR, Inc., NETGEAR and the NETGEAR Logo are trademarks of NETGEAR, Inc. Any non‑NETGEAR trademarks are used for reference purposes only. Compliance Nighthawk X8 For the current EU Declaration of Conformity, visit http://support.netgear.com/app/answers/detail/a_id/11621/. - Page 2 You can use the genie app to remotely access your router and the antennas as shown. change its key settings. Remote access with the genie app is NETGEAR genie displays. supported for Windows computers, iOS mobile devices, and Android If you do not see genie, enter 2.
-
Page 3: Hardware Features
Hardware Features Front Panel The LEDs, buttons, and USB ports are shown in the following figure. For more information about the LEDs and buttons, see LEDs page 2 and Front Panel Buttons on page 3. USB 3.0 port LEDs LED button USB 2.0 port WPS button WiFi button Rear Panel... -
Page 4: Led Description
LEDs The LEDs on the top of the router light to indicate router activity: Description Power LED • Solid white. The router is ready. • Solid amber. The router is starting. • Blinking amber. The firmware is upgrading, or the Reset button was pressed. -
Page 5: Front Panel Buttons
Description USB 1 LED The USB 1 LED is for the blue USB 3.0 USB port. The USB 2 LED is for the USB 2.0 port. • Solid white. A USB storage device is connected and is USB 2 LED ready. -
Page 6: Install Your Router
Install Your Router Make sure that your Internet service is active before you install your router. ¾ To install your router: 1. Position the antennas. For the best WiFi performance, We recommend that you position the antennas as shown in the figure. 2. - Page 7 3. Connect your modem: Internet Cable or Router Ethernet cable Modem a. Plug in, then turn on your modem. b. If you removed the batteries, replace them. c. With the Ethernet cable that came with the router, connect your modem to the yellow Internet port on your router. 4.
- Page 8 5. Check the LEDs. If the Power LED lights solid white and the other LEDs are off, press the LED button on the front panel of the router to turn on the other LEDs. 6. Connect a device. Ethernet cable WiFi device Internet Computer...
- Page 9 7. Launch a web browser. The first time that you connect to the router, the genie page displays. Follow the genie steps to connect to the Internet. If the genie page does not display, try the following: • Close and reopen the browser. • Make sure that your computer is connected to one of the Ethernet ports on the router, or that you are connected to your router’s WiFi network.
-
Page 10: Wifi Network Name And Password
WiFi settings are on the product label. We recommend that you use the preset WiFi settings because you can check the product label if you forget them. NETGEAR genie lets you change these settings. If you do so, write down the new WiFi settings and store them in a safe place. -
Page 11: Join The Wifi Network
Join the WiFi Network To join the router WiFi network, you can either use the router’s Wi‑Fi Protected Setup (WPS) function or select its WiFi network and type its password. For help with the WPS button on your computer or WiFi device, check the instructions or online help that came with that computer or device. -
Page 12: View Or Change The Router Settings
View or Change the Router Settings After you use genie to set up the router, you can log in to the router to view or change its settings. Log In to the Router ¾ To log in to the router: 1. -
Page 13: Recover A Forgotten Admin Password
2. Enter admin for the user name and password for the password. The BASIC Home page displays. 3. Select ADVANCED > Administration > Set Password. The Set Password page displays. 4. Type your old password and type the new password twice. 5. - Page 14 4. Click the Continue button. A page displays requesting the answers to your security questions. 5. Enter the saved answers to your security questions. 6. Click the Continue button. A page displays your recovered password. 7. Click the Login again button. A login window displays.
-
Page 15: Access A Usb Device On The Network
Access a USB Device on the Network ReadySHARE lets you access and share a USB storage device connected to the router’s USB ports. (If your USB device uses special drivers, it is not compatible.) ¾ To access the USB storage device from a Windows computer: 1. - Page 16 For more information about access control, see the user manual, which is available online at downloadcenter.netgear.com through a link in the router’s user interface. 7. Click the Connect button. A window displays the files and folders on the device.
- Page 17 Windows 10. ¾ To back up your Windows computer: 1. Connect a USB HDD to a USB port on the router. 2. Download ReadySHARE Vault from www.netgear.com/readyshare and install it on each Windows computer. 3. Launch ReadySHARE Vault. The dashboard displays.
-
Page 18: Set Up Ethernet Port Aggregation
The user name is admin and the default password is password. Use the default credentials if you did not change them. The BASIC Home page displays. 3. Select Wireless. The Wireless Setup page displays. 4. Select the Smart Connect check box. 5. - Page 19 For information about viewing the status of the Ethernet port aggregation, see the user manual, which is available online at downloadcenter.netgear.com or through a link in the router’s user interface. Enable Dynamic Quality of Service...
- Page 20 Click here to see bandwidth utilization by device and application link at the bottom of the page. For more information, see the user manual, which is available online at downloadcenter.netgear.com or through a link in the router’s user interface. Set Up VPN Service VPN service allows remote access to your home network with a secure connection.
- Page 21 ReadyCLOUD, you must create a ReadyCLOUD account and register your router. For more information about using ReadyCLOUD, see the ReadyCLOUD user manual for routers, which is available online at downloadcenter.netgear.com. ¾ To set up your ReadyCLOUD account and register your router: 1.
-
Page 22: Download The Netgear Genie App
Download the NETGEAR genie App The free NETGEAR genie app lets you easily monitor, connect, and control your home network from a Windows or Mac computer, tablet, or smartphone. You can share and stream music or videos,...
Need help?
Do you have a question about the R8500 and is the answer not in the manual?
Questions and answers