Table of Contents
Advertisement
Advertisement
Table of Contents

Related Manuals for Wellion Galileo GLu/KET


Summary of Contents for Wellion Galileo GLu/KET
- Page 1 OWNER‘S GUIDE...
- Page 2 Dear Wellion GALILEO GLU/KET (plus) Owner, Thank you for choosing the Wellion GALILEO GLU/KET (plus) Blood Glucose and Ketone Monitoring System to help you easily monitor your blood sugar level and blood ketone level. Your new Wellion GALILEO GLU/KET (plus) Blood Glucose and Ketone Monitoring System is a system that does not require you to code the meter manually so testing errors can be greatly reduced.
- Page 3 INTENDED USE The Wellion GALILEO GLU/KET (plus) Blood Glucose and Ketone Monitoring System is intended to quantitatively measure blood glucose in fresh capillary whole blood drawn from fingertips, palm, or forearm, and blood ketone in venous whole blood or capillary whole blood from fingertips. Alternative site testing for glucose test should be performed only during steady-state (when glucose is not changing rapidly).
- Page 4 YOUR NEW MEASURING KIT The Wellion GALILEO GLU/KET (plus) measuring kit includes the following items: Wellion GALILEO GLU/KET (plus) meter incl. batteries Wellion GALILEO Glucose Strips (optional) Wellion GALILEO Ketone Strips (optional) Wellion Lancing device Wellion Lancets Compact Pouch Owner‘s guide...
- Page 5 USB-cable, when Battery Compartment connected with Holds 2 x CR2032 3V lithium coin cell suitable software* batteries The correct reading of your data can be ensured only with the original Wellion GALILEO USB cable.
-
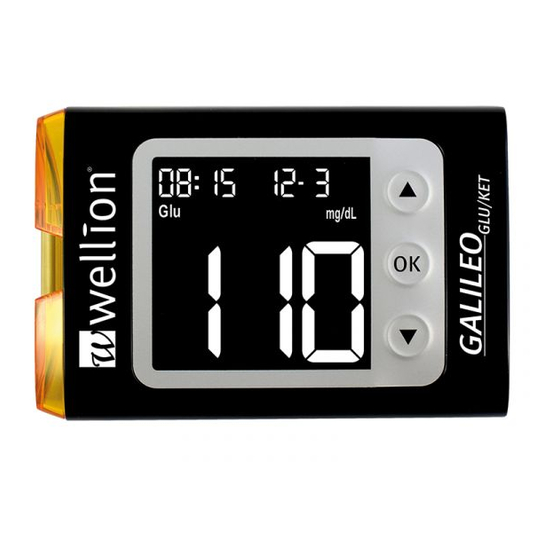
Page 6: Meter Display Screen
Meter Display Screen Time - indicates the time Medication/Insulin Marker - displayed when marking a result as being near to hypo warning - medication/insulin intake, or displayed when viewing a marked result threshold value at or below your hypoglycemic threshold value Date - indicates the G l u date (dd/mm) - Page 7 mem - indicates the meter is in memory recall AVG - displayed when viewing mode and the number on the main display the 1, 7, 14, 30, 60 and 90 day area is a memorized testing result averages. This is for glucose values only Main Display Area - Battery Symbol - Lights up to...
- Page 8 IMPORTANT Wellion GALILEO GLU/KET (plus) Meter. Other brands of test strips will not work with the meter. , it is important to tightly close the vial cap of the test strip bottle immediately after each use.
- Page 9 IMPORTANT Wellion GALILEO GLU/KET (plus) Meter. Other brands of test strips will not work with the meter. XXX.
- Page 10 SETTING UP YOUR NEW SYSTEM Inserting (or Changing) the Batteries The batteries need to be inserted before using your Wellion GALILEO GLU/KET (plus) Meter for the first time or when the battery icon appears on the meter display screen. Material you will need:...
- Page 11 Always keep a spare packaged battery on hand. Setting the Clock Material you will need: Your Wellion GALILEO GLU/KET (plus) Meter Step 1: With the meter turned off, press and hold the OK button until the screen displays “FunC“.
- Page 12 Step 2: Release the OK button and the meter will show the current date and time. If you are setting the date and time for the first time, the month will now start flashing to indicate you are in date and time set-up mode. If you are changing the date to enter date and time set-up mode.
- Page 13 Step 6 - Set Hour: The current hour will flash. Use the arrow buttons to select the correct hour. Press the OK button to confirm your choice and advance to set the minute. Step 7 - Set Minute: The current minute will flash. Use the arrow buttons to select the correct minute.
- Page 14 Setting Warning Values for Glucose / Ketose Awareness threshold Your Wellion GALILEO GLU/KET (plus) Blood Glucose and Ketone Meter has a feature to set your high and low blood glucose threshold (hyperglycemia and hypoglycemia values) to better assist you in understanding your blood sugar levels and glycemic state.
- Page 15 When the meter shows a hyper warning with your glucose result, it is recommended to make a ketone measurement. To make a ketone measurement you can use your Wellion GALILEO GLU/KET (plus) meter, together with the Wellion GALILEO ketone test strips (sold separately).
- Page 16 Turning ON/OFF Tone Sound Turning off the beeper will cause you to miss many important cues from your meter – such as confirmation or error messages. Material you will need: Your Wellion GALILEO GLU/KET (plus) Meter...
- Page 17 You can set up a total of 6 alarms - 3 for glucose and 3 for ketone - on your Wellion GALILEO GLU/KET (plus) Meter. The default setting for all alarms is off. You must set the clock before you can set the alarms.
- Page 18 3 beeps, pause, ... in repetition. Pressing Ok button or inserting a test strip will silence the alarm. Material you will need: Your Wellion GALILEO GLU/KET (plus) Meter Step 1: With the meter turned off, press and hold the OK but- ton until the screen displays “FunC“.
- Page 19 Step 4: The display screen will indicate the alarm 1 status (the default is OFF). You can turn it on by pressing OK and then G l u choosing the desired setting with the arrow buttons. Step 5: Press OK and the hour will flash. Select the hour using the arrow buttons.
- Page 20 Performing a Glucose Control Solution Test The purpose of glucose control solution testing is to validate the performance of the Wellion GALILEO GLU/KET (plus) Blood Glucose and Ketone Monitoring System using the testing solution with a known range of glucose. Control solutions are sold separately.
- Page 21 IMPORTANT with the Wellion GALILEO Blood Glucose Test Strip. Other brands of control solution will produce inaccurate results. . DO NOT use control solutions if expired. unused control solution 3 months after opening. Step 1: Insert a Wellion GALILEO Blood Glucose Test Strip into the meter with the blood sample reaction zone facing up.
- Page 22 IMPORTANT which is printed on the test strip bottle. tightly. . Store the test strip bottle in a dry, cool place. first opened, discard the bottle and any remaining test strips. to reach the new temperature before use. Your meter will not begin testing if it detects an out-of- range temperature.
- Page 23 after use. Step 5: Hold the meter and touch the control solution to the edge of the sampling end of the test strip. The control solution will be automatically drawn into the reaction area of the test strip. Step 6: The screen will begin to count down. After G l u 5 seconds, the control solution testing result will appear on when results are shown on the screen.
- Page 24 Performing a Ketone Control Solution Test The purpose of the ketone control solution testing is to validate the performance of the Wellion GALILEO GLU/KET (plus) Blood Glucose and Ketone Monitoring System using the testing solution with a known range of ketone. Control solutions are sold separately.
- Page 25 . DO NOT use control solutions if expired. unused control solution 3 months after opening. Step 1: Insert a Wellion GALILEO Blood Ketone Test Strip into the meter with the blood sample reaction zone facing up. Make sure the test strip contact points are inserted all the way into the meter.
- Page 26 IMPORTANT which is printed on the test strip foil and its package. . Store the test strips in a dry, cool place. 15 minutes for it to reach the new temperature before use. Your meter will not begin testing if it detects an out-of-range temperature. test strip port.
- Page 27 Step 5: Hold the meter and touch the control solution to the edge of the sampling end of the test strip. The control solution will be automatically drawn into the reaction area of the test strip. Step 6: The screen will begin to count down. After 8 seconds, the control solution testing result will appear on when results are shown on the screen.
- Page 28 NOTE IMPORTANT...
- Page 29 What you can do … control solution being Control Solution (Level 0, Level 1 and Level 2) or used Wellion GALILEO Ketone Control Solution (Level 2). for glucose test, or between 10°C-40°C for ketone test. contaminated control solution or damaged control solution and test strip.
- Page 30 TESTING YOUR BLOOD GLUCOSE Materials you will need: Your Wellion GALILEO GLU/KET (plus) Meter A new Wellion GALILEO Blood Glucose Test Strip Lancing device with a sterile, unused lancet Before you begin, make sure: more details. and dry well. will not test outside of this range and will display the temperature icon. Move the meter into an area that is between 5°C-45°C, and let it sit for 10 to 15 minutes before...
- Page 31 Preparing your Lancing device CAUTION Always use a new, sterile lancet each time you perform the test. lancets can lead to disease transmission. sample is obtained. Step 1: Wash the puncture site with soap and warm water and dry thoroughly. Warm water stimulates blood flow making it easier to obtain a sample.
- Page 32 Step 3: Unscrew the adjustable cap of the lancing device and insert the lancet by pushing down firmly until it is fully seated. Step 4: Twist the protective cover off from the lancet. Replace the adju- stable cover back onto the lancing device. Step 5: Adjust the puncture setting on the adjustable cap for the puncture depth level (1 is the lightest and 10 is the deep- est).
- Page 33 Important Information on Alternative Site Testing (AST) The Wellion GALILEO GLU/KET (plus) Blood Glucose and Ketone Monitoring System can test blood glucose from sites other than your fingertip such as palm and forearm (alternative site testing, or AST).
- Page 34 Alternative site measurements should never be used to calibrate continuous glucose monitors (CGMs). Alternative site measurements should never be used for insulin dosing calculations. AST SHOULD NOT be used when: sugar). Consult with your healthcare professional to decide if AST is right for you. IMPORTANT 1.
- Page 35 Performing a Blood Glucose Test Step 1: Take out a Wellion GALILEO Blood Glucose Test Strip from the test strip bottle and close the bottle immediately. Insert the test strip to turn on the meter. IMPORTANT which is printed on the test strip bottle.
- Page 36 Step 3 - Obtaining a blood drop: For Fingertip Testing: Hold the primed lancing device firmly against the side of your fin- gertip and press the release button to create a puncture. lancing site each time. For Testing on Palm and Forearm: Do only when it is more than two hours after a meal, diabetes medication, or exercise.
- Page 37 release pressure up and down 2–3 times without lifting device away from skin. When the blood is about the size of a pen tip lift the lancing device straight up without smearing the blood. IMPORTANT Step 4: Gently touch the test strip to the drop of blood at a slight angle. The test strip acts like a straw to pull the blood in.
- Page 38 Step 7 - Select the exercise marker: After selecting meal marker, a flashing exercise icon appears on the screen. Use the arrow buttons to select the exercise marker or remain blank. Press OK to confirm your choice and advance to select the medication/insulin marker. Step 8 - Select the medication/insulin marker: After selecting exercise marker, a flashing medication/insulin icon appears on the...
- Page 39 NOTE set up - see the chapter “Setting Warning Values“. inactivity. If you do not select any marker before turning off, the test result will be stored without any marker. CAUTION range – above 33,3 mmol/L (600 mg/dL) or below 1,1mmol/L (20 mg/dL). Test again using fingertip testing.
- Page 40 TESTING YOUR BLOOD KETONE Materials you will need: Your Wellion GALILEO GLU/KET (plus) Meter A new Wellion GALILEO Blood Ketone Test Strip Lancing device with a sterile, unused lancet Before you begin, make sure: more details. dry well. will not test outside of this range and will display the temperature icon. Move the meter into an area that is between 10°C-40°C, and let it sit for 10 to 15 minutes before...
- Page 41 Performing a Blood Ketone Test Step 1: Take out a Wellion GALILEO Blood Ketone Test Strip from the test strip foil. Insert the test strip to turn on the meter. IMPORTANT which is printed on the test strip foil. . Store the test strips in a dry, cool place.
- Page 42 Step 3 - Obtaining a blood sample: For Fingertip Testing: Hold the primed lancing device firmly against the side of your fingertip and press the release button to create a puncture. lancing site each time. Step 4: Gently touch the test strip to the drop of blood at a slight angle.
- Page 43 CAUTION range (above 8,0 mmol/L or below 0,1 mmol/L). Test again using fingertip testing. If you still receive the same result, call your physician or healthcare professional immediately. memory automatically. IMPORTANT Please follow your local healthcare provider‘s recommendation regarding proper disposal of used lancets.
- Page 44 UNDERSTANDING YOUR TEST RESULTS Understanding Your Blood Glucose Test Results Blood glucose values will vary depending on food intake, medication, health, stress, and exercise. The ideal ranges for adults without diabetes are It is important to consult with your physician or healthcare professional to determine an appropriate target range for you.
- Page 45 IMPORTANT hyperosmolar state, with or without ketosis. Understanding Your Blood Ketone Test Results Ketones are made when the body is using fat for energy instead of using glucose be- cause not enough insulin is available to use glucose for energy. It is a warning sign that your diabetes is out of control or that you are getting sick If your blood glucose is higher than 13,9 mmol/L (250 mg/dL) and your blood ketone result is...
- Page 46 1,6 to 3,0 mmol/L A high level of ketones which indicates a risk of diabetic ke- toacidosis (DKA). Contact your healthcare professional im- mediately Above 3,0 mmol/L Indicates a serious metabolic condition and emergency medical care is necessary What to do if you get a high or low blood ketone reading: with your healthcare provider.
- Page 47 Viewing Stored Readings and 1-, 7-, 14-, 30-, 60-, 90- Day Averages of Glucose Test Results from Memory Your Wellion GALILEO GLU/KET (plus) Meter can store up to 500 glucose test and con- trol results with date and time. In addition, the meter also provides 1-, 7-, 14-, 30-, 60-, 90-day averages to help you better track your efforts in controlling your blood glucose level.
- Page 48 Viewing Stored Readings of Ketone Test Results from Memory Your Wellion GALILEO GLU/KET (plus) Meter can store up to 100 ketone test and control results with date and time. You will need to set your meter date and time before using...
- Page 49 Material you will need: Your Wellion GALILEO GLU/KET (plus) Meter Step 1: Turn on the meter by pressing and holding the OK button until the screen choice. Step 2: The most recent test result will appear on screen. Press the arrow-up button to view your results from the most recent to the oldest.
- Page 50 Upload Data Insert the Wellion GALILEO USB Cable into the data port. The “PC“ mode shows on the screen. Follow the Data Management System (DMS) instruction manual to upload data. For purchase information of DMS, please contact your local distributor.
- Page 51 the meter or hold it under running water. Storage and Precautions age the electronics. es between 5°C and 45°C for glucose testing, and between 10°C and 40°C for ketone testing. or in an extremely hot or cold car. midity levels, such as in a bathroom or kitchen. is closed tightly.
- Page 52 SOLVING PROBLEMS This section details the significant display screen messages and error codes you may encounter when using your Wellion GALILEO GLU/KET (plus) Meter and Wellion GALILEO Test Strips. Message What It Means What You Should Do...
- Page 53 Message What It Means What You Should Do Not enough blood Remove the test strip and repeat the test with a sample on the test new test strip. See the chapters “Testing Your Blood strip to start Glucose“ or “Testing Your Blood Ketone“ Test strip Repeat the test with a new test strip.
- Page 54 Message What It Means What You Should Do Glucose test result Wash and dry your hands and repeat the test using (with Glu higher than symbol) 33,3 mmol/L physician or healthcare professional immediately. (600 mg/ dL) Glucose test result Wash and dry your hands and repeat the test (with Glu lower than symbol)
- Page 55 Message What It Means What You Should Do Low battery Change the batteries according to instructions for Inserting (or Changing) the Battery No memorized results in the See “Setting Up Your New System“ meter “Testing Your Blood Glucose“ and “Testing Your Blood Ketone“...
- Page 56 SYMBOLS (EXP) Expiration date (use by the last day of the month) (LOT) Batch Code C ˚ Temperature Limitations C ˚ F ˚ F ˚ Consult Instructions for Use In Vitro Diagnostic Medical Device Caution! Consult accompanying documents Catalogue number Keep away from sunlight/direct light Do not reuse Do not use if package is damaged...
-
Page 57: Specifications
Illuminated Test strip port: Method of measurement: Biosensor Test Strips: Wellion GALILEO Blood Glucose Test Strip Wellion GALILEO Blood Ketone Test Strip Test Range: 1,1 - 33,3 mmol/L (20 - 600 mg/dL) for glucose test 0,1 - 8,0 mmol/L for ketone test... - Page 58 Glucose test strip at 4°C to 30°C, Ketone test strip at 4°C to 30°C For additional information, refer to the Wellion GALILEO Blood Glucose Test Strip insert or Wellion GALILEO Blood Ketone Test Strip insert. Classification according to IEC/EN 61010-2-101 Electromagnetic Compatibility: This equipment complies with EMC requirement of EN 61326.
- Page 59 The manufacturer warrants the Wellion GALILEO GLU/KET (plus) blood sugar and ketone meter guarantee for material and manufacturing defects for a period of two years from date of purchase. This guarantee is lost when the device is not used as intended, has been poorly maintained or opened.
- Page 60 MED TRUST Handelsges.m.b.H. Gewerbepark 10 7221 Marz In Vitro Diagnostic AUSTRIA Medical Device www.medtrust.at...
Need help?
Do you have a question about the Galileo GLu/KET and is the answer not in the manual?
Questions and answers