Belmont Clesta II Operating Instructions Manual
Rod type
Hide thumbs
Also See for Clesta II:
- Operating instructions manual (40 pages) ,
- Installation instructions manual (24 pages) ,
- Operating instructions manual (40 pages)
Table of Contents
Advertisement
OPERATING INSTRUCTIONS
This manual provides operating instruction for CLESTA II ROD TYPE.
The instructions contained in this booklet should be thoroughly read and understood
before operating the unit.
After the installation is completed, file this manual and refer back to it for future
maintenance.
If you have any questions about this Manual or this product, please contact us.
If manual becomes unreadable or is lost, please request a new manual by contacting
your dealer.
Installation should be conducted by authorized personnel only. Follow instructions
on installation manual.
DENTAL UNIT
IMPORTANT
Rod Type
0197
Advertisement
Table of Contents

Subscribe to Our Youtube Channel
Related Manuals for Belmont Clesta II


Summary of Contents for Belmont Clesta II
- Page 1 Rod Type OPERATING INSTRUCTIONS IMPORTANT This manual provides operating instruction for CLESTA II ROD TYPE. The instructions contained in this booklet should be thoroughly read and understood before operating the unit. After the installation is completed, file this manual and refer back to it for future maintenance.
-
Page 2: Table Of Contents
TABLE OF CONTENTS Page SAFETY PRECAUTIONS -------------------------------------------------------- 1 1. OVERVIEW AND MAJOR PARTS ------------------------------------------- 5 2. DIMENSIONS & SPECIFICATIONS 2-1. DIMENSIONS --------------------------------------------------------------- 6 2-2. SPECIFICATIONS ---------------------------------------------------------- 6 3. OPERATING INSTRUCTIONS 3-1. DOCTOR TABLE SECTION --------------------------------------------- 7 3-2. CUSPIDOR UNIT SECTION --------------------------------------------- 14 3-3. -
Page 5: Safety Precautions
SAFETY PRECAUTIONS Before use, read the “Safety precautions” carefully to ensure proper use. ■ The following information is designed to ensure safe use of this product and to prevent injury and damage ■ to you and others. The precautions contained here are classified depending on the severity and degree of imminence of possible injury or damage resulting from improper use. - Page 6 SAFETY PRECAUTIONS WARNING 9. Ensure the maintenance of this product • Failure to maintain this product may lead to physical injury or property damage. • Refer to the section of maintenance. 10. Do not place objects weighing 1.5 kg or more on the Sub tray Do not place objects weighing 1.5 kilograms or more on the Sub tray.
- Page 7 SAFETY PRECAUTIONS CAUTION 5. keep your eyes on the patient during operation. • Confirm that the patient is seated in the proper position. Keep your eyes on the patient during the operation. • Pay special attention to surroundings at automatic operation of the dental treatment table. Damage to the backrest, stool or Doctor's table may occur.
- Page 8 SAFETY PRECAUTIONS CAUTION 18. Precautions for cleaning the operation panel (membrane switches) Penetration of droplets of sanitizing spray into the back of the operation panel may be associated with switch failure. Use a paper towel soaked with sanitizing solution to clean the surface of the operation panel. 19.
-
Page 9: Overview And Major Parts
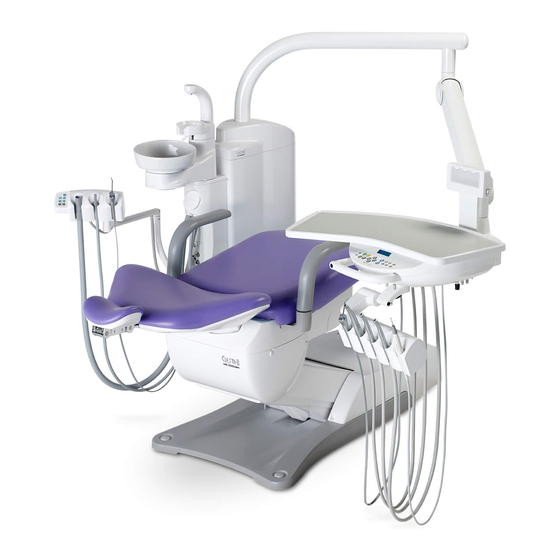
1. OVERVIEW AND MAJOR PARTS Fig.1-1 Overview and Major Parts Cupfiller Nozzle Saliva Ejector Handpiece Handle Cupfiller Base Assistant Holder Arm Right Hand Side : Standard Bowl Flush Nozzle Cuspidor Top Left Hand Side : Option Spittoon Bowl Cuspidor Body Solid Collector Light Pole Dental Size Film Viewer... -
Page 10: Dimensions & Specifications
2. DIMENSIONS & SPECIFICATIONS 2-1. DIMENSIONS -mm- Chair Mount Type Pedestal Type 340˚ 290˚ 290° 340° 90˚ ø50.8 (ø42.7) 21° 21˚ 28˚ 28° Fig.2-1 Dimensions... -
Page 11: Operating Instructions
Fig.3-1 Master Switch and Indicator seveal seconds on the indicator. Wait operation until Fig.3-2 is changed to Fig.3-3 Indicator on the indicator. CLESTA I I Ver.00 CLESTA I I Belmont Fig.3-2 Fig.3-3 (2) Main Control Panel A Type E Type A... - Page 12 While the bowl flush is working by momentarily pressing the bowl flush switch the bowl flush will stop. Note 2 : Clesta II unit can be set to timer mode (standard setting) and continuous mode for bowl flush. The bowl flush water volume can be adjusted by the bowl flush flow control knob located inside the cuspidor body.
- Page 13 Coolant Water ON/OFF Switch (Fig.3-11) A E When a handpiece is picked up and this switch is pressed, both LED A (air) and LED W (water) lights up, the coolant water and air comes out from the (Amber) (Green) handpiece. In case of air motor or air turbine, switching between spray (both of LED A and LED W are lit) and OFF occurs when this switch is pressed.
- Page 14 Function Switch (Fig.3-15) A E Use this switch for setting various working conditions. As for the setup procedures, please refer to 3-1.(3) a-i. Fig.3-15 Function Switch (3) Function Swicth Setup Procedure A E a. Timer Timer can be set maximum 90 mins. 50 secs. in 10 secs. segment. Decrease Switch Function Switch Increase Switch...
- Page 15 Flush out system (Optional) The CLESTA II is equipped with two types of flush out system. Short time flush out is for cleaning handpiece water lines. Long time flush out is for handpiece water lines, bowl flush water line and cupfiller water line.
- Page 16 f. Electronic sound for timer Electronic sound for timer can be changed. Function Switch Chair Auto Mode Switch Momentarily press the function switch six times. Momentarily press one of chair auto mode switch (0,1,2,LP ) then the new electronic sound is to be memorized. g.
- Page 17 (4) Scaler for SATELEC SP4055 (Optional) The setting range of ultrasonic scaler can be selected in 3 ranges (Scaling, prosthesis removal, amalgam, plugging / Ultrasonic endodontic treatment / Ultrasonic periodontal treatment). Pick up the handpiece of scaler and set the range by pressing increase switch or decrease switch. (5) Doctor Table Chassis (Fig.3-16) A.The handpiece spray water control knobs are located under the doctor table.
-
Page 18: Cuspidor Unit Section
3-2. CUSPIDOR UNIT SECTION Dental Light switch (for E Type) Cupfiller Switch Bowl Flush Switch Chair Auto Mode Switches Assistant Side Control Panel Dental Light Mode Water Heater Selection Switch Switch IO5000 / 900 Dental Light (Type 920) Service Water Control Knob Service Air Outlet... - Page 19 (3) Cuspidor Unit Body A. Assistant’s Syringe Flow Control Knobs (Fig.3-20) Assistant’s syringe flow control knobs are located in the cuspidor unit body. Lock Nut The yellow capped knob is to adjust the assistant's syringe air flow volume, and the blue capped knob is to adjust water flow volume.
- Page 20 (Fig.3-23, Fig.3-24) (6) Clean Water System (Optional) (Fig.3-23) (Fig.3-23) Remove or attach the bottle (Fig.3-24) Turn off the pressurization ON-OFF switch. Water bottle may be remove by turned in direction A. Fig.3-23 Clean Water System It is attached when turned in direction B. •...
-
Page 21: Foot Control Section
10˚ 3-3. FOOT CONTROL SECTION (1) Foot Control (Type A2) (Fig.3-28 & 3-29) A A. Drive Air Pedal Pick up a handpiece from the handpiece rest (pull the rod about 10 degrees to forward) and depress the drive air pedal, the handpiece starts running. -
Page 22: Care And Maintenance
5. CARE AND MAINTENANCE CAUTION Turn off the master switch at the initial position after daily operation or in long term iterval. When a leak or spill has occurred, such as water, wipe the floor immediately. Cleaning Unit CAUTION All surfaces can be cleaned with DURR FD333 cleaner. Spray the cleaner (DURR FD333) on cloth and wipe the surfaces with the cloth. - Page 23 B. Check whether contamination is removed or not after cleaning. Continue the cleaning if contamination is remained. C. Immersed with an alkaline disinfection or detergent for 5 minutes. (We recommend to use ID212 made by DURR) Cloth D. Rinse thoroughly by distilled water at ordinary Fig.5-4 Surface cleaning temperature or by clean water for more than 1 minute.
- Page 24 2. Micro Motor / Turbine / Scaler Sterilize the handpiece according to manufacturer’s operating manual. 3. Belmont 77 Syringe (Fig.5-10) Syringe body * Cleaning and sterilization must be done every after use to patients. Disassembly Remove the nozzle from syringe by turning it in direction A.
-
Page 25: Maintanance And Inspection
6. MAINTANANCE AND INSPECTION 6-1. Guide for daily maintenance and inspection (Maintenance and inspection by user) •Management of maintenance and inspection of medical equipment should be implemented by the user (medical institution). In case the user does not implement such management, it is permitted that such management is outsourced to a qualified entity such as a medical equipment repair company. - Page 26 Inspection method Influence if inspection Maintenance required in case Item Frequency not conducted of nonconformity and diagnosis Care Faulty suction may Clean the suction line and filter in After Flush the suction line, and Vacuum arise. accordance with "Method for closing then clean the filter of the and saliva...
-
Page 27: (Maintenance And Inspection By User) 6-2. Guideline For Periodical Check-Up
6-2. Guide for Periodical Check-up Some parts and components of the products are degraded or deteriorated depending on the frequency of use. Annual check-up and maintenance, as well as replacement of consumable parts, are required. The required parts (including consumable parts) are listed below. It may be different from the following list depending on the option of the unit. -
Page 28: Electromagnetic Compatibility
Guidance and manufacture’s declaration – electromagnetic emissions The CLESTA II Unit is intended for use in the electromagnetic environment specified below. The customer or the user of the CLESTA II Unit should assure that it is used in such an environment. - Page 29 To assess the electromagnetic environment due to fixed RF transmitters, an electromagnetic site survey should be considered. If the measured field strength in the location in which the CLESTA II Unit is used exceeds the applicable RF compliance level above, the CLESTA II Unit should be observed to verify normal operation.
-
Page 30: List Of Compatible Handpieces
The CLESTA II Unit is intended for use in an electromagnetic environment in which radiated RF disturbances are controlled. The customer or the user of the CLESTA II Unit can help prevent electromagnetic interference by maintaining a minimum distance between portable and mobile RF communications equipment (transmitters) and the CLESTA II Unit as recommended below, according to the maximum output power of the communications equipment. -
Page 31: Optional Accessories
10. OPTIONAL ACCESSORIES Optional accessories are listed below. It may be different from the following list dependimg on the specification of the unit. Optional Accessories intended use Cotton To keep clean cotton containers Waste To keep disposed cotton receptacle Foot control To move the foot control handle Foot switch... - Page 32 Declaration of Conformity We hereby declare that the product listed below complies with the essential requirements of the Medical Device Directive: 93/42/EEC and RoHS Directive: 2011/65/EU based on category 8 of Annex I. Product : DENTAL UNIT (CLASS IIa) Model : CLESTAⅡ "...
- Page 33 NOTE Takara Belmont (UK) Ltd. Belmont House One St.Andrews Way,Bow, TAKARA BELMONT CORPORATION London E3 3PA U.K. 2-1-1,Higashishinsaibashi ,Chuo-ku,Osaka, 542-0083 Japan Tel: (44)20 7515 0333 TEL. : +81 6 6213-5945 FAX : +81 6 6212 3680 Fax:(44)20 7987 3596 BOOK NO. FEFA27R0...
Need help?
Do you have a question about the Clesta II and is the answer not in the manual?
Questions and answers