Table of Contents
Advertisement
Quick Links
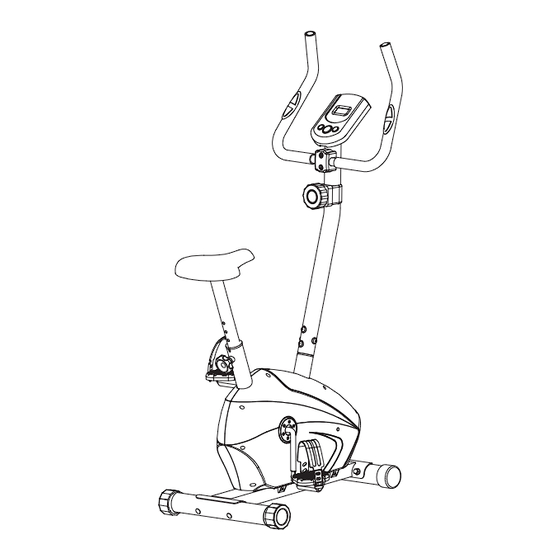
Model No. : WLIVEX85112.0
Serial No. ___________
Serial number decal
Write the serial number in the
space above for reference.
QUESTIONS ?
If you have questions, or if there are
missing parts, please contact us:
UK
Call: 08457 089 009
From Ireland: 053 92 36102
Website: www.iconsupport.eu
E-mail: csuk@iconeurope.com
Write:
ICON Health & Fitness, Ltd.
c/o HI Group PLC
Express Way
Whitwood, West Yorkshire
WF10 5QJ
UK
CAUTION
Read all precautions and instruc-
tions in this manual before using
this equipment. Keep this manual
for future reference.
USERʼS MANUAL
Visit our website
www.iconsupport.eu
Advertisement
Table of Contents

Related Manuals for Weslo Easy Fit WLIVEX85112.0


Summary of Contents for Weslo Easy Fit WLIVEX85112.0
- Page 1 USERʼS MANUAL Model No. : WLIVEX85112.0 Serial No. ___________ Serial number decal Write the serial number in the space above for reference. QUESTIONS ? If you have questions, or if there are missing parts, please contact us: Call: 08457 089 009 From Ireland: 053 92 36102 Website: www.iconsupport.eu E-mail: csuk@iconeurope.com...
-
Page 2: Table Of Contents
TABLE OF CONTENTS IMPORTANT PRECAUTIONS ..............3 BEFORE YOU BEGIN . -
Page 3: Important Precautions
IMPORTANT PRECAUTIONS WARNING : To reduce the risk of serious injury, read all important precautions and instructions in this manual and all warnings on your bike before using it. ICON assumes no responsibility for personal injury or property damage sustained by or through the use of this product. -
Page 4: Before You Begin
BEFORE YOU BEGIN Thank you for purchasing the WESLO® Easy Fit. number and serial number before contacting us. The exercice bike provides an array of features The model number is WLIVEX85112.0 and the lo- designed to make your workouts at home more cation of the serial number decal are shown on the effective and enjoyable. -
Page 5: Assembly
ASSEMBLY Assembly requires two persons. Place all parts of the exercise cycle in a cleared area and remove the packing materials. Do not dispose of the packing materials until assembly is completed. In addition to the included tool(s), assembly requires an adjustable wrench and a Phillips screwdriver . - Page 6 STEP 1 Attach the front stabilizer (2) and rear stabilizer (3) to the main frame (1) with the carriage bolts (5), arc washers (6) and acorn nuts (7) as shown. Note: The Leveler end caps of the rear stabilizer can be ADJUSTED to keep the equipment stable. STEP 2 Attach the pedals (9L/R) to the Crank (8L/R) re- spectively, viewed from the rider’s exercising posi-...
- Page 7 STEP 4 While another person holds the Upright (17) near the Frame (1), connect the Extension Wire (13) to Metallic Metallic the sensor Wire (11). support support Next, connect the Resistance Cable (25) to the Lower Cable (12) in the following way: •...
-
Page 8: How To Operate The Bike
HOW TO OPERATE THE EXERCISE CYCLE HOW TO ADJUST THE PEDAL STRAPS HOW TO ADJUST THE HEIGHT AND THE LATERAL POSITION OF THE SEAT To adjust the pedal For effective exercise, straps, first pull the Strap the seat should be at the ends of the pedal proper height. -
Page 9: Desired
HOW TO MEASURE YOUR HEART RATE MEASURE YOUR HEART RATE IF DESIRED When you are finished exercising You can measure you heart rate using either the If the pedals do not move for several minutes and handgrip pulse sensor. the buttons are not pressed, the console will turn If there are sheets of clear plastic on the metal off and the display will be reset. -
Page 10: Features Of The Console
CONSOLE FEATURES values will be reset. SET: Press this button to set the selected values when not in Scan mode. Set a value which will countdown on any functions of time, distance and calorie. when the value will goes to zero than the computer will alarm for 15 seconds. -
Page 11: Maintenance And Troubleshooting
MAINTENANCE AND TROUBLESHOOTING BATTERY REPLACEMENT Inspect and tighten all parts of the exercise cycle regularly. If the console display becomes dim, the batteries should be replaced; most console problems are the Replace any worn parts immediately. result of low batteries. To clean the exercise cycle, use a damp cloth and a small amount of mild detergent. -
Page 12: Exercise Guidelines
EXERCISE GUIDELINES WARNING: Burning Fat—To burn fat effectively, you must exer- cise at a low intensity level for a sustained period of time. During the first few minutes of exercise, your Before beginning this or any exercise pro- body uses carbohydrate calories for energy. Only af- gram, consult your physician. -
Page 13: Exploded Drawings
EXPLODED DRAWING—Model No. WLIVEX85112.0 part 1... - Page 14 EXPLODED DRAWING—Model No. WLIVEX85112.0 part 2...
-
Page 15: Part List
PART LIST—Model No. WLIVEX85112.0 Item Description Qty. Item Description Qty. Main frame Washer Front Stabilizer Rear Stabilizer Ball Bearing Rear End Cap Bearing Collar Carriage bolt M8×L74 Sensor Arc Washer Screw ST3X10 Acorn nut M8 Tri-slot nut Crank Big washer Pedal 1 pr. -
Page 16: Ordering Replacement Parts
ORDERING REPLACEMENT PARTS To order replacement parts, please see the front cover of this manual. To help us assist you, be prepared to provide the following information when contacting us: • the model number and serial number of the product (see the front cover of this manual) •...
Need help?
Do you have a question about the Easy Fit WLIVEX85112.0 and is the answer not in the manual?
Questions and answers