Samsung Galaxy S9 Quick Start Manual
Hide thumbs
Also See for Galaxy S9:
- User manual (237 pages) ,
- Basic manual (64 pages) ,
- Quick reference manual (23 pages)
Table of Contents
Advertisement
Available languages
Available languages
Advertisement
Table of Contents

Related Manuals for Samsung Galaxy S9


Summary of Contents for Samsung Galaxy S9
- Page 1 Quick Start Guide...
-
Page 2: Getting To Know Your
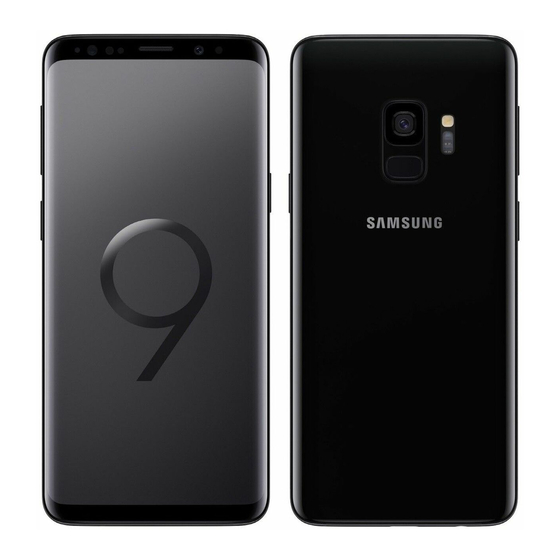
Getting to know your Galaxy S9 Unlocking your phone Press the Power/Lock key on the side of the phone and swipe up on the screen. Power/Lock key Front camera Volume keys Bixby Charging/data port SIM/microSD card tray Rear camera Flash... -
Page 3: Phone Setup
Phone setup Inserting SIM card 1. Hold the phone securely. 2. Use the tool that came with your phone to open the SIM/microSD ™ card tray. 3. Carefully place the SIM card into the tray with the carrier logo facing up. 4. -
Page 4: Smart Switch
Smart Switch Easily transfer photos, videos, music, apps and more with Samsung Smart Switch ™ Use the USB connector that came with your new device to transfer content. Select Smart Switch during setup, or open it later from the Home screen by swiping up for Apps and tapping Settings >... -
Page 5: Touch Screen
Touch screen Navigating your phone • From the Home screen, swipe up or down to access Apps. • Tap Recent to view recently viewed apps. ‐ Tap Multi window in the title bar to launch an application in split screen view. •... - Page 6 Personalize Tap and hold a blank space on a home screen to personalize: • Wallpapers: Change the look of the Home and Lock screens with a variety of wallpapers. You can also customize icons and the Always on Display screen. •...
-
Page 7: Send A Message
Messages Send a message 1. From the Home screen, tap Messages > New message 2. Enter a phone number or contact name in the Recipient field. 3. Tap START to compose a message. 4. Tap Enter message and enter your text. •... -
Page 8: Email Setup
Email Email setup 1. From the home screen, swipe up for Apps, and then tap Email 2. Enter an email address and password and then tap SIGN IN. Create and send an email message 1. From the home screen,swipe up for Apps, and then tap Email 2. -
Page 9: Camera And Video
Camera & video Take a Picture From the Home screen, tap Camera • Tap to take a photo. • Drag left or right to zoom in or out. • Tap or swipe up to take selfies. • Swipe right or left to select a shooting mode. - Page 10 Cricket services These services make using Cricket even better and easier! myCricket: Access billing, make a quick payment, view usage and access support from the palm of your hand. Cricket Visual Voicemail: Quickly view, access and play back your voicemail messages, easily save important numbers to your Favorites lists, and respond to messages by calling back or texting.
-
Page 11: More Information
Google, Android, and Google Play are trademarks of Google, LLC. © 2018 Samsung Electronics America, Inc. Samsung and Galaxy S, are all trademarks of Samsung Electronics Co., Ltd. Screen images simulated. Appearance of device may vary. -
Page 13: Cambio De Idioma
Cambio de idioma 1. Desde la pantalla de inicio, desliza hacia arriba en Aplicaciones y después pulsa en Ajustes > Administración general > Idioma y entrada > Idioma > Añadir idioma 2. Toca sin soltar y arrastra hacia el principio las flechas junto al idioma seleccionado. - Page 14 Familiarízate con tu Galaxy S9 Para desbloquear el teléfono Oprime la tecla de encender/bloquear en el costado del teléfono y desliza hacia arriba. Tecla de encender/bloquear Cámara delantera Teclas de volumen Bixby Puerto para carga/datos Bandeja para tarjeta SIM/microSD Cámara trasera Flash Escáner de huella...
-
Page 15: Configuración Del Teléfono
Configuración del teléfono Para insertar la tarjeta SIM 1. Sostén firmemente el teléfono. 2. Usa la herramienta que vino con el teléfono para abrir la bandeja para tarjetas SIM/microSD ™ 3. Coloca con cuidado la nueva tarjeta SIM en la bandeja, con el logotipo hacia arriba. - Page 16 Smart Switch Mueve facilmente fotos, videos, música, aplicaciones y más con Samsung Smart Switch ™ Usa el conector USB que viene con tu nuevo dispositivo para transferir contenido. Durante la confiuración selecciona Smart Switch, o ábrelo más tarde desde la pantalla de inicio deslizando hacia...
-
Page 17: Hello Bixby
1. From the Home screen, tap Camera > Bixby Vision and follow the prompts to complete the setup. 2. Tap > Settings to turn on/off search targets. Note: For more information about Bixby, visit samsung.com/us/support/owners/app/ Bixby. -
Page 18: Pantalla Táctil
Pantalla táctil Para explorar el teléfono • Desde una pantalla de inicio, desliza hacia arriba para tener acceso a Aplicaciones. • Pulsa en Reciente para ver las aplicaciones recientes. ‐ Pulsa en Ventana múltiple en la barra del título para iniciar una aplicación en la vista de pantalla dividida. - Page 19 Personalización Toca sin soltar un espacio en blanco en una de las pantallas de inicio para personalizar: • Fondos: cambia la apariencia de las pantallas de inicio y de bloqueo con diversos fondos de pantalla. También puedes personalizar iconos y la pantalla Always on Display.
- Page 20 Mensajes Envíar un mensaje 1. Desde la pantalla de inicio, pulsa en Mensajes > Nuevo mensaje. 2. Ingresa un número de teléfono o nombre de contacto en el campo Destinatario. 3. Toca INICIAR para redactar un mensaje. 4. Toca Introducir mensaje e ingresa tu texto.
-
Page 21: Correo Electrónico
Correo electrónico Configuración del correo electrónico 1. Desde la pantalla de inicio, desliza hacia arriba en Aplicaciones y después pulsa en Correo 2. Escribe la dirección de correo electrónico y contraseña, luego toca INICIAR SESIÓN. Para crear y enviar un mensaje de correo electrónico 1. -
Page 22: Cámara Y Video
Cámara y video Toma una foto Desde la pantalla de inicio, pulsa en Cámara • Pulsa en para tomar una foto. • Arrastra hacia la izquierda o derecha para acercar o alejar. • Pulsa en o desliza hacia arriba para tomar selfies. - Page 23 1. Desde la pantalla de inicio, pulsa en Cámara > Bixby Vision y sigue las instrucciones para completar la configuración. 2. Pulsa en > Ajustes para activar/ desactivar los objetivos de búsqueda. Nota: Para más information de Bixby, visita samsung.com/us/support/owners/ app/Bixby.
- Page 24 Servicios de Cricket ¡Con estos servicios, usar Cricket es aún mejor y más fácil! myCricket: ten acceso a la facturación, haz pagos rápidos, consulta tu uso y recibe ayuda desde la palma de tu mano. Cricket Visual Voicemail: consulta, ten acceso y reproduce tus mensajes del correo de voz rápidamente.
-
Page 25: Más Información
Google, Android y Google Play son marcas comerciales de Google, LLC. © 2018 Samsung Electronics America, Inc. Samsung y Galaxy S, son todas marcas comerciales de Samsung Electronics Co., Ltd. Las imágenes en pantalla son simuladas. La apariencia del teléfono puede variar.