Nexx Garage NXG-100 Installation Manual
Hide thumbs
Also See for NXG-100:
- Installation manual (14 pages) ,
- Installation manual (14 pages) ,
- Installation manual
Table of Contents
Advertisement
Advertisement
Table of Contents

Related Manuals for Nexx Garage NXG-100


Summary of Contents for Nexx Garage NXG-100
- Page 1 Installation Manual...
- Page 2 Thank you for purchasing Nexx Garage! Installation will be quick and easy and should take about 30 minutes to complete. For additional installation instructions, please visit our website or email us. Website: http://www.nexxgarage.com http://www.nexxgarage.com/support/ Customer Service / Support Email: support@nexxgarage.com Product Return: return@nexxgarage.com...
-
Page 3: Table Of Contents
4 Test Sensors For Notifications ............11 5 Mount The Device ................14 6 Connect The Device To Your Opener ..........15 7 Power Up Nexx Garage Device ............17 8 Mount The Sensors ................18 9 Test Mobile App For Notifications ........... 22 Nexx Garage Mobile App Features ............ -
Page 4: Introduction
INTRODUCTION Nexx Garage is a companion device to an existing garage door opener. It securely allows multiple users to open, close, and monitor their garage door from anywhere in the world. You can also control the opening or closing of garage door by voice command. -
Page 5: Contents Of The Box
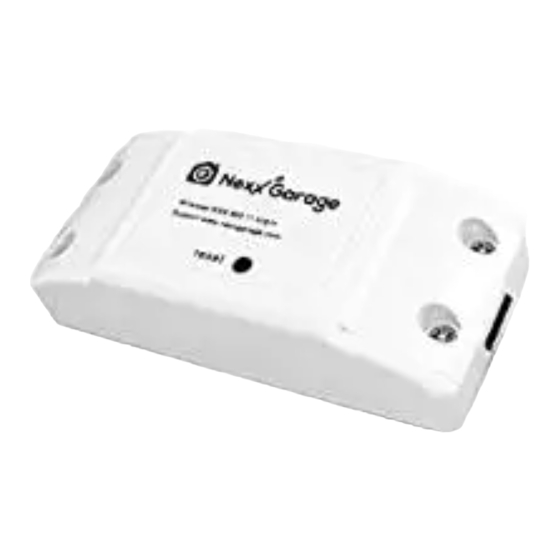
CONTENTS OF THE BOX Your Nexx Garage Box is packaged with the following parts: Nexx Garage Device Door sensors and cable 8 Double-sided adhesive tapes 4 Self-tapping screws Single wire Installation Manual Quick Start Guide Note: When unpacking, please make sure all these items are included in the box. -
Page 6: Installation
By doing so, your garage door should activate. Check out Nexx Garage website http://nexxgarage.com/videos for video of this test. If this test fails, your device may not be compatible so... -
Page 7: Install Mobile App & Create Account
INSTALL MOBILE APP & CREATE ACCOUNT First make sure you are on your home Wi-Fi and NOT mobile Wi-Fi. As Nexx Garage requires a good Wi-Fi signal to work properly, and if your Wi-Fi is weak, a Wi-Fi extender is highly recommended. -
Page 8: Register Device & Set Up Wi-Fi
Devices. Then tap “+” and “Yes, light steady green”. Once your device is registered, follow the onscreen wizard setup process or as detailed out below to connect the Nexx Garage Wi- Fi to your home Wi-Fi network. CONNECT TO NEXX GARAGE WI-FI NETWORK Switch to your Wi-Fi Settings and select the Nexx Garage Wi-Fi Network. - Page 9 Verify your Wi-Fi network and password. Save your configurations. After applying these settings, your Nexx Garage device will reboot. The LED light should blink several times. When the LED light is off, your device has successfully connected to your Wi-Fi network.
- Page 10 REGISTER TO CLOUD SERVICE Enter a name for your device. Tap “Register to Cloud”. Note: If there is an error registering to Cloud, make sure your phone is on your HOME network and try again.
-
Page 11: Test Sensors For Notifications
TEST SENSORS FOR NOTIFICATIONS This step is to verify if the sensors are working and you are getting notifications when the garage door is opened or closed. Connect the sensor with the connector to the Nexx Garage device connector. - Page 12 Tap and hold sensors together. LED light should blink and app should show door is closed.
- Page 13 Wait for 3 seconds then move the sensors apart. LED light should blink and app should show door is open. If you are not getting the proper notifications, your sensors may be defective so STOP and contact customer support at support@nexxgarage.com, and we will send you new sensors.
-
Page 14: Mount The Device
MOUNT THE DEVICE Clean the surface on top of your garage door opener before using the double-sided tape to secure the device. Mount the device on top of your garage door opener (GDO) near the GDO terminals using the double-sided adhesive tape. -
Page 15: Connect The Device To Your Opener
CONNECT THE DEVICE TO YOUR OPENER Locate the two exposed wires coming out of the Nexx Garage device. Connect these two exposed wires to your garage door opener (GDO). Connect them to the same wire as your wall console or manual button to open/close the garage door (see diagram below). - Page 16 If a wire is currently connected to the terminal of the GDO, take out the existing wire from the GDO terminal. Twist the two wires together and reconnect it back to the GDO.
-
Page 17: Power Up Nexx Garage Device
POWER UP NEXX GARAGE DEVICE Plug the power cable of the device into an outlet. The LED light from the device should blink several times and turn off. Once the LED light is off, this will indicate that the device has successfully connected to your Wi-Fi network. -
Page 18: Mount The Sensors
MOUNT THE SENSORS The sensors have 2 parts. One is connected to the cable while the other is not. Both sensors must be mounted parallel to each other as shown in the diagrams below, and they must be 1/8 to 1/4 inch apart, not touching. - Page 19 Mount the sensor that is connected to the cable to the center of the wall adjacent to the garage door, just above the garage door. Use the included double-sided tape to secure the sensor. If you have screws, you may use that instead.
- Page 21 Secure the remaining wires along the walls and ceiling using the included double-sided tape to avoid any moving parts of the door. You can also use other alternatives to secure the cable such as cable clips or staples.
-
Page 22: Test Mobile App For Notifications
TEST MOBILE APP FOR NOTIFICATIONS At this point, the app should indicate that you are connected to the device and that the door is currently closed. Press the garage door icon. Your garage door should be opening and the app should indicate that your garage door is opened. - Page 23 Press the garage door icon again. Your garage door should be closing. When the garage door is completely closed, the app should indicate that your garage door is closed. NEXX GARAGE INSTALLATION COMPLETED! CONGRATULATION! If you have any questions please email us at support@nexxgarage.com.
-
Page 24: Nexx Garage Mobile App Features
NEXX GARAGE MOBILE A PP FEATURES Mobile app features: Door Activation Share Access Door Activation History Auto Open Door Push Notification Door Open Reminder Register Device Door Activation Open – Close – Monitor garage door • From menu , select “Door Control”... - Page 25 , select “Settings”. • Turn on “Auto Open Door”. When the Nexx Garage mobile app is running in the foreground or background, it will use your GPS location to open your garage door when you are near your home. The...
- Page 26 You will keep receiving this notification every 15 minutes until the door is closed or you turn off the reminder from the “Settings” page. Register Device Add one or more Nexx Garage devices to our account. From menu , select “Registered Devices”.
-
Page 27: Nexx Garage Alexa Skill Setup
NEXX GARAGE ALEXA SK ILL SETUP Nexx Garage integrated with Alexa Skill allows you to control the opening or closing of garage door by voice command. Following steps describes Nexx Garage Alexa Skill setup. Open the Amazon Alexa app on your phone. - Page 28 Select “Skills” from the menu. Search for “Nexx Garage”.
- Page 29 Select “Nexx Garage” skill and press “Enable” button. Press “Link Account” button to go to the login page. Linking account will connect your Amazon account to your Nexx Garage account.
- Page 30 Pin code is not required when checking door status. You can disable the pin code from Nexx Garage app under “Settings”. Once you have successfully logged in, the message would be received as shown in image below:...
- Page 31 “Alexa, tell Nexx Garage to close garage door” “Alexa, tell Nexx Garage to close door” “Alexa, tell Nexx Garage to close garage” “My pin code is 1 2 3 4” (use your pin code) Note: You can disable/enable pin code from Nexx Garage app under “Settings”.
-
Page 32: Nexx Garage Google Home Setup
NEXX GARAGE GOOGLE HOME SETUP Nexx Garage integrated with Google Assistant Action allows you to control the opening or closing of garage door by voice command. Following steps describes Nexx Garage Google Home setup. Open Google Home app on your phone. - Page 33 Select “More settings” from the menu. Search for “Assistant apps”.
- Page 34 Select “Nexx Garage”. Nexx Garage screen...
- Page 35 Scroll down and tap “LINK ACCOUNT”. Linking account will connect your Google Home account to Nexx Garage account. At login page: Enter Nexx Garage account email and password Enter a 4 to 10 digit pin code. This pin code is required when opening/closing the garage door.
- Page 36 Once you have successfully logged in, you should receive a status of “Account now linked”. To you through the linking process again, tap “UNLINK” and then “LINK ACCOUNT”.
- Page 37 NEXX GARAGE GOOGLE HOME COMPLETED • Possible Actions “Hey Google, tell Nexx Garage to check garage door” “Hey Google, tell Nexx Garage to check door” “Hey Google, tell Nexx Garage to check garage” “Hey Google, tell Nexx Garage to open garage door”...
Need help?
Do you have a question about the NXG-100 and is the answer not in the manual?
Questions and answers