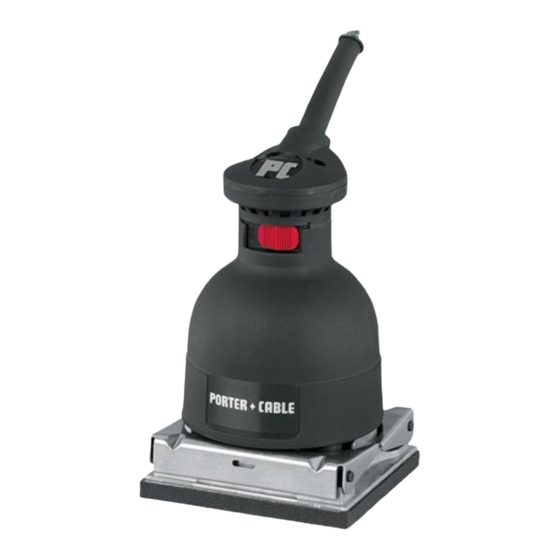
Porter-Cable SPEED-BLOC 330 Instruction Manual
Double insulated speed-bloc finishing sander
Hide thumbs
Also See for SPEED-BLOC 330:
- Instruction manual (12 pages) ,
- Instruction manual (44 pages)
Table of Contents
Advertisement
Instruction
manual
To learn more about Porter-Cable
visit our website at:
http://www.porter-cable.com
Copyright © 2005 Porter-Cable Corporation
ESPAÑOL: PÁGINA 15
FRANÇAISE : PAGE 29
Double Insulated
SPEED-BLOC ®
Finishing Sander
Please make certain that the person who is
to use this equipment carefully reads and
understands these instructions before
starting operations.
The Model and Serial No. plate is located on the main
housing of the tool. Record these numbers in the
spaces below and retain for future reference.
Model No. ______________________________________
Type ___________________________________________
Serial No. _______________________________________
MODEL 330
IMPORTANT
Part No. 900316 - 01-31-05
Advertisement
Table of Contents

Summary of Contents for Porter-Cable SPEED-BLOC 330
- Page 1 Copyright © 2005 Porter-Cable Corporation ESPAÑOL: PÁGINA 15 FRANÇAISE : PAGE 29 Double Insulated SPEED-BLOC ® Finishing Sander MODEL 330 IMPORTANT Please make certain that the person who is to use this equipment carefully reads and understands these instructions before starting operations.
-
Page 2: Table Of Contents
IMPORTANT SAFETY INSTRUCTIONS ......2 SAFETY GUIDELINES ........3 GENERAL SAFETY RULES . -
Page 3: Safety Guidelines
SAFETY GUIDELINES - DEFINITIONS It is important for you to read and understand this manual. The information it contains relates to protecting YOUR SAFETY and PREVENTING PROBLEMS. The symbols below are used to help you recognize this information. indicates an imminently hazardous situation which, if not avoided, will result in death or serious injury. -
Page 4: General Safety Rules
GENERAL SAFETY RULES Read all instructions. Failure to follow all instructions listed below may result in electric shock, fire and/or serious injury. The term "power tool" in all of the warnings listed below refers to your mains-operated (corded) power tool or battery-operated (cordless) power tool. - Page 5 GENERAL SAFETY RULES d) Remove any adjusting key or wrench before turning the power tool on. A wrench or a key left attached to a rotating part of the power tool may result in personal injury. e) Do not overreach. Keep proper footing and balance at all times. This enables better control of the power tool in unexpected situations.
-
Page 6: Additional Specific Safety Rules
Contact with a "live" wire will make exposed metal parts of the tool "live" and shock the operator. Always disconnect the sander cord plug from the power circuit before changing abrasive sheets. Such preventive safety measures reduce the risk of starting the power tool accidentally. - Page 7 SYMBOL ... volts ... amperes ... hertz ... watts ... kilowatts ... farads µF ... microfarads ... litres ... grams ... kilograms ... bars ... pascals ... hours ... minutes ... seconds ... no-load speed …/min or …min - ... Revolutions or reciprocations per minute or d.c.
-
Page 8: Additional Safety Rules For Paint Removal
ADDITIONAL SAFETY RULES FOR PAINT REMOVAL Extreme care should be taken when removing paint. The peelings, residue, and vapors of paint may contain lead, which is poisonous. Exposure to even low levels of lead can cause irreversible brain and nervous system damage. Young and unborn children are particularly vulnerable. -
Page 9: Extension Cord Selection
50 Ft. 100 Ft. 8-10 10-12 12-14 14-16 16-18 18-20 SAVE THESE INSTRUCTIONS! 1) Sander 2) Instruction Manual 3) Replacement Parts List 4) Combination Package Length of Cord in Feet 100 Ft. 150 Ft. 200 Ft. 200 Ft. 300 Ft. -
Page 10: Functional Description
Before starting to work, make sure you have the right abrasive for the material on which the sander is to be used. Make sure you use the correct size abrasive paper or cloth. Cut, do not tear, the abrasive sheets to size. -
Page 11: Operation
While holding sander firmly and off of work surface, slide switch (A), Fig. 3, to the “ON” position. Allow sander to reach full speed. Set it down on the work evenly and move it slowly back and forth in wide overlapping arcs (see SANDING PROCEDURE section of this manual). -
Page 12: Troubleshooting
The same procedure may be used when evening joints in all types of cabinet work. The sander may be worked on both sides and in all directions to obtain a smooth, matching joint. By properly changing from coarser to finer grit abrasives, an excellent finish will result. -
Page 13: Maintenance
MAINTENANCE KEEP TOOL CLEAN Periodically blow out all air passages with dry compressed air. All plastic parts should be cleaned with a soft damp cloth. NEVER use solvents to clean plastic parts. They could possibly dissolve or otherwise damage the material. Wear ANSI Z87.1 safety glasses while using compressed air. -
Page 14: Accessories
A complete line of accessories is available from your Porter-Cable Supplier, Porter-Cable Authorized Service Stations. Please visit our Web Site www.porter-cable.com for a catalog or for the name of your nearest supplier. Since accessories other than those offered by Porter- Cable such accessories could be hazardous. -
Page 15: Español
PORTER-CABLE • DELTA SERVICE CENTERS (CENTROS DE SERVICIO DE PORTER-CABLE • DELTA) (CENTRE DE SERVICE PORTER-CABLE • DELTA) Parts and Repair Service for Porter-Cable • Delta Power Tools are Available at These Locations (Obtenga Refaccion de Partes o Servicio para su Herramienta en los Siguientes Centros de Porter-Cable • Delta) (Locations où...


Need help?
Do you have a question about the SPEED-BLOC 330 and is the answer not in the manual?
Questions and answers