Table of Contents
Advertisement
Advertisement
Table of Contents

Related Manuals for Suntek HT-001


Summary of Contents for Suntek HT-001
- Page 1 User Manual HT-001...
-
Page 2: Table Of Contents
1.Introduction.......................3 1.1 Application......................3 1.2 Power Supply......................3 1.3 Caution........................3 1.4 Key Features......................4 2.Whole View and Details of Camera.................4 2.1 Front View of Camera....................5 2.2 Back View of Camera.....................5 2.3 Bottom View of Camera..................5 3. Operation........................6 3.1 Load Battery......................6 3.2 Insert TF Card......................6 3.3 Remoter........................6 3.4 Power On.......................7 3.4.1 Test........................7... -
Page 3: Introduction
1.Introduction Thank you for choosing our hunting camera, we have full set copyright of HT-001 both in hardware and software. Please read this introduction carefully before the camera using. 1.1 Application a. Instant surveillance camera for home, office, construction site, and warehouse, etc b. -
Page 4: Key Features
1.4 Key Features 30pcs IR LEDs for flash range as 20 meters 12MP/8MP/5 MP resolution optional Color pictures during daylight; black and white at night trigger time:1.1s Multi-shot pictures; 1,3,6,9 1/5/10/30 seconds/minutes Interval between motions optional video length: 10/30/60/90 seconds optional With 4 AA alkaline batteries, the longest standby time is up to 3 months operation temperature: -10℃... -
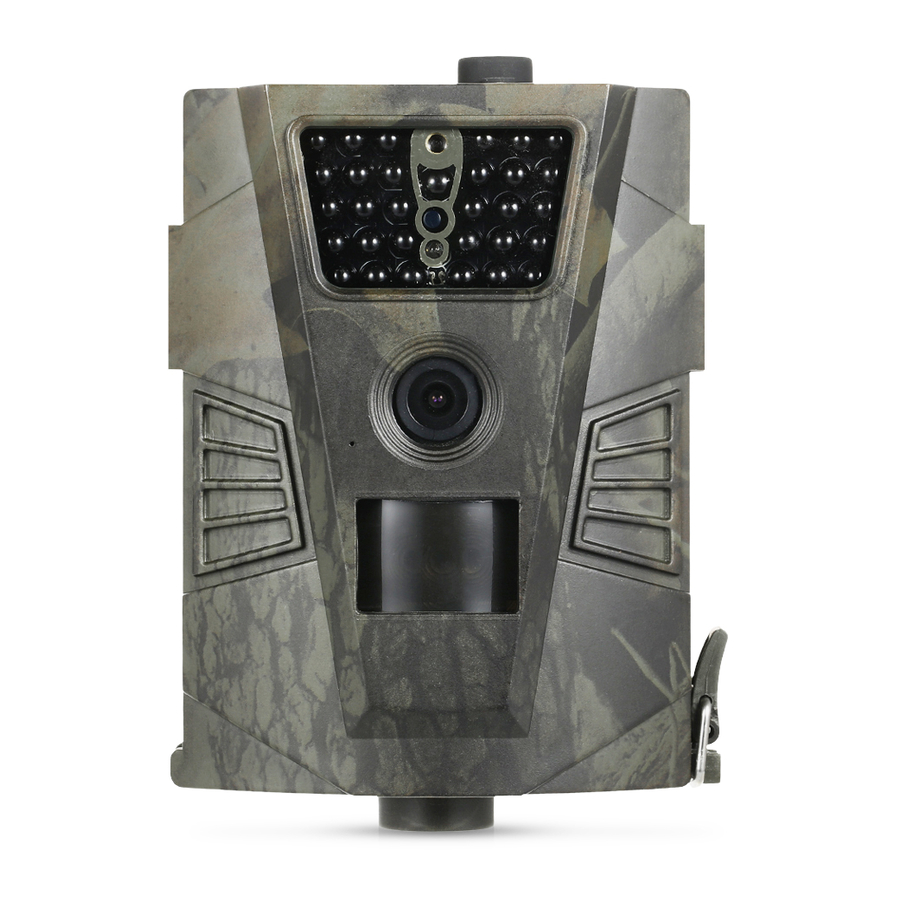
Page 5: Front View Of Camera
2.3 Bottom View of Camera... -
Page 6: Operation
3. Operation 3.1 Load Battery 3.2 Insert TF Card(8MB~32GB) 3.3 Remoter The infrared remoter is an input device of the camera and primarily used for customer settings. Its maximum remote distance is 9 meters. -
Page 7: Power On
Press the punctuation “ ” for laser light. Note(Under TEST mode): 1. Press “Shot” directly, the camera will take picture or video directly. 2. Press “OK” directly, the picture or video recorded can be viewed. 3. Viewing picture, press “Up” or “Down”. 4. - Page 8 1080P/720P/WVGA Resoluation /VGA Video Video Length 10/30/60/90S Record Audio ON/OFF Camera/camera+video/ Mode video Language 12languages Motion High/Mid/Low detection PAL/NTSC TV mode YY/MM/DD Date/time 26letters+number Video Timer 00:00:00/23:59:59 Fomat Cancel /ok Password OFF/ON Default Cancel /ok Version Camera version 2)Set via MMSCONFIG software in CD...
- Page 9 a. After you inserted the TF to camera, connect with the computer by USB cable, then the camera will be a removable disk. b. Open the MMSCONGIF software, you can change the Language, Working mode (Camera/Camera+Video/Video ),Resolution(12/8/5MP/1080P/720P/VGA),Multi(1/3/ 6/9),Camera ID (26alphabet +number), Date/time, Timer etc. in it. c.
-
Page 10: Menu Setting
3.4.2 ON In this mode, remoter is useless. The camera works automatically. Will capture if detected any motions by PIR. 4. Firmware Upgrade This camera is equipped with an automatic upgrade function for you. Upgrading is needed only when an improved firmware is available. The operations are as following: 1. -
Page 11: Specification
5. Specification Image Sensor 3 Mega Pixels Color CMOS Memory TF Card to 32GB F=3.1; FOV=90 ° Lens Size 129mmx93mmx39mm Black Invisible 940nm Motion Detection High/Normal/Low PIR Sensor Sight Angle 90 Degrees Number of IR LED 30LEDs Night Vision Lighting 65ft/20 meters Distance Trigger Speed...
Need help?
Do you have a question about the HT-001 and is the answer not in the manual?
Questions and answers