Juniper SSG 20 Hardware Installation And Configuration Manual
Secure services gateway; beta 3
Hide thumbs
Also See for SSG 20:
- Getting started manual (2 pages) ,
- Manual (21 pages) ,
- Datasheet (13 pages)
Table of Contents
Advertisement
Quick Links
Security Products
Secure Services Gateway (SSG) 20
Hardware Installation and Configuration Guide- Beta3
ScreenOS Version 5.4.0
Juniper Networks, Inc.
1194 North Mathilda Avenue
Sunnyvale, CA 94089
USA
408-745-2000
www.juniper.net
Part Number: 530-015646-01, Revision Beta3
1-888-314-JTAC
(1-888-314-5822 - toll free in U.S., Canada, and Mexico)
or go to the link to request service
http://www.juniper.net/support/requesting-support.html
Advertisement
Table of Contents

Related Manuals for Juniper SSG 20


Summary of Contents for Juniper SSG 20
- Page 1 Security Products Secure Services Gateway (SSG) 20 Hardware Installation and Configuration Guide- Beta3 ScreenOS Version 5.4.0 Juniper Networks, Inc. 1194 North Mathilda Avenue 1-888-314-JTAC (1-888-314-5822 - toll free in U.S., Canada, and Mexico) Sunnyvale, CA 94089 or go to the link to request service http://www.juniper.net/support/requesting-support.html...
- Page 2 Copyright © 2006 Juniper Networks, Inc. All rights reserved. Juniper Networks and the Juniper Networks logo are registered trademarks of Juniper Networks, Inc. in the United States and other countries. All other trademarks, service marks, registered trademarks, or registered service marks in this document are the property of Juniper Networks or their respective owners.
-
Page 3: Table Of Contents
Connecting the Interface Cable to a Device............12 Connecting the Power..................13 Connect the Device to a Network..............13 Connect an SSG 20 Device to an Untrusted Network ....... 13 Connecting Ethernet Ports ..............13 Connecting Serial (AUX/Console) Ports..........13 Connect an SSG Device to an Untrusted Network ........14 Connect Mini PIMs to an Untrusted Network ........ - Page 4 SSG 20 Hardware Installation and Configuration Guide Using Telnet .................... 20 Default Device Settings .................. 21 Basic Device Configuration ................23 Changing the Root Admin Name and Password ........23 Setting the Date and Time ............... 24 Bridge Group Interfaces ................24 Administrative Access ................
- Page 5 Table of Contents Index........................IX--1 Table of Contents...
- Page 6 SSG 20 Hardware Installation and Configuration Guide Table of Contents...
-
Page 7: About This Guide
SSG 20 Ethernet only SSG 20-WLAN which has four integrated wireless interfaces. Both of the SSG 20 devices support auxiliary (AUX), universal storage bus (USB) storage, and two mini physical interface module (PIM) slots that can hold any of the mini PIMs. -
Page 8: Webui Conventions
SSG 20 Hardware Installation and Configuration Guide WebUI Conventions A chevron ( > ) shows the navigational sequence through the WebUI, which you follow by clicking menu options and links. The following figure shows the following path to the address configuration dialog box—Objects > Addresses > List > New:... -
Page 9: Obtaining Documentation And Technical Support
Obtaining Documentation and Technical Support To obtain technical documentation for any Juniper Networks product, visit www.juniper.net/techpubs/. For technical support, open a support case using the Case Manager link at http://www.juniper.net/support/... - Page 10 SSG 20 Hardware Installation and Configuration Guide Obtaining Documentation and Technical Support...
-
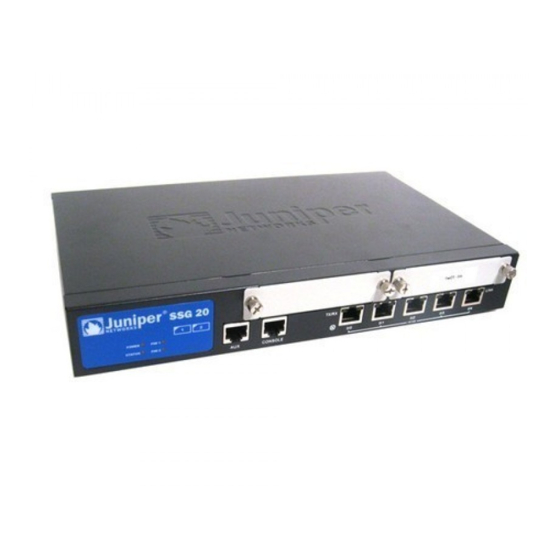
Page 11: Hardware Overview
Chapter 1 Hardware Overview This chapter provides detailed descriptions of the SSG 20 chassis and components. It contains the following sections: “Port and Power Connectors” on this page “Front Panel” on page 3 “Back Panel” on page 8... -
Page 12: Port And Power Connectors
10 /100 Console e0/0 e0/1 e0/2 e0/3 e0/4 Table 1 shows the ports and power connectors on an SSG 20 device. Table 1: SSG 20 Port and Power Connectors Port Description Connector Speed/Protocol Ports 0/0-0/4 Enables direct connections to workstations or a LAN... -
Page 13: Front Panel
Front Panel This section describes the following elements on the front panel of an SSG 20 device: System Status LEDs Port Descriptions Mini Physical Interface Module Port Descriptions System Status LEDs The system status LEDs display information about critical device functions. Figure 1 illustrates the position of each status LED on the system dashboard. - Page 14 SSG 20 Hardware Installation and Configuration Guide Name Color Status Description PIM 2 Green On steadily Indicates that the mini PIM is functioning Blinking Indicates that the mini PIM is passing traffic Indicates that the mini PIM not operational WLAN 802.11a...
-
Page 15: Port Descriptions
Port Descriptions This section explains the purpose and function of the following: Ethernet Ports on page 5 Console Port on page 5 AUX Port on page 5 Ethernet Ports Five 10/100 Ethernet ports provide LAN connections to hubs, switches, local servers, and workstations. -
Page 16: Mini Physical Interface Module Port Descriptions
One cable connector port—Accepts a network media connector. Figure 3 shows the available mini PIMs. You can install up to two mini PIMs in a device. Figure 3: Mini PIMs on the SSG 20 ADSL 2 /2 + ADSL2/2+ Annex B... - Page 17 Table 4: Mini PIM LED States on the SSG 20 Type Name Color State Description ADSL 2/2+ SYNC Green On steadily Indicates that the ADSL interface is trained (Annex A Blinking Indicates training is in progress and B) Interface is idle...
-
Page 18: Back Panel
SSG 20 Hardware Installation and Configuration Guide Back Panel This section describes the back panel of an SSG 20 device: “Power Adapter” on this page “Radio Transceiver,” on this page “Grounding Lug,” on this page “Antennae Types” on page 9 “Universal Serial Bus (USB) Host Module”... -
Page 19: Antennae Types
(with the antenna facing inward). Universal Serial Bus (USB) Host Module The slot labeled USB on the back panel of an SSG 20 device implements a host-only USB 1.1 host module for a USB device adapter or USB flash key, as defined in the CompactFlash Specification published by the CompactFlash Association. - Page 20 SSG 20 Hardware Installation and Configuration Guide Back Panel...
-
Page 21: Installing And Connecting The Device
Chapter 2 Installing and Connecting the Device This chapter describes how to install an SSG 20 device in a standard 19-inch equipment rack and connect cables and power to the device. Topics in this chapter include: “Before You Begin” on this page “Equipment Rack Installation”... -
Page 22: Equipment Rack Installation
Equipment Rack Installation You can front-mount an SSG 20 device into a standard 19-inch equipment rack. The device is shipped with mounting brackets installed. To front-mount an SSG 20 device, you need a number 2 phillips screwdriver (not provided) and four screws that are compatible with the equipment rack (not provided). -
Page 23: Connecting The Power
Connecting the device mini PIMs to an untrusted Network Connecting the device to an internal network or workstation Connect an SSG 20 Device to an Untrusted Network You can connect your SSG 20 device to the untrusted network in one of the following ways: Connecting Ethernet Ports... -
Page 24: Connect An Ssg Device To An Untrusted Network
SSG 20 Hardware Installation and Configuration Guide Connect an SSG Device to an Untrusted Network Figure 5 shows basic network cabling connections for a device. This figure shows two blank PIMs and the 10/100 Ethernet ports are cabled as follows: The port labeled 0/0 (ethernet0/0 interface) is connected to the untrust network. -
Page 25: Connecting Other Mini Pims
New Graphic Needed DATA VOICE ADSL ADSL 2 /2 + SYNC SYNC TX RX TX/RX TX/RX LI NK SSG 20 POWER PI M 1 802.11a STATUS PI M 2 CONSOL E WLAN 0 /0 10/100 0 /1 10 / 1 00... -
Page 26: Connect The Device To An Internal Network Or A Workstation
Connecting Ethernet Ports An SSG 20 device contains five Ethernet ports. You can use one or more of these ports to connect to LANs through switches or hubs. You can also connect one or all of the ports directly to workstations, eliminating the need for a hub or switch. You can use either crossover or straight through cables to connect the Ethernet ports to other devices. -
Page 27: Configure The Device
Chapter 3 Configure the Device The ScreenOS software is preinstalled on an SSG 20 device. When the device is powered on, it is ready to be configured. While the device has a default factory configuration that allows you to initially connect to the device, you need to perform further configuration for your specific network requirements. -
Page 28: Access The Device
NetScreen-Security Manager: NetScreen-Security Manager is a Juniper Networks enterprise-level management application that enables you to control and manage Juniper Networks firewall/IPSec VPN and SSG devices. For instructions on how to manage your device with NetScreen-Security Manager, refer to the NetScreen-Security Manager Administrator’s Guide. -
Page 29: Using The Webui
DB-9 adapter 2. Plug the male end of the RJ-45 CAT5 serial cable into the Console port on the SSG 20. (Be sure that the other end of the CAT5 cable is inserted properly and secured in the DB-9 adapter.) 3. -
Page 30: Using Telnet
SSG 20 Hardware Installation and Configuration Guide The WebUI application displays the login prompt as shown in Figure 8. Figure 8: WebUI Login Prompt 4. If you have not yet changed the default user name and password, enter netscreen in both the login and password prompts. (Use lowercase letters only. -
Page 31: Default Device Settings
Default Device Settings This section describes the default settings and operation of an SSG 20 device. Table 5 describes the default zone bindings for ports on the devices. Table 5: Default Physical Interface to Zone Bindings Port Label Interface Zone... - Page 32 SSG 20 Hardware Installation and Configuration Guide Table 6: Wireless and Logical Interface Bindings SSG 20-WLAN Interface Zone Wireless interface wireless0/0 (default IP address is Trust 192.168.2.1/24) Specifies a wireless interface, which is configurable to operate on 2.4G and/or wireless0/1-0/3 Null 5G radio.
-
Page 33: Basic Device Configuration
“Backup Untrust Interface Configuration” on page 26 Changing the Root Admin Name and Password The root admin user has complete privileges to configure an SSG 20 device. We recommend that you change the default root admin name ( netscreen ) and password ( netscreen ) immediately. -
Page 34: Setting The Date And Time
Setting the Date and Time The time set on an SSG 20 device affects events such as the setup of VPN tunnels. The easiest way to set the date and time on the device is to use the WebUI to synchronize the device system clock with the workstation clock. -
Page 35: Administrative Access
Administrative Access By default, anyone in your network can manage a device if they know the login and password. You can configure the device to be managed only from a specific host on your network: WebUI Configuration > Admin > Permitted IPs: Enter the following, click Add: IP Address/Netmask: ip_addr/mask set admin manager-ip ip_addr/mask save... -
Page 36: Default Route
LAN. Backup Untrust Interface Configuration The SSG 20 device allows you to configure a backup interface for untrust failover. To set a backup interface for untrust failover, perform the following steps: 1. Set the backup interface in the Null security zone with the unset interface interface [ port interface ] CLI command. -
Page 37: Wireless Configuration
NOTE: If you are operating the SSG 20-WLAN device in a country other than the United States or Japan, then you must use the set wlan country-code command before a WLAN connection can be established. This command sets the selectable channel range and transmit power level. -
Page 38: Wireless Network Configuration
Once the SSID name is set, more SSID attributes can be configured. The SSG 20-WLAN device allows you to create up to 16 SSIDs, but only 4 of them can be used simultaneously. You can configure the device to use the 4 SSIDs on either one of the transceivers or split the use on both. - Page 39 WebUI Wireless > SSID > New: Enter the following, then click OK: SSID: netscreen open Authentication: open Encryption: none Wireless Interface Binding: wireless0/0 (select) set ssid name “netscreen open” set ssid “netscreen open” authentication open encryption none set ssid “netscreen open” interface wireless0/0 set interface wireless0/0 wlan both set interface wireless0/0 zone trust save...
-
Page 40: Authentication And Encryption
SSG 20 Hardware Installation and Configuration Guide Authentication and Encryption The SSG 20-WLAN supports the following authorization and encryption methods: Authentication Encryption Open Allows any wireless client to access the device Shared-key WEP shared-key WPA-PSK AES/TKIP with Pre-shared key AES/TKIP with key from RADIUS server WPA2-PSK 802.11i compliant with a pre-shared key... -
Page 41: Virtual Circuits To An Adsl2/2+ Interface
If you are using the ADSL2/2+ interface to connect to the service provider’s network, you must configure the adsl(x/0) interface. To do this, you must obtain the following information from your service provider: Virtual Path Identifier and Virtual Channel Identifier (VPI/VCI) values ATM Adaptation Layer 5 (AAL5) multiplexing method, which can be one of the following: Virtual Circuit-based multiplexing, in which each protocol is carried over a... -
Page 42: Vpi/Vci And Multiplexing Method
PPPoE or PPPoA An SSG 20 device includes both PPPoE and PPPoA clients to connect to the service provider’s network over the ADSL link. PPPoE is the most common form of ADSL encapsulation and is intended for termination on each host on your network. -
Page 43: Static Ip Address And Netmask
To configure the user name roswell and password area51 for PPPoE and bind the PPPoE configuration to the adsl1/0 interface: WebUI Network > PPP > PPPoE Profile> New: Enter the following, click OK: PPPoE Instance: poe1 Bound to Interface: adsl1/0 (select) Username: roswell Password: area51 set pppoe name poe1 username roswell password area51... -
Page 44: The Isdn Interface
SSG 20 Hardware Installation and Configuration Guide To use Domain Name System (DNS) for domain name and address resolution, the computers in your network need to have the IP address of at least one DNS server. If the device receives an IP address for the ADSL2/2+ interface through PPPoE or PPPoA, then it also automatically receives IP addresses for the DNS server(s). -
Page 45: The T1 Interface
set interface bri1/0 ppp profile isdnprofile save For more information on how to configure the ISDN interface, refer to the Concepts & Examples ScreenOS Reference Guide. To configure the ISDN interface as the backup interface, see “Backup Untrust Interface Configuration” on page 26. The T1 Interface The T1 interface is a basic Physical Layer protocol used by the Digital Signal level 1 (DS-1) multiplexing method in North America. -
Page 46: The E1 Interface
SSG 20 Hardware Installation and Configuration Guide The E1 Interface The E1 interface is a standard wide area network (WAN) digital communications format designed to operate over copper facilities at a rate of 2.048 Mbps. Widely used outside North America, E1 is a basic time-division multiplexing scheme used to carry digital circuits. -
Page 47: The V.92 Modem Interface
Concepts and Examples ScreenOS Reference Guide. The SSG 20 device provides various detection methods and defense mechanisms to combat probes and attacks aimed at compromising or harming a network or network resource: ScreenOS SCREEN options secure a zone by inspecting, and then allowing or denying, all connection attempts that require crossing an interface to that zone. -
Page 48: Verify External Connectivity
SSG 20 Hardware Installation and Configuration Guide To set ScreenOS SCREEN options for a zone: WebUI Screening > Screen: Select the zone to which the options apply. Select the SCREEN options that you want, then click Apply: set zone zone screen option... - Page 49 2. Wait for one to two seconds. After the first reset, the STATUS LED blinks green; the device is now waiting for the second reset. The Console message now states that the device is waiting for a second confirmation. 3. Push the reset pinhole again for four to six seconds. The Console message verifies the second reset.
- Page 50 SSG 20 Hardware Installation and Configuration Guide Reset the Device to Factory Defaults...
-
Page 51: Chapter 4 Servicing The Device
Tools and Parts Required To replace a component on an SSG 20 device, you need the following tools and parts: Electrostatic bag or antistatic mat... -
Page 52: Removing A Blank Faceplate
SSG 20 Hardware Installation and Configuration Guide Removing a Blank Faceplate To maintain proper airflow through the SSG device, blank faceplates should remain over slots that do not contain mini PIMs. Do not remove a blank faceplate unless you are installing a mini PIM in its empty slot. -
Page 53: Installing A Mini Pim
8. Grasp the screws on each side of the mini PIM faceplate and slide it out of the device. Place the mini PIM in the electrostatic bag or on the antistatic mat. 9. If you are not reinstalling a mini PIM into the emptied slot, install a blank faceplate over the slot to maintain proper airflow. -
Page 54: Memory Upgrade
PIM is online. Memory Upgrade You can upgrade an SSG 20 device with a single 128 MB SODIMM DRAM memory module to a 256 MB module. To upgrade the memory on an SSG 20 device, perform the following steps: 1. - Page 55 9. To replace the top panel on the chassis, set the front edge of the top panel into the groove that runs along the top front edge of the chassis. Then lower the top panel onto the chassis. 10. Use the phillips screwdriver to tighten the screws you removed earlier, securing the top panel to the chassis.
- Page 56 SSG 20 Hardware Installation and Configuration Guide Memory Upgrade...
-
Page 57: Ssg 20 Physical Specifications
Appendix A Specifications This appendix provides general system specifications for an SSG 20 device. SSG 20 Physical Specifications Table 1: SSG 20 Physical Specifications Description Value Chassis 294mm X 194.8mm X 44mm (11.5 inches X 7.7 inches X 2 inches) -
Page 58: Environmental
SSG 20 Hardware Installation and Configuration Guide Environmental Table 3: SSG 20 Environmental Tolerance Description Value Altitude No performance degradation to 6,600 ft (2,000 m) Relative humidity Normal operation ensured in relative humidity range of 5% to 90% noncondensing Temperature Normal operation ensured in temperature range of 32°F (0°C) to 104°F... -
Page 59: European Telecommunications Standards Institute (Etsi)
EN-61000-4-6 Low Frequency Common Immunity EN-61000-4-11 Voltage Dips and Sags European Telecommunications Standards Institute (ETSI) ETSI EN-3000386-2: Telecommunication Network Equipment. Electromagnetic Compatibility Requirements; (equipment category -Other than telecommunication centers) T1 Interface FCC Part 68 - TIA 968 Industry Canada CS-03 UL 60950-1 Applicable requirements for TNV circuit with outside plant lead connection Connectors... - Page 60 SSG 20 Hardware Installation and Configuration Guide Connectors...
-
Page 61: Using The Initial Configuration Wizard
Appendix A Initial Configuration Wizard This appendix provides detailed information about the Initial Configuration Wizard (ICW) for an SSG 20 device. Using the Initial Configuration Wizard After you have physically connected your device to the network, you can use the ICW to configure the interfaces that are installed on your device. -
Page 62: Rapid Deployment Window
SSG 20 Hardware Installation and Configuration Guide 17. Confirmation Window on page XIX 1. Rapid Deployment Window Table 1: Rapid Deployment Window If your network uses NetScreen-Security Manager, you can use a Rapid Deployment configlet to automatically configure the SSG device. Obtain a configlet from your Security Manager administrator, select the Yes option, select the Load Configlet from: option, browse to the file location, then click Next. -
Page 63: Physical Ethernet Interface Window
Figure 2: Wireless Access Point County Code Window 4. Physical Ethernet Interface Window On the interface-to-zone bindings screen, you set the interface to which you want to bind the Untrust security zone. Bgroup0 is prebound to the Trust security zone. Ethernet0/1 is bound to the DMZ security zone but is optional. -
Page 64: Adsl2/2+ Interface Window
SSG 20 Hardware Installation and Configuration Guide 5. ADSL2/2+ Interface Window If you have the ADSL2/2+ mini PIM installed on your device, the following window is displayed. After you have entered the necessary information, click Next. NOTE: If you have two ADSL2/2+ mini PIMs installed on your device and you select the Multi-link option, you will see two Physical Layer tabs. -
Page 65: T1 Interface Windows
6. T1 Interface Windows If you have the T1 mini PIM installed on your device and select the Frame Relay option, the following windows are displayed: “T1 Physical Layer Tab Window” on page V “T1 Frame Relay Tab Window” on page VII NOTE: If you have two T1 mini PIMs installed on your device and you select the Multi-link option, you will see two Physical Layer tabs. - Page 66 SSG 20 Hardware Installation and Configuration Guide Table 3: Field Description for T1 Physical Layer Tab Field Description Clocking Sets the transmit clock on the interface. Line Buildout Sets the distance at which an interface drives a line. Default setting is 0~132 feet.
- Page 67 Figure 6: T1 Frame Relay Tab Window Table 4: Field Description for T1 Frame Relay Tab Field Description No-Keepalives checkbox Enables no-keepalives Type Sets the frame relay LMI type ANSI: American National Standards Institute supports data rates up to 8 Mbps downstream and 1 Mbps upstream. ITU: International Telecommunications Union supports data rates of 6.144 Mbps downstream and 640 kbps upstream.
- Page 68 SSG 20 Hardware Installation and Configuration Guide If you have the T1 mini PIM installed on your device and select the PPP option, the following windows are displayed: “PPP Option with PPP Tab Window” on page VIII “PPP Option with Peer User Tab Window” on page VIII After you have entered the necessary information, click Next.
- Page 69 If you have the T1 mini PIM installed on your device and select the Cisco HDLC option, the following window is displayed. Figure 9: Cisco HDLC Option with Cisco HDLC Tab Window Table 7: Field Description for Cisco HDLC Option Field Description Interface IP...
-
Page 70: E1 Interface Windows
SSG 20 Hardware Installation and Configuration Guide 7. E1 Interface Windows If you have the E1 mini PIM installed on your device and select the Frame Relay option, the following windows are displayed: “E1 Physical Layer Tab Window” on page X “E1 Frame Relay Tab Window”... - Page 71 Figure 11: E1 Frame Relay Tab Window Table 9: Field Descriptions for the Frame Relay Tab Field Description No-Keepalives checkbox Enables no-keepalives Type Sets the frame relay LMI type ANSI: American National Standards Institute supports data rates up to 8 Mbps downstream and 1 Mbps upstream. ITU: International Telecommunications Union supports data rates of 6.144 Mbps downstream and 640 kbps upstream.
-
Page 72: Isdn Interface Windows
SSG 20 Hardware Installation and Configuration Guide 8. ISDN Interface Windows If you have the ISDN mini PIM installed on your device, a physical layer tab window similar to the following is displayed. NOTE: If you have two ISDN mini PIMs installed on your device and you select the Multi-link option, you will see two Physical Layer tabs. - Page 73 Figure 13: ISDN Licensed-Line, Leased-Line, and Dial Using BRI Tabs Window Table 11: Field Descriptions for the ISDN Licensed-Line, Leased-Line, and Dial Using BRI Tabs Field Description PPP Profile Name Sets a PPP profile name to the ISDN interface Authentication Sets the PPP authentication type: CHAP: Challenge Handshake Authentication Protocol PAP: Password Authentication Protocol...
-
Page 74: Modem Interface Window
SSG 20 Hardware Installation and Configuration Guide 9. V.92 Modem Interface Window If you have the V.92 mini PIM installed on your device, the following window is displayed: Figure 14: V.92 Modem Interface Window Table 12: Field Descriptions for V.92 Modem... -
Page 75: Untrust Zone (Ethernet0/0 Interface) Window
10. Untrust Zone (Ethernet0/0 Interface) Window The Untrust zone interface can have a static IP address or a dynamic IP address assigned via DHCP or PPPoE. Insert the necessary information, then click Next. Figure 15: ethernet0/0 Interface Window Table 13: Field Descriptions for Ethernet0/0 Interface Field Description Dynamic IP via DHCP... -
Page 76: Dmz Zone (Ethernet0/1 Interface) Window
SSG 20 Hardware Installation and Configuration Guide 11. DMZ Zone (Ethernet0/1 Interface) Window The DMZ zone interface can have a static IP address or a dynamic IP address assigned via DHCP. Insert the necessary information, then click Next. Figure 16: Ethernet0/1 Interface Window... -
Page 77: Wireless Interface (Wireless0/0) In Trust Zone Window
13. Wireless Interface (wireless0/0) in Trust Zone Window You must set a Service Set Identifier (SSID) before the wireless0/0 interface can be activated. For detailed instructions about configuring your wireless interface(s), see the Concepts and Examples ScreenOS Reference Guide. Figure 18: Wireless0/0 Interface Window Table 16: Field Descriptions for Wireless0/0 Interface Field Description... -
Page 78: Interface Summary Window
SSG 20 Hardware Installation and Configuration Guide 14. Interface Summary Window Select Yes, to enable your device to assign IP addresses to your wired network via DHCP. Enter the IP address range that you want your device to assign to clients using your network. -
Page 79: Wireless Dhcp Interface Window
16. Wireless DHCP Interface Window Confirm your device configuration and change as needed. Click Next to save, reboot the device, then run the configuration. 17. Confirmation Window... - Page 80 SSG 20 Hardware Installation and Configuration Guide...
- Page 81 Index configuring 32 AAL5 multiplexing 31 adding virtual circuit 31 Wireless ADSL antennae 16 configuring interface 30 using the default interface 16 connecting the cable 13 connecting the port 13 Annex A 13 Annex B 13 antennae 16 ATM Adaptation Layer 5 31 backup interface to Untrust zone 26 configuration management services 25...
- Page 82 SSG 20 Hardware Installation and Configuration Guide Index...
Need help?
Do you have a question about the SSG 20 and is the answer not in the manual?
Questions and answers