Advertisement
Available languages
Available languages
Quick Links
OWNER'S MANUAL
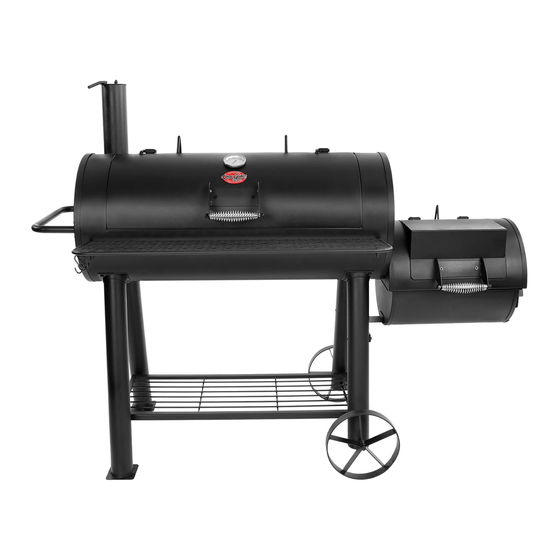
Competition Pro™
Model 8125
Keep your receipt with this manual for Warranty.
CUSTOMER SERVICE
1-912-638-4724
Service@CharGriller.com
Contents of this manual are Trademarked and Copyrighted by Char-Griller | A&J Manufacturing.
Using the information contained in this manual without consent of Char-Griller and/or
A&J Manufacturing is strictly prohibited.
OM 8125 A.1
Advertisement

Related Manuals for Char-Griller Competition Pro 8125


Summary of Contents for Char-Griller Competition Pro 8125
- Page 1 Keep your receipt with this manual for Warranty. CUSTOMER SERVICE 1-912-638-4724 Service@CharGriller.com Contents of this manual are Trademarked and Copyrighted by Char-Griller | A&J Manufacturing. Using the information contained in this manual without consent of Char-Griller and/or A&J Manufacturing is strictly prohibited. OM 8125 A.1...
- Page 2 IMPORTANT SAFETY WARNINGS READ ALL SAFETY WARNINGS AND INSTRUCTIONS CAREFULLY BEFORE ASSEMBLING AND OPERATING YOUR GRILL Read the following instructions carefully and be sure your appliance is properly assembled, installed, and maintained. Failure to follow these instructions may result in serious bodily injury and/or property damage.
-
Page 3: Register Your Grill
Customer Service at 1-912-638-4724. Registration provides important protections: 1. In the extremely unlikely event of a product recall Char-Griller can easily contact you and rectify the issue. 2. If a warrantied part is broken or missing we can send you the needed parts promptly. - Page 4 This grill has been made according to the highest of quality standards. If you have any questions that are not addressed in this manual or if you need parts please call our Customer Service Department at 1-912-638-4724 (USA) or email Char-Griller at: Service@CharGriller.com and have your serial number handy.
-
Page 5: Warranty Information
SURFACE RUST IS NOT CONSIDERED A MANUFACTURING OR MATERIALS DEFECT Char-Griller grills are made of steel and if exposed to the elements rust will occur naturally. Please refer to the section entitled, “Usage” to review how to care for your grill properly. -
Page 6: Parts List
PARTS LIST Sold under license from W.C. Bradley Co. -
Page 7: Table Of Contents
Competition Pro™ PARTS LIST Item Part Name THERMOMETER WITH WINGNUT & FLAT WASHER LOGO PLATE W/CLIPS HOOD HANDLE BODY Side Fire Box (SFB) LID STOPPER SFB HANDLE SFB LID SFB TOP HALF SFB COOKING GRATE SFB CHARCOAL GRATE SFB BOTTOM HALF SFB DOOR LATCH SFB DOOR DAMPER SFB SUPPORT BRACKET... - Page 8 HARDWARE AND TOOLS NEEDED Assembly: Requires 2 people. Get another person to help. Tools Needed: Pliers, Phillips Head Screwdriver and a 7/16” Nut Driver. NOTE: Do Not tighten any bolts unless instructed to do so. Tightening too soon may prohibit parts from fi tting together. All Hex Nuts should be on the inside of the grill unless stated otherwise.
- Page 9 Competition Pro™ ASSEMBLY Step 1 Attach one (1) LONG LEG and one (1) SHORT LEG to back leg positions on GRILL BODY underside, using eight (8) ¼-20 x ½” HEX BOLTS and eight (8) ¼ LOCK WASHERS. Hardware: Hex Bolt Lock Washer Side Fire Box Opening...
- Page 10 Step 2 Attach other one (1) LONG LEG and one (1) SHORT LEG to front positions on GRILL BODY underside, using eight (8) ¼-20 x ½” HEX BOLTS and eight (8) ¼ LOCK WASHERS. Then, affi x BOTTOM SHELF as shown. Hardware: Hex Bolt Lock Washer...
- Page 11 Competition Pro™ Step 3 RUN AXLE ROD THROUGH HOLES IN SHORT LEGS, THEN ATTACH WHEELS TO AXLE ROD USING TWO (2) 7/16 HEX BOLTS. Hardware: 7/16 Hex Jam Nut 7/16 Hex Jam Nut Long Leg Wheel Short Leg Axle...
-
Page 12: Hood Handle
Step 4 Attach HOOD HANDLE to GRILL HOOD using two (2) ¼-20 x ½” HEX BOLTS and two (2) ¼-20 HEX FLANGE NUTS. Hardware: Hex Bolt Hex Bolt Hex Flange Nut Hood Handle Hex Nut... - Page 13 Competition Pro™ Step 5 Place THERMOMETER through hole in GRILL HOOD, and secure with included WINGNUT and FLAT WASHER, as shown. (NOTE: Hardware came attach on Thermometer.) Thermometer Wingnut Flat Washer...
- Page 14 Step 6 Attach SIDE HANDLE to GRILL BODY using four (4) ¼-20 x ½” HEX BOLTS and four (4) ¼-20 HEX FLANGE NUTS. Hardware: Hex Bolt Hex Flange Nut Hex Bolt Side Handle Hex Nut...
- Page 15 Competition Pro™ Step 7 Attach SMOKESTACK to GRILL BODY using two (2) ¼-20 x ½” HEX BOLTS and two (2) ¼-20 HEX FLANGE NUTS. Hardware: Hex Bolt Smokestack Lock Washer Hex Bolt Hex Nut...
- Page 16 Step 8 Attach TOP HALF OF SFB to BOTTOM HALF OF SFB using six (6) ¼-20 x ½” HEX BOLT and six (6) ¼ LOCK WASHERS. Then, attache the LID STOPPER to the top of the SIDE FIREBOX. Hardware: Hex Bolt Lock Washer Top Half of SFB Bottom Half of SFB...
- Page 17 Competition Pro™ Step 9 Attach SIDE FIRE BOX LID to SIDE FIRE BOX using two (2) 1/4” FLAT WASHER and two (2) ¼-20 x 1/2” HEX BOLTS. Then attach HANDLE to SIDE FIRE BOX using two (2) 1¼-20 x ½” HEX BOLTS and two (2) ¼-20 HEX FLANGE NUTS.
- Page 18 Step 10a Attach SIDE FIRE BOX BRACE to GRILL using two (2) 1¼-20 x ½” HEX BOLTS and two (2) ¼ LOCK WASHERS. Hardware: Hex Bolt Lock Washer Side Fire Box Brace Lock Washer Hex Bolt...
- Page 19 Competition Pro™ Step 10b Attach SIDE FIRE BOX UNIT to GRILL using six (6) 1¼-20 x ½” HEX BOLTS and six (6) ¼ LOCK WASHERS. Hardware: Hex Bolt Lock Washer Hex Nut Hex Bolt...
-
Page 20: Body
Step 11 Place CHARCOAL GRATES inside GRILL BODY near bottom, as shown. Then, place CHAR- COAL GRATE inside SIDE FIRE BOX. - Page 21 Competition Pro™ Step 12 Place COOKING GRATES inside GRILL BODY above CHARCOAL GRATES, as shown. Then, place COOKING GRATE inside SIDE FIRE BOX.
- Page 22 Step 13 Attach FRONT SHELF to front of GRILL BODY, as shown. Front Shelf...
-
Page 23: Utensil Hook
Competition Pro™ Step 14 Attach UTENSIL HOOKS to FRONT SHELF, as shown. Utensil Hook... -
Page 24: Cooking Grate
GRILL PREPARATION & OPERATING INSTRUCTIONS PLEASE NOTE: NO RETURNS ON USED GRILLS Read all safety warnings and instructions carefully before assembling and operating your grill. NOTE: Grill interiors are not painted, rather coated with vegetable oil. DO NOT remove this coating. Cure both grills prior to cooking to protect interior and exterior fi... - Page 25 Competition Pro™ CUTS OF MEAT...
- Page 26 GRILLING RECIPES Direct Heat • Direct Heat is a high heat method used to cook foods that take less than 25 minutes to cook. Typically, this means foods that are relatively small or thin such as steaks, chops, boneless chicken breasts, fi sh fi llets, hamburgers, etc.
- Page 27 Competition Pro™ QUAIL OR DOVES: • Cover birds in Italian dressing (Good Seasons or Kraft Zesty) and marinate overnight. • Pour remaining dressing and cover with Texas Pete Hot Sauce for 6 hours. • Wrap birds in thick bacon secured by a toothpick. •...
- Page 28 • Bring to room temperature before cooking. • Mix in chopped onions, green peppers, salt, sear 3/4 inch patties on each side with fi re grate in high position for a few minutes. • Lower fi re grate to medium position and grill with lid down to avoid fl are-ups. •...
- Page 29 Competition Pro™ SMOKING RECIPES Indirect Heat Pan not included. Disposable bread pan is recommended. SMOKE BY COOKING SLOWLY (See chart above). 1. Place water/drip pan on left side of fi re grate. 2. Place hot coals on right side (damper end) of fi re grate. The charcoal basket accessory helps confi...
- Page 30 SMOKED TURKEY: • Empty cavity rinse and pat dry with paper towel. • Tuck wing tips under the back and tie legs together. • Place in center of cooking grid directly above foil drip pan of water. • Smoke for 12 minutes per pound. Allow several extra minutes per pound if stuffed to allow for expansion.
- Page 31 Competition Pro™ not use vegetable oil or salt and pepper if using marinade. SMOKED VENISON: Venison Marinade: 1 cup Balsamic or wine vinegar 1 cup olive oil 2 oz. Worcestershire 1/2 oz. Tabasco 2 tbsp. Season All 1-2 chopped jalapenos 3 oz.
- Page 32 SMOKED SPARE/BACK RIBS: • Peel off tough layer of skin on back side. • Rub all surfaces with seasoning. • Place ribs in center of grid above drip pan and smoke approximately 1 1/2 hours or until meat pulls away from bone. •...
- Page 33 Competition Pro™ SHISH KABOB MARINADE: 1 cup soy sauce 1/2 cup brown sugar 1/2 cup vinegar 1/2 cup pineapple juice 2 teaspoons salt 1/2 teaspoon garlic powder • Mix ingredients and bring to a boil. • Marinate beef in mixture a minimum of 4 hours.
- Page 34 ACCESSORIES Custom Fit Cover #8955 Weather Resistant Charcoal Basket #4040 Protects Grill Finish Confi nes Coals to One Side for Smoking Indirect Cooking Apron #8805 Machine Washable Two Front Pockets Adjustable Straps For Pricing or to Order, Visit www.CharGriller.com CALL: 912-638-4724...
- Page 35 Competition Pro™ This Page Intentionally Left Blank...
- Page 36 P.O. Box 30864 Sea Island, GA 31561 912-638-4724 www.CharGriller.com Service@CharGriller.com...
- Page 37 Para efectos de Garantía, guarda tu recibo con este manual. ATENCIÓN AL CLIENTE 1-912-638-4724 Service@CharGriller.com Lo contenido en este manual es Marca Registrada y Propiedad con Derechos de Autor de Char-Griller|A&JManufacturing. Está terminantemente prohibido utilizar la información suministrada en este manual sin el consentimiento de Char-Grillery/oA&JManufacturing. OM 8125 A.1...
- Page 38 Departamento de Atención al Cliente al 1-912-638-4724 (EE.UU.), o envíenos un correo electrónico a: Service@Char-Griller.com; tenga el número de serial de su parrillera al alcance. Documente el Número de Serial y Modelo de su Parrillera AQUÍ: (El número de modelo y serial se encuentran en la parte trasera del cuerpo de la parrilera o en la...
- Page 39 Competition Pro™ ADVERTENCIAS DE SEGURIDAD LEA TODAS LAS INSTRUCCIONES Y ADVERTENCIAS DE SEGURIDAD CUIDADOSAMENTE ANTES DE ENSAMBLAR Y OPERAR SU PARRILLERA Lea todas las instrucciones cuidadosamente y asegúrese de que su parrillera esté ensamblada, instalada y reciba mantenimiento apropiadamente. El incumplimiento de estas instrucciones puede causar daños a la propiedad y/o lesiones severas.
- Page 40 ESTAS ADVERTENCIAS TAMBIÉN APLICAN PARA LA PARRILLERA LATERAL. REGISTRE SU PARRILLERA: Para aprovechar al máximo la garantía de Char-Griller, registre su parrillera a través de la página web www.CharGriller.com/Register o llamando a Servicio al Cliente al 1-912-638-4724. Registrarse le otorga protecciones importantes: 1.
- Page 41 El ÓXIDO SUPERFICIAL NO ES CONSIDERADO UN DEFECTO DE MANUFACTURA O DE MATERIAL Las parrilleras Char-Griller están hechas de acero y al ser expuestas a los elementos ambientales se producirá la oxi- dación naturalmente. Por favor, refi érase a la sección “Uso” para revisar como cómo cuidar su parrillera apropiadamente.
- Page 42 LISTA DE PARTES Vendido bajo licencia de W.C. Bradley Co.
- Page 43 Competition Pro™ LISTA DE PARTES Artículo Nombre de Parte Cantidad TERMÓMETRO CON TUERCA MARIPOSA Y ARANDELA DE RESORTE PLACA DE LOGO CON CLIPS ASA DE LA TAPA TAPA CUERPO TAPÓN DE TAPA de la PARRILLERA LATERAL (SFB) ASA DE SFB TAPA DE SFB PARTE SUPERIOR DE SFB REJILLAS DE COCCIÓN DE SFB...
- Page 44 HERRAMIENTAS Y PARTES Ensamblaje: El ensamblaje requiere de dos personas. Haz que otra persona te ayude. Herramientas necesarias: Alicate, Destornillador de Cabeza Phillips, y una Llave de Tuercas de 7/16”. NOTA: No apriete ningún tornillo o perno a menos que se le diga. El apretar demasiado pronto puede impedir que las partes encajen.
- Page 45 Competition Pro™ ENSAMBLAJE Paso 1 Sujete una (1) PATA LARGA y una (1) PATA CORTA a la posición de las patas traseras en la parte inferior del CUERPO DE LA PARRILLERA, utilizando ocho (8) TUERCAS de ¼-20 x ½“ y ocho (8) ARANDELAS DE RESORTE de ¼.
- Page 46 Paso 2 Sujete las otras patas: una (1) PATA LARGA y una (1) PATA CORTA a la posición de las patas traseras en la parte inferior del CUERPO DE LA PARRILLERA, utilizando ocho (8) TUERCAS de ¼-20 x ½“ y ocho (8) ARANDELAS DE RESORTE de ¼.
- Page 47 Competition Pro™ Paso 3 PASE EL EJE DE RODAMIENTO A TRAVÉS DE LOS HUECOS EN LAS PATAS CORTAS Y LUEGO SUJETA LAS RUEDAS AL EJE DE RODAMIENTO UTILIZANDO DOS (2) PERNOS DE 7/16. En este paso se utilizan: Perno Contratuerca 7/16 Arandela de Resorte Pata Larga Rueda...
- Page 48 Paso 4 Sujeta el ASA DE LA TAPA a la TAPA DE LA PARRILLERA utilizando dos (2) PERNOS de ¼-20 x ½¨ y dos Tuercas con Brida de 1/4-20. En este paso se utilizaron: Perno Perno Tuerca con Brida Asa de la Tapa Tuerca...
- Page 49 Competition Pro™ Paso 5 Coloca el Termómetro a través del hueco en la TAPA DE LA PARRILLERA, y asegúralo con la TUERCA MARIPOSA y ARANDELA proporcionada, según se muestra en la imagen. (NOTA: Partes vinieron sujetas al Termómetro). Termómetro Tuerca Mariposa Arandela...
- Page 50 Paso 6 Sujeta el ASA LATERAL al CUERPO DE LA PARRILLERA utilizando cuatro (4) PERNOS de ¼-20 x ½¨ y cuatro (4) TUERCAS CON BRIDA de 1/4-20. En este paso se utilizaron: Perno Tuerca con Brida Perno Asa Lateral Tuerca...
- Page 51 Competition Pro™ Paso 7 Sujeta la CHIMENEA DE GASES al CUERPO DE LA PARRILLERA utilizando dos (2) PERNOS de ¼-20 x ½¨ y dos TUERCAS CON BRIDA de ¼¨-20. En este paso se utilizaron: Perno Chimenea para Gases Tuerca con Brida Perno Tuerca...
- Page 52 Paso 8 Sujete la PARTE SUPERIOR DEL SFB a la PARTE INFERIOR DEL SFB utilizando seis (6) PERNOS de 1/4-20 x ½¨ y seis (6) ARANDELAS DE RESORTE de 1/4.Luego sujete el TAPÓN DE LA TAPA arriba de la PARRILLERA LATERAL.
- Page 53 Competition Pro™ Paso 9 Adjuntar CAJA DE FUEGO LADO TAPA a CAJA DE FUEGO LADO usando dos ( 2 ) 1/4 “ arandela plana y dos ( 2 ) ¼ - 20 x 1/2 “ tornillos hexagonales . A continuación, conecte MANGO a CAJA DE FUEGO LADO utilizando dos ( 2 ) 1 ¼...
- Page 54 Paso 10a Sujete el FRENO DE LA PARRILLERA LATERAL a la PARRILLERA utilizando dos (2) PERNOS de 1 ¼-20 x ½¨ y dos (2) ARANDELAS DE RESORTE de ¼¨. En este paso se utilizaron: Perno Arandela de Resorte Freno de Parrillera Lateral Arandela de Resorte Perno...
- Page 55 Competition Pro™ Paso 10b Sujeta la UNIDAD DE LA PARRILLERA LATERAL a la PARRILLERA utilizando seis (6) PERNOS de 1 ¼-20 x ½¨y seis (6) ARANDELAS DE RESORTE de ¼. En este paso se utilizaron: Perno Arandela de Resorte Tuerca Perno...
- Page 56 Paso 11 Coloque las REJILLAS PARA EL CARBÓN dentro del CUERPO DE LA PARRILLERA cerca del fondo. Luego, coloque las REJILLAS PARA EL CARBÓN dentro de la PARRILLERA LATERAL.
- Page 57 Competition Pro™ Paso 12 Coloca las REJILLAS DE COCCIÓN dentro del CUERPO DE LA PARRILLERA sobre las REJILLAS PARA CARBÓN, como se muestra. Luego, coloca la REJILLA DE COCCIÓN dentro de la PARRILLERA LATERAL...
- Page 58 Paso 13 Sujete la REPISA FRONTAL al frente del CUERPO DE LA PARRILLERA, como se muestra. Repisa Frontal...
- Page 59 Competition Pro™ Paso 14 Sujete los GANCHOS PARA UTENSILIO a la REPISA FRONTAL, como se muestra. Gancho para Utensilio...
- Page 60 Esta Página Ha Sido Intencionalmente Ha Dejado En Blanco...
- Page 61 Competition Pro™ PREPARACIÓN DE LA PARRILLERA E INSTRUCCIONES PARA LA OPERACIÓN TOME NOTA: NO HAY DEVOLUCIÓN EN PARRILLERAS USADAS Lea todas las advertencias de seguridad e instrucciones antes de ensamblar y operar la parrillera. NOTA: El interior de las parrillas no están pintadas, sólo cubiertas con aceite vegetal.
- Page 62 CORTES DE CARNES COSTILLAS CORTES DE RES COSTILLA PARA ASAR, EXTREMO GRANDE SOLOMO LOMO COSTILLA PARA ASAR, EXTREMO PEQUEÑO PUNTA DE BISTEC DE LOMITO SOLOMO FILETE DE COSTILLA, EXTREMO PEQUEÑO BISTEC DE LOMO BISTEC DE BISTEC DE COSTILLA LOMO ENTERO BISTEC DE COSTILLA PARA ASAR SOLOMO COSTILLITAS...
- Page 63 Competition Pro™ RECETAS DE PARRILLAS Calor Directo • El Calor Directo es un método de alta temperatura utilizada para cocinar comidas que toman menos de 25 minutos de cocción. Normalmente, esto signifi ca que son comidas que tienen poco grosor como los bistecs, chuletas, pechugas de pollo deshuesadas, fi...
- Page 64 CODORNICES O PALOMAS: • Cubra las aves en aderezo italiano (Good Seasons o Kraft Zesty) y marínelas durante la noche. • Vierta el aderezo restante y cubra con Salsa Picante Texas Pete por 6 horas. • Envuelva las aves en tocino grueso y asegure con un mondadientes. •...
- Page 65 Competition Pro™ • Lleve a temperatura ambiente antes de cocinar. • Mezcle en cebollas y pimentón cortado, sal, selle cada lado de carne de hamburguesas de 2 cms de grosor con la rejilla de fuego en posición alta por unos pocos minutos. •...
- Page 66 Bandeja no incluida. Se recomienda una bandeja para pan desechable. AHUMADO POR COCCIÓN LENTA (Ver el cuadro de arriba) 1. Coloque la bandeja de goteo/recolectora de agua en la parte izquierda de la rejilla de fuego. 2. Coloque carbón caliente en la parte derecha (el regulador del extremo) de la rejilla de fuego. La cesta para el carbón vegetal ayuda a mantener en sitio los carbones.
- Page 67 Competition Pro™ PERROS CALIENTES AHUMADOS RELLENOS: • Corte los perros calientes diagonalmente, a 0.6 centímetros en cada punta. • Rellene los perros calientes con queso y salsa de pepinillos y envuelva en tocineta. • Coloque en una rejilla de cocción sobre la bandeja de goteo y ahúme por 15 a 20 minutos o hasta que el tocineta este crujiente.
- Page 68 VEGETALES AHUMADOS: • Nabos, papas, zanahorias, quingombó, champiñones, cebollas peladas, calabacín, calabaza, etc. • Coloque en bandeja y cubra con agua y cocine por varias horas hasta que se la carne esté lista. O coloque vegetales en la parrilla y ahúme por 50 minutos, envuelto o no en papel de aluminio. PESCADO AHUMADO: •...
- Page 69 Competition Pro™ MARINADA SHISH KABOB: Mezcle 1 taza de salsa de soya 1/2 taza de azúcar morena 1/2 taza de vinagre 1/2 taza de jugo de piña 2 cucharaditas de sal 1/2 cucharadita de ajo en polvo • Mezcle todos los ingredientes en una olla y lleve a hervir. •...
- Page 70 ACCESORIOS Cubierta a la Medida #8955 Resistente al Clima Resguarda el Acabado Cesta de Carbón #4040 Confi na Carbones a un lado para ahumar Cocina Indirecta Delantal #8805 Lavable a Maquina Dos bolsillos frontales Tiras ajustables Para obtener precios o para Ordenar, Visita www.CharGriller.com LLAMA AL: 912-638-4724...
- Page 71 Competition Pro™ Esta Página Ha Sido Intencionalmente Ha Dejado En Blanco...
- Page 72 P.O. Box 30864 Sea Island, GA 31561 912-638-4724 www.CharGriller.com Service@CharGriller.com...
Need help?
Do you have a question about the Competition Pro 8125 and is the answer not in the manual?
Questions and answers