Advertisement
Advertisement
Table of Contents

Related Manuals for Commodore Amiga 500+


Summary of Contents for Commodore Amiga 500+
- Page 1 The Complete Amiga 500+ User Guide By Peter Hutchison 8 2016 Revised: 23/10/2016...
-
Page 2: Table Of Contents
Contents Introduction Page 3 Setting up the Amiga for First Time Page 4 Guide to Workbench 2.04 Page 6 Menus Page 6 Mouse Page 8 Programs Page 9 Preferences Page 13 Workbench 2.1 Page 19 Beyond Workbench 2.x Page 19 Adding more Memory to the A500+ Page 20 Adding a CD or DVD ROM drive to the A500+... -
Page 3: Introduction
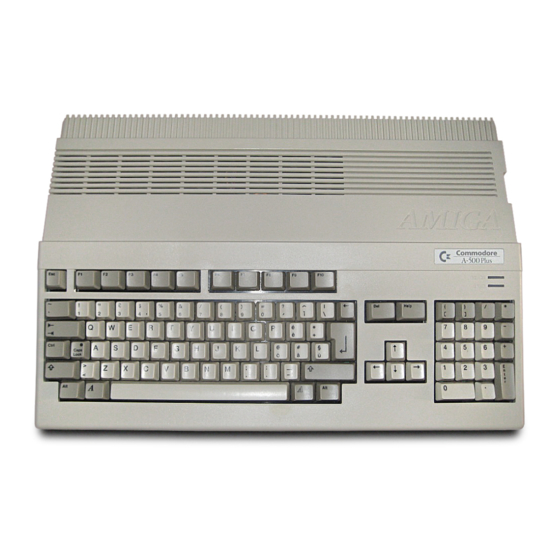
Introduction Welcome to the Commodore Amiga A500+. The first replacement of the A500 Amiga. It was affordable and easy to use. It had a wide range of software, in particular, games which Jay Minor, the creator of the Amiga, had designed it for. -
Page 4: Setting Up The Amiga For First Time
You can a while menu bar at the top and all the disks mounted on the right hand of the screen. The Ram Disk is a special one which is a disk in memory basically. More on Workbench will be explained later. Setting up the Amiga for First Time Before setting up the Amiga make sure you have the following items ready: Amiga A500+... - Page 5 Finally if you have any external floppy disk drives plug them in to the External Drive socket on the back of the Amiga. Further drives can be added to other drives. If you have an external hard disk, remove the cover from the Expansion port on the left- hand side of the Amiga and slot in the drive.
-
Page 6: Menus
left mouse button once (this will select the disk), then move the pointer to the top left of the screen and click and HOLD the right-hand mouse button and a menu appear, make sure the Icons menu is selected, move the mouse down the menu and select Copy Figure 3 It will say >Put SOURCE disk (FROM disk) in drive DF0:=, remove the disk from the... - Page 7 DF0. Guide to Workbench 2.04 Contents 1. The Menus 2. The Mouse 3. WB Programs 4. Amiga DOS 5. Common Problems 1. The Menus At the top of the screen, there are three menus which are accessible when you move the pointer to the top of the screen and click the Right Mouse Button.
- Page 8 1.1.4 Update All Reload all the icons and redraw them.
- Page 9 1.1.5 Last Message Display the last error or information message on the title bar. 1.1.6 About (?) Display Kickstart and Workbench versions and Copyright information. 1.1.7 Quit (Q) Exit Workbench, this will quit workbench and leave the workbench screen open. You should open a command window before quitting otherwise a reboot is required.
- Page 10 1.2.8 Show 1.2.8.1 Only Icons Displays files that have an icon file and hides all other files. 1.2.8.2 All Files Display all files in window whether or not they have an icon file or not. 1.2.9 View By 1.2.9.1 Icon Display files using Icons only.
-
Page 11: Mouse
1.3.5 Snapshot (S) Saves the current position of file within the window. 1.3.6 Unsnapshot (U) Removes the positioning information from a file. 1.3.7 Leave Out (L) Places the file on the desktop but the file is still located in its original location. A backdrop file contains a list of files left out. -
Page 12: Programs
select that item. 2.2 Using the Left Mouse Button This button is mainly used to select and move icons around and click on gadgets (or buttons). 2.2.1 Clicking To select an icon, move the pointer over the desired icon and then click the LMB once. The icon will change to a reverse or an alternative image to indicate it has been selected. - Page 13 3. The Programs Here I will give a brief explanation of the programs provided with Workbench 2.05. 3.1 Workbench Disk 3.1.1 Utilities Drawer 3.1.1.1 Clock This displays an analogue or digital clock showing the present time and/or date. From the menu you can select Analog, Digital 1 or Digital 2 (difference being is that one displays time in a window, the other displays time in the window bar).
- Page 14 3.1.1.4 Say This program uses the built in narrator to speak English to you by typing in words in the Input window. You can change the narrator using command such as: -m (male), -f (female), -r (robot), -n (natural), - s### (speed = 40 - 400) or -p### (pitch = 65 to 320).
-
Page 15: Preferences
NOTIFY = notify flag 3.2.3 GraphicDump GraphicDump can be used to print pictures to a printer. This is mainly for IFF ILBM pictures, use Multiview for other formats. Picture size can be set using SIZE Tool Type. 3.2.4 IconEdit IconEdit is used to modify file icon or .info files on the Amiga. Most Workbench 3.x icons are 4 colour icons but can be expanded to multicolour icons via the Extras, Color Palette menu. - Page 16 This tool is used to prepare PCMCIA memory cards as static RAM cards or system memory. A Ram Card can hold files like a normal disk and is accessed via the device CC0:, cards prepared as system memory is added to both Chip and Fast memory, you need to reboot before you can use that memory. 3.3.0 Memacs Memacs or Micro Emacs is a full screen text editor which allows you to write short documents, script files and program files if necessary.
- Page 17 Return Zero <key> Key combination eg Shift+Letter 3.3.4 NoCapsLock This disables the Caps Lock key so you will need to use Shift for Capital letters. 3.3.5 Blanker This program will blank the screen after 60 seconds of inactivity. 3.3.6 IHelp Configures function keys to manipulate windows and screens.
- Page 18 3.4.2 Pointer This preference can be used to change the shape of the mouse pointer. The Pointer can be a Low Res or High Res pointer depending on screen resolution. The >Set Point= button determines where in the image the click point is, by default it is at the top left. The >Test= button applies the changes to the current point.
- Page 19 3.4.4 Overscan Overscan sets the physical screen size, the monitor driver is loaded on the left and list of dimensions are shown and two buttons which can be used to resize the display for Text or Graphic displays by dragging one or more of the nine black handles to the desired size. 3.4.5 Printer The Printer preference selects the printer driver (from Devs:Printers) and sets other options: Printer Port: Parallel, Serial...
- Page 20 3.4.6 ScreenMode This preference sets the monitor driver, display mode, resolution and colour depth for the Workbench screen. 3.4.7 Time This sets the current date and time and saves in a battery-backed clock (if provided) and in memory.
- Page 22 3.4.8 Input Input controls certain aspects of the keyboard and the Mouse: Mouse Speed - How fast the pointer moves around the screen. Acceleration - Boosts mouse speed when you move it around. Double-click - Delay between clicks before it is accepted as a double click. You can use the Show and Test double-click buttons below to check it.
- Page 23 3.4.10 PrinterGfx Printer Graphics preference sets options for when printing pictures or diagrams using a printer (See Printer preferences). Color Correct: Corrects colour by reducing number of colours available to correct RGB imbalances Dithering: Ordered, Halftone, Floyd-Steinburg Scaling: Fraction, Integer Image: Positive, Negative Aspect: Horizontal, Vertical Shade: Black &...
- Page 24 Bits/Char: Number of bits used for data Stop bits: Number of bits used at the end of data 3.4.14 WBPattern Workbench pattern preferences can display specific patterns or pictures to customize your Workbench desktop. Pattern: Workbench, Windows Test: Tests your pattern or picture. Clear: Clear drawing area using selected colour Undo: Undo the last change made Color Palette: List of available colours (selected colour at the top).
-
Page 25: Beyond Workbench 2.X
4. Workbench 2.1 Workbench 2.05 can be upgraded to Workbench 2.1 which has the following minor changes: 4.1 Removed features Colors AddMonitor BindMonitor Say and Speak: device 4.2 Added features New Devs system to easily add new devices including DosDrivers, monitors, printers ... - Page 26 For Workbench 3.5 or higher, you would need an accelerated Amiga A600 with at least a 68020 processor with more memory. If Workbench is too limiting, you can replace the entire workbench with a replacement such as Directory Opus 6 which has a feature rich interface with more customisation than before and much easier to use.
- Page 27 To add a CD or DVD ROM device to the A500+ requires another device to be connected to the expansion slot, but this can be difficult if its already occupied by a hard drive unit. Commodore produced the A590 CD drive. IDE expansion is rare on the A500 compared to later models.
-
Page 28: Upgrading The Processor
Upgrading the Processor The standard 68000 7.14MHz processor in the Amiga A500 +is quite slow compared to more recent processors and cannot cope with bigger applications and games. The processor is slotted on the main mother board. A 68020 or higher accelerator board is required to upgrade to Workbench 3.5 or 3.9. For faster processors such as the 68020 or 68030 then a new expansion board needs to be purchased and inserted via the trapdoor expansion slot underneath the Amiga. -
Page 29: Upgrading The Kickstart And Workbench
9. Upgrading the Kickstart and Workbench 9.1 Kickstart 2.x revisions Version Revision Year Notes 2.05 37.210 1991 Early versions for Kickit or Rekick 2.05 37.299 1991 No PCMCIA or IDE hard disk support! 2.05 37.300 1991 No support for HDDs > 40 MB! 2.05 37.350 1992... - Page 30 9.3 In most cases a new Kickstart ROM Chip set needs to be installed. See these instructions. a) Place the A500+ unit upside down on a flat surface. b) Use a screwdriver to remove the case screws. c) Turn the unit to normal, face front position. Do carefully flip backwards the top cover and then the keyboard assembly.
-
Page 31: The Motherboard
The Amiga 500+ has had several revisions including the 8A and 8A.1. A Picture of the A500+ 8A1 revision motherboard is shown below. Very early boards still used the OCS chipset when Commodore was trying to get rid of old stock. From the left (top to bottom): Denise or Super DENISE chip (39081) - supports ECS graphics supporting HAM6 (4096 colours) and EHB (Extra half bright) for 64 colours. -
Page 32: Backward Compatibility
GARY – IO chip. DRAM Chips – 512KB, 1MB or 2MB of Chip RAM included from NEC. Expansion slot in trap door. Mouse and Joystick ports 11. Backward Compatibility Compatibility with older software can be done in two ways: Hardware and Software. Hardware: a) Install a Kickstart ROM Switcher to allow you to switch between Kickstart 1.3 and later Kickstart... - Page 33 It should display entry(s) for all hard disks found. If no entries are shown then you need to change the device name for the SCSI_DEVICE_NAME in the Tooltypes in the Icon Information for HDToolbox. Change Drive Type - This is used to the read the correct drive configuration from the hard disk including, heads, cylinders, the block size and so on.
-
Page 34: Installing Workbench Onto A Hard Disk
use a new version which supports larger disks. Try the one supplied with a new filesystem such as Smart File System (SFS) from http://strohmayer.org/. 13. Installing Workbench onto a Hard Disk Boot off the Install disk and run the InstallHD script to install Workbench 2.0 or if you have an older version of Workbench run the UpgadeWB script to update Workbench.
Need help?
Do you have a question about the Amiga 500+ and is the answer not in the manual?
Questions and answers