Advertisement
Mag
User Guide
Guía de usuario
Mode d'emploi
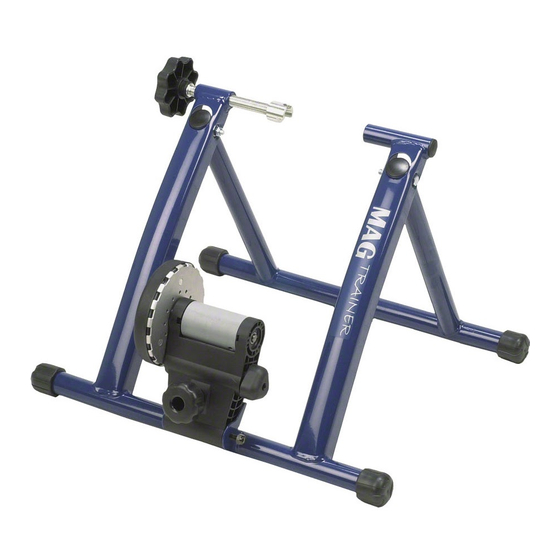
PARTS LIST | LISTADO DE PIEZAS | LISTE DES PIÈCES
Trainer Frame
Bastidor del aparato
de entrenamiento
Cadre du trainer
Resistance Unit
Unidad de resistencia
Unité de résistance
Knob
Pomo
Molette
Clamp Knob
Pomo abrazadera
Molette de la broche
If you do not find all of these items in the box, please contact customer
service at 800.783.7257.
Si en la caja no encuentra todos estos elementos, póngase en contacto
800-783-7257.
Si un des éléments ci-dessus ne se trouve pas dans l'emballage, veuillez
contacter 800-783-7257.
Leg
Pata
Tige
1
Advertisement
Table of Contents

Summary of Contents for Graber Mag
- Page 1 User Guide Guía de usuario Mode d’emploi PARTS LIST | LISTADO DE PIEZAS | LISTE DES PIÈCES If you do not find all of these items in the box, please contact customer service at 800.783.7257. Si en la caja no encuentra todos estos elementos, póngase en contacto 800-783-7257.
- Page 2 COMMON SENSE PRECAUTIONS | PRECAUCIONES RECOMENDADAS | PRÉCAUTIONS ÉLÉMENTAIRES Before starting any exercise program, consult with your physician or health professional. He or she can help establish the exercise frequency, intensity and time appropriate for your particular age and condition. If you have any pain or tightness in your chest, an irregular heartbeat, shortness of breath, feel faint, or have any discomfort while you exercise, STOP! Consult your physician before continuing. Failure to follow any of these safeguards may result in injury or serious health problems.
- Page 3 1.3: Insert resistance unit into frame. While holding resistance unit in place, insert carriage bolt into the square hole of the trainer frame, passing through the resistance unit, to the other side of the trainer frame. 1.3: Inserte la unidad de resistencia en el bastidor. Sujetando la unidad de resistencia en su posición, inserte el perno de cabeza redondeada en el orificio cuadrado del bastidor del aparato de entrenamiento, pasando a través de la unidad de resistencia, hasta...
- Page 4 1.7: The trainer is designed to be used with the provided skewer. Replace the skewer on the rear wheel of your bike with the one provided. Make sure the quick release handle is on the left (non-drive) side of the bicycle and faces upward or backwards. 1.7: El aparato de entrenamiento está...
- Page 5 TIGHTENING THE ROLLER AGAINST THE TIRE. FIJACIÓN DE LA BICICLETA AL APARATO DE ENTRENAMIENTO FIXATION DU VÉLO SUR L’APPAREIL D’ENTRAÎNEMENT 3.1: Fill tire to manufacturer’s suggested tire pressure. 3.1: Llene la rueda a la presión indicada por el fabricante. 3.1: Gonflez le pneu à la pression indiquée par le fabriquant. 3.2: Turn the knob on the resistance unit until it touches the tire.
- Page 6 Lifetime Manufacturer’s Warranty We warrant your product to be free of any defects in material or workmanship. This warranty does not apply to parts that have been worn out through normal use or damaged through misuse, abuse, neglect, accident, or unauthorized modification. Where applicable, incidental and consequential damages are not covered, and there are no other warranties, expressed or implied. This warranty applies to the original owner only.
Need help?
Do you have a question about the Mag and is the answer not in the manual?
Questions and answers