Table of Contents
Advertisement
Preface
Thanks for your favor in our product. This manual is helpful for you to quickly know how to use the
product. For detailed features and operations, please refer to the TETRA Terminal Series Feature Book
and the Safety Information Booklet along with the product.
This manual is applicable to the following product:
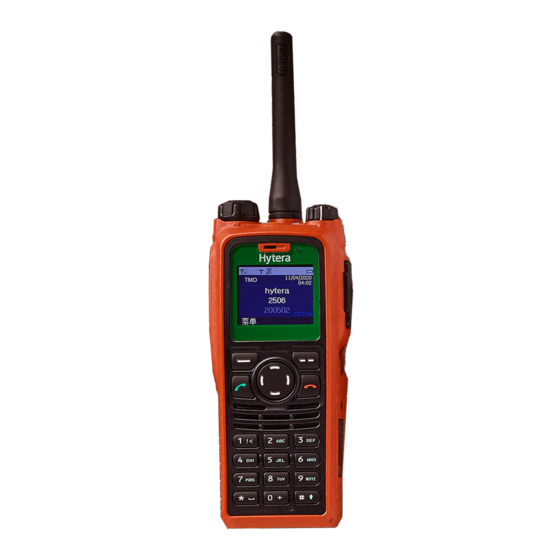
PT790Ex F5 TETRA Intrinsically
Safe Portable Terminal
Advertisement
Table of Contents

Related Manuals for Hytera PT790Ex F5 TETRA


Summary of Contents for Hytera PT790Ex F5 TETRA
- Page 1 Thanks for your favor in our product. This manual is helpful for you to quickly know how to use the product. For detailed features and operations, please refer to the TETRA Terminal Series Feature Book and the Safety Information Booklet along with the product. This manual is applicable to the following product: PT790Ex F5 TETRA Intrinsically Safe Portable Terminal...
- Page 2 Disclaimer Hytera Communications Corporation Limited (the Company) endeavors to achieve the accuracy and completeness of this manual, but no warranty of accuracy or reliability is given. All the specifications and designs are subject to change without notice due to continuous technology development. No part of this manual may be copied, modified, translated, or distributed in any manner without the express written permission of us.
- Page 3 the requirements set forth in the above standards before they can be marketed in the U.S, and the manufacturer shall post a RF label on the product to inform users of operational instructions, so as to enhance their occupational health against exposure to RF energy. EU Regulatory Conformance As certified by the qualified laboratory, the product is in compliance with the essential requirements and other relevant provisions of the Directive 1999/5/EC.
- Page 4 Antenna should be kept away from eyes. • When worn on the body, always place the radio in a Hytera’s approved clip, holder, holster, case, or body harness for this product. Using approved body-worn accessories is important because the use of Hytera’s or other manufacturer’s non-approved accessories...
- Page 5 IC statement The device has been tested and compliance with SAR limits, users can obtain Canadian information on RF exposure and compliance Après examen de ce matériel aux conformité aux limites DAS et/ou aux limites d’intensité de champ RF, les utilisateurs peuvent sur l’exposition aux radiofréquences et la conformité...
- Page 6 IC RSS warning The term “IC:” before the certification/registration number only signifies that the Industry Canada technical specifications were met. Le terme "IC:" devant le numéro de certification / enregistrement signifie seulement que les spécifications techniques d'Industrie Canada ont été respectées. Nominal antenna port impedance / Impédance nominale antenne Port 50 Ω IC radiation exposure statement ...
- Page 7 Contents 1. Intrinsically Safe Terminal Information ...................1 Equipment marking ..........................5 No Misoperations ..........................5 Safety Instructions ..........................6 Compliance Standards.......................... 6 2. Items in the Package .......................... 9 3. Product Overview ..........................10 3.1 Product Controls ........................... 10 3.2 Programmable Keys ........................
-
Page 8: Intrinsically Safe Terminal Information
1. Intrinsically Safe Terminal Information Equipment marking FM/CAN Class I, Zone 0 AEx/Ex ia IIC T4 Ga Class I,II, III Div 1, Group A,B,C,D,E, F, G T120°C -30℃≤Ta≤60℃ ATEX II 1G Ex ia IIC T4 II 1D Ex ia IIIC T120°C IP6X I M1 Ex ia IECEx Ex ia IIC T4 Ga... -
Page 9: Safety Instructions
Safety Instructions Caution To protect you against any property loss, bodily injury or even death, be sure to observe the following safety instructions: Use only the Ex-battery BL1813-Ex or BL2413-Ex specified by the Company. The use of other batteries may result in Ex-protection (intrinsic safety) failure. Charge the battery in a non-hazardous area only with the designated charger. - Page 10 Standard Issue Date 2004 FM Class 3611 FM Class 3810 2005 ANSI/IEC-60529(Ed. 4.0) 2004 ANSI/ISA-60079-0(12.00.01) 2009 ANSI/ISA-60079-11(12.02.01) 2012 ANSI/ISA-60079-31(12.10.03) 2009 ANSI/ISA-61010-1(82.02.01) 2004 CAN/CSA-C22.2 No.0-M91 2006 CAN/CSA-C22.2 No.142-M1987 2009 CAN/CSA-C22.2 No.213-M1987 2008 CAN/CSA-C22.2 No.60079-0 (Ed. 5.0) 2011 CAN/CSA-C22.2 No.60079-11 (Ed. 5.0) 2011 CAN/CSA-C22.2 No.60079-31 (Ed.1.0) 2012...
- Page 11 Standard Issue Date 2011 IEC-60079-11 (Ed. 6.0) IEC-60079-31 (Ed. 1.0) 2008...
-
Page 12: Items In The Package
2. Items in the Package Please unpack carefully and check if all items listed below are received. If any item is missing or damaged, please contact your dealer. Portable Terminal Antenna Belt Clip Strap Charger Battery Power Adapter Documentation Kit Note The frequency band is marked on the label of the antenna;... -
Page 13: Product Overview
3. Product Overview Product Controls Part Name Part Name Power On-Off/Volume Control ○ ○ SK1 (Side Key 1) Knob ○ ○ PTT (Push-to-Talk) Key Half-duplex Microphone ○ ○ SK2 (Side Key 2) Accessory Connector Cover ○ ○ Emergency Key Options/Back Key... -
Page 14: Programmable Keys
Part Name Part Name ○ ○ Group Selector Knob End Key ○ ○ Full-duplex Receiver Navigation Key ○ ○ LCD Display Full-duplex Microphone ○ ○ Func/OK Key Battery Latch ○ ○ Answer/Call Key Accessory Connector ○ ○ Half-duplex Speaker Belt Clip ○... -
Page 15: Before Use
4. Before Use Attaching the Antenna Rotate the antenna clockwise to fasten it. To remove the antenna, rotate it counter-clockwise. Installing the SIM Card If a SIM card is required to realize the End-to-End Encryption (E2EE) feature which should be purchased separately, please install the SIM card first. -
Page 16: Attaching The Battery
Attaching the Battery ○ Align the battery slots with the guide rails on the terminal, and push the battery as 2 shows. Open the battery latch and hold it down until the metal lock goes into the battery housing completely. Push the battery until it is fully fitted into the slot, and then release the battery latch. - Page 17 4.3.3 Attaching the Accessories Open the accessory connector cover as shown below. Align the accessory (such as an audio accessory, or a programming cable) plug with the accessory connector. Caution: Do not scrape the silicone rubber surrounding the accessory connector screw hole. Otherwise, the waterproof performance of the terminal will be affected.
-
Page 18: Charging The Battery
Charging the Battery Only use the charger and battery specified by the Company. The charger LED indicator will indicate the charging process.(See the table below). The figure below shows you how to charge the battery. ○ Connect the power adapter to AC socket. See arrow ○... - Page 19 LED Indication Charging Status The LED indicator flashes red Standby(no load) slowly. The LED indicator glows red. Charging The LED indicator glows orange. 90% charged The LED indicator glows green. Fully charged The LED indicator flashes red Charging failed rapidly.
-
Page 20: Status Indication
5. Status Indication Status Icon Name Icon Terminal Status The battery strength is low. Battery Strength Icon More bars indicate more battery strength. No signal indicates that the terminal is unregistered. RSSI Icon (For TMO only) More bars indicate stronger signal. There is(are) unread message(s). -
Page 21: Led Indicator
LED Indicator LED Indication Terminal Status The LED indicator glows red. Transmitting The LED indicator glows green. Receiving The LED indicator flashes green slowly. Channel free in DMO The LED indicator glows orange. Channel busy in DMO... -
Page 22: Basic Operations
6. Basic Operations Turning On/Off To turn on the terminal, rotate the Power On-Off/Volume Control knob clockwise. Then the LED indicator flashes green, and the terminal shows the power-up screen and sounds power-up alert. Upon successful powering on, the terminal enters the home screen. In TMO, after being turned on, the terminal will register with the network. -
Page 23: Pin Code Security And Changing
key and then directly in the home screen. PIN Code Security and Changing PIN code can prevent unidentified user from using your terminal. To enable or disable the PIN Code feature, enter the Function menu from the home screen by pressing the Func/OK key , and then go to “Settings ->... -
Page 24: Call Services
7. Call Services 7.1.1 Individual Call In TMO mode, an individual call can be initiated either as a half-duplex call or full-duplex call, which can be received without pressing any key (Direct Signaling) or by pressing PTT (Hook Signaling). Contact your dealer for such programming as well as for more details. - Page 25 Full-duplex Individual Call If it is an incoming call with Direct Signaling, there will be an alert tone to inform the called party that a call is received. If it is an incoming call with Hook Signaling, the terminal sounds alert and vibrates to inform the called party that there is an incoming call.
- Page 26 Initiating a Telephone Call Select a gateway. In the home screen, press Func/OK key and then go to “Settings -> Network -> PSTN GW / PABX GW”. Select an appropriate gateway, and press Func/OK key to confirm. Input a telephone number. Return to the home screen.
- Page 27 Initiating an Individual Call In the home screen, directly input the number you want to call through the keypad, or press Func/OK key to enter the “PhoneBook” or “Call Log” submenu, and select a contact. Then press PTT key to initiate the call.
-
Page 28: Message
8. Message Status Message Status message, which should be programmed by your dealer only, can facilitate instant messaging of the frequently-used messages. You can only send or view rather than edit the status messages. When the message is sent successfully, for the receiving terminal, it will receive either the status ID of the status message (if the terminal has not predefined the message text) or the predefined text of the status ID (if the terminal has predefined the message text). - Page 29 Note: If the message is sent as a flash message, the receiving party can preview all the content in a predefined time period without any operation. Once the time period expires, the terminal will go back to the home screen, with the icon displaying on the status bar.
-
Page 30: Troubleshooting
9. Troubleshooting Phenomenon Analysis Solution Terminals cannot be The battery power gets too low to Charge for the battery. powered on. power on the terminal. The terminal may be operating in Switch to TMO mode. DMO. Network registration Check the signal strength. Make fails or The terminal may get out of the sure the terminal is within the... - Page 31 Phenomenon Analysis Solution another terminal with higher call available and try again. priority. The channel resources may be Wait until the channel becomes allocated to other services due to available and try again. overloaded network. Check the signal strength. Make The terminal may get out of the sure the terminal is within the network coverage (in TMO mode).
-
Page 32: Care And Cleaning
10. Care and Cleaning To guarantee optimal performance as well as a long service life of the product, please follow the tips below. Product Care Do not pierce or scrape the product. Keep the product far away from substances that can corrode the circuit. Do not hold the product by its antenna or earpiece cable directly. -
Page 33: Optional Accessories
11. Optional Accessories The following items are the main optional accessories for the product. For more other accessories, please consult your local dealer. Caution: Use the accessories specified by the Company only. If not, the Company shall not be liable for any loss or damage arising out of use of unauthorized accessories. Power Supply: MCA05 Battery Optimizing System, MCA08 MCU Multi-unit Rapid-rate Charger (for Li-Ion/Ni-MH Battery),... -
Page 34: Appendix
12. Appendix 12.1 SSI & TSI Dialing Rules In the TETRA system, subscribers are distinguished by different identities. Each subscriber is assigned with a unique short subscriber identity (SSI), which serves a part of the TETRA subscriber identity (TSI). And TSI is generally composed in this way: Mobile Country Code (MCC) + Mobile Network Code (MNC) + SSI.
Need help?
Do you have a question about the PT790Ex F5 TETRA and is the answer not in the manual?
Questions and answers