Advertisement
Quick Links
Advertisement

Related Manuals for juwel SeaSkim


Summary of Contents for juwel SeaSkim
- Page 1 INSTRUCTION MANUAL SeaSkim www.juwel-aquarium.com...
- Page 2 Our products represent over 50 years experience in the manufacturing of aquariums and their acessories applying most modern production techniques bringing together the JUWEL Aquarium system, which is both easy to use and simple to maintain. Please read this instruction manual carefully and completely to make sure you have received all components before setting up the aquarium.
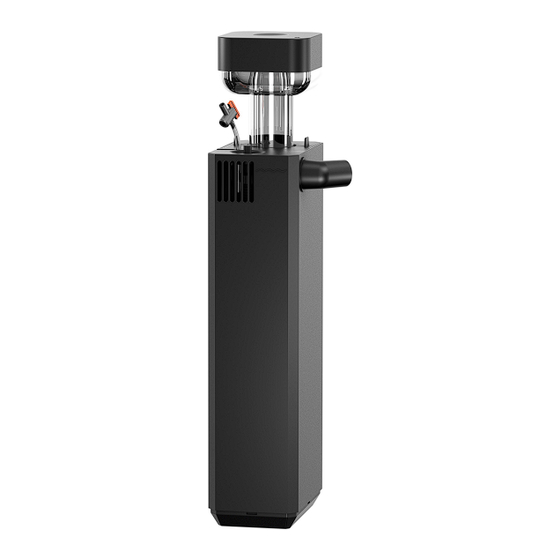
- Page 3 Foam collector unit cover Foam collector unit SeaSkim housing lid Outlet nozzle Air controller Air hose Air pressure controller Mount SeaSkim housing Distance pieces...
- Page 4 The JUWEL SeaSkim is intended for installation in the JUWEL Rio, Lido, Vision and Trigon aquariums. These Juwel aquariums are characterised by the fact that an opening for the SeaSkim is already available and closed by means of a cap. Remove the cap closing the...
- Page 5 4. Apply a sufficient quantity of the enclosed JUWEL Conexo glue (item No. 88355) to the outside of the mount after attaching the template. 5. Affix the mount through the designated opening of the template from the inside to the aquarium pane and let it dry for at least 48 - 72 hours.
- Page 6 5. Align the outlet in accordance with the environmental situation in your aquarium. If you wish to close the space between the SeaSkim and the aquarium pane, apply a silicone seam, as shown. This way you prevent fish from being able to swim into the gap.
- Page 7 Maintenance JUWEL SeaSkim Quarterly: Deactivate the SeaSkim pump and lift off the foam collector unit. Remove the cap and the housing and retrieve the separation wall with the SeaSkim pump. Remove the air pressure controller by turning it to the left and disconnect the air hose from the venturi nozzle. Now, you can remove the pump and the venturi nozzle from the separation wall.
- Page 8 6. After that, and before you reconnect the devices that are operated inside the water to the power supply, please reinstall the SeaSkim pump in reverse order and reinsert it in the SeaSkim.
- Page 9 T he S e aS kim produce s f oam, but it doe s not rise int o t he f oam chambe r • Newly equipped aquarium and / or newly installed SeaSkim. Wait for the run-in period (1-3 days) and/or the occurrence of a higher water contamination due to stocking with animals.
- Page 10 EasyFe e d - aut omat ic f e e de r We offer you the EasyFeed automatic feeder matching all JUWEL aquariums. It is available from specialist retailers as original JUWEL Aquarium accessory (item No. 89000). Proper disposal (electrical waste) The labelling on the product or on the accompanying literature declares that it must not be disposed of, at the end of its service life, together with household rubbish.
- Page 11 § 1 Extent of the guarantee (1) This guarantee extends to the JUWEL-Aquarium product and its components excluding items subject to wear and tear such as light tubes and filter media. It is limited to the product as such and does not cover damage to other property and/or individuals. In addition, the provisions of the product liability law apply. These provisions are not limited by the aforementioned arrangement.
Need help?
Do you have a question about the SeaSkim and is the answer not in the manual?
Questions and answers