Table of Contents
Advertisement
Advertisement
Table of Contents

Summary of Contents for ACOUSTIC SOLUTIONS BD-1738
-
Page 1: Instruction Manual
Instruction Manual BD-1738... - Page 2 HiFi with WiFi Contents Important safety information Using the FM Radio General safety information Tuning to an FM station Power source Changing the scan setting Positioning your HiFi Audio mode Moisture and water Storing FM station presets Ventilation Recalling FM station presets Heat sources and flames FM display information Your HiFi with WiFi...
-
Page 3: Important Safety Information
Important safety information General safety information Keep the product and all its parts out of reach of small children. This product is not intended for use by persons (including children) with reduced physical, sensory or mental capabilities, or lack of experience and knowledge, unless they have been given supervision or instruction concerning the use of the appliance by a person responsible for their safety. -
Page 4: Positioning Your Hifi
Important safety information Positioning your HiFi It is important that you consider carefully in advance where your HiFi will be situated and make sure that it is: • on a flat and stable surface. • within 1.4 metres of a power socket. Please ensure that the mains power lead and speaker cables are not a trip hazard. -
Page 5: Your Hifi With Wifi
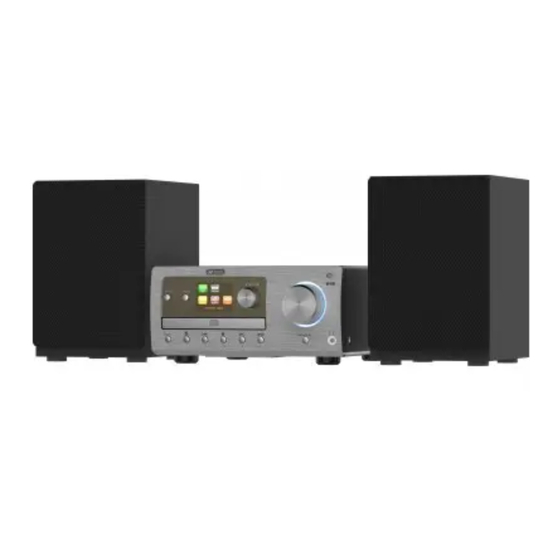
Your HiFi with WiFi Front View Power on/off 2. Mode 3. Display 4. Rotary Tune/Select 5. NFC Touch point 6. CD tray 7. Rotary Volume control 8. Preset 9. Eject (CD mode) 10. Skip back 11. Stop 12. Skip forward 13. - Page 6 Your HiFi with WiFi Remote control Power on/off 2. Mode 3. Skip back 4. Play/Pause 5. Clock 6. Select 7. Scan 8. Prog./Preset 9. Menu 10. Pair 11. Alarm 12. Info. 13. Snooze 14. Mute 15. Eject (CD mode) 16. Skip forward 17.
-
Page 7: Using Your Hifi
DAB and FM radio stations. 3. Plug the mains power plug into the mains power wall socket and switch on. The HiFi will switch on, the Acoustic Solutions logo will be displayed for a few seconds. - Page 8 Using your HiFi 4. The Set Timezone screen is displayed and UK timezone of UTC +00:00: Dublin, London is the first option highlighted at the top of the display. Use the Tune/Select control to highlight your preferred option and press to select. 5.
- Page 9 Using your HiFi Push button - If you highlight and select this option, the WPS Setup screen will be displayed and you will be prompted to ‘Push WPS button at the other end’ (on your router). Then short press the Tune/Select control to SELECT. The router encryption key will be sent automatically to your HiFi.
-
Page 10: Change The Mode
Using your HiFi Short press the Menu/Info button to move from the number and letters part of the screen to the three options on the right hand side. Use the Tune/Select control to move up and down the options and press to select. Short press the Menu/Info button again to move back to the numbers and letters part of the screen. -
Page 11: Using Headphones
Using your HiFi Using headphones You can connect headphones with a 3.5mm plug (not included) to your HiFi. The stereo headphone socket can be found on the front of the HiFi, underneath and to the right of the large rotary volume control. When you have headphones connected the HiFi speakers are switched off and all sound is via the headphones. -
Page 12: Using The Internet Radio
Using the Internet Radio Internet Radio mode Check that you are in internet radio mode. If you are not already in Internet radio mode, short press the Mode button on the HiFi or on the remote control, then use the rotary Tune/Select control on the HiFi or the buttons on the remote control to highlight Internet radio. - Page 13 Using the Internet Radio Note: Depending on where your HiFi is being used and your IP Internet radio My Favourites address, other local internet radio options may be presented on Local United Kingdom this screen. In the UK, Local United Kingdom and BBC will also Stations be displayed.
-
Page 14: Podcasts
Using the Internet Radio Short press the Menu/Info button on the HiFi or the Menu button on the remote control to move from the number and letters part of the screen to the three options on the right hand side. Use the Tune/Select control on the HiFi or the buttons on the remote control to move up and down the options and press to select. -
Page 15: Last Listened
Using the Internet Radio 5. If you select to search using the name of the podcast, this works the same way as when you are searching for an internet radio station. See page 13, Searching for an Internet Radio Station, point 4. 6. -
Page 16: Storing Internet Radio Station Presets
Using the Internet Radio Storing Internet radio station presets Your HiFi can store up to 40 Internet radio stations in its preset memories for instant access to your favourite stations. Note: When you store your Internet radio station presets, these do not overwrite your DAB or FM radio station presets. -
Page 17: My Favourites
Using the Internet Radio • Bit rate, Codec and Sampling rate - e.g. Bit rate: 320kbps, Codec: AAC and Sampling rate: 48.0 kHz. Playback buffer - When playing an internet radio stream, your • Internet radio 4:28PM BBC radio 2 HiFi downloads a small amount of the stream before it starts to Playback buffer play, this is called ‘buffering’. -
Page 18: Registering On The Frontier Silicon Portal
Using the Internet Radio Registering on the Frontier Silicon Portal If you register your product on the Frontier Silicon Portal, you can organise your Favourites listings and also add your own internet radio stations to the portal, so that they can be listened to on your HiFi. -
Page 19: Using The Music Player
Using the Music Player Music player mode If you are not already in Music player mode, short press the Mode button on the HiFi or on the remote control, then use the rotary Tune/Select control on the HiFi or the buttons on the remote control to highlight My Music. - Page 20 Using the Music Player Playing audio files using Music player mode In music player mode: Use the rotary Tune/Select control on the HiFi or the buttons on the remote control to highlight shared media. Press the Tune/Select on the HiFi or the Select button on the remote control to select.
-
Page 21: Using The Dab Radio
Using the DAB Radio Radio aerial Please make sure that the radio aerial on the back of the HiFi is fully extended and adjusted before you attempt to tune to a DAB radio station (a vertical position is recommended). This will ensure that the maximum signal strength is available when the HiFi begins to scan. -
Page 22: Prune Dab Stations
Using the DAB Radio Prune DAB stations You can remove the DAB stations in the station list that cannot be received in your area. These are listed with a ‘?’ prefix. Long press the Menu/Info button on the HiFi or the Menu button on the remote control. Use the rotary Tune/Select control on the HiFi or the buttons on the remote control to move to Prune invalid. -
Page 23: Dab Display Information
Using the DAB Radio 2. Short press the Tune/Select control on the HiFi or the Select button on the remote control. The HiFi will tune to that station and begin to play. Note: If no DAB station has been stored under the preset button, ‘Preset empty’ will be displayed, then the HiFi will revert to the previously selected radio station. - Page 24 Using the DAB Radio There are 3 levels of compression: • DRC off - no compression. This is the default setting. • DRC low - medium compression. • DRC high - maximum compression. Long press the Menu/Info button on the HiFi or the Menu button on the remote control to enter the menu options.
-
Page 25: Using The Fm Radio
Using the FM Radio Radio aerial Please make sure that the radio aerial on the back of the HiFi is fully extended and adjusted before you attempt to tune to an FM radio station (a vertical position is recommended). This will ensure that the maximum signal strength is available when the HiFi begins to scan. -
Page 26: Audio Mode
Using the FM Radio 2. Strong stations only? YES NO will be displayed and the NO option will be highlighted. If you select YES: Your HiFi will scan for Strong stations only. The scan will only stop when a strong signal strength is received which should also result in a better audio quality. -
Page 27: Recalling Fm Station Presets
Using the FM Radio Note: If there is already an existing FM station stored under a preset, it will be overwritten when you store the new station. Recalling FM station presets In FM radio mode: Short press the Preset button on the HiFi or the Prog button on the remote control. Use the rotary Tune/Select control on the HiFi or the buttons on the remote control to move to the Preset location and station that you would like to listen to (1-40). -
Page 28: Bluetooth Mode
Bluetooth mode Bluetooth (BT) mode Check that your HiFi is in Bluetooth mode. If you are not already in Bluetooth mode, short press the Mode button on the HiFi or on the remote control, then use the rotary Tune/Select control on the HiFi or the buttons on the remote control to highlight Bluetooth. -
Page 29: Listening To Music/Audio Using Bluetooth
Bluetooth mode 7. Your device will remain paired with the HiFi unless you decide to disconnect or ‘unpair’ it. Note: If your device should become unpaired for any reason, follow the steps above to ‘pair’ it again. You can Long press the button on the HiFi or on the remote control to disconnect the current device and search for new devices. -
Page 30: Using The Cd Player
Using the CD Player CD mode Check that your HiFi is in CD mode. If you are not already in CD mode, short press the Mode button on the HiFi or on the remote control, then use the rotary Tune/Select control on the HiFi or the buttons on the remote control to highlight CD. -
Page 31: Programmed Play Mode
Using the CD Player • Stop Short press the button on the HiFi or on the remote control. Programmed play mode In programmed play mode, you can program the play order of the tracks on your CD. You can program up to 20 tracks in total. Note: To set up programmed play mode, the CD must be stopped in the CD compartment and must not be paused or playing. - Page 32 Using the CD Player Put your fingers around the outside edge of the CD and lift off of the CD drawer. Short press the button on the front of the HiFi or on the remote control to close the CD drawer.
- Page 33 Aux in mode Aux in mode Check that your HiFi is in Aux in mode. If you are not already in Aux in mode, short press the Mode button on the HiFi or on the remote control, then use the rotary Tune/Select control on the HiFi or the buttons on the remote control to highlight AUX.
-
Page 34: Menu Settings
Menu settings System Settings available in the Menu There are a range of features and settings available to you within the Menu of your HiFi. You can access the Menu system settings, when the HiFi is on (not in Standby mode), from any mode: Long press the Menu/Info button on the HiFi or the Menu button on the remote control. - Page 35 Menu settings • Language You can change the display language of your HiFi, there are 4 options available; English, French, German, Italian. English is the default setting. • Backlight You can change the backlight timeout settings. Permanently On, 10, 20, 30, 45, 60, 90, 120 and 180 seconds are available.
-
Page 36: Technical Specification
Technical specification Power supply: Input AC 100-240V, 50/60Hz Remote control battery: 1 x CR2025 (supplied) Audio output: 2 x 20W RMS WiFi: 802.11 b/g/n. Supports WEP and WPA/WPA2 encryption. Frequency range: DAB: Band III, 174 MHz to 240 MHz 87.5 MHz to 108 MHz Bluetooth: 2.4GHz-2.480GHz Version 2.1... -
Page 37: Troubleshooting
Troubleshooting If you are experiencing problems with your HiFi, there are some quick and easy checks that you can do, which may help to solve the problem. Problem Solution Unable to connect • Check that you are able to connect successfully to your wirelessly to your router: router using WiFi with another device, such as a computer, tablet or mobile phone. - Page 38 Troubleshooting Problem Solution Some internet radio • The station may not be broadcasting at the time of day that stations are not you have tried to listen to it. (Depending on the particular available: radio station if may be in a different time zone) •...
- Page 39 Troubleshooting Problem Solution Radio reception is poor: • Fully extend the radio aerial to get the best reception and sound quality. • Retune the radio station/s • Try moving your HiFi to another location to see if reception improves. • Check that you do not have other electrical equipment too close to your HiFi, causing interference.
-
Page 40: Product Support
Product Support Help and assistance If you require any technical guidance or find that your HiFi with WiFi is not operating as intended, a simple solution can often be found in the Troubleshooting section of these instructions or online at www.argos-support.co.uk If you still require further assistance, call one of our experts on 0345 600 3021*. -
Page 41: General Information
General information • Disposal of your old product. Your product is designed and manufactured with high quality materials and components, which can be recycled and reused. • When this crossed out wheeled bin symbol is attached to a product it means the product is covered by the European Directive 2012/19/EC. -
Page 42: Product Guarantee
PRODUCT GUARANTEE This product is guaranteed against manufacturing defects for a period of Year This product is guaranteed for twelve months from the date of original purchase. Any defect that arises due to faulty materials or workmanship will either be replaced, refunded or repaired free of charge where possible during this period by the dealer from whom you purchased the unit. - Page 43 This page is intentionally blank...
Need help?
Do you have a question about the BD-1738 and is the answer not in the manual?
Questions and answers