
Related Manuals for Nortel 325-24T


Summary of Contents for Nortel 325-24T
- Page 1 Part No. 320985-A Rev 01 August 2006 4655 Great America Parkway Santa Clara, CA 95054 System Configuration Guide Nortel Ethernet Switches 325 and 425 Software Release 3.6 *320985-A Rev 01*...
-
Page 2: Restricted Rights Legend
In the interest of improving internal design, operational function, and/or reliability, Nortel Networks reserves the right to make changes to the products described in this document without notice. Nortel Networks does not assume any liability that may occur due to the use or application of the product(s) or circuit layout(s) described herein. - Page 3 30 days of purchase to obtain a credit for the full purchase price. “Software” is owned or licensed by Nortel Networks, its parent or one of its subsidiaries or affiliates, and is copyrighted and licensed, not sold. Software consists of machine-readable instructions, its components, data, audio-visual content (such as images, text, recordings or pictures) and related licensed materials including all whole or partial copies.
- Page 4 12.212 (for non-DoD entities) and 48 C.F.R. 227.7202 (for DoD entities). Customer may terminate the license at any time. Nortel Networks may terminate the license if Customer fails to comply with the terms and conditions of this license. In either event, upon termination, Customer must either return the Software to Nortel Networks or certify its destruction.
- Page 5 Getting help from the Nortel web site ........
- Page 6 Contents restore factory-default command ......... 48 Ping enhancement .
- Page 7 Contents Resetting the unit ......... . . 70 Aborting a command .
- Page 8 Contents Accelerator keys for repetitive tasks ....... 107 Adding a new port to an existing port number list ....108 Removing a port from an existing port number list .
- Page 9 Contents show sys-info command ......... . . 138 show tech command .
- Page 10 Contents Toolbar ............178 Device view .
- Page 11 Contents Chapter 6 System configuration using the Console Interface ....213 IP Configuration/Setup screen ........214 Choosing a BootP request mode .
- Page 12 Contents ip default-gateway command ........254 no ip default-gateway command .
- Page 13 Contents no ip bootp server command ........276 default ip bootp server command .
- Page 14 Contents sntp sync-interval command ........293 Setting local time zone .
- Page 15 Contents Upgrading software ..........315 download command .
- Page 16 Contents Chapter 9 Configuring the switch using Device Manager ..... 337 Viewing Unit information ..........337 Unit tab .
- Page 17 Contents Chapter 11 Administering the switch using Web-based management... . 375 Viewing system information ..........375 Quick Start .
- Page 18 Contents Installing an SFP Transceiver ........409 Guidelines .
- Page 19 Contents Command List ..........447 Appendix F Technical specifications .
- Page 20 Contents 320985-A Rev 01...
- Page 21 Ethernet Switch 325-24G LED display panel ..... . 60 Figure 5 Ethernet Switch 325-24T back panel ......61 Figure 6 Ethernet Switch 425 .
- Page 22 Figures Figure 30 show sys-info command output ....... 138 Figure 31 show tech command output .
- Page 23 Figures Figure 65 Area graph ..........188 Figure 66 Bar graph .
- Page 24 Figures Figure 100 show cli command output ........273 Figure 101 show sys-info command output .
- Page 25 Figure 168 Nortel SFP label ........
- Page 26 Figures Figure 170 Removing an SFP ......... . 416 Figure 171 RJ-45 (8-pin modular) port connector .
- Page 27 Tables Table 1 VLAN Tagging mode definitions ....... . 51 Table 2 Components on the Ethernet Switch 325 switch front panel .
- Page 28 Tables Table 30 Open Device dialog box fields ....... . 176 Table 31 Menu bar commands .
- Page 29 Tables Table 65 default ip address unit command parameters and variables ..259 Table 66 ping command parameters and variables ......260 Table 67 ping command parameters and variables .
- Page 30 Tables Table 100 no lldp port status command parameters and variables ... . . 306 Table 101 default lldp port status command parameters and variables ..307 Table 102 show lldp command parameters and variables .
- Page 31 1000BASE-SFP models ........412 Table 157 Nortel CWDM SFP transceiver list ......413 Table 158 Technical specifications for 1000BASE-SX, and 1000BASE-LX SFPs .
- Page 32 Tables Table 170 Electrical parameters ........469 Table 171 Physical dimensions of the Ethernet Switch 325 .
-
Page 33: Preface
Preface This guide provides information about configuring and managing basic switching features on the Nortel Ethernet Switch 325 and Nortel Ethernet Switch 425. This guide describes the features of the following Nortel switches. • Nortel Ethernet Switch 325-24T • Nortel Ethernet Switch 325-24G •... -
Page 34: Before You Begin
Preface Before you begin This guide is intended for network administrators who have the following background: • basic knowledge of networks, Ethernet bridging, and IP routing • familiarity with networking concepts and terminology • basic knowledge of network topologies Text conventions This guide uses the following text conventions: angle brackets (<... -
Page 35: Related Publications
For more information about using the Ethernet Switch 325/425, refer to the following publications: • Release Notes for the Nortel Ethernet Switch 325/425, Software Release 3.6 (217155-C) Documents important changes about the software and hardware that are not covered in other related publications. -
Page 36: Getting Help From The Nortel Web Site
How to get help This section explains how to get help for Nortel products and services. Getting help from the Nortel web site The best way to get technical support for Nortel products is from the Nortel Technical Support web site: www.nortel.com/support... -
Page 37: Getting Help Through A Nortel Distributor Or Reseller
Getting help over the phone from a Nortel Solutions Center If you do not find the information you require on the Nortel Technical Support web site, and have a Nortel support contract, you can also get help over the phone from a Nortel Solutions Center. - Page 38 Preface 320985-A Rev 01...
-
Page 39: About Ethernet Switches 325 And 425
Chapter 1 About Ethernet Switches 325 and 425 This chapter provides an introduction to the Ethernet switch software release 3.6. This version of the Ethernet switch software supports the following devices: • Ethernet Switch 325 • Ethernet Switch 425 This chapter describes the hardware components and features of the Ethernet Switch 325/425, and covers the following topics: •... -
Page 40: Link Layer Discovery Protocol (Ieee 802.1Ab)
Chapter 1 About Ethernet Switches 325 and 425 • “Radius password fallback enhancement” on page 45 • “SNMP trap port enhancement” on page 46 • “EAPoL with Guest VLAN” on page 46 • “shutdown command” on page 46 • “reload command” on page 47 •... - Page 41 Chapter 1 About Ethernet Switches 325 and 425 • receives network management information from adjacent stations on the same LAN. LLDP also makes it possible to discover certain configuration inconsistencies or malfunctions that can result in impaired communications at higher layers. For example, it can be used to discover duplex mismatches between an IP Phone and the connected switch.
-
Page 42: Lldp Operational Modes
Chapter 1 About Ethernet Switches 325 and 425 LLDP operational modes LLDP is a one-way protocol. An LLDP agent can transmit information about the capabilities and current status of the system associated with its MAC service access point (MSAP) identifier. The LLDP agent can also receive information about the capabilities and current status of the system associated with a remote MSAP identifier. -
Page 43: Transmitting Lldpdus
Chapter 1 About Ethernet Switches 325 and 425 In addition to the four mandatory TLVs, Release 3.6 software supports the basic management TLV set. You can specify which of these optional TLVs to include in the transmitted LLDPDUs for each port. The optional management TLVs are as follows: •... -
Page 44: Configuring Lldp Using The Cli
Chapter 1 About Ethernet Switches 325 and 425 Configuring LLDP using the CLI For information about configuring LLDP using the CLI, refer to “Configuring LLDP using the CLI” on page 300. Ethernet Switch 425-48T stacking support With Release 3.6 software, the Ethernet Switch 425-48T can be stacked together with the Ethernet Switch 425-24T up to eight units high. -
Page 45: Radius Password Fallback Enhancement
Therefore, ensure you are aware of the valid usernames (default RW and RO) before you change passwords. For more information, refer to Configuring and Managing Security for Nortel Ethernet Switches 325 and 425, Software Release 3.6 (320988-A). Radius password fallback enhancement With Release 3.6 software, you can configure RADIUS password fallback as an... -
Page 46: Eapol With Guest Vlan
<host-ip> [port <1-65535>] {<community-string>|v2c <community-string>| v3 {auth|no-auth|auth-priv} <username>} For more information, see Configuring and Managing Security for Nortel Ethernet Switches 325 and 425, Software Release 3.6 (320988-A). EAPoL with Guest VLAN Prior to Release 3.6, EAP (802.1x) Authentication supported Port Based User Access. -
Page 47: Reload Command
Chapter 1 About Ethernet Switches 325 and 425 For more information, see “shutdown command for the unit” on page 134. reload command CLI command provides you with a configuration rollback reload mechanism to prevent loss of connectivity to a switch, typically for remote configurations. -
Page 48: Show Mac-Address-Table Enhancement
Chapter 1 About Ethernet Switches 325 and 425 If the configurations cause no problems and switch connectivity is maintained, you can perform the following: Save the current running configuration using the copy config nvram command. write mem, save config b Since the new configuration is working properly, cancel the reload using command. -
Page 49: Ping Enhancement
Chapter 1 About Ethernet Switches 325 and 425 restore factory-default [-y] where the parameter instructs the switch not to prompt for confirmation. [-y] For more information, refer to “Resetting the switch to default configuration” on page 261. Ping enhancement Release 3.6 software extends the ping capabilities of the device. Using the CLI, you can now specify additional ping parameters, including the number of ICMP packets to be sent, the packet size, the interval between packets, and the timeout. -
Page 50: Download Without Reset
Chapter 1 About Ethernet Switches 325 and 425 Download without reset The download without reset enhancement allows you to download diagnostic and image software to the switch without the switch performing an automatic reset. Once the software is downloaded, you must initiate a manual reset to load the new diagnostic and software images. -
Page 51: Bootp When Needed As Default
The additional options are available using only the Console Interface VLAN Port Configuration screen or the CLI command. For more information, vlan ports refer to Configuring VLANs, Spanning Tree, and MultiLink Trunking for Nortel Ethernet Switches 325 and 425, Software Release 3.6 (320986-A). System Configuration Guide... -
Page 52: Vlan Configuration Control
Chapter 1 About Ethernet Switches 325 and 425 VLAN Configuration Control VLAN Configuration Control (VCC) is a new feature in Software Release 3.6 that allows a switch administrator to control how VLANs are modified. VLAN Configuration Control is a superset of the existing AutoPVID functionality and incorporates this functionality for backwards compatibility. -
Page 53: Port Mirroring Configuration Rules
SFP GBIC Support on the Ethernet Switch 425 Small Form Factor Pluggable transceivers (SFPs) are hot-swappable input/output enhancement components designed for use with Nortel products to allow Gigabit Ethernet ports to link with other Gigabit Ethernet ports over various media types. -
Page 54: Flash Memory Storage
Chapter 1 About Ethernet Switches 325 and 425 Flash memory storage Switch software image storage The Ethernet Switch 325/425 uses flash memory to store the switch software image. The flash memory allows you to update the software image with a newer version without changing the switch hardware (see “Software Download screen”... -
Page 55: Configuration And Switch Management
Chapter 1 About Ethernet Switches 325 and 425 • RFC 1573 (Interface MIB) • RFC 1643 (Ethernet MIB) • RFC 1757 (RMON) • RFC 1271 (RMON) • RFC 1157 (SNMP) Standards The following IEEE Standards also contain information germane to the Ethernet Switch 325/425: •... - Page 56 You can use any generic SNMP-based network management software to configure and manage an Ethernet Switch 325/425. • Nortel Enterprise Policy Manager The Nortel Enterprise Policy Manager (formerly Optivity Policy Services) allows you to configure the Ethernet Switches 325 and 425 with a single system. 320985-A Rev 01...
-
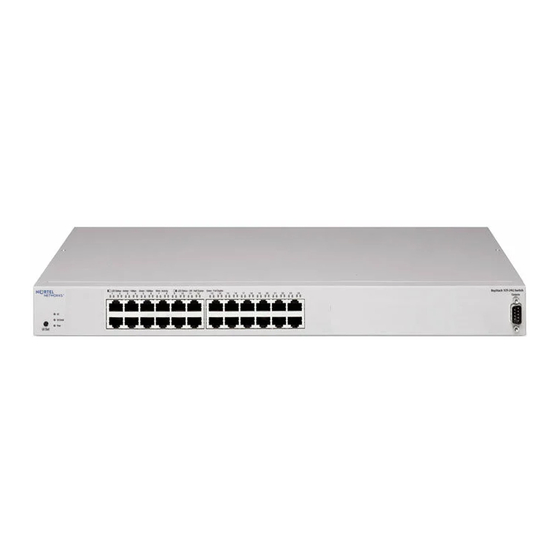
Page 57: Hardware Components Of The Ethernet Switch 325
Chapter 1 About Ethernet Switches 325 and 425 Hardware components of the Ethernet Switch 325 Front panel Figure 2 shows the front and side views of the Ethernet Switch 325. Figure 2 Ethernet Switch 325-24G Figure 3 shows the configuration of the front panel on the Ethernet Switch 325. Table 2 describes the components on the front panel. -
Page 58: Console Port
Table 2 Components on the Ethernet Switch 325 switch front panel Item Description UI button 1000T Connectors (not available with Ethernet Switch 325-24T) Port connectors Console port Note: 1000T connectors are not available for the Ethernet Switch 325-24T. Console port The Console port allows you to access the Console Interface (CI) screens and customize your network using the console menu and screens. -
Page 59: Port Connectors
Chapter 1 About Ethernet Switches 325 and 425 Port connectors The Ethernet Switch 325 uses 10BASE-T/100BASE-TX RJ-45 (8-pin modular) port connectors. The 10BASE-T/100BASE-TX port connectors are configured as MDI-X (Media Dependent Interface-crossover). These ports are connected by straight cables to the Network Interface Card (NIC) in a node or a server, similar to a conventional Ethernet repeater hub. - Page 60 Chapter 1 About Ethernet Switches 325 and 425 Figure 4 Ethernet Switch 325-24G LED display panel LED Status - Amber:10Mps Green:100 Mps Blink:Activity LED Status - Off:Hal D UI Cmd T: 1000T A: Activity UI Set Table 3 Ethernet Switch 325-24G LED descriptions Label Color/Status Meaning...
-
Page 61: Back Panel
Green/blinking Indicates activity on link. No activity on the link. Back panel The back panel of the Ethernet Switch 325-24T is shown in Figure Table 4 describes the components on the back panel. Figure 5 Ethernet Switch 325-24T back panel... -
Page 62: Ac Power Receptacle
Chapter 1 About Ethernet Switches 325 and 425 AC power receptacle The AC power receptacle accepts the AC power cord which is supplied with the switch. For installation outside North America, make sure that you have the proper power cord for your region. Any cord used must have a CEE-22 standard V female connector on one end and must meet the IEC 320-030 specifications. - Page 63 Chapter 1 About Ethernet Switches 325 and 425 Table 5 International power cord specifications (continued) Country/Plug description Specifications Typical plug United Kingdom: 240 VAC 50 Hz • BS1363 male plug with Single phase fuse • Harmonized cord 229FA Australia: 240 VAC 50 Hz AS3112-1981 Male plug Single phase...
- Page 64 Chapter 1 About Ethernet Switches 325 and 425 Vorsicht: Bitte sofort lesen. Sehen Sie nach, ob dieses Netzkabel über den richtigen Stecker verfügt und für die Verwendung in Ihrem Stromversogungsnetz zertifiziert ist. Falls dieses Kabel nicht für das Stromversorgungsnetz in Ihrem Land geeignet ist, darf es nicht verwendet werden.
- Page 65 Chapter 1 About Ethernet Switches 325 and 425 Advertencia: Sírvase leer inmediatamente. Inspeccione este cable de alimentación eléctrica y determine si viene con el enchufe apropiado y está debidamente certificado para el uso con su sistema eléctrico. Si no cumple con los reglamentos del sistema eléctrico de su país, despójese de este cable de alimentación inmediatamente y obtenga el cable requerido, según las ordenanzas y códigos eléctricos nacionales.
- Page 66 Chapter 1 About Ethernet Switches 325 and 425 Avertissement: Le débranchement du cordon d'alimentation constitue le seul moyen de mettre cet appareil hors tension. Le cordon d'alimentation doit donc toujours être branché dans une prise accessible pour faciliter la mise hors tension en cas d'urgence.
-
Page 67: Hardware Components Of The Ethernet Switch 425
Chapter 1 About Ethernet Switches 325 and 425 Hardware components of the Ethernet Switch 425 Figure 6 shows the front and side views of the Ethernet Switch 425. Figure 6 Ethernet Switch 425 11107FA Front panel Figure 7 shows the configuration of the front panel on the Ethernet Switch 425-24T. -
Page 68: User Interface Button
Chapter 1 About Ethernet Switches 325 and 425 Table 6 Components of the Ethernet Switch 425-24T front panel Item Description UI button 10/100/1000BaseT (copper) port 25 and 26 Gigabit Interface Converter (GBIC) ports 25 and 26 10/100BaseT ports 1 to 24 Console port Note: With Release 3.6 software, the Ethernet Switches 425-24T and 425-48T have stacking enabled by default, which means that ports 26... -
Page 69: Setting The Unit As The Base Unit
Chapter 1 About Ethernet Switches 325 and 425 Setting the unit as the Base Unit To set the unit as the Base Unit with the UI button: Press the UI button and hold in for three seconds. The unit is now in the Configuration mode, and the color and status of the UI LED turns green blinking. -
Page 70: Resetting The Stack
Chapter 1 About Ethernet Switches 325 and 425 The color and status of the UI LED returns to steady green once the command has been accepted. If the command is rejected, the UI LED turns amber blinking. Note: Changing the Base Unit does not take effect until you restart the system. - Page 71 Chapter 1 About Ethernet Switches 325 and 425 To confirm, keep the UI button pressed for 3 seconds more. The UI LED turns either to solid-green (command accepted) or to solid-amber (error). After another period (5 seconds) the UI LED turns Off. Once the command is accepted, the new configuration is stored in NVRAM.
-
Page 72: Aborting A Command
Chapter 1 About Ethernet Switches 325 and 425 Label Color/Status Description Down Green/steady The unit is being set as base or non-base unit using the UI button — base unit has Base LED on as well. Amber/blinking The stack is reset using the UI button. Aborting a command To abort a command entered using the UI button, do one of the following actions: •... -
Page 73: Led Display During Change In Ip Address And Subnet Mask
Chapter 1 About Ethernet Switches 325 and 425 If the default IP configuration is set, any change to the configured IP address or subnet mask through the other user interfaces, will cause the In-use IP configuration of the switch or stack to change. Therefore, the newly configured IP address must be used to manage the switch or stack. -
Page 74: Console Port
Chapter 1 About Ethernet Switches 325 and 425 Table 8 describes the LED behavior at the time of setting the default IP address and subnet mask. Table 8 UI button LED display during change in IP address and subnet mask Label Color/Status Status... -
Page 75: Gigabit Interface Converter
SFP GBICs (Small Form Factor Pluggable Gigabit Interface Converters) are hot-swappable input/output enhancement components designed for use with Nortel products to allow Gigabit Ethernet ports to link with fiber optic networks. Port connectors The Ethernet Switch 425 uses 10BASE-T/100BASE-TX RJ-45 (8-pin modular) port connectors. -
Page 76: Led Display Panel
Chapter 1 About Ethernet Switches 325 and 425 LED display panel Figure 8 shows the Ethernet Switch 425 LED display panel. Figure 8 Ethernet Switch 425 LED display panel LED Status - Amber:10Mps Green:100 Mps Blink:Activity LED Status - Off:Half Duplex Green:Full Base GBK/Stack Up... - Page 77 Chapter 1 About Ethernet Switches 325 and 425 Table 9 Ethernet Switch 425 LED descriptions (continued) Command Label Status Color State Meaning Duplex Mode Green This port has a good connection (fiber), and is configured (MGBIC) to full duplex. This port does not have a good connection (fiber), and port is configured to half duplex.
-
Page 78: Cascade Up And Down Connectors
Chapter 1 About Ethernet Switches 325 and 425 Back panel Figure 9 shows the back panel of the Ethernet Switch 425. Figure 9 Ethernet Switch 425 back panel Cascade Down 100-240 V- 50-60Hz 2A 11110EA Table 10 describes the components on the back panel. Table 10 Components on the Ethernet Switch 425 back panel Item Description... -
Page 79: Ac Power Receptacle
Chapter 1 About Ethernet Switches 325 and 425 AC power receptacle The AC power receptacle accepts the AC power cord which is supplied with the switch. For installation outside North America, make sure that you have the proper power cord for your region. Any cord used must have a CEE-22 standard V female connector on one end and must meet the IEC 320-030 specifications. - Page 80 Chapter 1 About Ethernet Switches 325 and 425 Table 11 International power cord specifications (continued) Country/Plug description Specifications Typical plug United Kingdom: 240 VAC 50 Hz • BS1363 male plug with fuse Single phase • Harmonized cord 229FA Australia: 240 VAC 50 Hz AS3112-1981 Male plug Single phase...
- Page 81 Chapter 1 About Ethernet Switches 325 and 425 Vorsicht: Bitte sofort lesen. Sehen Sie nach, ob dieses Netzkabel über den richtigen Stecker verfügt und für die Verwendung in Ihrem Stromversogungsnetz zertifiziert ist. Falls dieses Kabel nicht für das Stromversorgungsnetz in Ihrem Land geeignet ist, darf es nicht verwendet werden. Besorgen Sie sich ein Kabel, das die Vorschriften der Zulassungsbehörden in Ihrem Land erfüllt.
- Page 82 Chapter 1 About Ethernet Switches 325 and 425 Caution: Warning: Removal of the power cord is the only way to turn off power to this device. The power cord must always be connected in a location that can be accessed quickly and safely in case of an emergency. Vorsicht: Die Stromzufuhr zu diesem Gerät kann nur durch Ziehen des Netzstromkabels unterbrochen werden.
-
Page 83: Network Configuration Examples
Chapter 1 About Ethernet Switches 325 and 425 Network configuration examples This section provides network configuration examples using the Ethernet Switch 325/425. In these examples, the packet classification feature can be used to prioritize the traffic of the network to ensure uninterrupted traffic of critical applications. - Page 84 Chapter 1 About Ethernet Switches 325 and 425 Figure 11 Ethernet Switch 425 used as a desktop switch Before After Ethernet Switch 425-24T 10BASE-T hub Up to 24 users Up to 24 users Network Network Center Center 10 Mb/s 100 Mb/s 1000 Mb/s - 23 users share 10 Mb/s (10/24 Mb/s per user) - 24 users;...
-
Page 85: Segment Switch Application
Chapter 1 About Ethernet Switches 325 and 425 Segment switch application Figure 12 Figure 13 show the Ethernet Switch 325/425 used as a segment switch to alleviate user contention for bandwidth and eliminate server and network bottlenecks. Before segmentation, 88 users had a total bandwidth of only 10 Mb/s available. -
Page 86: High-Density Switched Workgroup Application
Figure 14 shows an example of using an Ethernet Switch 425 with a high-speed (gigabit) connection to a Nortel Ethernet Routing Switch 8600. Ethernet Switch 425 and Ethernet Switch 325 are also shown in this example of a high-density switched workgroup. -
Page 87: Stack Operation
Ethernet Switch 425 with an optional (1000BASE-SX) GBIC for maximum bandwidth. The Ethernet Switch 425-24T and the Ethernet Switch 325-24T have 100 Mb/s connections to the Ethernet Switch 425-24T, a 100BASE-TX hub, and a 100 Mb/s server as well as 10 Mb/s connections to DTE (data terminal equipment). -
Page 88: Base Unit
Chapter 1 About Ethernet Switches 325 and 425 The Ethernet Switch 425 does not support stack redundancy. In case of cable or unit failure, all units of the stack begin to work as standalone switches. However, the stack is automatically formed again once the missing cable is re-inserted or the faulty unit is replaced. -
Page 89: Stack Mac Address
Chapter 1 About Ethernet Switches 325 and 425 For example, when you initially power up the stack, the base unit becomes unit 1 and the unit that the base unit connects to becomes unit 2 (and the next unit is unit 3 and so on), until the maximum stack configuration (up to 8 units) is reached. -
Page 90: Stack Configurations
Chapter 1 About Ethernet Switches 325 and 425 Stack configurations As shown in Figure 16, the cable connectors provide the ability to stack up to eight switches. Because stack parameters are associated with the base unit (see “Base unit” on page 88), the physical stack order depends on the base unit’s position and whether the stack is configured stack up or stack down. -
Page 91: Stack Down Configurations
Chapter 1 About Ethernet Switches 325 and 425 Table 12 describes the stack up configuration illustration references. Table 12 Stack up configuration description Item Description Base unit Last unit Stacking cable 30 cm (order number AL 2018005) Stacking cable 1 m (order number AL 2018006) Stack down configurations Figure 16, data flows from the base unit (unit 1) to the next switch, which is... - Page 92 Certain Network Management Station (NMS) applications assume a stack up configuration for the GUI which represents the stack (see Figure 15). For this reason, Nortel recommends that you always configure the top unit in the stack as the base unit. In any stack configuration, the following applies: •...
-
Page 93: Accessing The Ci Menus And Screens
Chapter 2 Using the console interface This chapter describes how to configure and manage the Ethernet Switch 325/425 using the menu-driven Console Interface (CI). This chapter covers the following topics: • “Accessing the CI menus and screens” • “Using the CI menus and screens” on page 94 •... -
Page 94: Using The Ci Menus And Screens
Chapter 2 Using the console interface Using the CI menus and screens The CI menus and screens provide options that allow you to configure and manage the Ethernet Switch 325/425. Help prompts at the bottom of each menu and screen explain how to enter data in the highlighted field and how to navigate the menus and screens. -
Page 95: Screen Fields And Descriptions
Chapter 2 Using the console interface To return to the previous menu, press Ctrl+R. To go to the next screen in a series, press Ctrl+N. To return to the main menu at any time, press Ctrl+C. Press Backspace to delete entered text. You can set the options that appear in brackets. -
Page 96: Main Menu
Chapter 2 Using the console interface The CI screens for your specific switch model display the model name in the main menu screen title and the correct number of ports and port types in the Port Configuration screen. Note: The field values shown in the CI screens in this section are provided as examples only. - Page 97 Chapter 2 Using the console interface Figure 18 Console interface main menu Ethernet Switch 425-48T Main Menu IP Configuration/Setup... SNMP Configuration... System Characteristics... Switch Configuration... Console/Comm Port Configuration... Display Hardware Units... Spanning Tree Configuration... TELNET/SNMP/Web Access Configuration... Software Download... Configuration File... Display System Log...
- Page 98 The screen also displays the SPF GBIC. Configuring VLANs, Spanning Tree Displays the Spanning Tree Configuration Menu (see Spanning Tree, and MultiLink Trunking for Nortel Ethernet Switches Configuration... 325 and 425, Software Release 3.6 (320986-A)). This menu provides the...
- Page 99 Chapter 2 Using the console interface Table 14 Console interface main menu options (continued) Option Description System Monitoring Guide for Nortel Display System Log Displays the System Log screen (see Ethernet Switches 325 and 425, Software Release 3.6 (320989-A)). Reset Resets the switch with the current configuration settings.
-
Page 100: System Characteristics Screen
Chapter 2 Using the console interface Table 14 Console interface main menu options (continued) Option Description Shutdown Allows the switch to be safely shut down and powered off. This option is followed by two screen prompts that precede the action. At the first prompt, enter the time in minutes to wait before the switch is shut down. - Page 101 Chapter 2 Using the console interface Figure 19 System Characteristics screen System Characteristics Operation Mode: Switch MAC Address: 00-0F-CD-BF-1E-80 Reset Count: Last Reset Type: Management Reset Power Status: Primary Power Local GBIC Type: port 49, None port 50, None sysDescr: Ethernet Switch 425-48T HW:00 FW:3.5.0.2 SW:v3.6.0...
- Page 102 Chapter 2 Using the console interface Table 15 System Characteristics screen fields (continued) Field Description MAC Address The MAC address of the switch or, when the switch is participating in a stack configuration, the MAC address of the stack configuration. Reset Count A read-only field that indicates the number of resets since the operational firmware was first loaded on the switch.
-
Page 103: Switch Configuration Menu Screen
Chapter 2 Using the console interface 1 Although this field can be set to up to 255 characters from a Network Management Station (NMS), only 56 characters are displayed on the console terminal. Switch Configuration Menu screen The Switch Configuration Menu screen (Figure 20) allows you to set or modify the switch configuration. - Page 104 Configuring and MAC Address Table Displays the MAC Address Table screen (see Managing Security for Nortel Ethernet Switches 325 and 425, Software Release 3.6 (320988-A)). This screen allows you to view all MAC addresses and their associated port or trunk that the switch has learned, or to search for a particular MAC address (to see if the switch has learned the address).
- Page 105 System Port Mirroring Configuration... Displays the Port Mirroring Configuration screen (see Monitoring Guide for Nortel Ethernet Switches 325 and 425, Software Release 3.6 (320989-A)). This screen allows you to designate a single switch port as a traffic monitor for one specific port.
-
Page 106: Port List Syntax
Chapter 2 Using the console interface Port list syntax When you enter a port list in a stack configuration, you must specify either a unit/ port list, NONE, or ALL. In a stack configuration, ALL indicates all of the stack port;... -
Page 107: Accelerator Keys For Repetitive Tasks
Chapter 2 Using the console interface Figure 21 MAC Address Security Port Lists screen MAC Address Security Port Lists Entry Port List ----- --------- [1/3,2/7,3/1-4] More... Press Ctrl-N to display next screen. Enter port list, “NONE”,”ALL”,”1,3,7-9”, press <Return> or <Enter> when done. Press Ctrl-R to return to previous menu. -
Page 108: Adding A New Port To An Existing Port Number List
Chapter 2 Using the console interface Adding a new port to an existing port number list In the example shown in Figure 21, S3 shows the Port List field values as: 1/3,2/7,3/1-4 If you want to add another port (for example, port 2/9) to the existing port number list, you could highlight the field and then type another port list, including the new port number 1/3,2/7,2/9,3/1-4 Enter. -
Page 109: Port Configuration Screen
Chapter 2 Using the console interface Port Configuration screen The Port Configuration screen (Figures and 23) allows you to configure specific switch ports or all switch ports. You can enable or disable the port status of specified switch ports, set the switch ports to autonegotiate for the highest available speed of the connected station, or set the speed for selected switch ports (autonegotiation is not supported on fiber optic ports). - Page 110 Chapter 2 Using the console interface Figure 22 Port Configuration screen (1 of 2) Port Configuration Port Trunk Status Link LnkTrap Autonegotiation Speed Duplex ---- ----- ------------ ----- ------- --------------- ----------------- [ Enabled Down [ On [ Enabled [ Enabled Down [ On [ Enabled...
- Page 111 The read-only data displayed in this column indicates the trunks that correspond to the switch ports specified in the Trunk Members fields of the Trunk Configuration Configuring VLANs, Spanning Tree, and MultiLink Trunking for screen (see Nortel Ethernet Switches 325 and 425, Software Release 3.6 (320986-A)). System Configuration Guide...
-
Page 112: High Speed Flow Control Configuration Screen
Chapter 2 Using the console interface Table 17 Port Configuration screen fields (continued) Field Description Status Allows you to disable any of the switch ports. You can also use this field to control access to any switch port. Default Value Enabled Range Enabled, Disabled... - Page 113 Chapter 2 Using the console interface Figure 24 High Speed Flow Control Configuration High Speed Flow Control Configuration Port Autonegotiation Speed Duplex Flow Control ---- --------------- -------------- -------------- Enabled 1000Mbs / Full Disabled Enabled 1000Mbs / Full Disabled Use space bar to display choices, press <Return> or <Enter> to select choice. Press Ctrl-R to return to previous menu.
-
Page 114: Choosing A High Speed Flow Control Mode
Chapter 2 Using the console interface Table 18 High Speed Flow Control Configuration screen fields (continued) Field Description Autonegotiation Indicates if the Autonegotiation has been enabled on the port. When enabled, the port only advertises support for 1000 Mb/s operation, in full-duplex mode. Default Value Enabled Range... -
Page 115: Asymmetric Mode
Chapter 2 Using the console interface When a pause frame is received (by either the GBIC port or its link partner), the port suspends transmission of frames for a number of slot times specified in the control frame or until a pause-release control frame is received. Both devices on the link must support this mode when it is selected. - Page 116 Chapter 2 Using the console interface The Rate Limiting Configuration screen allows you to limit the forwarding rate of broadcast and multicast packets at ingress. Note: All configuration settings that you make in the Rate Limiting Configuration screen are applied across the entire unit (if stacking in configured).
- Page 117 Chapter 2 Using the console interface Figure 25 Rate Limiting Configuration screen Rate Limiting Configuration Packet Type Limit ---- ------------- -------- Switch Both ] [ 0 pps ] Stack Both ] [ 0 pps ] Use space bar to display choices, press <Return> or <Enter> to select choice. Press Ctrl-R to return to previous menu.
- Page 118 Chapter 2 Using the console interface Table 19 Rate Limiting Configuration screen fields (continued) Field Description Limit Sets the amount of Packets Per Second allowed for forwarding. 0 pps means Rate Limiting has been disabled. Default value: 0 pps Range: 0-262143 Switch Allows you to enable Rate Limiting on current selected unit.
-
Page 119: Cli Basics
Chapter 3 CLI Basics You can manage the Ethernet Switch 325/425 with a number of management tools such as: • Device Manager (GUI) • Web-based management system • Console Interface (CI menus) • Command Line Interface (CLI) The Ethernet Switch 325/425 Command Line Interface (CLI) is a management tool that provides methods for configuring, managing, and monitoring the operational functions of the switch. -
Page 120: Cli Command Modes
120 Chapter 3 CLI Basics • “Basic navigation” on page 128 • “Managing basic system information” on page 137 • “Managing MAC address forwarding database table” on page 143 CLI command modes Most CLI commands are available only under a certain command mode. The Ethernet Switch 325/425 has the following four command modes: •... - Page 121 Chapter 3 CLI Basics 121 The Interface Configuration commands allow you to configure parameters for each port, such as speed and duplex mode. The Interface Configuration mode is also referred to as config-if mode. Figure 26 provides an illustration of the hierarchy of Ethernet Switch 325/425 CLI command modes.
- Page 122 Privileged EXEC (config) mode to exit to exit Privileged EXEC mode; to quit to Main logout Menu Interface interface 325-24T(config-if)# 425-48T(config-if)# Configuration FastEthernet (config-if) {<portnum>|all} enter from Global Configuration mode to quit to Main logout Menu; to exit to Privileged EXEC mode;...
-
Page 123: Port Numbering
CLI in privExec mode and use the commands to move to the other command modes. Port numbering The port numbering for different versions of Ethernet switches are listed below: • Ethernet Switch 325-24T has twenty-four 10/100 Mb/s ports. • Ethernet Switch 325-24G has twenty-four 10/100 Mb/s ports and two 10/100/1000 ports. •... -
Page 124: Port Numbering In Standalone Mode
124 Chapter 3 CLI Basics Port numbering in standalone mode In a standalone mode, the port number variable is an integer between 1 to 50 for Ethernet Switch 425-48T and 1 to 26 for Ethernet Switch 425-24T. You can use variable in the following formats: <portlist>... -
Page 125: Accessing Cli
Chapter 3 CLI Basics 125 — Example: means unit 3, port 24 3/24 • A range of port numbers—an integer for the unit, followed by /, and integers for the port number between 1 and 24 separated by a dash —... - Page 126 When you access the Ethernet Switch 325/425, the banner appears (Figure 27). Figure 27 Ethernet Switch 425-48T banner Enter Ctrl-Y to begin. *************************************************************** *** Ethernet Switch 425-48T *** Nortel *** Copyright (c) 1996-2005, All Rights Reserved *** Release 3.6 SSH *** HW:00 FW:3.5.0.2 SW:v3.6.0 ***************************************************************...
-
Page 127: Setting The System Username And Password
You can set usernames and passwords for system access through the Console Interface, CLI, Telnet, and Web-based management. For more information, refer to Configuring and Managing Security for Nortel Ethernet Switches 325 and 425, Software Release 3.6 (320988-A). System Configuration Guide... -
Page 128: Getting Help
128 Chapter 3 CLI Basics Getting help When you navigate through the CLI, online Help is available at all levels. Entering a portion of the command, space, and a question mark ( ) at the prompt results in a list of all options for that command. Refer to “help command”... -
Page 129: Keystroke Navigation
Chapter 3 CLI Basics 129 The system records the last command in a CLI session. However, the last command is not saved across reboots. Add the word to the beginning of most CLI configuration commands to clear or remove the parameters of the actual command. For example, when you enter the command you set the IP stack ip stack address 192.32.154.126,... -
Page 130: Help Command
130 Chapter 3 CLI Basics Table 21 Keystroke navigation Key combination Function Ctrl+ P or Up arrow Previous history command Ctrl+ Transpose characters Ctrl+ Delete entire line Ctrl+ Delete word left of cursor Ctrl+ Delete all characters to left of cursor Ctrl+ Exit Global Configuration mode (to Privileged EXEC mode) -
Page 131: Default Command
Chapter 3 CLI Basics 131 Figure 29 help command output in privExec mode 425-48T>help Context help may be requested at any point in a command by entering a question mark '?'. If nothing matches, the help list will be empty and you must backup until entering a '?' shows the available options. -
Page 132: Logout Command
132 Chapter 3 CLI Basics logout command command logs you out of the CLI session and returns you to the logout Main Menu of the Console Interface (CI) menus (Figure 28). The syntax for the command is: logout logout command is in all command modes. logout command has no parameters or variables. -
Page 133: Interface Command
Chapter 3 CLI Basics 133 Table 22 describes the parameters and variables for the command. configure Table 22 configure command parameters and variables Parameters and Description variables terminal | network Specifies the source for the configuration commands for the Ethernet Switch 325/425: terminal—allows you to enter config mode to enter configuration commands network—allows you to set up parameters for auto-loading a script at boot-up... -
Page 134: End Command
134 Chapter 3 CLI Basics end command command moves you to the priv Exec mode from either the Global Configuration (config) mode or the Interface Configuration (config-if) mode. The syntax for the command is: command has no parameters or variables. exit command command moves you around the command modes: exit... - Page 135 Chapter 3 CLI Basics 135 Enter yes at this prompt to shut down the switch. The following warning message then appears: Warning the switch/stack has been set to reboot in <xx> minutes. Current configuration has been saved, no further configuration changes can be saved until reboot occurs or 'shutdown cancel' command is issued.
-
Page 136: Reload Command
136 Chapter 3 CLI Basics Table 23 describes the parameters and variables for the command. shutdown Table 24 shutdown command parameters and variables Parameters Description and variables force Instructs the switch to skip the shutdown confirmation prompt. minutes-to-wait Specifies the number of minutes that pass before the switch resets <1-60>] itself. -
Page 137: Managing Basic System Information
Chapter 3 CLI Basics 137 Warning the switch/stack has been set to reload in <xx> minutes. Current configuration has NOT been saved. Configuration must be explicitly saved. Once the reload timer expires, the switch resets, reloads the last saved configuration, and re-enables the autosave feature. The syntax for the command is: reload... -
Page 138: Show Sys-Info Command
SNTP not synchronized. sysServices: sysContact: sysName: Ethernet 425-48T sysLocation: 425-48T# To change the system contact, name, or location, refer to the snmp-server command (see Configuring and Managing Security for Nortel Ethernet Switches 325 and 425, Software Release 3.6 (320988-A)). 320985-A Rev 01... -
Page 139: Show Tech Command
Chapter 3 CLI Basics 139 show tech command command displays the system information. The syntax for the show tech command is: show tech show tech command is in the privExec command mode. The show tech show tech command has no parameters or variables. Figure Figure 31 on page 139, and... - Page 140 140 Chapter 3 CLI Basics Figure 32 show tech command output (continued) *****MEMORY INFORMATION***** status bytes blocks avg block max block ------ --------- -------- ---------- ---------- current free 3384136 21974 3333064 alloc 7077632 4335 1632 cumulative alloc 1036033356 11295553 *****IP Configuration***** BootP Mode: BootP Disabled Configured In Use...
-
Page 141: Show Stack-Info Command
Chapter 3 CLI Basics 141 Figure 33 show tech command output (continued) VLAN members ------ ------ ------ ------ ------ ------ ------ ------ ------ ------ Msti Config Id Selector: Msti Region Name: 00:0f:6a:7d:bb:e0 Msti Region Version: Msti Config Digest: AC:36:17:7F:50:28:3C:D4:B8:38:21:D8:AB:26:DE:62 Port Role State STP Status... -
Page 142: Show Stacking-Mode Command
142 Chapter 3 CLI Basics The syntax for the command is: show stack-info show stack-info command is in the privExec command mode. show stack-info command has no parameters or variables. show stack-info Figure 34 displays sample output from the command. show stack-info Figure 34 show stack-info command output 425-24T(config)#show stack-info... -
Page 143: Managing Mac Address Forwarding Database Table
Chapter 3 CLI Basics 143 Figure 35 displays sample output from the command. show stacking-mode Figure 35 show stacking-mode command output 425-24T>show stacking-mode Current mode for unit 1 is stackable, base unit set. Next mode for unit 1 is stackable, base unit set. Current mode for unit 2 is stackable, base unit not set. -
Page 144: Show Mac-Address-Table Command
144 Chapter 3 CLI Basics show mac-address-table command command displays the current contents of the show mac-address-table MAC address forwarding database table. The syntax for the show command is: mac-address-table show mac-address-table [vid ] [aging-time] <1-4094> [address <H.H.H>] [port <LINE>] [include/exclude <pattern>] command is in the privExec command mode. -
Page 145: Mac-Address-Table Aging-Time Command
Chapter 3 CLI Basics 145 Figure 36 displays sample output from the show mac-address-table command. Figure 36 show mac-address-table command output 425-48T(config)#show mac-address-table Mac Address Table Aging Time: 400 Number of addresses: 13 MAC Address Source MAC Address Source ----------------- -------- ----------------- --------... -
Page 146: Default Mac-Address-Table Aging-Time Command
146 Chapter 3 CLI Basics Figure 37 displays sample output from the mac-address-table aging-time command. Figure 37 mac-address-table aging-time output 425-48T(config)#mac-address-table aging-time 400 425-48T(config)# default mac-address-table aging-time command command sets the time that default mac-address-table aging-time the switch retains unseen MAC addresses to 300 seconds. The syntax for the command is: default mac-address-table aging-time default mac-address aging-time... -
Page 147: Installing Device Manager
Installing Device Manager The JDM software is provided on the device software CD as a self-extracting executable file, and is also available from the Nortel web site. This chapter provides instructions for installing the JDM software in a Windows*, UNIX*, or Linux* environment. -
Page 148: Jdm Installation Precautions
Release Notes for a complete compatibility list. • If you want to use JDM to support multiple Nortel switches in your network, ensure that the JDM version you use supports each version of software running on each Nortel device in your network. -
Page 149: Installing The Device Manager Software
Chapter 4 Getting Started with Device Manager 149 Installing the Device Manager software Device Manager software can be installed in Windows, UNIX, or Linux environment. The following sections provide information on the system requirements and installation procedures to install Device Manager software in Windows, UNIX, and Linux environments. -
Page 150: Removing Previous Versions Of Jdm On Windows
For example, to remove Device Manager from a Windows XP system using the default program group, choose the following option from the Windows Start menu: All Programs>Nortel>Java Device Manager>Uninstall DM. If no program group was added to the Windows Start menu during installation, then complete the following steps to remove existing Device Manager software: Navigate to the folder where the JDM software is installed. -
Page 151: Installing Jdm On Windows From The Web
“Executing the JDM installation software on Windows” on page 152. Installing JDM on Windows from the web To obtain the JDM software from the Nortel web site: Go to the following URL: http://www.nortel.com/support Select the software support page for your product. -
Page 152: Executing The Jdm Installation Software On Windows
152 Chapter 4 Getting Started with Device Manager Executing the JDM installation software on Windows An install screen opens, followed by a Nortel dialog box. When the InstallAnywhere Introduction dialog box appears (Figure 38), you are ready to install the JDM. - Page 153 Chapter 4 Getting Started with Device Manager 153 Click I accept the terms of the License Agreement (Figure 39). Figure 39 License Agreement dialog box Click Next. The Choose Install Set dialog box opens (Figure 40). Figure 40 Choose Install Set dialog box System Configuration Guide...
- Page 154 154 Chapter 4 Getting Started with Device Manager Do one of the following: — Select Typical installation to install the common set features, as well as online help. — Select Minimal installation to select minimal features to install (recommended for those with limited disk space). —...
- Page 155 Chapter 4 Getting Started with Device Manager 155 Click Next. The Choose Install Folder dialog box opens (Figure 42). Figure 42 Choose Install Folder dialog box Click Restore Default Folder to use the default location for JDM, or click Choose to select a different storage path. Note: If Device Manager is already installed on your computer, you must choose a storage path that does not conflict with the already existing version.
- Page 156 156 Chapter 4 Getting Started with Device Manager Click Next. The Choose Shortcut Folder dialog box opens (Figure 43). Figure 43 Choose Shortcut Folder dialog box 10 Select the desired shortcut path from the list provided. 11 Click Next. 320985-A Rev 01...
- Page 157 Chapter 4 Getting Started with Device Manager 157 The Pre-Installation Summary dialog box opens (Figure 44). A summary of the choices you have made is displayed for confirmation. Figure 44 Pre-Installation Summary dialog box 12 Verify the folder, shortcut, and disk space required to install the software. If necessary, click Previous to return to the appropriate dialog box and make changes.
- Page 158 158 Chapter 4 Getting Started with Device Manager 13 Click Install. The installation process begins. When the installation is complete, the Install Complete dialog box opens (Figure 45). Figure 45 Install Complete dialog box 14 Click Done to exit the installation. JDM is now installed on your machine.
-
Page 159: Installing Jdm On Unix Or Linux
Chapter 4 Getting Started with Device Manager 159 Installing JDM on UNIX or Linux Note: JDM installation procedures are standardized across all platforms. In addition, the required Java Runtime Environment (JRE) version 1.4.1 is part of the JDM installation package and does not require a separate installation. The bundled JRE is used with this JDM only, and does not affect other Java applications on the same system. -
Page 160: Minimum Requirements
160 Chapter 4 Getting Started with Device Manager Minimum requirements JDM supports two UNIX platforms and one Linux platform: • a UNIX SPARC* workstation running the Sun* Solaris* 2.7.x (or higher) • an HP* workstation running the HP-UX* 11.x operating system (or higher) •... -
Page 161: Installing Jdm On Linux From The Cd
To install the JDM software to a UNIX (Solaris or HP-UX) environment from the web: Go to the following URL: http://www.nortel.com/support Select the software support page for your product. The software page opens. Click the Java Device Manager version you want. - Page 162 162 Chapter 4 Getting Started with Device Manager Make the installation file executable. For the Solaris environment, make the file executable by entering: chmod a+x dm_xxxx_solaris_sparc.sh For the HP-UX environment, make the file executable by entering: chmod a+x jdm_xxxx_hpux_pa-risc.sh For the Linux environment, make the file executable by entering: chmod a+x jdm_xxxx_linux.sh Run the installation file.
-
Page 163: Executing The Jdm Installation Software On Unix Or Linux
Chapter 4 Getting Started with Device Manager 163 Executing the JDM installation software on UNIX or Linux An install screen opens, followed by a Nortel dialog box. When the InstallAnywhere Introduction dialog box appears (Figure 46), you are ready to begin the JDM installation. - Page 164 164 Chapter 4 Getting Started with Device Manager Click Next to continue the installation process. The License Agreement dialog box opens (Figure 47). Figure 47 License Agreement dialog box Click I accept the terms of the License Agreement. 320985-A Rev 01...
- Page 165 Chapter 4 Getting Started with Device Manager 165 Click Next. The Choose Install Set dialog box opens (Figure 48). Figure 48 Choose Install Set dialog box Do one of the following: — Select Typical installation to install the common set features, as well as online help.
- Page 166 166 Chapter 4 Getting Started with Device Manager Click Next. If you did not select Custom installation in step 4, then the Choose Install Folder dialog box opens. Continue with step 8 page 167. If you selected Custom installation in step 4, then the Feature Sets dialog box opens...
- Page 167 Chapter 4 Getting Started with Device Manager 167 Figure 50 Choose Install Folder dialog box Click Restore Default Folder to use the default location for JDM, or click Choose to select a storage path. Note: If Device Manager is already installed on your computer, you must choose a storage path that does not conflict with the already existing version.
- Page 168 168 Chapter 4 Getting Started with Device Manager Click Next. The Pre-Installation Summary dialog box opens (Figure 51). Figure 51 Pre-Installation Summary dialog box 10 Verify the folder and disk space required to install the software. If necessary, click Previous to return to the appropriate dialog box and make changes. 320985-A Rev 01...
- Page 169 Chapter 4 Getting Started with Device Manager 169 11 Click Install. The installation process begins (Figure 52). Figure 52 Installing Java Device Manager dialog box System Configuration Guide...
-
Page 170: Removing Jdm In Unix Or Linux Environments
170 Chapter 4 Getting Started with Device Manager When the installation is complete, the Install Complete dialog box opens (Figure 53). Figure 53 Install Complete dialog box 12 Click Done to exit the installation. JDM is now installed on your machine. Removing JDM in Unix or Linux environments In a UNIX or Linux environment, complete the following steps to remove the existing JDM software:... -
Page 171: Device Manager Basics
Do one of the following, depending upon your operating system environment: • In a Microsoft Windows environment, choose All Programs > Nortel > Java Device Manager > DM from the Windows Start menu. • In a UNIX environment, verify that the Device Manager installation directory is in your search path;... -
Page 172: Setting The Device Manager Properties
172 Chapter 4 Getting Started with Device Manager Figure 54 Device Manager window Setting the Device Manager properties The Device Manager communicates with the Ethernet Switch 325/425 using Simple Network Management Protocol (SNMP). The software is shipped with default values set for important communication parameters, such as the polling interval, timeout, and retry count. - Page 173 Chapter 4 Getting Started with Device Manager 173 Figure 55 Properties dialog box Type information and select check boxes. Click OK. Table 28 describes the Properties dialog box fields. Table 28 Properties dialog box fields Area Field Description Polling Status Interval Interval at which status information is gathered (default is 20 seconds).
-
Page 174: Opening A Device
174 Chapter 4 Getting Started with Device Manager Table 28 Properties dialog box fields (continued) Area Field Description SNMP Retry Count Number of times Device Manager sends the same polling request if a response is not returned to Device Manager. You may want to set this field to three or four. - Page 175 Chapter 4 Getting Started with Device Manager 175 Table 29 describes the default access community strings for the Device Manager software. Table 29 SNMP community string default values Access level Description Read-only public Read/write private To display the device view: Do one of the following: •...
- Page 176 176 Chapter 4 Getting Started with Device Manager Table 30 describes the Open Device dialog box fields. Table 30 Open Device dialog box fields Field Description Device Name Either an IP address or a DNS name for the device, entered by the user.
-
Page 177: Device Manager Window
Chapter 4 Getting Started with Device Manager 177 Figure 57 Device view Device Manager window The Device Manager window (Figure 58) has the following parts: • Menu bar • Toolbar • Device view • Status bar Figure 58 Parts of the Device Manager window Menu bar Toolbar Device view... -
Page 178: Toolbar
178 Chapter 4 Getting Started with Device Manager Table 31 describes the Menu Bar commands. Table 31 Menu bar commands Command Description Device Opens the Open Device dialog box. It also allows you to: • Set the Properties used during a Device Manager session •... -
Page 179: Device View
Chapter 4 Getting Started with Device Manager 179 Table 32 describes the toolbar buttons. Table 32 Toolbar buttons Button Name Description Menu bar equivalent Open Opens the Open Device dialog Device > Open Device box. Refresh Refreshes the device view Device >... -
Page 180: Selecting Objects
180 Chapter 4 Getting Started with Device Manager Selecting objects The types of objects contained in the device view are: • A standalone switch (called a unit in the menus and dialog boxes) • A switch stack (called a chassis in the menus and dialog boxes) •... -
Page 181: Selecting Multiple Objects
Chapter 4 Getting Started with Device Manager 181 Selecting multiple objects For instructions on selecting multiple objects of the same type (such as ports or switches of the same type), see Table Table 33 Selecting multiple objects Object to be selected Action To select a block of contiguous ports Drag to select the group of ports... -
Page 182: Leds And Ports
182 Chapter 4 Getting Started with Device Manager Figure 60 Interface tab LEDs and ports The color of LEDs in the device view is the same as the colors of the LEDs on the physical switch. However, the device view does not show blinking activity of the LEDs. -
Page 183: Shortcut Menus
Chapter 4 Getting Started with Device Manager 183 Table 34 describes the status assigned to each color. Table 34 Port color codes Color Description Green Port is operating. Port has been manually disabled. Orange Port has no link. In addition, the Help menu provides a legend that identifies the port colors and their meanings (Figure 61). - Page 184 184 Chapter 4 Getting Started with Device Manager Table 35 describes the Switch unit shortcut menu command on the switch unit shortcut menu. Table 35 Switch unit shortcut menu command Command Description Edit Opens a dialog box that provides basic hardware information about the switch and allows you to set the Rate Limiting configuration for the switch unit.
-
Page 185: Status Bar
Chapter 4 Getting Started with Device Manager 185 Status bar The status bar displays error and informational messages from the software application. These messages are not related to the device being managed. Using the buttons in Device Manager dialog boxes Table 37 describes buttons in Device Manager dialog boxes. -
Page 186: Editing Objects
190 and to the System Monitoring Guide for Nortel Ethernet Switches 325 and 425, Software Release 3.6 (320989-A). This section describes the types of statistics and graphs available, the graph dialog boxes, and the procedure for creating a graph. -
Page 187: Types Of Statistics
Chapter 4 Getting Started with Device Manager 187 Types of statistics The data tables in the statistics dialog boxes list the counters, or categories of statistics being gathered, for the specified object. For example, the categories for ports include Interface, Ethernet Errors, Bridge, and Rmon. Each category can be associated with six types of statistics. - Page 188 188 Chapter 4 Getting Started with Device Manager Figure 64 Line graph Figure 65 Area graph 320985-A Rev 01...
- Page 189 Chapter 4 Getting Started with Device Manager 189 Figure 66 Bar graph Figure 67 Pie graph System Configuration Guide...
-
Page 190: Statistics For Single And Multiple Objects
190 Chapter 4 Getting Started with Device Manager Statistics for single and multiple objects Statistics for a selected object or objects are displayed in the statistics dialog box. The dialog box for a single object shows all six types of statistics for each counter (Figure 68). -
Page 191: Viewing Statistics As Graphs
Chapter 4 Getting Started with Device Manager 191 To change the type of statistics displayed, select a different type from the show list at the bottom of the dialog box. The statistics are updated based on the poll interval shown at the bottom of the dialog box. - Page 192 192 Chapter 4 Getting Started with Device Manager Figure 70 Statistics dialog box for a port Select a tab for the group of statistics you want to view. On the displayed data table, click and drag to select the cells you want to graph.
-
Page 193: Telnet Session
Chapter 4 Getting Started with Device Manager 193 Table 39 describes the buttons in the graph dialog boxes. Table 39 Graph dialog box buttons Button Name Description Stacked “Stacks” data quantities instead of displaying them side-by-side. Horizontal Rotates the graph 90 degrees. Log Scale Changes the scale of the x-axis (of an unrotated graph) from numeric to logarithmic. -
Page 194: Opening An Ssh Connection To The Device
Note: The SSH connection is established only when the device is SSH capable and enabled. For more information on SSH connections, refer to Configuring and Managing Security for Nortel Ethernet Switches 325 and 425, Software Release 3.6 (320988-A). Opening the Web-based management home page From the Device Manager, you can access the Web-based management home page. -
Page 195: Trap Log
Chapter 4 Getting Started with Device Manager 195 • From the Device Manager main menu, choose Actions > Open Home Page. • On the toolbar, click the Open Home Page button. The Web-based management home page opens (Figure 71). Figure 71 Web-based management home page Trap log You can configure an Ethernet Switch 325/425 to send SNMP generic traps. -
Page 196: Online Help
(HP OpenView), you can specify the traps to be sent in V1 format. For more information about traps and trap receivers, refer to Configuring and Managing Security for Nortel Ethernet Switches 325 and 425, Software Release 3.6 (320988-A). Online Help Online Help in Device Manager is context-sensitive. - Page 197 Chapter 4 Getting Started with Device Manager 197 Table 40 describes the Help file locations. Table 40 Help file locations Platform Default path Windows 95, Windows 98, Windows NT, <JDM Installation directory>/help/ Windows 2000, Windows XP hummingbird/v360.zip. After you unzip the file, <JDM Installation directory>/help/ hummingbird/v360/help.html.
- Page 198 198 Chapter 4 Getting Started with Device Manager 320985-A Rev 01...
-
Page 199: Using The Web-Based Management Interface
Chapter 5 Using the Web-based management interface This chapter describes the requirements for using the Web-based management interface and how to use it as a tool to configure your Ethernet Switch 325/425. Requirements To use the Web-based management interface, you need the following items: •... -
Page 200: Logging In To The Web-Based Management Interface
Chapter 5 Using the Web-based management interface Access to the Web management interface must also be enabled for the switch (the default setting) using the Console Interface. For information about enabling Web access, refer to “TELNET/SNMP/Web Access Configuration screen” on page 234. -
Page 201: Menu
Network security does not exist the first time you access the Embedded Web Server. The system administrator must create access parameters and passwords to protect the integrity of your network configuration(s). For more information, refer to Configuring and Managing Security for Nortel Ethernet Switches 325 and 425, Software Release 3.6 (320988-A). Menu... - Page 202 Chapter 5 Using the Web-based management interface Table 41 lists the main headings in the Web-based management user interface and their associated options. Table 41 Main headings and options Main menu titles Option Summary Stack Information (stack mode only) Switch Information Identify Unit Numbers (stack mode only) Stack Numbering (stack mode only) Configuration...
- Page 203 This icon identifies a menu title option with a hyperlink to related pages. This icon is linked to an action, for example, logout, reset, or reset to system defaults. Clicking on the Nortel logo opens the corporate home page in a new Web browser. System Configuration Guide...
-
Page 204: Management
Chapter 5 Using the Web-based management interface Management page When you click a menu option, the corresponding management page opens. Figure 74 shows the page displayed for the Administration > Security > Console option. Figure 74 Console page Note: The Console Stack Password Setting section is active only when the switch is in the stack mode. -
Page 205: Viewing Summary Information
Chapter 5 Using the Web-based management interface • Icons and buttons Icons and buttons perform an action concerning the displayed page or the switch. Some pages include a button that opens another page or updates the values shown on the current page. Some pages include icons that initiate an action, such as reformatting the current displayed data as a bar or pie chart. -
Page 206: Viewing Summary Switch Information
Chapter 5 Using the Web-based management interface Viewing summary switch information You can view summary information about the switch. For example, the unit number and its corresponding physical description and serial number. To view summary switch information: ➨ From the main menu, choose Summary > Switch Information. The Switch Information page opens (Figure 75). -
Page 207: Viewing Stack Information
Chapter 5 Using the Web-based management interface Table 44 Switch Information page fields Item Description Manufacturing Data The date of manufacture of the board in ASCII format. Code Hardware Version The hardware version of the policy switch. Serial Number The serial number of the policy switch. Operational State The current operational state of the device. - Page 208 Chapter 5 Using the Web-based management interface Figure 76 Stack Information page Table 45 describes the fields on the Stack Information and Stack Inventory sections of the Stack Information page. Table 45 Stack Information page fields Section Field Description Stack System Description The name created in the configuration process to identify the Information...
-
Page 209: Changing Stack Numbering
Chapter 5 Using the Web-based management interface Table 45 Stack Information page fields (continued) Section Field Description Stack Inventory Unit The unit number assigned to the device by the network manager. For more information on stack numbering, see page 209. Description The description of the device or its subcomponent. - Page 210 Chapter 5 Using the Web-based management interface Figure 77 Stack Numbering Setting page Table 46 describes the fields on the Stack Numbering Setting page. Table 46 Stack Numbering Setting page fields Item Range Description Current Unit Number 1..8 Unit number previously assigned to the policy switch. The entries in this column are displayed in the order of their current physical cabling with respect to the base unit, and can show nonconsecutive unit numbering if one or more units were...
-
Page 211: Identifying Unit Numbers
Chapter 5 Using the Web-based management interface Identifying unit numbers You can identify unit numbers of the switches participating in a stack configuration by viewing the active LEDs on the front panel of each switch. To identify unit numbers in your configuration: From the main menu, choose Summary >... - Page 212 Chapter 5 Using the Web-based management interface 320985-A Rev 01...
-
Page 213: System Configuration Using The Console Interface
Chapter 6 System configuration using the Console Interface This chapter describes how to configure and manage the Ethernet Switch 325/425 using the menu-driven Console Interface (CI). This chapter covers the following topics: • “IP Configuration/Setup screen” • “SNMP Configuration screen” •... -
Page 214: Ip Configuration/Setup Screen
Chapter 6 System configuration using the Console Interface IP Configuration/Setup screen The IP Configuration/Setup screen (Figure 79) allows you to set or modify the Ethernet Switch 325/425 IP configuration parameters. Data that you enter in the user-configurable fields takes effect as soon as you press Enter. To open the IP Configuration/Setup screen: ➨... - Page 215 Chapter 6 System configuration using the Console Interface Table 47 IP Configuration/Setup screen fields Field Description BootP Request One of four modes of operation for BootP. (See “Choosing a BootP request mode” on Mode page 216 for details about the four modes.) Default Value BootP When Needed Range...
-
Page 216: Choosing A Bootp Request Mode
Chapter 6 System configuration using the Console Interface Table 47 IP Configuration/Setup screen fields (continued) Field Description In-Band Subnet The subnet address mask associated with the in-band IP address shown on the screen Mask (see In-Band Switch IP address field). Network routers use the subnet mask to determine the network or subnet address portion of a host’s IP address. -
Page 217: Bootp When Needed
Chapter 6 System configuration using the Console Interface • BootP or Last Address Note: Whenever the switch is broadcasting BootP requests, the BootP process eventually times out if a reply is not received. When the process times out, the BootP request mode automatically changes to BootP Disabled mode. -
Page 218: Bootp Disabled
Chapter 6 System configuration using the Console Interface • If the switch does not receive a BootP reply, the switch cannot be managed using the in-band IP address set from the console terminal. If an IP address is not currently in use, these actions take effect immediately. If an IP address is currently in use, these actions take effect only after the switch is reset or power cycled. -
Page 219: Snmp Configuration Screen
Chapter 6 System configuration using the Console Interface SNMP Configuration screen The SNMP Configuration screen (Figure 80) allows you to set or modify the SNMP configuration parameters. To open the SNMP Configuration screen: ➨ Choose SNMP Configuration (or press m) from the main menu. Figure 80 SNMP Configuration screen SNMP Configuration Read-Only Community String:... - Page 220 Disabled 1 The Trap IP Address and Community String fields can be set using a MIB table (in a Nortel proprietary MIB). The status of the row in the MIB table can be set to Ignore. If the row status is set to Ignore, the fields appear to be set when viewed from the console terminal;...
-
Page 221: System Characteristics Screen
Chapter 6 System configuration using the Console Interface System Characteristics screen The System Characteristics screen (Figure 81) allows you to view system characteristics and contains three user-configurable fields: sysContact, sysName, and sysLocation. To open the System Characteristics screen: ➨ Choose System Characteristics (or press s) from the main menu. Figure 81 System Characteristics screen System Characteristics Operation Mode:... - Page 222 Chapter 6 System configuration using the Console Interface Table 49 describes the System Characteristics screen fields Table 49 System Characteristics screen fields Field Description Operation Mode Read-only field that indicates the operation mode of the unit, for example: • When the unit is part of a stack configuration, the (read-only) field indicates the unit is operational in a stack, and lists the current unit number of this switch.
-
Page 223: Console/Comm Port Configuration Screen
Chapter 6 System configuration using the Console Interface Table 49 System Characteristics screen fields (continued) Field Description sysServices A read-only field that indicates the switch’s physical and data link layer functionality. sysContact The name and phone number of the person responsible for the switch. Default Value Zero-length string Range... - Page 224 231). Therefore, ensure you are aware of the valid usernames (default RW and RO) before you change passwords. For information about modifying existing usernames, see Configuring and Managing Security for Nortel Ethernet Switches 325 and 425, Software Release 3.6 (320988-A). 320985-A Rev 01...
- Page 225 Chapter 6 System configuration using the Console Interface Table 50 describes the Console/Comm Port Configuration screen fields. Table 50 Console/Comm Port Configuration screen fields Field Description Comm Port Data Bits A read-only field that indicates the current console/comm port data bit setting. Comm Port Parity A read-only field that indicates the current console/comm port parity setting.
- Page 226 Chapter 6 System configuration using the Console Interface Table 50 Console/Comm Port Configuration screen fields (continued) Field Description Console Switch Enables password protection for accessing the console interface (CI) of a Password Type standalone switch through a console terminal. If you set this field to Local Password, you can use the Logout option to restrict access to the CI.
- Page 227 Si olvida las nuevas contraseñas, no podrá acceder al interfaz de la consola. En ese caso, póngase en contacto con Nortel para obtener ayuda al respecto. Attenzione: In caso di modifica delle password predefinite nel sistema, assicurarsi di annotare le nuove password e di conservarle in un luogo sicuro.
- Page 228 Chapter 6 System configuration using the Console Interface Table 50 Console/Comm Port Configuration screen fields (continued) Field Description Console Read-Only When the Console Switch Password field is set to Required (for Telnet, for Stack Password Console, or for Both), this field allows read-only password access to the CI of any participating switch in a stack configuration.
- Page 229 Si olvida las nuevas contraseñas, no podrá acceder al interfaz de la consola. En ese caso, póngase en contacto con Nortel para obtener ayuda al respecto. Attenzione: In caso di modifica delle password predefinite nel sistema, assicurarsi di annotare le nuove password e di conservarle in un luogo sicuro.
- Page 230 Chapter 6 System configuration using the Console Interface Table 50 Console/Comm Port Configuration screen fields (continued) Field Description Primary RADIUS Server The IP address of the Primary RADIUS server. Default 0.0.0.0 (no IP address assigned) Range Four-octet dotted-decimal notation, where each octet is represented as a decimal value, separated by a decimal point Secondary RADIUS The IP address of the Secondary RADIUS server.
-
Page 231: Logging In
Enter a valid username and password and press Enter. You are then directed to the Console Interface main menu. For information about modifying the existing usernames, see Configuring and Managing Security for Nortel Ethernet Switches 325 and 425, Software Release 3.6 (320988-A). System Configuration Guide... -
Page 232: Renumber Stack Units Screen
Chapter 6 System configuration using the Console Interface Renumber Stack Units screen The Renumber Stack Units screen (Figure 75) allows you to renumber the units configured in the stack. When selected, this option identifies the unit number of each unit in the stack configuration by lighting the corresponding number of (100 Mb/s port) LEDs on each unit for approximately 10 seconds. -
Page 233: Hardware Unit Information Screen
Yes. Renumbering resets the switch with the current configuration values. When you select this option, the switch resets, runs a self-test, then displays the Nortel logo Ctrl+ screen. After you press Y at the screen prompt, the console screen temporarily displays the (standalone) Ethernet Switch 325/425 main menu. -
Page 234: Telnet/Snmp/Web Access Configuration Screen
Chapter 6 System configuration using the Console Interface Figure 85 Hardware Unit Information screen Hardware Unit Information Unit# Switch Model GBIC1 Model GBIC2 Model SW Version ----- ---------------- ---------------- ---------------- ------------- 425-48T None None v3.6.0 Press Ctrl-N to display next screen. Press Ctrl-R to return to previous menu. - Page 235 Chapter 6 System configuration using the Console Interface Figure 86 TELNET Configuration screen TELNET/SNMP/Web Access Configuration TELNET: Access: Use List: Login Timeout :[ 1 minute ] TELNET: [ Enabled [ Yes ] Login Retries :[ 3 ] SNMP : [ Enabled [ Yes ] Inactivity Timeout:[ 15 minutes ] : [ Enabled...
- Page 236 0 to 60 minutes (0 indicates “no timeout”) System Event Logging Specifies the types of events that are displayed in the Event Log screen (see Monitoring Guide for Nortel Ethernet Switches 325 and 425, Software Release 3.6 (320989-A). Default value...
-
Page 237: Software Download Screen
Chapter 6 System configuration using the Console Interface Table 52 TELNET/SNMP/Web Access Configuration screen fields (continued) Field Description Allowed Source Specifies up to 10 user-assigned host IP addresses that are allowed Telnet access to the IP Address Default value 0.0.0.0 (no IP address assigned) Range Four-octet dotted-decimal notation, where each octet is represented as a decimal value, separated by a decimal point... - Page 238 Chapter 6 System configuration using the Console Interface Precaución: No interrumpa la alimentación del dispositivo durante el proceso de descarga del software. Si lo hace, puede alterar la imagen de la programación (firmware). Attenzione: Non interrompere l'alimentazione elettrica al dispositivo durante il processo di scaricamento del software.
- Page 239 Chapter 6 System configuration using the Console Interface Figure 87 Software Download screen for an Ethernet Switch 325/425 stack Software Download Software Image Filename: [ docu/hummingbird_360.img ] Diagnostics Image Filename: TFTP Server IP Address: [ 198.202.188.174 ] Start TFTP Load of New Image: [ No Enter text, press <Return>...
-
Page 240: Led Indications During The Download Process
Chapter 6 System configuration using the Console Interface Table 53 Software Download screen fields (continued) Field Description Start TFTP Load Specifies whether to start the download of the switch software image (default is No). of New Image Use the spacebar to toggle the selection to Yes. Enter Press to initiate the software download process. -
Page 241: Binary Configuration Download
Chapter 6 System configuration using the Console Interface The Configuration File Download/Upload screen (Figure 89) allows you to store and retrieve your switch/stack configuration parameters on a TFTP server. It also allows you to enable and disable the autosave feature. Binary configuration download You can retrieve the configuration parameters of a standalone switch or an entire stack and use the retrieved parameters to automatically configure a replacement... - Page 242 Chapter 6 System configuration using the Console Interface To open the Configuration File Download/Upload screen (Figure 89): ➨ Choose Configuration File Download/Upload (or press c) from the main menu Figure 89 Configuration File Download/Upload screen Configuration File Download/Upload Configuration Image Filename: TFTP Server IP Address: [ 198.202.188.174 ] Copy Configuration Image to Server:...
-
Page 243: Requirements
Chapter 6 System configuration using the Console Interface Table 54 Configuration File Download/Upload screen fields (continued) Field Description Copy Configuration Specifies whether to copy the presently configured switch/stack parameters to Image to Server the specified TFTP server (default is No). Use the spacebar to toggle the selection to Yes. -
Page 244: Ascii Configuration File Download
Chapter 6 System configuration using the Console Interface Table 55 describes configuration file parameter information. Table 55 Parameters not saved to the configuration file These parameters are not saved Used in this screen See page In-Band Stack IP Address IP Configuration/Setup In-Band Switch IP Address In-Band Subnet Mask Default Gateway... - Page 245 Chapter 6 System configuration using the Console Interface Figure 90 ASCII Configuration File Download screen ASCII Configuration File Download ASCII Configuration Filename: TFTP Server IP Address: [ 0.0.0.0 ] Retrieve Configuration File from Server: [ No Last Manual Configuration Status: Passed Last Auto Configuration Status: Passed...
- Page 246 Chapter 6 System configuration using the Console Interface Table 56 ASCII Configuration File Download/Upload screen fields Field Description Retrieve Configuration File This field specifies whether to retrieve the stored ASCII configuration file from Server from the specified TFTP server (default value is No). If you choose Yes, the download process begins immediately and, when the download is completed, the switch/stack will be configured based on the CLI commands in the ASCII configuration file.
-
Page 247: Enabling And Disabling Autosave
Chapter 6 System configuration using the Console Interface Enabling and disabling autosave The Autosave Configuration screen (Figure 91) allows you to enable and disable the autosave feature on the switch or stack. To view the Autosave Configuration screen: ➨ From the Configuration File Menu, choose Autosave Configuration (or press s). -
Page 248: Using Sntp
Chapter 6 System configuration using the Console Interface Using SNTP The Simple Network Time Protocol (SNTP) feature synchronizes the Universal Coordinated Time (UTC) to an accuracy within 1 second. This feature adheres to the IEEE RFC 2030 (MIB is the s5agent). With this feature, the system can obtain the time from any RFC 2030-compliant NTP/SNTP server. -
Page 249: Setting Local Time Zone
Chapter 6 System configuration using the Console Interface Setting local time zone SNTP uses Universal Coordinated Time (UTC) for all time synchronizations so it is not affected by different time zones. In order for the switch report the correct time for your local time zone and daylight savings time, you must use the following commands: •... - Page 250 Chapter 6 System configuration using the Console Interface • ip domain-name command • no ip domain-name command • default ip domain-name command For more information on these commands, see “System configuration using the CLI” on page 251. 320985-A Rev 01...
-
Page 251: System Configuration Using The Cli
Chapter 7 System configuration using the CLI In the Ethernet Switches 325 and 425, the Command Line Interface (CLI) commands allows you to display and modify the switch configuration while the switch is operating. This chapter includes information about general switch maintenance, such as setting up access parameters, upgrading the software, and setting the speed. -
Page 252: Assigning And Clearing Ip Addresses
252 Chapter 7 System configuration using the CLI Configuring the switch IP address, subnet mask and default gateway IP notation To enter IP addresses and subnet masks in the CLI, enter both the IP address and the subnet mask in dotted decimal notation (XXX.XXX.XXX.XXX). Assigning and clearing IP addresses Using the CLI, you can assign IP addresses and Gateway addresses, clear these addresses, and view configured IP addresses. -
Page 253: No Ip Address Command
Chapter 7 System configuration using the CLI 253 Table 58 describes the parameters and variables for the command. ip address Table 58 ip address command parameters and variables Parameters and Description variables stack|switch Sets the stack the IP address and subnet mask or the switch IP address and netmask. -
Page 254: Ip Default-Gateway Command
254 Chapter 7 System configuration using the CLI Note: When you change the IP address or subnet mask, you may lose connection to Telnet and the Web. You also disable any new Telnet connection, and you must connect to the serial console port to configure a new IP address. -
Page 255: Show Ip Command
Chapter 7 System configuration using the CLI 255 command has no parameters or variables. no ip default-gateway Note: When you change the IP gateway address, you may lose connection to Telnet and the Web. You also may disable any new Telnet connection required to connect to the serial console port to configure a new IP Gateway address. -
Page 256: Show Ip Address Command
256 Chapter 7 System configuration using the CLI Figure 92 show ip command output 425-48T(config-if)#show ip BootP Mode: BootP Disabled Configured In Use Last BootP --------------- --------------- --------------- Stack IP Address: 0.0.0.0 0.0.0.0 Switch IP Address: 192.168.151.175 192.168.151.175 0.0.0.0 Subnet Mask: 255.255.255.0 255.255.255.0 0.0.0.0... -
Page 257: Assigning And Clearing Ip Addresses For Specific Units
Chapter 7 System configuration using the CLI 257 Figure 93 displays a sample output of the command. show ip address Figure 93 show ip address command output 425-24T(config)#show ip address unit 1 Configured In Use Last BootP --------------- --------------- --------------- Stack IP Address: 0.0.0.0 0.0.0.0... -
Page 258: No Ip Address Unit Command
258 Chapter 7 System configuration using the CLI Note: When you change the IP address or subnet mask, you may lose connection to Telnet and the Web. no ip address unit command command sets the IP address for the specified unit in no ip address unit a stack to all zeros (0). -
Page 259: Pinging
Chapter 7 System configuration using the CLI 259 Table 65 describes the parameters and variables for the default ip address command. unit Table 65 default ip address unit command parameters and variables Parameters and Description variables unit <1-8> Zeroes out the IP address for the specified unit. Note: When you change the IP gateway, you may lose connection to Telnet and the Web. - Page 260 260 Chapter 7 System configuration using the CLI Table 66 describes the parameters and variables for the command. ping Table 66 ping command parameters and variables Parameters and Description variables XXX.XXX.XXX.XXX Specify the IP address of the target device in dotted-decimal notation.
-
Page 261: Resetting The Switch To Default Configuration
Chapter 7 System configuration using the CLI 261 Resetting the switch to default configuration command resets the switch or stack to its restore factory-default default configuration. The syntax for the command is: restore factory-default restore factory-default [ -y ] where the parameter instructs the switch not to prompt for confirmation. -
Page 262: Show Ip Dns Command
262 Chapter 7 System configuration using the CLI • “ip domain-name command” on page 265 • “no ip domain-name command” on page 265 • “default ip domain-name command” on page 265 show ip dns command command displays the DNS domain name, as well as any show ip dns configured DNS servers. -
Page 263: Ip Name-Server Command
DNS domain name, if set, is appended. Or the hostname can be a full hostname, such as fred.ca.nortel.com.) If the device receives the packet, it sends a ping reply. When the switch receives the reply, it displays a message indicating that the specified IP address is being used. -
Page 264: No Ip Name-Server Command
264 Chapter 7 System configuration using the CLI command is in the config command mode. ip name-server Note: You can add up to 3 servers; adding one at a time. Table 68 describes the parameters and variables for the ip name-server command. -
Page 265: Ip Domain-Name Command
Chapter 7 System configuration using the CLI 265 ip domain-name command command sets the system’s DNS domain name. The ip domain-name syntax for the command is: ip domain-name ip domain-name [<LINE>] command is in the config command mode. ip domain-name Table 70 describes the parameters and variables for the ip domain-name... -
Page 266: Configuration Management
266 Chapter 7 System configuration using the CLI command is in the config command mode. default ip domain-name command has no parameters or variables. default ip domain-name Configuration Management This section covers the following topics: • “Automatically loading Configuration file” on page 266 •... -
Page 267: Show Config-Network Command
Chapter 7 System configuration using the CLI 267 Table 71 describes the parameters and variables for the configure network command. Table 71 configure network command parameters and variables Parameters and variables Description load-on-boot Specifies the settings for automatically loading a configuration file when {disable|use-bootp|use-config the system boots: •... -
Page 268: Ascii Configuration Generator
268 Chapter 7 System configuration using the CLI command has no parameters or values. show config-network Figure 97 shows the output for the command show config-network Figure 97 show config-network command 425-48T(config-if)#show config-network Auto-Load Configuration On Boot: Disabled Configuration Filename: TFTP Server IP Address: 198.202.188.174 Last Auto Configuration Status:... -
Page 269: Show Running-Config Command
Chapter 7 System configuration using the CLI 269 show running-config command This command displays the current configuration of switch or a stack as a series of CLI commands. This command must be executed in the configuration mode and has no parameters or variables. -
Page 270: Customizing Your System
270 Chapter 7 System configuration using the CLI copy running-config tftp command This command copies contents of the current configuration file to another file on the TFTP server. The syntax of the command is copy running-config tftp {<address> <filename>} This command can be executed in the config mode. Table 72 describes the parameters and variables of this command. -
Page 271: Show Terminal Command
Chapter 7 System configuration using the CLI 271 • “show terminal command” • “terminal command” on page 271 show terminal command command displays the current serial port information, show terminal which includes connection speed, as well as the terminal width and length in number of characters. -
Page 272: Show Cli Command
272 Chapter 7 System configuration using the CLI Table 73 describes the parameters and variables for the command. terminal Table 73 terminal command parameters and variables Parameters and Description variables speed Sets the transmit and receive baud rates for the terminal. You can {2400|4800|9600| set the speed at one of the five options shown;... -
Page 273: Displaying System Information
Chapter 7 System configuration using the CLI 273 Figure 100 show cli command output 425-48T(config)#show cli info Inactivity Timeout: 15 minute(s) Login Timeout: 1 minute(s) Login Retries: More: True Screen Lines: 425-48T(config)#RW *************** *************** 425-48T# Displaying system information command displays the current system characteristics. show sys-info Note: You must have SNTP enabled and configured to display GMT time. -
Page 274: Setting Boot Parameters
274 Chapter 7 System configuration using the CLI Figure 101 show sys-info command output 425-48T(config-if)#show sys-info Operation Mode: Switch MAC Address: 00-0F-CD-BF-1E-80 Reset Count: Last Reset Type: Management Reset Power Status: Primary Power Autotopology: Enabled Local GBIC Type: (port 49) GBIC is missing Local GBIC Type: (port 50) GBIC is missing sysDescr:... -
Page 275: Ip Bootp Server Command
Chapter 7 System configuration using the CLI 275 command is in the privExec command mode. boot Table 75 describes the parameters and variables for the command. boot Table 75 boot command parameters and variables Parameters and Description variables default Restores switch or stack to factory-default settings after rebooting. Note: When you reset to factory defaults, the stack operational mode, last reset count, and reason for last reset will not be set to factory defaults. -
Page 276: Setting Tftp Parameters
276 Chapter 7 System configuration using the CLI no ip bootp server command command disables the BootP server. The syntax for no ip bootp server command is: no ip bootp server no ip bootp server command is in the config command mode. no ip bootp server command has no parameters or values. -
Page 277: Show Tftp-Server Command
Chapter 7 System configuration using the CLI 277 show tftp-server command command displays the IP address of the server used for show tftp-server all TFTP-related transfers. The syntax for the command is: show tftp-server show tftp-server command is in the privExec command mode. show tftp-server command has no parameters or variables. -
Page 278: No Tftp-Server Command
278 Chapter 7 System configuration using the CLI no tftp-server command command clears the TFTP server IP address to 0.0.0.0. no tftp-server The syntax of the command is: no tftp-server no tftp-server command is in the config command mode. no tftp-server command has no parameters or values. -
Page 279: Setting The Default Management Interface
On startup, the switch or stack displays the banner and prompts the user to press [Ctrl}+y. After entering these characters, the system displays either a menu or the Nortel Command Line Interface (NCLI) prompt, depending on which is set using this command. -
Page 280: Customizing The Opening Banner
You can customize the banner that appears when you connect to the Ethernet Switch 325/425. You can customize the text that reads . However you NORTEL cannot customize the second line that reads Enter [Ctrl]+y to begin The Banner Control feature provides an option to specify the banner text. If you choose not to display the banner, the system enters the command mode through the default command interface. -
Page 281: Show Banner Command
Chapter 7 System configuration using the CLI 281 command for displaying banner is in the config mode. banner Table 81 describes the parameters for the banner command. Table 81 banner command parameters Parameters Description static Displays the default agent-banner. custom Displays the custom agent-banner. -
Page 282: Displaying The Arp Table
282 Chapter 7 System configuration using the CLI command is in the config mode. no banner Displaying the ARP table command displays the arp table of the device. The show arp-table syntax for the command is: show arp-table show arp-table command is in the exec command mode. -
Page 283: Show Interfaces Command
Chapter 7 System configuration using the CLI 283 show interfaces command command displays the current configuration and status show interfaces of all interfaces. The syntax for the command is: show interfaces show interfaces [names] [<portlist>] command is in the exec command mode. show interfaces Table 83 describes the parameters and variables for the... -
Page 284: Show Interfaces Config Command
284 Chapter 7 System configuration using the CLI Figure 105 show interfaces command output 425-48T(config-if)#show interfaces Status Auto Flow Port Trunk Admin Oper Link LinkTrap Negotiation Speed Duplex Control ---- ----- ------- ---- ---- -------- ----------- -------- ------ ------- Enable Down Down Enabled Enabled Enable... -
Page 285: Saving The Configuration To Nvram
Chapter 7 System configuration using the CLI 285 Table 83 describes the parameters and variables for the show interfaces command. config Table 84 show interfaces config command parameters and variables Parameters and Description variables <portlist> Enter the ports you want to display. Figure 104 displays a sample output of the show interfaces config... -
Page 286: Write Memory Command
286 Chapter 7 System configuration using the CLI copy config nvram command is in the privExec command mode. copy config nvram command has no parameters or variables. copy config nvram Note: The system automatically issues the copy config nvram command periodically. See “Enabling and disabling autosave”... -
Page 287: Show Autosave Command
Chapter 7 System configuration using the CLI 287 Enabling and disabling autosave The Ethernet Switch 325/425 performs a check every sixty seconds to detect changes in the configuration file or a new log message in the non-volatile storage. If any of these two events occurs, the switch automatically saves it’s configuration and the non-volatile log to flash memory. -
Page 288: Autosave Enable Command
288 Chapter 7 System configuration using the CLI Figure 107 show autosave command output 425-48T(config-if)#show autosave Auto Save: Enabled 425-48T(config-if)# autosave enable command command enables the autosave feature. The syntax for autosave enable command is: autosave enable autosave enable command is in the config command mode. autosave enable command has no parameters or variables. -
Page 289: Setting Time On Network Elements Using Simple Network Time Protocol
Chapter 7 System configuration using the CLI 289 Setting time on network elements using Simple Network Time Protocol The Simple Network Time Protocol (SNTP) feature synchronizes the Universal Coordinated Time (UTC) to an accuracy within 1 second. This feature adheres to the IEEE RFC 2030 (MIB is the s5agent). -
Page 290: Sntp Enable Command
290 Chapter 7 System configuration using the CLI Figure 108 show sntp command output 425-48T(config-if)#show sntp SNTP Status: Disabled Primary server address: 0.0.0.0 Secondary server address: 0.0.0.0 Sync interval: 24 hours Last sync source: 0.0.0.0 Primary server sync failures: Secondary server sync failures: 0 Last sync time: Not Set Next sync time:... -
Page 291: Sntp Server Primary Address Command
Chapter 7 System configuration using the CLI 291 sntp server primary address command command specifies the IP addresses of sntp server primary address the primary NTP server. The syntax for the sntp server primary address command is: sntp server primary address <A.B.C.D> command is in the config command sntp server primary address mode. -
Page 292: No Sntp Server Command
292 Chapter 7 System configuration using the CLI Table 86 describes the parameters and variables for the sntp server command. secondary address Table 86 sntp server secondary address command parameters and variables Parameters and Description variables <A.B.C.D> Enter the IP address of the secondary NTP server. The default is 0.0.0.0. -
Page 293: Sntp Sync-Now Command
Chapter 7 System configuration using the CLI 293 sntp sync-now command command forces a manual synchronization with the NTP sntp sync-now server. Note: You must have SNTP enabled before this command can take effect. The syntax for the command is: sntp sync-now sntp sync-now command is in the config command mode. -
Page 294: Setting Local Time Zone
294 Chapter 7 System configuration using the CLI Setting local time zone SNTP uses Universal Coordinated Time (UTC) for all time synchronizations so it is not affected by different time zones. In order for the switch report the correct time for your local time zone and daylight savings time, you must use the following commands: •... -
Page 295: No Clock Time-Zone
Chapter 7 System configuration using the CLI 295 no clock time-zone command disables the clock time zone feature. The no clock time-zone syntax for the command is: no clock time-zone no clock time-zone command is in the config command mode. no clock time-zone command has no parameters or variables. -
Page 296: No Clock Summer-Time
296 Chapter 7 System configuration using the CLI no clock summer-time command disables the daylight savings time no clock summer-time feature. The syntax for the command is: no clock summer-time no clock summer-time command is in the config command mode. no clock summer-time command has no parameters or variables. -
Page 297: Enabling Autopology
Offset: 60 minutes. Timezone will be 'DST' Enabling Autopology You can enable the Optivity* Autopology* protocol using the CLI. Refer to www.nortel.com/support for information on Autopology. (The product family for Optivity and Autotopology is Data and Internet.). This section covers the following commands: •... -
Page 298: No Autotopology Command
298 Chapter 7 System configuration using the CLI no autotopology command command disables the Autotopology protocol. The no autotopology syntax for the command is: no autotopology no autotopology command is in the config command mode. no autotopology command has no parameters or values. no autotopology default autotopology command command enables the Autotopology protocol. -
Page 299: Show Autotopology Nmm-Table
1/37 192.168.151.171 0x000115 000F6A822EC1 325-24G 12 Yes HTBT 1/21 1/37 192.168.151.172 0x000115 0009978982C1 460-24T-PWR 12 Yes HTBT 1/21 1/37 192.168.151.174 0x000113 000F6A823621 325-24T 12 Yes HTBT 1/19 1/37 192.168.151.176 0x000107 000F3DE52801 3510-24T 12 Yes HTBT 1/ 7 System Configuration Guide... -
Page 300: Lldp Command
300 Chapter 7 System configuration using the CLI Configuring LLDP using the CLI You can enable the LLDP using the CLI. For more information about LLDP, see “Link Layer Discovery Protocol (IEEE 802.1ab)” on page 40. This section covers the following commands: •... -
Page 301: Default Lldp Command
Chapter 7 System configuration using the CLI 301 Table 58 describes the parameters and variables for the command. lldp Table 91 lldp command parameters and variables Parameters and Description variables Sets the interval between successive transmission cycles. tx-interval <5-327698> tx-hold-multiplier Sets the multiplier for tx-interval used to compute the Time To Live <2-10>... -
Page 302: Lldp Port Config Notification Command
302 Chapter 7 System configuration using the CLI Table 92 default lldp command parameters and variables Parameters and Description variables reinit-delay Sets reinitialize delay to the default value (2). tx-delay Sets transmission delay to the default value (2). notification-interval Sets notification interval to the default value (5). lldp port config notification command command enables notification when lldp port config notification... -
Page 303: Default Lldp Port Config Notification Command
Chapter 7 System configuration using the CLI 303 Table 94 describes the parameters and variables for the no lldp port config command. notification Table 94 no lldp port config notification command parameters and variables Parameters and Description variables port <portlist> Specifies the ports affected by the command. -
Page 304: No Lldp Tx-Tlv Command
304 Chapter 7 System configuration using the CLI Table 96 describes the parameters and variables for the command. lldp tx-tlv Table 96 lldp tx-tlv command parameters and variables Parameters and Description variables port <portlist> Specifies the ports affected by the command. port-desc Port description TLV sys-name... -
Page 305: Default Lldp Tx-Tlv Command
Chapter 7 System configuration using the CLI 305 default lldp tx-tlv command command specifies the optional TLVs not to default lldp tx-tlv include in the transmitted LLDPDUs (by default, the optional TLVs are not included in LLDPDUs). The syntax for the command default lldp tx-tlv default lldp tx-tlv [port <portlist>] [port-desc] [sys-name]... -
Page 306: No Lldp Port Status Command
306 Chapter 7 System configuration using the CLI Table 99 describes the parameters and variables for the lldp port status command. Table 99 lldp port status command parameters and variables Parameters and Description variables port <portlist> Specifies the ports affected by the command. Enables LLDPU receive only. -
Page 307: Show Lldp Command
Chapter 7 System configuration using the CLI 307 command is in the config-if command default lldp port status mode. Table 101 describes the parameters and variables for the default lldp port command. status Table 101 default lldp port status command parameters and variables Parameters and Description variables... - Page 308 308 Chapter 7 System configuration using the CLI Figure 113 displays the output from the show lldp local-sys-data command. Figure 113 show lldp local-sys-data command output 425>show lldp local-sys-data ------------------------------------------------------------------------- LLDP local-sys-data chassis ------------------------------------------------------------------------- ChassisIdSubtype ChassisId SysName SysCap Supported Enabled SysDesc ------------------------------------------------------------------------- MAC address...
-
Page 309: Show Lldp Port Command
Chapter 7 System configuration using the CLI 309 Figure 114 displays the output from the show lldp mgmt-sys-data command. Figure 114 show lldp mgmt-sys-data command output 425>show lldp mgmt-sys-data ------------------------------------------------------------------------- lldp mgmt-sys-data ------------------------------------------------------------------------- ------------------------------------------------------------------------- MgmtAddr MgmtIfId MgmtAddrOID ------------------------------------------------------------------------- ipV4 10.128.100.100 1.3.6.1.4.1.45.3.57.1 ------------------------------------------------------------------------- Figure 115... - Page 310 310 Chapter 7 System configuration using the CLI Table 102 describes the parameters and variables for the show lldp port command. Table 103 show lldp port command parameters and variables Parameters and Description variables port <portlist> Specifies the ports affected by the command. neighbor Displays LLDP neighbors.
- Page 311 Chapter 7 System configuration using the CLI 311 Figure 117 displays the output from the show lldp port command. neighbor-mgmt-addr Figure 117 show lldp port neighbor-mgmt-addr command output 425>show lldp port 1/1 neighbor-mgmt-addr ------------------------------------------------------------------------ lldp neighbor-mgmt-addr ------------------------------------------------------------------------ ------------------------------------------------------------------------ Port Time Index ChassisIdSubtype ChassisId PortIdSubtype...
-
Page 312: Configuring Leds On The Display Panel
312 Chapter 7 System configuration using the CLI Figure 119 show lldp port tx-stats command output 425>show lldp port 1/1 tx-stats ------------------------------------------------------------------------- lldp tx-stats ------------------------------------------------------------------------- ------------------------------------------------------------------------- Port Frames ------------------------------------------------------------------------- ------------------------------------------------------------------------- Figure 120 displays the output from the command. show lldp stats Figure 120 show lldp port tx-tlv command output 425>show lldp port 1/1 tx-tlv ------------------------------------------------------------------------... -
Page 313: Configuring Ui Button
Chapter 7 System configuration using the CLI 313 Table 104 describes the parameters for the command. blink-leds Table 104 blink-leds command parameters and variables Parameters and Variables Description Sets the LEDs to stop blinking. time Indicates the duration for the LEDs to blink in order to identify the unit. -
Page 314: Ui-Button Unit Command
314 Chapter 7 System configuration using the CLI ui-button unit command command enables UI button on selected unit in the range ui-button unit of <1-8>. Note: This command is specific to stacking mode only. The syntax for the command is: ui-button unit ui-button unit <unit #>... -
Page 315: Upgrading Software
Chapter 7 System configuration using the CLI 315 default ui-button command command restores UI button to its default default ui-button configuration. The syntax for the command is: default ui-button default ui-button command is in the config command mode. default ui-button command has no parameters or values. -
Page 316: Download Command
316 Chapter 7 System configuration using the CLI • “download command” download command command upgrades the software for the Ethernet Switches 325 download and 425. You can upgrade both the software image and the diagnostics image. If you upgrade to a stack configuration, the entire stack will be upgraded, and the new image is loaded onto every unit of the stack. - Page 317 Chapter 7 System configuration using the CLI 317 Table 105 download command parameters and variables Parameters and Description variables diag <filename> Enter the name of the Ethernet Switches 325 and 425 diagnostics image you want to download. no-reset Download the specified software without resetting the unit. The software download process automatically completes without user intervention.
- Page 318 318 Chapter 7 System configuration using the CLI 320985-A Rev 01...
-
Page 319: Ethernet Port Management Using The Cli
Chapter 8 Ethernet port management using the CLI This chapter describes how to enable a port, name a port and enable rate limiting. This chapter covers the following topics: • “Enabling or disabling a port” • “Naming ports” on page 321 •... -
Page 320: No Shutdown Command
320 Chapter 8 Ethernet port management using the CLI Table 106 describes the parameters and variables for the shutdown [port command. <portlist>] Table 106 shutdown [port <portlist>] command parameters and variables Parameters and Description variables port <portlist> Specifies the port numbers to shut down or disable. Enter the port numbers you want to disable. -
Page 321: Naming Ports
Chapter 8 Ethernet port management using the CLI 321 Table 107 describes the parameters and variables for the no shutdown command. Table 107 no shutdown command parameters and variables Parameters and Description variables port <portlist> Specifies the port numbers to enable. Enter the port numbers you want to disable. -
Page 322: No Name Command
322 Chapter 8 Ethernet port management using the CLI Table 108 describes the parameters and variables for the command. name Table 108 name command parameters and variables Parameters and Description variables port <portlist> Specifies the port numbers to name. Note: If you omit this parameter, the system uses the port number you specified in the command. -
Page 323: Setting Port Speed
Chapter 8 Ethernet port management using the CLI 323 Table 110 describes the parameters and variables for the default name command. Table 110 default name command parameters and variables Parameters and Description variables port <portlist> Specifies the port numbers to clear of names. Note: If you omit this parameter, the system uses the port number you specified in the command. -
Page 324: Default Speed Command
324 Chapter 8 Ethernet port management using the CLI Table 111 describes the parameters and variables for the command. speed Table 111 speed command parameters and variables Parameters and Description variables port <portlist> Specifies the port numbers to configure the speed. Enter the port numbers you want to configure. -
Page 325: Duplex Command
Chapter 8 Ethernet port management using the CLI 325 Table 112 describes the parameters and variables for the default speed command. Table 112 default speed command parameters and variables Parameters and Description variables port <portlist> Specifies the port numbers to set the speed to factory default. Enter the port numbers you want to set. -
Page 326: Default Duplex Command
326 Chapter 8 Ethernet port management using the CLI Note: When you set the duplex mode for autonegotiation, ensure that the other side of the link is also set for autonegotiation. default duplex command command sets the duplex operation for a port to the default duplex factory default duplex value. -
Page 327: Flowcontrol Command
Chapter 8 Ethernet port management using the CLI 327 flowcontrol command command is used only on Gigabit Ethernet ports and controls flowcontrol the traffic rates during congestion. The syntax for the command is: flowcontrol flowcontrol [port <portlist>] {asymmetric|symmetric|auto|disable} command is in the config-if mode. flowcontrol Table 115 describes the parameters and variables for the... -
Page 328: Default Flowcontrol Command
328 Chapter 8 Ethernet port management using the CLI Table 116 describes the parameters and variables for the no flowcontrol command. Table 116 no flowcontrol command parameters and variables Parameters and Description variables port <portlist> Specifies the port numbers to disable flow control. Note: If you omit this parameter, the system uses the port number you specified in the command. -
Page 329: Enabling Rate-Limiting
Chapter 8 Ethernet port management using the CLI 329 Enabling rate-limiting You can limit the percentage of multicast traffic, or broadcast traffic, or both using the CLI. For more information about rate-limiting, refer to “Rate Limiting Configuration screen” on page 115. -
Page 330: Rate-Limit Command
330 Chapter 8 Ethernet port management using the CLI rate-limit command command configures rate-limiting on the switch. rate-limit The syntax for the command is: rate-limit rate-limit [multicast <pct>] [broadcast <pct>] [both <pct>] command is in the config-if command mode. rate-limit Table 118 describes the parameters and variables for the rate-limit... -
Page 331: Default Rate-Limit Command
Chapter 8 Ethernet port management using the CLI 331 default rate-limit command command restores the rate-limiting value for the default rate-limit switch to the default setting. The syntax for the command default rate-limit default rate-limit command is in the config-if command mode. default rate-limit Enabling Custom Autonegotiation Advertisements (CANA) -
Page 332: Show Auto-Negotiation-Capabilities Command
332 Chapter 8 Ethernet port management using the CLI command is in the show auto-negotiation-advertisements userExec command mode. Table 119 describes the parameters and variables for the show command. auto-negotiation-advertisements Table 119 show auto-negotiation-advertisements command Parameters and values Description Enter ports for which you want the current port <portlist>... -
Page 333: Auto-Negotiation-Advertisements Command
Chapter 8 Ethernet port management using the CLI 333 Table 120 describes the parameters and variables for the show command. auto-negotiation-capabilities Table 120 show auto-negotiation-capabilities command Parameters and values Description Enter ports for which you want the autonegotiation port <portlist> capabilities displayed. -
Page 334: No Auto-Negotiation-Advertisements Command
334 Chapter 8 Ethernet port management using the CLI Table 121 describes the parameters and variables for the command. auto-negotiation-advertisements Table 121 auto-negotiation-advertisements command Parameters and values Description Enter ports for which you want to configure port <portlist> advertisements. These are speed-duplex-pause settings. Any [10-full] [10-half] combination of these settings is allowed, but [100-full] [100-half]... -
Page 335: Default Auto-Negotiation-Advertisements Command
Chapter 8 Ethernet port management using the CLI 335 default auto-negotiation-advertisements command command sets default default auto-negotiation-advertisements advertisements for the switch. The syntax for the default command is: auto-negotiation-advertisements default auto-negotiation-advertisements [port <portlist>] command is in the default auto-negotiation-advertisements interface configuration command mode. Table 123 describes the parameters and variables for the default... - Page 336 336 Chapter 8 Ethernet port management using the CLI 320985-A Rev 01...
-
Page 337: Viewing Unit Information
Chapter 9 Configuring the switch using Device Manager The first four sections of this chapter describe how you can use Device Manager to configure your switch, manage SNTP, and display topology information. The chapter includes the following information: • “Viewing Unit information” •... -
Page 338: Unit Tab
338 Chapter 9 Configuring the switch using Device Manager The following sections provide a description of the tabs in the Edit > Unit dialog box and details about each item on the tab. Unit tab To open the Unit tab: ➨... -
Page 339: Viewing Switch Ip Information
Chapter 9 Configuring the switch using Device Manager 339 From the Device Manager main menu, choose Edit > Unit. The Unit dialog box opens with the Unit tab displayed (Figure 128 on page 338). Click the Rate Limit tab. The Rate limit tab opens (Figure 129). -
Page 340: Globals Tab
340 Chapter 9 Configuring the switch using Device Manager To open the IP dialog box: ➨ From the Device Manager main menu, choose Edit > IP. The Edit IP dialog box opens with the Globals tab displayed. The following sections provide a description of the tabs in the Edit > IP dialog box and details about each item on the tab. -
Page 341: Addresses Tab
Chapter 9 Configuring the switch using Device Manager 341 Addresses tab The Addresses tab shows the IP address information for the device. To open the Addresses tab: From the Device Manager main menu, choose Edit > IP. The IP dialog box opens with the Globals tab displayed (Figure 130 on page 340). - Page 342 342 Chapter 9 Configuring the switch using Device Manager ARP tab The ARP (Address Resolution Protocol) tab shows the MAC addresses and the associated IP addresses for the switch. To open the ARP tab: From the Device Manager main menu, choose Edit > IP. The IP dialog box opens with the Globals tab displayed (Figure 130 on page...
-
Page 343: Editing The Chassis Configuration
Chapter 9 Configuring the switch using Device Manager 343 Editing the chassis configuration You can edit a chassis configuration from the Edit Chassis dialog box. To open the Chassis dialog box: Select the chassis. Do one of the following: • From the Device Manager main menu, choose Edit >... - Page 344 344 Chapter 9 Configuring the switch using Device Manager Figure 133 Edit Chassis dialog box — System tab Table 129 describes the System tab fields. Table 129 System tab fields Field Description sysDescr The assigned system name. sysUpTime The time since the system was last booted. sysContact Type the contact information (in this case, an e-mail address) for the system administrator.
- Page 345 Chapter 9 Configuring the switch using Device Manager 345 Table 129 System tab fields (continued) Field Description AuthenticationTraps Click to enable or disable. When you enable, SNMP traps are sent to trap receivers for all SNMP access authentication. When you disable, no traps are received. To view traps, click the Trap toolbar button.
-
Page 346: Base Unit Info Tab
346 Chapter 9 Configuring the switch using Device Manager Table 129 System tab fields (continued) Field Description NextBootLoadProtocol The transport protocol to be used by the agent to load the configuration information and the image at the next boot. LastLoadProtocol The transport protocol last used to load the image and configuration information on the switch. -
Page 347: Stack Info Tab
Chapter 9 Configuring the switch using Device Manager 347 Table 130 describes the Base Unit Info tab fields. Table 130 Base Unit Info tab fields Field Description Type The switch type. Descr A description of the switch hardware, including number of ports and transmission speed. - Page 348 348 Chapter 9 Configuring the switch using Device Manager Figure 135 Edit Chassis dialog box — Stack Info tab Table 131 describes the Stack Info tab fields. Table 131 Stack Info tab fields Field Description Descr A description of the component or subcomponent. If not available, the value is a zero length string.
-
Page 349: Agent Tab
Chapter 9 Configuring the switch using Device Manager 349 Table 131 Stack Info tab fields (continued) Field Description OperState The current operational state of the component. The possible values are: • other—some other state • notAvail—state not available • removed—component removed •... -
Page 350: Powersupply Tab
350 Chapter 9 Configuring the switch using Device Manager Figure 136 Edit Chassis dialog box — Agent tab Table 132 describes the Agent tab fields. Table 132 Agent tab fields Field Description NextBootIpAddr The IP address to be used the next time the switch is booted. NextBootNetMask The subnet mask to be used the next time the switch is booted. - Page 351 Chapter 9 Configuring the switch using Device Manager 351 The Chassis dialog box opens (Figure 133 on page 344) with the System tab displayed. Click the PowerSupply tab. The PowerSupply tab opens (Figure 137). Figure 137 Edit Chassis dialog box — Power Supply tab Table 133 describes the PowerSupply tab fields.
- Page 352 352 Chapter 9 Configuring the switch using Device Manager Fan tab The Fan tab provides read-only information about the operating status of the switch fans. To open the Fan tab: Select the chassis. From the shortcut menu, choose Edit > Chassis. The Chassis dialog box opens (Figure 133 on page 344) with the System tab...
-
Page 353: Banner Tab
Chapter 9 Configuring the switch using Device Manager 353 Table 134 describes the Fan tab fields. Table 134 Fan tab fields Field Description Desc The fan type. OperStat The operational state of the fan. Values include: • other: Some other state. •... - Page 354 354 Chapter 9 Configuring the switch using Device Manager Figure 139 Edit Chassis dialog box — Banner tab To set the default banner: In the Banner tab, click on the static radio button, and then click Apply. This resets the banner in Telnet to the default banner. To check that the default banner is set in Telnet: In the Main Menu, click on Device >...
- Page 355 ### ### #### ############# ### ########### ########### ########### ########### ########### Enter Ctrl-Y to begin. *************************************************************** *** Ethernet Switch 425-24T *** Nortel *** Copyright (c) 1996-2005, All Rights Reserved *** Release 3.6 *** HW:0A FW:3.5.0.2 SW:v3.6.0 *************************************************************** To disable the banner: ➨...
-
Page 356: Custom Banner Tab
356 Chapter 9 Configuring the switch using Device Manager Figure 141 Telnet window without banner Ethernet Switch 425-24T Main Menu IP Configuration/Setup... SNMP Configuration... System Characteristics... Switch Configuration... Console/Comm Port Configuration... Spanning Tree Configuration... TELNET/SNMP/Web Access Configuration... Software Download... Configuration File... Display System Log... - Page 357 Chapter 9 Configuring the switch using Device Manager 357 Figure 142 Edit Chassis dialog box — Custom Banner tab To create a Custom Banner: In the Banner tab, click on the custom radio button, and then click Apply. Click on the Custom Banner tab (Figure 142).
-
Page 358: Working With Configuration Files
358 Chapter 9 Configuring the switch using Device Manager Figure 143 Telnet window with custom banner ****************************************************************************** Ethernet Switches 325/425 ****************************************************************************** Enter Ctrl-Y to begin. *************************************************************** *** Ethernet Switch 425-24T *** Nortel *** Copyright (c) 1996-2005, All Rights Reserved *** Release 3.6 *** HW:0A FW:3.5.0.2 SW:v3.6.0 *************************************************************** To disable the banner: ➨... - Page 359 Chapter 9 Configuring the switch using Device Manager 359 ➨ From the Device Manager main menu, choose Edit > File System. The FileSystem dialog box opens (Figure 144) and displays the Config/ Image/Diag tab. Figure 144 FileSystem - Config/Image/Diag File tab dialog box Table 135 describes the FileSystem Config/Image/Diag file dialog box fields.
-
Page 360: Ascii Config File
360 Chapter 9 Configuring the switch using Device Manager Table 135 FileSystem Config/Image/Diag file dialog box fields (continued) Field Description Action • This object is used to download or upload a config file, an image file or diag firmware file. In read operation, if there is no action taken since the boot up, it will return with a value of other. - Page 361 Chapter 9 Configuring the switch using Device Manager 361 Figure 145 File system - ASCII Config File dialog box Table 136 describes the ASCII Config File tab fields. Table 136 ASCII Config File tab fields Field Description LoadServerAddr The IP address of the load server for the ASCII configuration file. If not used, then the value is 0.0.0.0.
-
Page 362: Working With Sntp
362 Chapter 9 Configuring the switch using Device Manager Working with SNTP The Simple Network Time Protocol (SNTP) feature synchronizes the Universal Coordinated Time (UTC) to an accuracy within 1 second. This feature adheres to the IEEE RFC 2030 (MIB is the s5agent). With this feature, the system can obtain the time from any RFC 2030-compliant NTP/SNTP server. - Page 363 Chapter 9 Configuring the switch using Device Manager 363 Figure 146 SNTP dialog box Table 137 describes the SNTP dialog box fields. Table 137 SNTP dialog box fields Field Description PrimaryServer The IP address of the primary SNTP server. Address SecondaryServer The IP address of the secondary SNTP server.
-
Page 364: Displaying Topology Information Using Device Manager
364 Chapter 9 Configuring the switch using Device Manager Table 137 SNTP dialog box fields (continued) Field Description LastSyncTime Specifies the Coordinated Universal Time (UTC) when the device last synchronized with an NTP server. LastSyncSource Specifies the IP source address of the NTP server with which this device last synchronized NextSyncTime Specifies the the Coordinated Universal Time (UTC) at which the... -
Page 365: Topology Table Tab
Description IpAddr The IP address of the device. Status Whether Nortel topology is on (topOn) or off (topOff) for the device. The default value is topOn. NmmLstChg The value of sysUpTime the last time an entry in the network management MIB (NMM) topology table was added, deleted, or modified. - Page 366 366 Chapter 9 Configuring the switch using Device Manager The Topology Table tab opens (Figure 148). Figure 148 Diagnostics dialog box — Topology Table tab Table 139 describes the Topology Table tab fields. Table 139 Topology Table tab fields Field Description Slot The slot number in the chassis in which the topology message...
-
Page 367: Viewing And Editing A Single Port Configuration
Chapter 10 Configuring ports using Device Manager This chapter describes how to use Device Manager to configure ports on an Ethernet Switch 325/425. The windows displayed when you configure a single port differ from the ones displayed when you configure multiple ports. However, the options are similar. This section covers: •... -
Page 368: Interface Tab For A Single Port
368 Chapter 10 Configuring ports using Device Manager Note: When you edit a single port, tabs that are not applicable are not available for you to select. When you edit multiple ports, some tabs are not available, and some tabs are available even though the options are not applicable. - Page 369 Chapter 10 Configuring ports using Device Manager 369 Figure 149 Port dialog box — Interface tab Note: 10/100BASE-TX ports may not autonegotiate correctly with older 10/100BASE-TX equipment. In some cases, the older devices can be upgraded with new firmware or driver revisions. If an upgrade does not allow autonegotiation to correctly identify the link speed and duplex settings, you can manually configure the settings for the link in question.
- Page 370 370 Chapter 10 Configuring ports using Device Manager Table 140 describes the Interface tab fields for a single port. Table 140 Interface tab fields for a single port Field Description Index A unique value assigned to each interface. The value ranges between 1 and 512.
-
Page 371: Viewing And Editing Multiple Port Configurations
Chapter 10 Configuring ports using Device Manager 371 Table 140 Interface tab fields for a single port (continued) Field Description AdminSpeed Set the port’s speed. OperSpeed The current operating speed of the port. AutoNegotiationCapability Specifies the port speed and duplex capabilities that a switch can support on a port, and that may be advertised by the port using auto-negotiation AutoNegotiationAdvertisments Specifies the port speed and duplex abilities to be advertised during link... -
Page 372: Interface Tab For Multiple Ports
372 Chapter 10 Configuring ports using Device Manager Interface tab for multiple ports The Interface tab shows the basic configuration and status of the selected ports. To view or edit the Interface tab for multiple ports: Select the ports that you want to edit. Press Ctrl+left-click the ports that you want to configure. - Page 373 Chapter 10 Configuring ports using Device Manager 373 Table 141 Interface tab fields for multiple ports (continued) Field Description Size of the largest packet, in octets, that can be sent or received on the interface. PhysAddress MAC address assigned to a particular interface. AdminStatus Current administrative state of the device, which can be one of the following:...
- Page 374 374 Chapter 10 Configuring ports using Device Manager Table 141 Interface tab fields for multiple ports (continued) Field Description AutoNegotiation Specifies the port speed and duplex capabilities that a switch can Capability support on a port, and that may be advertised by the port using auto-negotiation AutoNegotiation Specifies the port speed and duplex abilities to be advertised during...
-
Page 375: Viewing System Information
Chapter 11 Administering the switch using Web-based management The administrative options available to you are: • “Viewing system information” • “Quick Start” on page 377 • “Configuring system security” on page 379 • “Rebooting the Ethernet Switch 325/425” on page 379 •... - Page 376 Chapter 11 Administering the switch using Web-based management Figure 151 System Information page Table 142 describes the items on the System Information page. Table 142 System Information page items Item Description sysDescription The default description of the Ethernet Switch 325/425. sysUpTime The elapsed time since the last network management portion of the system was last re-initialized.
-
Page 377: Quick Start
Chapter 11 Administering the switch using Web-based management Quick Start The Quick Start feature allows the administrator of the Ethernet Switch 325/425 to make the initial setup by consolidating multiple setup pages into a single page. The Quick Start screen will allow the administrator to configure the following information: •... - Page 378 Chapter 11 Administering the switch using Web-based management Figure 152 Quick Start page Click on the Submit button after making the required settings. Table 143 describes the items on the Quick Start page. Table 143 Items on the Quick Start page Section Item Description...
-
Page 379: Configuring System Security
VLAN Configuring system security For information on configuring system security, please refer to Configuring and Managing Security for Nortel Ethernet Switches 325 and 425, Software Release 3.6 (320988-A) Rebooting the Ethernet Switch 325/425 You can reboot a standalone switch or an entire stack without erasing any configured switch parameters. - Page 380 Chapter 11 Administering the switch using Web-based management From the main menu, choose Administration > Reset. The reset warning message displays (Figure 153). Figure 153 Reset page message Click OK. To reboot the Ethernet Switch 425-24T in its stack mode without making changes (since your last Submit request): From the main menu, choose Administration >...
-
Page 381: Changing The Ethernet Switch 325/425 To System Defaults
(for details on configuring management passwords, see Configuring and Managing Security for Nortel Ethernet Switches 325 and 425, Software Release 3.6 (320988-A)). Changing the Ethernet Switch 325/425 to system defaults... -
Page 382: Logging Out Of The Management Interface
Chapter 11 Administering the switch using Web-based management Click OK. To change the Ethernet Switch 425 in its stacking mode to system defaults: From the main menu, choose Administration > Reset to Default. The Reset to Default page opens (Figure 156). - Page 383 200. If you have configured system password security, a reset returns you to a log on page (for details on configuring management passwords, see Configuring and Managing Security for Nortel Ethernet Switches 325 and 425, Software Release 3.6 (320988-A)). System Configuration Guide...
- Page 384 Chapter 11 Administering the switch using Web-based management 320985-A Rev 01...
-
Page 385: Configuring The Switch Using Web-Based Management
Chapter 12 Configuring the switch using Web-based management The switch configuration options available to you are: • “Configuring BootP, IP, and gateway settings” • “Modifying system settings” on page 389 • “Configuring switch port autonegotiation speed” on page 390 • “Configuring high speed flow control”... - Page 386 Chapter 12 Configuring the switch using Web-based management From the main menu, choose Configuration > IP. The IP page opens (Figure 158). Figure 158 IP page 320985-A Rev 01...
- Page 387 Chapter 12 Configuring the switch using Web-based management Table 144 describes the items on the IP page. Table 144 IP page items Section Item Range Description Boot Mode BootP BootP When Needed (default) Choose this mode to inform the Setting Request switch to send a BootP request when Mode...
- Page 388 Chapter 12 Configuring the switch using Web-based management Table 144 IP page items (continued) Section Item Range Description BootP or Last Address Choose this mode to inform the switch at each startup, to obtain its IP configuration using BootP. If the BootP request fails, the switch uses the network parameters stored in its non-volatile memory.
-
Page 389: Modifying System Settings
Chapter 12 Configuring the switch using Web-based management Click Submit. Modifying system settings You can create or modify the system name, system location, and network manager contact information. Note: The configurable parameters on the System page are displayed in a read only format on the System Information home page. To configure system settings: From the main menu, choose Configuration >... -
Page 390: Configuring Switch Port Autonegotiation Speed
Chapter 12 Configuring the switch using Web-based management Table 145 describes the items on the System page. Table 145 System page items Item Range Description System The factory set description of the hardware and software versions. Description System Object ID The character string that the vendor created to uniquely identify this device. - Page 391 Chapter 12 Configuring the switch using Web-based management Figure 160 Port Management page Table 146 describes the items on the Port Management page. Table 146 Port Management page items Item Range Description Port The switch port number of the corresponding row. The values that you set in each switch row affect all switch ports and, when the switch is part of a stack, the values that set in the stack row affect all ports in the entire stack...
- Page 392 Chapter 12 Configuring the switch using Web-based management Table 146 Port Management page items Item Range Description Link The current link state of the corresponding port as follows: Up: The port is connected and operational Down: The port is not connected or is not operational. Link Trap (1) On Choose to control whether link up/down traps are sent to...
-
Page 393: Configuring High Speed Flow Control
Chapter 12 Configuring the switch using Web-based management Configuring high speed flow control You can view the High Speed Flow Control parameters for Ethernet Switch 325/ 425 in this page. To configure high speed flow control: From the main menu, choose Configuration > High Speed Flow Control. The High Speed Flow Control page opens (Figure 161). -
Page 394: Downloading Switch Images
Chapter 12 Configuring the switch using Web-based management In the upper-left corner, click on the unit number for viewing the GBIC configuration. Downloading switch images You can download the Ethernet Switch 325/425 software image to non-volatile flash memory. To download the Ethernet Switch 325/425 software image, a properly configured Trivial File Transfer Protocol (TFTP) server must be present in your network, and the policy switch must have an IP address. - Page 395 Chapter 12 Configuring the switch using Web-based management Table 148 describes the fields on the Software Download page. Table 148 Software Download page fields Fields Range Description Current Running Version The version of the current running software. Local Store Version The local version of the software in the flash memory.
-
Page 396: Downloading Ascii Configuration Files
Chapter 12 Configuring the switch using Web-based management Table 149 LED Indications during the software download process Phase Description LED Indications The switch downloads the new 100 Mb/s port status LEDs (ports 18 to 24 only): The software image and programs it. LEDs begin to turn on in succession on each ASIC as follows: ASIC 1 from port 1 to port 12 and return, ASIC 2 from with port 24 to port 13 and return, ASIC 3 from port 25... -
Page 397: Tftp Server
Chapter 12 Configuring the switch using Web-based management Table 150 describes the items displayed on the ASCII Configuration File Download page. Table 150 Ascii Configuration file download page items Item Description Ascii Configuration File Allows you to select the ASCII config file located on a personal computer. - Page 398 Chapter 12 Configuring the switch using Web-based management Figure 164 Configuration File Download/Upload page Table 151 describes the Configuration File Setting items on the Configuration File Download/Upload page. Table 151 Configuration File Setting items Item Range Description Configuration Image 1..32 Type the configuration file name.
-
Page 399: Parameters On A Tftp Server
Chapter 12 Configuring the switch using Web-based management Requirements for storing and retrieving configuration parameters on a TFTP server The following requirements apply when storing and retrieving configuration parameters on a TFTP server: • The Configuration File feature can only be used to copy standalone switch configuration parameters to other standalone switches or to copy stack configuration parameters to other stack configurations. -
Page 400: Enabling And Disabling Autosave
Chapter 12 Configuring the switch using Web-based management Table 152 Parameters not saved to the configuration file These parameters are not saved: Used in this screen: See page: Console Read-Only Switch Password Console/Comm Port Configuration Console Read-Write Switch Password Console Read-Only Stack Password Console Read-Write Stack Password Enabling and disabling autosave The Configuration File Download/Upload pag... - Page 401 Chapter 12 Configuring the switch using Web-based management Figure 165 Console/Communication Port page Table 153 describes the items on the Console/Communication Port page. Table 153 Console/Communication Port page items Item Range Description Comm Port Data Bits The current console communication port data bit setting.
-
Page 402: Configuring Rate Limiting
Chapter 12 Configuring the switch using Web-based management Configuring Rate Limiting Broadcast Rate Limiting is a box-oriented feature which allows you to configure threshold limits for either broadcast or multicast packets ingressing on a port for a given time interval (in packets per second). If the configured threshold exceeds on a port, the switch will drop extra packets received. - Page 403 Chapter 12 Configuring the switch using Web-based management Table 154 Rate Limiting page items (continued) Section Description Packet Type Select the type of packet. Limit Configure the threshold limit for the selected type of packet. On the Rate Limiting page, type information in the text boxes, or select from a list.
- Page 404 Chapter 12 Configuring the switch using Web-based management 320985-A Rev 01...
-
Page 405: Chapter 13 Troubleshooting
Chapter 13 Troubleshooting This chapter describes how to isolate and diagnose problems with your Ethernet Switch 325/425 and covers the following topics: • “Interpreting the LEDs” • “Diagnosing and correcting problems” on page 405 — Normal power-up sequence — Port connection problems Interpreting the LEDs For information on interpreting the LEDs for the Ethernet Switch 325, refer to Figure 4 on page... -
Page 406: Normal Power-Up Sequence
Chapter 13 Troubleshooting Vorsicht: Um Verletzungsgefahr durch einen elektrischen Stromschlag auszuschließen, nehmen Sie niemals die obere Abdeckung vom Gerät ab. Im Geräteinnern befinden sich keine Komponenten, die vom Benutzer gewartet werden können. Avertissement: Pour éviter tout risque d'électrocution, ne jamais retirer le capot de l'appareil. -
Page 407: Port Connection Problems
Chapter 13 Troubleshooting Table 155 Corrective actions Symptom Probable cause Corrective action All LEDs are off. The switch is not receiving AC Verify that the AC power cord is fastened securely power. at both ends and that power is available at the AC power outlet. -
Page 408: Port Interface
Chapter 13 Troubleshooting • If the connected station uses a form of autonegotiation that is not compatible with the IEEE 802.3u autonegotiating standard, the Ethernet Switch 325/425 cannot negotiate a compatible mode for correct operation. • If the autonegotiation feature is not present or not enabled at the connected station, the Ethernet Switch 325/425 may not be able to determine the correct duplex modes. -
Page 409: Installing An Sfp Transceiver
Appendix A Installing an SFP Transceiver SFPs are hot-swappable input and output enhancement products that allow Gigabit Ethernet ports to link to Short Wavelength (SX), Long Wave length (LX), and Coarse Wavelength Division Multiplexed (CWDM) fiber optic networks. The Ethernet Switch 425 has two front-panel ports. They are port numbers 25 and 26 on the Ethernet Switch 425-24T and port numbers 49 and 50 on the Ethernet Switch 425-48T. -
Page 410: Product Description
This section describes the SFP and label, and provides a model list for 1000BASE-SX, 1000BASE-LX SFPs. This section also describes the Nortel Coarse Wavelength Division Multiplexed (CWDM) SFPs and provides a CWDM SFP model list. This section includes the following topics: •... -
Page 411: Locking/Extractor Mechanisms
SFP and XFP transceivers. Figure 167 Locking/extractor mechanism SFP labeling The Nortel label on a typical SFP contains a Nortel serial number, a bar code, a manufacturer’s code, an interface type, and a part number. See Figure 168 on page 412. -
Page 412: Sfp Models
Figure 168 Nortel SFP label SFP models SFPs are hot-swappable input/output enhancement components designed for use with Nortel products to allow Gigabit Ethernet ports to link with other Gigabit Ethernet ports over various media types. Table 156 lists and describes the Nortel SFP models that are supported by the Ethernet Switch 425. -
Page 413: Cwdm Sfp Models
CWDM optical wavelengths in both ring and point-to-point configurations. All components are color-coded by wavelength. Table 157 lists the Nortel CWDM SFPs and describes their wavelengths, color codes, part numbers, and cable lengths. Table 157 Nortel CWDM SFP transceiver list... -
Page 414: Installing Sfps
Installing an SFP Transceiver Table 157 Nortel CWDM SFP transceiver list (continued) CWDM SFP Product number Cable length 1590nm/Red • AA1419031 • 40 KM • AA1419039 • 70 KM 1610nm/Brown • AA1419032 • 40 KM • AA1419040 • 70 KM Note: The cable distance may vary depending on the quality of fiber optic cable used. -
Page 415: Removing An Sfp
Installing an SFP Transceiver Figure 169 Inserting an SFP Removing an SFP To remove an SFP Disconnect the network fiber cable from the SFP connector. Depending on your SFP model, press the locking/extractor mechanism on the SFP to release the SFP. Note: Your SFP locking/extractor mechanism may be different than the models shown. -
Page 416: Technical Specifications
Installing an SFP Transceiver Figure 170 Removing an SFP Slide the SFP out of the module SFP slot. If the SFP does not slide easily from the module slot, use a gentle side-to-side rocking motion while firmly pulling the SFP from the slot. Attach a dust cover over the fiber optic bores and store the SFP in a safe place until needed. -
Page 417: Sfp Specifications
Installing an SFP Transceiver SFP specifications This section provides technical specifications for the SFP models and includes the following topics: • “SFP physical specifications” • “1000BASE-SX (LC Type) specifications” on page 418 • “1000BASE-LX (LC Type) specifications” on page 418 •... -
Page 418: Base-Sx (Lc Type) Specifications
Installing an SFP Transceiver 1000BASE-SX (LC Type) specifications The Model 1000BASE-SX SFP provides 1000BASE-SX (850 nm, short wavelength, Gigabit Ethernet) connectivity using LC duplex multimode fiber connectors. The Model 1000BASE-SX SFP supports full-duplex operation only. Table 159 describes standards, connectors, cabling, and distance for the Model 1000BASE-SX SFP. - Page 419 Installing an SFP Transceiver Table 160 describes standards, connectors, cabling, and distance for the Model 1000BASE-LX SFPs. Table 160 1000BASE-LX SFP specifications Type Specification Standards Conforms to the following standards: • 802.3z, 1000BASE-LX Connectors Duplex LC fiber optic connector Cabling •...
-
Page 420: Base-Sx (Mt-Rj Type) Specifications
Installing an SFP Transceiver 1000BASE-SX (MT-RJ Type) specifications The Model 1000BASE-SX (MT-RJ Type) SFP GBIC provides Gigabit Ethernet connectivity using MT-RJ multi-mode fiber connectors. Table 161 describes standards, connectors, cabling, and distance for the Model 1000BASE-SX (MT-RJ Type) SFP GBIC. Table 161 1000BASE-SX SFP specifications Type Specification... -
Page 421: Cwdm Sfp Specifications
Installing an SFP Transceiver CWDM SFP specifications Table 162 describes CWDM SFP (70 km) specifications. Table 162 CWDM SFP (70 km) specifications Item Specification Physical dimensions 0.457 X .604 X 2.18 inches (11.6 X 15.3 X 55.43 mm) Connectors Duplex LC fiber optic Cabling SMF, 9 µm Data rate... - Page 422 Installing an SFP Transceiver Table 163 describes CWDM SFP (40 km) specifications. Table 163 CWDM SFP (40 km) specifications Item Specification Physical dimensions 0.457 X .604 X 2.18 inches (11.6 X 15.3 X 55.43 mm) Connectors Duplex LC fiber optic Cabling SMF, 9 µm Average launch power...
-
Page 423: Hard-Copy Technical Manuals
Installing an SFP Transceiver How to get help If you have purchased a service contract for your Nortel product from a distributor or authorized reseller, contact the technical support staff for that distributor or reseller for assistance. If you have purchased a Nortel service program, contact Nortel Technical Support. - Page 424 Installing an SFP Transceiver 320985-A Rev 01...
-
Page 425: Connectors And Pin Assignments
Appendix B Connectors and pin assignments This appendix describes the port connectors and pin assignments for the Ethernet Switch 325/425. RJ-45 (10BASE-T/100BASE-TX) port connectors The RJ-45 port connectors (Figure 171) are wired as MDI-X ports to connect end stations without using crossover cables. (See “MDI and MDI-X devices”... -
Page 426: Mdi And Mdi-X Devices
Connectors and pin assignments Table 164 lists the RJ-45 (8-pin modular) port connector pin assignments. Table 164 RJ-45 port connector pin assignments Signal Description Receive Data + Receive Data - Transmit Data + Not applicable Not applicable Not applicable Not applicable Transmit Data - Not applicable Not applicable... -
Page 427: Mdi-X To Mdi Cable Connections
Connectors and pin assignments MDI-X to MDI cable connections Ethernet Switch 325/425 switches use MDI-X ports that allow you to connect directly to end stations without using crossover cables (Figure 172). Figure 172 MDI-X to MDI cable connections MDI-X to MDI-X cable connections If you are connecting the Ethernet Switch 325/425 to a device that also implements MDI-X ports, use a crossover cable (Figure... -
Page 428: Db-9 (Rs-232-D) Console/Comm Port Connector
Connectors and pin assignments Figure 173 MDI-X to MDI-X cable connections DB-9 (RS-232-D) Console/Comm Port connector BayStack 420 Switch Switch or hub Ethernet 325/425 MDI-X port Crossover cable MDI-X port BS45057B The DB-9 Console/Comm Port connector (Figure 174) is configured as a data communications equipment (DCE) connector. - Page 429 Connectors and pin assignments Table 165 DB-9 Console port connector pin assignments Signal Description Carrier detect (not used) Transmit data (output) Receive data (input) Data terminal ready (not used) Signal ground Not used Request to send (not used) Not used Ring indicator (not used) Shell Chassis ground...
-
Page 430: Base-T Pinouts For The Ethernet Switch 425
Connectors and pin assignments 1000Base-T pinouts for the Ethernet Switch 425 Table 166 Pin descriptions for 1000Base-T pinouts MDI-X BI_DA+ BI_DB+ BI_DA– BI_DB– BI_DB+ BI_DA+ BI_DC+ BI_DD+ BI_DC– BI_DD– BI_DB– BI_DA– BI_DD+ BI_DC+ BI_DD– BI_DC– 320985-A Rev 01... -
Page 431: Appendix C Default Settings
Appendix C Default settings Table 167 lists the factory default settings for the Ethernet Switch 325/425 according to the console interface (CI) screens and fields for the settings. Table 167 Factory default settings Field Default setting Appears in this CI screen BootP Request Mode BootP when needed “IP Configuration/Setup screen”... - Page 432 Default settings Table 167 Factory default settings (continued) Field Default setting Appears in this CI screen Operation Mode Stack “System Characteristics screen” on page 221 Reset Count Last Reset Type Power Cycle Power Status Primary Power sysContact Zero-length string sysName Zero-length string sysLocation Zero-length string...
- Page 433 (320988-A)) MAC Address Security Disabled MAC Address Security Configuration Configuring and Menu screen (see MAC Address Security Disabled Managing Security for Nortel SNMP-Locked Ethernet Switches 325 and 425, Software Release 3.6 (320988-A)) Partition Port on Intrusion Disabled Detected Partition Time...
- Page 434 2 attempts Create VLAN VLAN Configuration screen (see Configuring VLANs, Delete VLAN blank field Spanning Tree, and MultiLink Trunking for Nortel VLAN Name VLAN # (VLAN number) Ethernet Switches 325 and 425, Management VLAN Yes, VLAN #1 Software Release 3.6...
- Page 435 1 to 6 (depending on MultiLink Trunk Configuration Menu Configuring VLANs, configuration status) screen (see Spanning Tree, and Trunk Members (Unit/Port) Blank field MultiLink Trunking for Nortel Ethernet Switches 325 and 425, STP Learning Normal Software Release 3.6 (320986-A)) Trunk Mode Basic...
- Page 436 125 seconds Set Router Ports Version 1 Static Router Ports Blank System Unit Port Statistics screen (see Monitoring Guide for Nortel Port Ethernet Switches 325 and 425, Software Release 3.6 (320989-A)) System Display Messages From Volatile System Log screen (see...
- Page 437 STPG mode (see Bridge Priority 8000 in Hex. Configuring VLANs, Spanning Tree, and Bridge Hello Time 2 seconds MultiLink Trunking for Nortel Bridge Max. Age Time 20 seconds Ethernet Switches 325 and 425, Software Release 3.6 (320986-A)) Bridge Forward Delay Time 15 seconds Bridge Max.
- Page 438 Spanning Tree Port Configuration screen in STPG mode (see Priority Configuring VLANs, Spanning Tree, and Path Cost 10 or 100 MultiLink Trunking for Nortel State Topology dependent Ethernet Switches 325 and 425, Software Release 3.6 (320986-A)) Bridge Priority 0x0000 - 0xF000...
- Page 439 0x8000 Spanning Tree Switch Settings screen in RSTP mode (see Root Port Configuring VLANs, Spanning Tree, and Root Path Cost MultiLink Trunking for Nortel Maximum Age Time 20 seconds Ethernet Switches 325 and 425, Software Release 3.6 (320986-A)) Forward Delay...
- Page 440 Spanning Tree Switch Settings screen in MSTP mode (see Bridge Priority HEX: 0x0000 - 0xF000 Configuring VLANs, Spanning Tree, and Root Port MultiLink Trunking for Nortel Root Path Cost Ethernet Switches 325 and 425, Software Release 3.6 (320986-A)) Maximum Age Time 20 seconds...
- Page 441 Default settings Table 167 Factory default settings (continued) Field Default setting Appears in this CI screen Image Filename Zero-length string “Software Download screen” on page 237 Diagnostics Filename Zero-length string TFTP Server IP Address 0.0.0.0 (no IP address assigned) Start TFTP Load of New Image Configuration Image Filename Zero-length string “Configuration File Download/Upload...
- Page 442 Default settings 320985-A Rev 01...
-
Page 443: Sample Bootp Configuration File
Appendix D Sample BootP configuration file This appendix provides a sample BootP configuration file. The BootP server searches for this file, called bootptab (or BOOTPTAB.TXT, depending on your operating system), which contains the site-specific information (including IP addresses) needed to perform the software download and configuration. You can modify this sample BootP configuration file or create one of your own. -
Page 444: Sample Bootp Configuration File
Sample BootP configuration file # The following is a sample of a BootP configuration file that was extracted # from a Nortel EZ LAN network management application. Note that other BootP daemons can use a configuration file with a different format. - Page 445 Sample BootP configuration file # Caution Omitting a Forward slash (/) when the entry is continued to the next line, can cause the interruption of the booting process or the incorrect image file to download. Always include forward slashes where needed. # Important Note: If a leading zero (0) is used in the IP address it is calculated as an octal number.
- Page 446 Sample BootP configuration file global1|/ |ht=ethernet|/ |hd=c:\opt\images|/ |sm=255.255.255.0|/ |gw=192.0.1.0| # The following sample entry describes a BootP client: bay1|ht=ethernet|ha=0060fd000000|ip=192.0.0.1 |hd=c:\ezlan\images|bf=Hummingbird_3.5_100.img # Where: # host name: bay1 # hardware type: Ethernet # MAC address: 00-60-FD-00-00-00 # IP address: 192.0.0.0 # home directory of boot file: c:\ezlan\images # boot file: hummingbird_3.5_100.img 320985-A Rev 01...
-
Page 447: Command List
[10-full] [10-half] [100-full] [100-half] [1000-full] [1000-half] [asymm-pause-frame] [pause-frame] [none] auto-negotiation-capabilities page 332 Configuring VLANs, Spanning Tree, and auto-pvid MultiLink Trunking for Nortel Ethernet Switches 325 and 425, Software Release 3.6 (320986-A) autotopology page 297 autosave enable page 288 banner [ custom | static | disabled | <1-15> LINE |... - Page 448 Command List Table 168 CLI command list (continued) Command Page No. Configuring and Managing Security for Nortel cli-password {switch|stack} {ro|rw} <WORD> <WORD> Ethernet Switches 325 and 425, Software Release 3.6 (320988-A) cli-password {switch|stack} {serial|telnet} {none|local|radius} clock summer-time <zone> [date {<day> <month>...
- Page 449 276 default ip domain-name page 265 Configuring VLANs, Spanning Tree, and default lacp aggregation [port <portlist>] enable MultiLink Trunking for Nortel Ethernet Switches 325 and 425, Software Release 3.6 (320986-A) Configuring VLANs, Spanning Tree, and default lacp mode [port <portlist>] MultiLink Trunking for Nortel Ethernet Switches 325 and 425, Software Release 3.6...
- Page 450 Command List Table 168 CLI command list (continued) Command Page No. Configuring and Managing Security for Nortel default snmp-server authentication-trap Ethernet Switches 325 and 425, Software Release 3.6 (320988-A) Configuring and Managing Security for Nortel default snmp-server community [ro|rw] Ethernet Switches 325 and 425, Software Release 3.6...
- Page 451 [address <ip>] {image <image-name>| page 316 image-if-newer <image-name> | diag <filename>} [no-reset] duplex [port <portlist>] {full|half|auto} page 323 Configuring and Managing Security for Nortel eapol {disable|enable} Ethernet Switches 325 and 425, Software Release 3.6 (320988-A) Configuring and Managing Security for Nortel eapol guest-vlan [vid <1-4094>...
- Page 452 Command List Table 168 CLI command list (continued) Command Page No. ip name-server <A.B.C.D> page 263 Configuring and Managing Security for Nortel ipmgr {source-ip <1-10> Ethernet Switches 325 and 425, Software <XXX.XXX.XXX.XXX>[mask <XXX.XXX.XXX.XXX>]} Release 3.6 (320988-A) Configuring and Managing Security for Nortel ipmgr {telnet|snmp|http} [source-ip <1-10>...
- Page 453 Ethernet Switches 325 and 425, Software Release 3.6 (320989-A) logout page 132 mac-address-table aging-time <time> page 145 Configuring and Managing Security for Nortel mac-security [disable|enable] [filtering {enable|disable}] [intrusion-detect Ethernet Switches 325 and 425, Software {enable|disable|forever}] [intrusion-timer <1-65535>] Release 3.6 (320988-A) [learning-ports <portlist>] [learning...
- Page 454 281 no clock summer-time page 296 no clock time-zone page 295 no command page 131 Configuring and Managing Security for Nortel no eapol guest-vlan [enable] Ethernet Switches 325 and 425, Software Release 3.6 (320988-A) no flowcontrol [port <portlist>] page 298...
- Page 455 System Monitoring Guide for Nortel no logging remote level Ethernet Switches 325 and 425, Software Release 3.6 (320989-A) Configuring and Managing Security for Nortel no mac-security Ethernet Switches 325 and 425, Software Release 3.6 (320988-A) Configuring and Managing Security for Nortel no mac-security mac-address-table {address <H.H.H>|port <portlist>|security-list <1-32>]...
- Page 456 [<1-65535>] Ethernet Switches 325 and 425, Software Release 3.6 (320989-A) no shutdown [port <portlist>] page 320 Configuring and Managing Security for Nortel no snmp server [authentication-trap|community [ro|rw] contact|host [<host-ip> <community-string>] Ethernet Switches 325 and 425, Software [location|name] Release 3.6...
- Page 457 Command List 457 Table 168 CLI command list (continued) Command Page No. Configuring and Managing Security for Nortel no snmp-server view <viewname> Ethernet Switches 325 and 425, Software Release 3.6 (320988-A) Configuring and Managing Security for Nortel no snmp trap link-status [port <portlist>] Ethernet Switches 325 and 425, Software Release 3.6...
- Page 458 {disable | Xrx monitor-port <portlist> mirror-port-X <portlist> Ethernet Switches 325 and 425, Software Release 3.6 (320989-A) Configuring QoS for Nortel Ethernet Switches qos egressmap ds <0-63> 1p <0-7> 325 and 425, Software Release 3.6 (320987-A) Configuring QoS for Nortel Ethernet Switches qos egressmap enable 325 and 425, Software Release 3.6...
- Page 459 [info|mode|password] page 272 show clock summer-time page 296 show clock time-zone page 296 Configuring and Managing Security for Nortel show eapol Ethernet Switches 325 and 425, Software Release 3.6 (320988-A) Configuring and Managing Security for Nortel show eapol guest-vlan Ethernet Switches 325 and 425, Software Release 3.6...
- Page 460 Table 168 CLI command list (continued) Command Page No. Configuring VLANs, Spanning Tree, and show lacp port [<portlist>] MultiLink Trunking for Nortel Ethernet Switches 325 and 425, Software Release 3.6 (320986-A) Configuring VLANs, Spanning Tree, and show lacp stats [port <portlist>] MultiLink Trunking for Nortel Ethernet Switches 325 and 425, Software Release 3.6...
- Page 461 System Monitoring Guide for Nortel show rmon stats Ethernet Switches 325 and 425, Software Release 3.6 (320989-A) show running-config page 269 Configuring and Managing Security for Nortel show snmp-server community Ethernet Switches 325 and 425, Software Release 3.6 (320988-A) show sntp page 289...
- Page 462 Table 168 CLI command list (continued) Command Page No. Configuring VLANs, Spanning Tree, and show spanning-tree mstp port statistics [<portlist>] MultiLink Trunking for Nortel Ethernet Switches 325 and 425, Software Release 3.6 (320986-A) Configuring VLANs, Spanning Tree, and show spanning-tree mstp statistics MultiLink Trunking for Nortel Ethernet Switches 325 and 425, Software Release 3.6...
- Page 463 Command List 463 Table 168 CLI command list (continued) Command Page No. show tech page 139 Configuring and Managing Security for Nortel show telnet-access Ethernet Switches 325 and 425, Software Release 3.6 (320988-A) show terminal page 271 show tftp-server page 277...
- Page 464 Command List Table 168 CLI command list (continued) Command Page No. Configuring and Managing Security for Nortel snmp-server community <community-string> [ro|rw] Ethernet Switches 325 and 425, Software Release 3.6 (320988-A) Configuring and Managing Security for Nortel snmp-server community <community-string> Ethernet Switches 325 and 425, Software {read-view <view-name>|write-view <view-name>|...
- Page 465 293 Configuring VLANs, Spanning Tree, and spanning-tree mstp [max-hop <600 - 4000>] [forward-time <4 - 30>] [max-age <6 - 40>] MultiLink Trunking for Nortel Ethernet Switches [pathcost-type {bits16 | bits32}][priority {0000 | 325 and 425, Software Release 3.6 (320986-A) 10000 | 20000 | …...
- Page 466 Page No. Configuring VLANs, Spanning Tree, and spanning-tree rstp [port <portlist>] [cost <1 - 200000000>] [edge-port {false | true}] [learning MultiLink Trunking for Nortel Ethernet Switches {disable | enable}] [p2p {auto | force-false | 325 and 425, Software Release 3.6 (320986-A) force-true}][priority {00 | 10 | …...
- Page 467 Command Page No. ui-button enable page 313 ui-button unit <unit #> page 314 Configuring and Managing Security for Nortel username <username> <password> [ro|rw] Ethernet Switches 325 and 425, Software Release 3.6 (320988-A) Configuring VLANs, Spanning Tree, and vlan configcontrol <vcc_option>...
- Page 468 Command List 320985-A Rev 01...
-
Page 469: Appendix F Technical Specifications
Appendix F Technical specifications This appendix provides technical specifications for the Ethernet Switch 325/425. Environmental specifications Table 169 lists environmental specifications for the Ethernet Switch 325/425. Table 169 Environmental specifications Parameter Operating specification Storage specification Temperature 0° to 40°C (32° to 104°F) -25°... -
Page 470: Physical Dimensions
Technical specifications Table 170 Electrical parameters (continued) Parameter Electrical specification Input current • Ethernet Switch 325: 2 A @ 120 VAC 1 A @ 240 VAC • Ethernet Switch 425 1 A @ 100 VAC 0.5 A @ 240 VAC Maximum thermal 75 BTU/hr (Ethernet Switch 325) output... -
Page 471: Performance Specifications
Table 173 Performance specifications of the Ethernet Switch 325 Parameter Specifications Frame Forward Rate 3.6 Million packets per second (Mpps) for the Ethernet Switch 325-24T, and 6.6 Mpps for the Ethernet Switch (64-byte packets) 325-24G. Port Forwarding/Filtering • For 10 Mb/s: 14,880 pps maximum Performance •... -
Page 472: Network Protocol And Standards Compatibility
Technical specifications Network protocol and standards compatibility The following are protocols and standards used by the Ethernet Switch 425-24T: • IEEE 802.3 10BASE-T (ISO/IEC 8802-3, Clause 14) • IEEE 802.3u 100BASE-TX (ISO/IEC 8802-3, Clause 25) • IEEE 802.1Q (VLAN Tagging) •... -
Page 473: Electromagnetic Immunity
Technical specifications Electromagnetic immunity The Ethernet Switch 325/425 meets the EN50082-1:1997 standard. System Configuration Guide... - Page 474 Technical specifications 320985-A Rev 01...
-
Page 475: Index
Index ASCII Configuration File Download screen ASCII Configuration Filename field AbsoluteValue statistics ASCIIConfigAutodldStatus field access ASCIIConfigAutoDownload field access levels ASCIIConfigFileName field accessing the CLI ASCIIConfigManualdldStatus field Action field ASCIIConfigManualDownload field Actions menu Authentication Trap field Addr field AuthenticationTraps field Addresses tab Auto Configuration on Reset field AdminDuplex field 370, AutoNegotiate field 370,... - Page 476 Index configuration, editing ChassisType field banner command for displaying banner check boxes, about Banner display control CI Main Menu Banner tab Clear All Port Statistics option Bar Chart button Base Unit Info Tab CLI command list, alphabetical Base Unit Info tab 346, clock summer-time command BcastAddr field clock time-zone command...
- Page 477 Index Console Interface (CI) logging in data, exporting console interface (CI) DB-9 console/comm port connector main menu default access community strings for Device menus, using Manager Console Password field default auto-negotiation-advertisements console port command default settings default autosave enable command Console Port Speed field default autotopology command Console Read-Only Password field 227,...
- Page 478 Index Device Manager window 171, Device menu Fan tab Device Name field fiber optic networks device view, summary linking with Gigabit Ethernet ports device, opening File System window diagnostics FileSystem dialog box Disable command flash memory for software image upgrades disable command flow control disabled port, color...
- Page 479 Index Help button ip address command help command IP Address tab Help menu IP Address to Ping field Help, Device Manager ip address unit command High Speed Flow Control Configuration IP addresses, configuring option ip bootp server command High Speed Flow Control Configuration IP Configuration option screen IP Configuration screen...
- Page 480 Index link, lacking, color icons 203, LinkTrap field 370, main menu, console interface Listen for Syslogs ManualSyncRequest field Listen for Traps Max Traps in Log field LLDP Maximum statistics TLVs lldp command viewing lldp port config notification command MDAs lldp port status command MDI-X to MDI cable connections lldp tx-tlv command MDI-X to MDI-X cable connections...
- Page 481 Index network security, protecting system integrity no tftp-server command new features no ui-button command new table entry, creating NoSuchObject error message 368, New Unit Number field 210, NextBootDefaultGateway field NextBootLoadProtocol field object types NextBootMgmtProtocol field objects editing NextBootNetMask field selecting NextBootpAddr field online Help 178, NextSyncTime field...
- Page 482 Index Primary RADIUS Server field PrimaryServer Address field Packet Type field PrimaryServer SynchFailures field passwords Print button Paste button product support PhysAddress field 370, Properties dialog box 172, ping command 259, Hotswap Poll Interval field polling interval If Traps, Status Interval port ) field Status Poll Interval field...
- Page 483 Index ReasmTimeout field reboot save config command ReBoot field scripts 119, 132, Refresh Device Status button Secondary RADIUS Server field Register for Traps SecondaryServer Address field release notes, obtaining SecondaryServer SynchFailures field reload command Secure Shell Renumber Stack Units screen security, configuring renumber unit command passwords...
- Page 484 Index show ip dns command LED indication descriptions process 317, 394, show lldp command Software Download option show lldp port command Software Download page show mac-address-table command Software Download screens show rate-limit command software installation show running-config command UNIX show sntp command Windows show stack-info command software version requirements...
- Page 485 344, switch information System Characteristics option Support heading System Characteristics screen 100, support, Nortel Networks System Characteristics screen fields switch configuration files Base Unit 101, not-saved parameters Last Reset Type 102, retrieving from a TFTP server...
- Page 486 Index sysName 102, terminal sysObjectID 102, requirements sysServices 102, settings sysUpTime 102, terminal command system default settings, resetting to text conventions System Description field TFTP system information 138, TFTP Server IP Address field 239, 242, System Information page tftp-server command System Location field time zone, setting system location, naming...
- Page 487 Index Type field 338, 342, 347, 370, Web quick start types of objects Web-based management opening from Device Manager Web-based management interface home page, graphic 195, UI button logging in ui-button enable command main menu, icons 203, management page ui-button unit command navigating the menu Unit field 111, 113, requirements to use...
- Page 488 Index 320985-A Rev 01...
Need help?
Do you have a question about the 325-24T and is the answer not in the manual?
Questions and answers