Advertisement
Table of Contents
- 1 Table of Contents
- 2 Warning Decal Placement
- 3 Important Precautions
- 4 Before You Begin
- 5 Assembly
- 6 How to Use the Elliptical Exerciser
- 7 Use Cross Training Program
- 8 Maintenance and Troubleshooting
- 9 Exercise Guidelines
- 10 Part List
- 11 Exploded Drawing
- 12 90 Day Full Warranty
- Download this manual
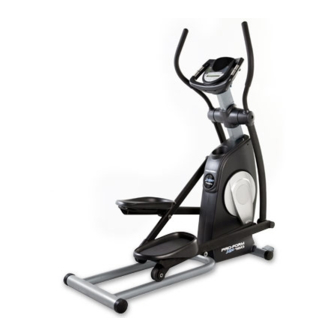
Model No. 831.28645.1
Serial No.
Serial Number
(on underside
• Assembly
• Operation
• Maintenance
• Part List and Drawing
CAUTION
Read all precautions and instruc-
tions in this manual before using
this equipment. Keep this manu-
al for future reference.
ELLIPTICAL EXERCISER
Decal
of frame)
User's Manual
Sears, Roebuck and Co., Hoffman Estates, IL 60179
Advertisement
Table of Contents

Related Manuals for ProForm XP 160 831.28645.1


Summary of Contents for ProForm XP 160 831.28645.1
- Page 1 Model No. 831.28645.1 Serial No. Serial Number Decal (on underside of frame) • Assembly • Operation • Maintenance • Part List and Drawing CAUTION Read all precautions and instruc- tions in this manual before using this equipment. Keep this manu- al for future reference.
-
Page 2: Table Of Contents
TABLE OF CONTENTS WARNING DECAL PLACEMENT ............. .2 IMPORTANT PRECAUTIONS . -
Page 3: Important Precautions
IMPORTANT PRECAUTIONS WARNING: To reduce the risk of serious injury, read all important precautions and instructions in this manual and all warnings on your elliptical exerciser before using your elliptical exerciser. Sears assumes no responsibility for personal injury or property damage sustained by or through the use of this product. -
Page 4: Before You Begin
BEFORE YOU BEGIN Thank you for selecting the new PROFORM elliptical exerciser. The PROFORM XP 160 elliptical exerciser provides a wide array of features designed to make your workouts at home more effective and enjoyable. For your benefit, read this manual carefully before you use the elliptical exerciser. -
Page 5: Assembly
ASSEMBLY Assembly requires two persons. Place all parts of the elliptical exerciser in a cleared area and remove the packing materials. Do not dispose of the packing materials until assembly is completed. In addition to the included hex keys, assembly requires a Phillips screwdriver wrench , and a rubber mallet As you assemble the elliptical exerciser, use the drawings below to identify small parts. - Page 6 To make assembly easier, read the information on page 5 before you begin assembling the elliptical exerciser. Orient the the Front Stabilizer (35) as shown. Attach the two Wheels (25) to the Front Stabilizer with two M10 x 62mm Patch Bolts (89) and two M10 Nylon Locknuts (97).
- Page 7 4. Have a second person hold the Upright (6) near the Frame (2) as shown. Pull the Wire Harness (48) out of the Frame (2) and insert it upward through the Upright (6). Do not let the Wire Harness fall into the Upright; use a piece of tape or an elastic band to hold the Wire Harness in place until step 12.
- Page 8 6. Identify the Left Handlebar (8), which is marked with a “Left” sticker. Insert the Left Handlebar into one of the Handlebar Legs (11) as shown. Attach the Left Handlebar (8) with two M8 x 42mm Bolts (71) and two M8 Nylon Locknuts (96).
- Page 9 8. Apply a generous amount of grease to the Pivot Axle (65) and insert it into the Frame (2). Attach the two Frame Covers (17) to the Frame (2) with four M4 x 16mm Screws (86) as shown. 9. Apply a small amount of grease to both sides of a Wave Washer (98).
- Page 10 10. Identify the Left Pedal (13) and the Left Pedal Leg (14), which are marked with “Left” stickers, and orient them as shown. Attach the Left Pedal (13) to the Left Pedal Leg (14) with four M6 x 35mm Phillips Screws (87) and four M6 Split Washers (88).
- Page 11 12. The Console (5) requires four 1.5V “D” batteries (not included); alkaline batteries are recommend- ed. IMPORTANT: If the elliptical exerciser has been exposed to cold temperatures, allow it to warm to room temperature before insert- ing batteries into the Console. If you do not do this, the console displays or other elec- tronic components may become damaged.
-
Page 12: How To Use The Elliptical Exerciser
HOW TO USE THE ELLIPTICAL EXERCISER HOW TO MOVE THE ELLIPTICAL EXERCISER Due to the size and weight of the elliptical exercis- er, moving it requires two persons. Stand in front of the elliptical exerciser, hold the upright, and place one foot against one of the front wheels. - Page 13 FEATURES OF THE CONSOLE The advanced console offers an array of features designed to make your workouts more effective and enjoyable. When you select the manual mode of the console, you can change the resistance of the pedals with the touch of a button.
- Page 14 HOW TO USE THE MANUAL MODE 1. Press the Resistance decrease button or begin pedaling to turn on the console. A moment after you turn on the console, the dis- play will light. 2. Select the manual mode. Each time you turn on the console, the manual mode will be selected automatically.
- Page 15 5. Measure your heart rate if desired. If there are sheets of clear plastic on the metal contacts on the handgrip pulse sen- sor, remove the plas- tic. To measure your heart rate, hold the handgrip pulse sensor with your palms resting against the metal con- tacts.
-
Page 16: Use Cross Training Program
HOW TO USE A CROSS TRAINING PROGRAM 1. Press the Resistance decrease button or begin pedaling to turn on the console. A moment after you turn on the console, the dis- play will light. 2. Select one of the five cross training programs. To select a cross training program, press the Programs button repeatedly until the name of the desired cross training program appears in the dis-... - Page 17 4. Perform the first strength exercise when prompted. When the first strength exercise segment begins, the name of the first strength exercise will appear in the display for a few seconds. The time will pause and flash in the display. Next, the display will show the recommended number of repetitions for the first strength exercise.
- Page 18 HOW TO USE A CALORIE GOAL PROGRAM 1. Press the Resistance decrease button or begin pedaling to turn on the console. A moment after you turn on the console, the dis- play will light. 2. Select one of the calorie goal programs. Press the Programs button repeatedly until the name of the desired calorie goal program appears in the display.
- Page 19 HOW TO USE THE HIGH PERFORMANCE PROGRAM 1. Press the Resistance decrease button or begin pedaling to turn on the console. A moment after you turn on the console, the dis- play will light. 2. Select the high performance program. Press the Programs button repeatedly until the words HIGH PERFORMANCE appear in the dis- play.
- Page 20 HOW TO USE THE HEART RATE CONTROL PROGRAM 1. Press the Resistance decrease button or begin pedaling to turn on the console. A moment after you turn on the console, the dis- play will light. 2. Select the heart rate control program. Press the Programs button repeatedly until the words HEART RATE CONTROL appear in the dis- play.
-
Page 21: Maintenance And Troubleshooting
MAINTENANCE AND TROUBLESHOOTING Inspect and tighten all parts of the elliptical exerciser regularly. Replace any worn parts immediately. To clean the elliptical exerciser, use a damp cloth and a small amount of mild soap. IMPORTANT: To avoid damage to the console, keep liquids away from the console and keep the console out of direct sunlight. -
Page 22: Exercise Guidelines
EXERCISE GUIDELINES WARNING: Before beginning this or any exercise program, consult your physician. This is especially important for persons over the age of 35 or persons with pre-existing health problems. The pulse sensor is not a medical device. Various factors may affect the accuracy of heart rate readings. - Page 23 STRENGTH TRAINING GUIDELINES During strength exercises, you must maintain proper form for the best results. Maintaining proper form involves moving through the full range of motion for each exercise and moving only the appropriate parts of the body. Exercising in an uncontrolled manner will reduce the benefits of strength exercises.
-
Page 24: Part List
PART LIST—Model No. 831.28645.1 Key No. Qty. Description Base Frame Outer Crank Arm Cover Inner Crank Arm Cover Console Upright Roller Cover Left Handlebar Right Handlebar Handlebar Endcap Handlebar Leg Left Roller Leg Left Pedal Left Pedal Leg Right Pedal Right Pedal Leg Frame Cover Inner Handlebar Cover... - Page 25 Key No. Qty. Description M8 x 16mm Patch Screw M8 Nylon Locknut M10 Nylon Locknut Wave Washer Note: Specifications are subject to change without notice. See the back cover of this manual for information about ordering replacement parts. *These parts are not illustrated. If a part is missing, call 1-888-533-1333. Key No.
-
Page 26: Exploded Drawing
EXPLODED DRAWING A—Model No. 831.28645.1 R0108A... - Page 27 EXPLODED DRAWING B—Model No. 831.28645.1 R0108A...
-
Page 28: 90 Day Full Warranty
Get it fixed, at your home or ours! For repair—in your home—of all major brand appliances, lawn and garden equipment, or heating and cooling systems, no matter who made it, no matter who sold it! For the replacement parts, accessories, and user’s manuals that you need to do-it-yourself. For Sears professional installation of home appliances and items like garage door openers and water heaters.
Need help?
Do you have a question about the XP 160 831.28645.1 and is the answer not in the manual?
Questions and answers
What is the stride length for a pro form xp 160?
I am only 5.4 how do I change the vertical length it’s hurting my hips