Table of Contents
Advertisement
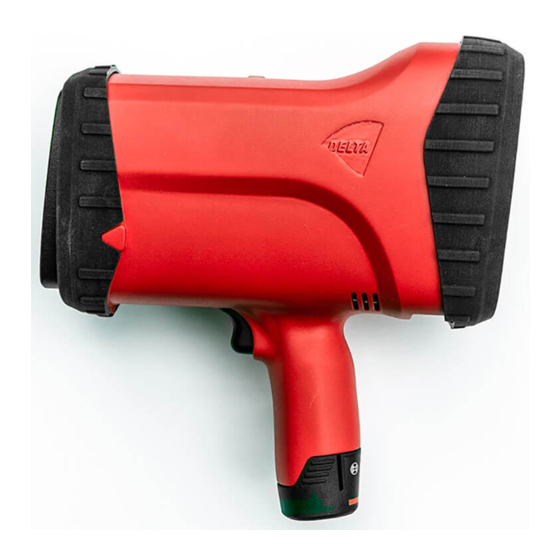
RetroSign GRX Retroreflectometer
User Manual
On-site Quality Control of Road Traffic Signs, High Visibility Clothing, Conspicuity Tapes, and License
Plates in accordance with CEN/ASTM
Manual December 2017 - English
DELTA - Venlighedsvej 4 - 2970 Hørsholm - Denmark - Tel. +45 72 19 40 00 - roadsensors@delta.dk
Advertisement
Table of Contents

Related Manuals for Delta RetroSign GRX-1


Summary of Contents for Delta RetroSign GRX-1
- Page 1 On-site Quality Control of Road Traffic Signs, High Visibility Clothing, Conspicuity Tapes, and License Plates in accordance with CEN/ASTM Manual December 2017 - English DELTA - Venlighedsvej 4 - 2970 Hørsholm - Denmark - Tel. +45 72 19 40 00 - roadsensors@delta.dk...
- Page 2 / or bystander of the device. Retro Sign GRX est conforme à l'exigence de l'exposition aux RF au Canada avec une distance de séparation de 80 mm entre l'utilisateur et / ou spectateur de l'appareil. RetroSign GRX User Manual / December 2017 DELTA...
- Page 3 Disclaimer The information contained in this document is subject to change without notice. DELTA MAKES NO WARRANTY OF ANY KIND WITH REGARD TO THIS MATERIAL, INCLUDING, BUT NOT LIMITED TO, THE IMPLIED WARRANTIES OF MERCHANTABILITY AND FITNESS FOR A PARTICU-LAR PURPOSE. DELTA SHALL NOT BE LIABLE FOR ERRORS CONTAINED HEREIN OR FOR INCIDENTAL OR CONSEQUENTIAL DAMAGES IN CONNECTION WITH THE FURNISHING, PERFORMANCE OR USE OF THIS MATERIAL.
- Page 4 RetroSign GRX User Manual / December 2017 DELTA...
- Page 5 RetroSign GRX User Manual / December 2017 DELTA...
- Page 6 RetroSign GRX User Manual / December 2017 DELTA...
- Page 7 Delete series data ......................... 47 Export series data ......................... 47 Calibration ............................52 How to perform a reference calibration ..................52 How to perform a dark calibration ....................53 Settings ............................. 55 Extension pole ........................... 57 RetroSign GRX User Manual / December 2017 DELTA...
- Page 8 Environmental characteristics ......................68 Mechanical characteristics ........................ 68 Appendix B: iPad App ........................... 69 Availability ............................69 Using the App ............................ 70 Main Menu............................71 Manage Menu ........................... 76 Appendix C: Delivery ..........................80 RetroSign GRX User Manual / December 2017 DELTA...
-
Page 9: Section 1: Introduction
When using ASTM geometry the sign is illuminated at an entrance angle of -4º, whereas CEN geometry means that the sign is illuminated at an entrance angle of +5º. DELTA can supply additional entrance/illumination angles of +10º, +20º, +30º, +40º, and +45º if required. The entrance/illumination angles are determined by the angle adapter mounted at the front of the GRX. -
Page 10: International Standards
A mains powered battery charger is supplied as customary delivery. The majority of buttons on the RetroSign GRX are accessible via the touch screen. The physical buttons and features on the instrument are shown below. RetroSign GRX User Manual / December 2017 DELTA... -
Page 11: Angle Adaptor
The backside of the angle adaptor is used for calibration and looks like this: See Section 3 – Operating Information for details on how to calibrate the GRX. RetroSign GRX User Manual / December 2017 DELTA... -
Page 12: Touch Screen
Built-in camera for picture of sign, easy calibration, and scanning of barcode / QR codes • Recognition of sign orientation and correct instrument rotation • Additional entrance angle adapter (+10º, +20º, +30º, +40º, and 45º) • Extension pole kit RetroSign GRX User Manual / December 2017 DELTA... -
Page 13: Section 2: General Information
Factory calibrations The RetroSign GRX is factory calibrated. The reference’s value is measured in DELTA’s DANAK accredited calibration laboratory using traceable methods and equipment. To ensure that the GRX measures retroreflection of materials correctly it is recommended to do a daily calibration using the calibration reference supplied with the instrument. -
Page 14: Grx Type Cen
1.5º, and 2.0º). The measurement area is ø 25 mm / inch. GRX type SAFETY The illumination angle is +5º and the offsets between the illumination and observation angle is 0.2º. The measurement area is ø 25 mm / 1 inch. RetroSign GRX User Manual / December 2017 DELTA... -
Page 15: Battery
To recharge the battery, first make sure that the RetroSign GRX is turned off, remove the battery from the handle and insert it in the charger. Make sure the battery and battery charger is clean and dry before and during charging takes place. RetroSign GRX User Manual / December 2017 DELTA... - Page 16 Do not store battery in charger. Storing the battery in the charger over a long period of time could lead to battery damage and fire. • See further details in the charger user guide. RetroSign GRX User Manual / December 2017 DELTA...
- Page 17 Practical advice With continuous or repetitive charging cycles without interruption, the charger can warm up. This is of no consideration and does not indicate a technical defect of the unit. RetroSign GRX User Manual / December 2017 DELTA...
-
Page 18: Section 3: Operating Information
1-2 seconds. Calibrate the instrument if necessary (see ‘Calibration’ later in this section). To ensure high quality of data DELTA recommends calibrating the instrument minimum once a day, typically in the morning before commencing the measurements. The instrument can be operated between 0... - Page 19 Select, add, edit, or delete a user Templates Add, edit, or delete templates Overview of conducted measurements and series. Export or delete data Calibrate Calibrate the GRX Settings Adjust settings e.g. time, date RetroSign GRX User Manual / December 2017 DELTA...
-
Page 20: Users
. In the pop-up box you can change the user name: 4) Add new user by pressing . In the pop-up box, enter the relevant user name of the new user and press ‘OK’: RetroSign GRX User Manual / December 2017 DELTA... -
Page 21: Working With Templates, Series, And Inspections
Note: inspections are grouped in series. In practice, when using the GRX you start deciding on a template, then set up one or more series and finally conduct the measurements: → → Template Series Measurements RetroSign GRX User Manual / December 2017 DELTA... -
Page 22: Templates
ID. ‘Templates’ from the main menu. The list To choose a template, or add a new template, select of stored templates is now displayed on the screen: RetroSign GRX User Manual / December 2017 DELTA... - Page 23 You filter or find an existing template by tapping ‘Type here to filter…’: • Use the keyboard, which appears on the screen, to type the name of the relevant filter. When finished, press RetroSign GRX User Manual / December 2017 DELTA...
- Page 24 Edit an existing template by first tapping on the relevant template and then press at the top of the screen. • This is then displayed on the screen, with the name of the template written at the top: RetroSign GRX User Manual / December 2017 DELTA...
- Page 25 3) Add a new template • Add a new template by pressing at the top of the screen. This is then displayed on the screen: RetroSign GRX User Manual / December 2017 DELTA...
- Page 26 4) Delete a template and ‘OK’. Delete a template by first tapping on the relevant template name and then pressing The template is now deleted. RetroSign GRX User Manual / December 2017 DELTA...
-
Page 27: Series
To filter or find an existing series name tap on ‘Type here to filter…’: • Use the keyboard that appears on the screen, to type the name of the relevant filter. When finished, press • The screen now shows the series that match your filter. RetroSign GRX User Manual / December 2017 DELTA... - Page 28 – see screen shot below). Customized fields can be added by selecting ‘Add new field’ from the list and then typing in the name of your own data field. Finish adding fields by pressing ‘Add’: RetroSign GRX User Manual / December 2017 DELTA...
- Page 29 How many measurements (of background and legend) should been taken? Use the swipe up / down functionality to select the relevant number (0-10). RetroSign GRX User Manual / December 2017 DELTA...
-
Page 30: Performing An Inspection
‘Measure’ from the main menu and press the trigger-button on the GRX handle to Select initiate a new inspection: • The display now shows an overview of the data fields specified for the inspection (if ‘single shot’ has not been activated): RetroSign GRX User Manual / December 2017 DELTA... - Page 31 (see section MUTCD library for further details). Follow the below instructions to select the relevant MUTCD sign. RetroSign GRX User Manual / December 2017 DELTA...
- Page 32 • Press ‘Select MUTCD sign’ on the screen: • Then select the relevant MUTCD category from the list: RetroSign GRX User Manual / December 2017 DELTA...
- Page 33 Select sheeting type according to ASTM D4956-11A. • The pass/fail threshold values for background, legend, and contrast are automatically calculated (as in the example below) according to MUTCD requirements (see ‘MUTCD library’ RetroSign GRX User Manual / December 2017 DELTA...
- Page 34 (e.g. 10 % as in the example below). • Press ‘done’ to transfer the information (e.g. MUTCD code, sheeting type and pass/fail threshold) to the data fields. (or press ‘cancel’ to abort). RetroSign GRX User Manual / December 2017 DELTA...
- Page 35 Take a photo (optional feature) Use the GRX to take a photo of the particular sign. • Press the trigger to take a photo (or tap the icon): RetroSign GRX User Manual / December 2017 DELTA...
- Page 36 Place the RetroSign GRX on the element you want to measure and press ‘Measure’ on the screen (or press the trigger-button on the GRX handle) to do the measurement reading. DELTA recommend that the RetroSign GRX is in contact with the element when measuring, this will ensure that the measurement angles are in accordance with the standard.
- Page 37 The instrument automatically suggests a color of the sign. In some cases, e.g. when measuring worn signs or signs with orange or brown colors, the GRX may have difficulties identifying the correct color. RetroSign GRX User Manual / December 2017 DELTA...
- Page 38 Result view When all steps of the inspection are completed the main screen will show the results of the inspection: RetroSign GRX User Manual / December 2017 DELTA...
- Page 39 United States. During the use of the GRX, the instrument will ask you to choose the relevant sign type according to the below table (source: http://mutcd.fhwa.dot.gov/pdfs/2009/mutcd2009edition.pdf, page 31) RetroSign GRX User Manual / December 2017 DELTA...
- Page 40 Note: special cases W3-1, W3-2, W3-3, and W3-5 are not supported by the GRX because these types of sign contain 3 or more colors. How to work with the MUTCD library is further described in Section 3 ‘Working with templates, series, and inspections’. RetroSign GRX User Manual / December 2017 DELTA...
-
Page 41: View Series And Delete Inspections
• export series data These options are further explained below. View series and delete inspections To see the inspections linked to a series, tap on the relevant line in the log overview. RetroSign GRX User Manual / December 2017 DELTA... - Page 42 ‘Delete’ icon to delete the particular inspection. Alternatively, tap on an inspection to view the data and from here select the ‘delete’ icon at the top right corner to delete the data. RetroSign GRX User Manual / December 2017 DELTA...
- Page 43 Use the swipe- functionality to flick through the pages. Also, scroll up/down to see the full dataset on page 2. RetroSign GRX User Manual / December 2017 DELTA...
- Page 44 Inspection page 1: RetroSign GRX User Manual / December 2017 DELTA...
- Page 45 Inspection page 2: RetroSign GRX User Manual / December 2017 DELTA...
- Page 46 Inspection page 3: RetroSign GRX User Manual / December 2017 DELTA...
-
Page 47: Delete Series Data
How to export data of one series: • From the log list swipe the screen from right to left and these icons appear: • Press the ‘Export’-icon and a pop-up menu appear: RetroSign GRX User Manual / December 2017 DELTA... - Page 48 In the pop-up box select or unselect the output you want the data exported to (.xls, .kmz, .jpg). You can choose to have data presented horizontally or vertically in the Excel data sheet. RetroSign GRX User Manual / December 2017 DELTA...
- Page 49 (v or h) indicates vertical or horizontal Excel organization: For multiple files the file name is: ‘Retrosign GRX SNxxxx + series name + date of last series entry + v/h.xls’ RetroSign GRX User Manual / December 2017 DELTA...
- Page 50 Below are examples of a data transfer that is presented horizontally and vertically in an Excel data sheet, and in Google Earth. Fields marked green indicate that the sign has passed the pass/fail check whereas red indicate that it has failed the check. Horizontal view RetroSign GRX User Manual / December 2017 DELTA...
- Page 51 Vertical view Google Earth file RetroSign GRX User Manual / December 2017 DELTA...
-
Page 52: Calibration
Calibration The RetroSign GRX is factory calibrated. In order to ensure high quality of data DELTA recommends calibrating the RetroSign GRX once a day, typically in the morning, before commencing the measurements. The calibration process automatically compensates for instrument offsets etc. -
Page 53: How To Perform A Dark Calibration
Fill out the fields: type in the calibration reference values printed on the calibration target or scan them from the calibration target by selecting ‘Scan barcode’ and place the barcode in front of the reader: RetroSign GRX User Manual / December 2017 DELTA... - Page 54 10 m/33 feet in front of it and away from any light source). • Press the trigger (or press ‘Calibrate’) to calibrate. • When the message ’Dark Calibration completed’ appears on the screen, press ‘Next’ to complete the dark calibration session. RetroSign GRX User Manual / December 2017 DELTA...
-
Page 55: Settings
Once the reference calibration also is completed the instrument is ready for measuring. Note: If the measurement results still seem to be incorrect even after a dark calibration of the GRX, it is recommended to contact your appointed dealer or DELTA. Settings It is possible to adjust and configure many different data fields for the RetroSign GRX e.g. - Page 56 The function can be adjusted between 15 seconds and 30 minutes by tapping on the display. Turn location tracking (GNSS) on/off This setting allows the user to completely disable location tracking. RetroSign GRX User Manual / December 2017 DELTA...
-
Page 57: Extension Pole
Information about the GRX This section contains information related to the instrument setup and functions. This is information which DELTA may request access to in About the instrument case there is a problem with the instrument. Extension pole For measuring signs at a high or unreachable level it is advisable to use the extension pole. -
Page 58: Mounting The Grx Onto The Extension Pole
Following this, the GRX with the mounted extension fixture can now be mounted on the extension pole. • The extension fixture is locked in position by the integrated snap-lock in the pole. RetroSign GRX User Manual / December 2017 DELTA... -
Page 59: The Remote Button
GRX angle adapter plate is in full contact with the sign surface. The remote button The GRX is operated using the remote button mounted on the extension pole (see below photo). RetroSign GRX User Manual / December 2017 DELTA... -
Page 60: Activating The Remote Button
To leave the sleep mode, simply click the remote button and a red LED lamp will start flashing to show the reconnection between the GRX and the remote button. Once the remote button becomes re-activated, it does not require any other setup. RetroSign GRX User Manual / December 2017 DELTA... -
Page 61: Section 4: Errors And Warnings
Please remove or rotate it before measurement position. proceeding. Error Slope too High/Low on channel: channel Calibration target is not as Check calibration name expected or internal target for damage. hardware problem. Clean lenses. If problem persists, RetroSign GRX User Manual / December 2017 DELTA... -
Page 62: Measurement
FAT formatted and wait at least 10 seconds from inserting until pressing Export. Error USB power. Unable to activate power to If problem persists, USB port. Most likely a contact your dealer. hardware problem. RetroSign GRX User Manual / December 2017 DELTA... -
Page 63: How To Limit Errors
However, RetroSign GRX can conduct measurements without contact to the sign surface. If you do have to perform inspections like this please consult your appointed dealer or DELTA, for instruction in your specific situation. RetroSign GRX User Manual / December 2017... - Page 64 Note: The instrument automatically turns off when the battery is depleted. Rechargeable batteries have a limited number of charge cycles and may eventually need to be replaced. See also ‘Battery’ in Section 2 – General Information. RetroSign GRX User Manual / December 2017 DELTA...
-
Page 65: Section 5: Maintenance
The lens does not need special maintenance. If dirty carefully moist the lens with ordinary window cleaning liquid and clean it with a soft linen cloth. If damaged send the instrument to DELTA or one of our authorized service dealers for repair. -
Page 66: Calibration
To ensure reliable measurements, it is recommended that the calibration target is periodically recalibrated or changed to a traceable standard. DELTA suggests this period to be every 2 years. The calibration target comes with a DANAK accredited calibration certificate. DELTA offers calibration traceable to PTB (Physikalisch-Technishe Bundesanstalt) and NIST (National Institute of Standards and Technology). -
Page 67: Appendix A: Specifications
Field of measurement: ...................... ø 25 mm/1 inch Light source: ........................Illuminant »A« Receptor sensitivity: ....................Precise eye corrected Min. reading (cd/lx×m²): ........................... 0 Max reading (cd/lx×m²): ........................2000 Some angles are optional RetroSign GRX User Manual / December 2017 DELTA... -
Page 68: Electrical Characteristics
Recommended storage (due to lifetime considerations of the battery): ..0°C to +30°C (32°F to 86°F) Humidity: .......................... Non-condensing Mechanical characteristics Length: ........................270mm/10.6 inches Width: .......................... 110 mm/4.3 inches Height: ........................285 mm/11.2 inches Weight: ..........................1.9 kg/4.2 lbs RetroSign GRX User Manual / December 2017 DELTA... -
Page 69: Appendix B: Ipad App
GRX e.g. how Inspections, Series, and Templates function and how they are interlinked. For further description of these functionalities please refer to the relevant sections in the GRX manual. Availability The app for RetroSign GRX looks like this: RetroSign GRX User Manual / December 2017 DELTA... -
Page 70: Using The App
Download the app for RetroSign GRX from Apple’s App Store by scanning the below QR code or searching for DELTA GRX in App Store. QR code Search in App Store Note: The app for RetroSign GRX is only available for iPad running IOS 10 or later versions. -
Page 71: Main Menu
(see example below): • To see data for a particular inspection, select an inspection by tapping on the relevant line. Below is an example of inspection details for one measurement: RetroSign GRX User Manual / December 2017 DELTA... - Page 72 To insert comments on the photo just tap on the photo and the inspection image appear. Here you can highlight areas directly on the image and add comments, as in below example: RetroSign GRX User Manual / December 2017 DELTA...
- Page 73 Choose (tap) the GRX instrument on the list (see example below), and the GRX starts to synchronise data between the GRX and the App. 3. Graphs • To see a graphical presentation of the data, select ‘GRAPHS’ in the Main Menu: RetroSign GRX User Manual / December 2017 DELTA...
- Page 74 To do a search in your data-set, select ‘SEARCH’ in the Main Menu: • Fill out the relevant filter(s) to the left and the search result will appear to the right (see example below): RetroSign GRX User Manual / December 2017 DELTA...
- Page 75 To see where the inspections to place, select ‘MAP’ in the Main Menu: Note: the iPad must be connected to the internet in order for the mapping to work. • Below is an example of a mapping of inspection results in a series: RetroSign GRX User Manual / December 2017 DELTA...
-
Page 76: Manage Menu
Below are instructions for each of the items in the Manage Menu. 1. Series • To see or alter the series in your data-set, select ‘SERIES’ in the Manage Menu: Below is an example of the screen from managing series: RetroSign GRX User Manual / December 2017 DELTA... - Page 77 In the top right corner, you can add fields to the template by tapping ‘+’. Note: when you synchronise the app with your GRX, this new template will be transferred to the instrument. Any deleted or edited series will also be transferred. RetroSign GRX User Manual / December 2017 DELTA...
- Page 78 From the list chose the series you want to export data to Excel (tap on the series). • Now chose where you want to save the data. All installed cloud drive provider apps installed on the iPad is supported. (see example below): RetroSign GRX User Manual / December 2017 DELTA...
- Page 79 The data is then exported to an Excel spreadsheet. RetroSign GRX User Manual / December 2017 DELTA...
-
Page 80: Appendix C: Delivery
The RetroSign GRX instrument is delivered with the below items. 1. Carrying case 2. Angel adaptor 3. RetroSign GRX instrument including battery 4. Battery charger 5. Spare battery 6. USB stick for data transfer RetroSign GRX User Manual / December 2017 DELTA...
Need help?
Do you have a question about the RetroSign GRX-1 and is the answer not in the manual?
Questions and answers