Table of Contents
Advertisement
Advertisement
Table of Contents

Related Manuals for SwissQprint Nyala

Summary of Contents for SwissQprint Nyala
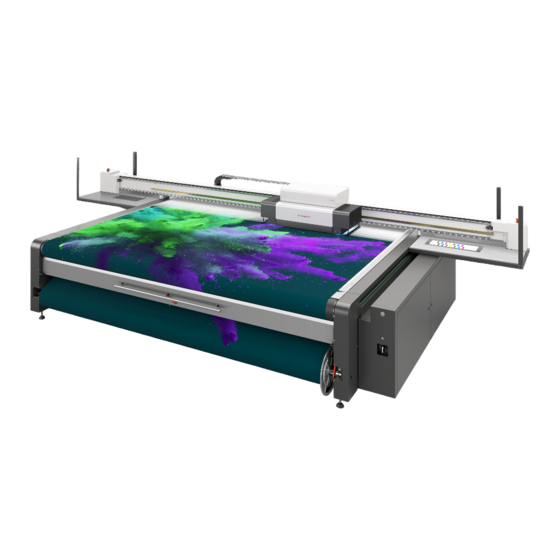
- Page 1 Operating manual Nyala High-End UV Inkjet System...
- Page 2 Translation of the original (German) operating manual date 08-2014 author swissQprint AG version...
- Page 3 Content Introduction ............7 Foreword .
- Page 4 Danger areas............29 3.9.1 Printing, material supply, adjustment work .
- Page 5 4.5.2 Cleaning print heads ..........59 4.5.3 Cleaning instructions .
-
Page 7: Introduction
Introduction Introduction Foreword To the customer By deciding to purchase our product, you are participating in the success of swissQprint printing systems. The modular design of our system guarantees you: • A system solution that meets your individual requirements in terms of speed and quality. -
Page 8: Volume 1 - Operating Manual
1.2.3 Volume 2 - Software operating manual This volume contains information about Amber. 1.2.4 Volume 3 - Service handbook * This volume contains information on servicing the machine by authorised service personnel. * optional © swissQprint AG, 2014... -
Page 9: Structure Of This Operating Manual
There are a number of optional extras available for the machine. Descriptions relating to these op- tional extras are identified in the operating manual by the * symbol. You can find the optional accessories for your machine in the sales documents. © swissQprint AG, 2014... -
Page 10: Points To Note When Reading This Operating Manual
Where to keep the manual Keep Volume 1 "Operating manual" and Volume 2 "Software operating manual" close at hand in the vicinity of the workstation. Volume 3 "Service handbook" must be available to maintenance and service personnel if re- quired. © swissQprint AG, 2014... -
Page 11: Current Status Of Documentation
In the interests of our customers, we reserve the right to make changes as a result of technical im- provements. This document therefore corresponds to the technical status of the product supplied and not the manufacturer's current state of development. © swissQprint AG, 2014... -
Page 12: Rating Plate
Rating plate Note! The rating plate is used to uniquely identify your machine. Manufacturer Frequency Manufacturer's address Power supply CE symbol Mains voltage connection Serial number Total weight Machine type Machine name Date of manufacture (YYYY/MM) © swissQprint AG, 2014... -
Page 13: Product Description
General technical description of the machine Directional information Directional information such as "right, left" or "forwards, backwards" relate to the view of the ope- rator towards the machine during the step described. Front Rear Left Right © swissQprint AG, 2014... -
Page 14: Intended Use
Printing on heat-resistant boards or flexible materials 2.2.1 Components Cleaning station Adjusting wheel for vacuum* Emergency stop switches PC main switch Drizzle station Beam Switch for vacuum Vacuum plate Main switch Print head carriage Pressure gauge for vacuum Roll printing device* © swissQprint AG, 2014... -
Page 15: Technical Information
Product description Technical information 2.3.1 Dimensions and weight Symbol Description Connection point for electricity, network and air Exhaust outlet for vacuum pump(s) • Recommended location size • Barrier marking Flatbed Weight: 1200 - 1700 kg © swissQprint AG, 2014... - Page 16 Product description Roll option Weight: 1200 - 1700 kg © swissQprint AG, 2014...
- Page 17 Product description Reinforced roll to roll option Weight: 1200 - 1700 kg © swissQprint AG, 2014...
- Page 18 Product description Board option Weight: 1350 - 1850 kg © swissQprint AG, 2014...
-
Page 19: Environmental Conditions
Speed mode 88 m Production mode 46 m Quality mode 36 m Fine art mode 20 m Print output with full printing width – roll to roll With "roll to roll", productivity is reduced by approx. 10% © swissQprint AG, 2014... -
Page 20: Electrical Connection, Power Consumption
2 x 1.3 kW 4.6 kW 7.2 kW CEE16 Nyala Tandem 2 x 2.2 kW 4.6 kW 9.0 kW CEE32 * True power approx. 70% of the apparent power ** UV system dependent on selected drying mode © swissQprint AG, 2014... -
Page 21: Print Head
Print head Designation Value Unit Variable drop size 9 - 42 Picolitre Colour channels 9 pcs Addressable resolution 360 - 1080 DPI Visual resolution 2160 DPI K, C, M, Y, Lc*, Lm*, white* Colour configuration Spot colours/other* © swissQprint AG, 2014... - Page 22 Product description © swissQprint AG, 2014...
-
Page 23: Safety
3.1.2 Latest technology The supplied machine meets the standards of the latest technology at the time of delivery. However, the equipment may pose dangers unless the safety instructions in this guide are ob- served and implemented. © swissQprint AG, 2014... -
Page 24: Proper Use
Proper use of the machine also requires: • compliance with applicable national safety regulations; • observation of the safety instructions in this operating manual; • compliance with the conditions of use and use of the specified operating materials. © swissQprint AG, 2014... -
Page 25: Examples Of Improper Use
– if the operating manual is incomplete • Use of ink and other chemicals not approved by swissQprint • Non-adherence to maintenance requirements • failure to react to signs of wear and damage... -
Page 26: Hazards, Important Instructions
Warns of serious damage to the equipment or other material damage or consequential damage. Tip! Tip! Is used to designate user tips and useful information which enhance the usability and prolong the service life of the machine and make the work significantly easier. © swissQprint AG, 2014... -
Page 27: Areas Of Responsibility
• have read and understood the operating manual, • be over the age of 16, • be familiar with first aid techniques and the use of fire extinguishers. © swissQprint AG, 2014... -
Page 28: Rules And Occupational Health And Safety
Any troubleshooting work or inspection on the machine may only be carried out when it is switched off. Safety devices must never be bypassed or rendered ineffective. If malfunctions cannot be remedied by the operators using simple measures, then the responsible service station must be informed. © swissQprint AG, 2014... -
Page 29: Danger Areas
• Do not store any tools inside or on top of the machine. • Personal property and items of clothing or protective equipment that have been removed must not interfere with the operation of the machine. © swissQprint AG, 2014... -
Page 30: Printing, Material Supply, Adjustment Work
The working area of the operating personnel during the actual printing process is defined as fol- lows: Only one person allowed to operate the machine at the operating unit, to load material and to car- ry out settings work. © swissQprint AG, 2014... -
Page 31: Definition Of The Danger Areas
• UV lamps Risk of tripping • Loose cables • Cable ducts on the floor Hazard due to poisonous materials • Cleaning the machine • Cleaning the print heads • Ink tanks • Central waste container © swissQprint AG, 2014... -
Page 32: Safety And Monitoring Devices
Safety 3.10 Safety and monitoring devices Emergency stop switches X-Bumper Control switch at purge tray Main switch Print head carriage protection switch Control panel Control switch at vacuum slide cover © swissQprint AG, 2014... -
Page 33: Emergency Stop Switches
Do not press the emergency off switch to switch off the machine in routine operation. Note! Release the emergency stop switch once operational safety has been restored. You do this by turning the switch clockwise (see "Emergency stop switches", 51). © swissQprint AG, 2014... -
Page 34: Control Switch At Purge Tray
All movements are blocked. • In the event of activation via Amber, an error message appears on the screen. • In the event of activation via the control panel, an error message appears on the LCD display. © swissQprint AG, 2014... -
Page 35: Main Switch
The following safety measures are introduced when an overload occurs or an axle drive is blocked: • An emergency stop is carried out. • The machine switches to the operating status ERROR. • An error message indicates the safety shutdown. © swissQprint AG, 2014... -
Page 36: Safety Equipment
Use only chemical-resistant protective gloves that are free from visible damage and have been stored correctly. Caution! You are responsible for: • Wearing the necessary personal protective equipment • Cleaning and maintaining it regularly • Replacing damaged and unusable items of protective equipment promptly © swissQprint AG, 2014... -
Page 37: Safety Signs
Important safety signs are fitted onto the machine. If these are not observed there is a danger of death or serious injury. Warning: UV radiation Warning: hot surface Warning: hand injuries Warning: electrical danger Wear eye protection Wear protective gloves © swissQprint AG, 2014... -
Page 38: Meaning Of The Safety Signs
3.12.2 Mandatory sign These symbols • are round and blue in colour; • stipulate that personal protective equipment must be worn to protect against dangers. Wear eye protection Wear protective gloves Wear a respiration filter mask © swissQprint AG, 2014... -
Page 39: Warning Signs
• should draw attention to objects and circumstances to warn against possible danger to life and limb. Warning: hot surfaces Warning: electrical hazard Warning: dangerous (poisonous) materials Warning: UV radiation Warning: hand injuries © swissQprint AG, 2014... -
Page 40: Electrical Hazards
Facial injuries and other injuries caused by propelled objects. • damage to the machine Precautions during the initialisation and the operation in the ONLINE/OFFLINE operating status: • Before operation, check whether there are any objects on the table or the side covers. © swissQprint AG, 2014... -
Page 41: Burns
• After eye contact: rinse eyes thoroughly for several minutes by holding the eyelids open under running water. If irritation continues, seek medical advice. • After swallowing: do not induce vomiting: seek medical advice immediately. © swissQprint AG, 2014... -
Page 42: Risk Of Fire And Explosion
Solid materials, mainly organic in nature; e.g. wood, paper, textiles, etc. Liquid and liquefiable substances; e.g. petrol, oils, greases, paints, etc. C Combustible gases: methane, propane On fires caused by ink or cleaning agents, use only fire extinguishers filled with CO2 or dry powder. © swissQprint AG, 2014... -
Page 43: In The Event Of A Fire
The adjacent sign indicates the location of a fire extinguisher. • Do not use flammable cleaning agents to clean the machine. • Store all chemicals in the proper manner in accordance with local guide- lines. © swissQprint AG, 2014... -
Page 44: Risk Of Poisoning
Make sure that the hazard label on chemical containers is displayed correctly. If the hazard label is missing or damaged, replace it with original labels. • Provide adequate ventilation, including at floor level, when working with chemicals. • Use breathing apparatus if necessary when working with chemicals. © swissQprint AG, 2014... -
Page 45: Handling And Storage Of Chemicals
Hazard label for poisonous substances Hazard label for substances that pose a health hazard Hazard label for irritating substances Caution! Chemicals (printing ink, cleaning agents) that are classified as irritating are used for operating and cleaning this machine. © swissQprint AG, 2014... -
Page 46: Handling Chemicals Safely
Dispose of chemicals in accordance with current national environmental protection regula- tions. In case of doubt, check the appropriate disposal methods with your local collection point or recycling centre. • Collect different chemicals in separate containers for disposal. © swissQprint AG, 2014... -
Page 47: Disposal
You should nevertheless provide adequate ventilation, including at floor level. Safety instructions • Protect your skin and eyes with suitable UV protection when operating the machine. • Never look directly into a UV lamp. © swissQprint AG, 2014... -
Page 48: Safety Instructions For Operators
The reliability, readiness and service life of the machine greatly depend on you carrying out your work in a conscientious manner. Note! Specialist knowledge and expertise are required to service and maintain the machine. The manu- facturer provides this knowledge through training courses which are specially tailored for service personnel. © swissQprint AG, 2014... -
Page 49: Controls And Operation
Operating errors or careless operation may endanger human lives and they may cause serious damage of the machine. The device is equipped with safety appliances in order to prevent danger. These appliances, however, cannot prevent damage caused by operating errors or careless usage. © swissQprint AG, 2014... -
Page 50: Controls
Controls and operation Controls Operating unit Monitor Emergency stop switches Membrane keyboard with LCD display Mouse Keyboard Loading drawer © swissQprint AG, 2014... -
Page 51: Emergency Stop Switches
• the PC and screen remain switched on. Note! Release the emergency stop switch once operational safety has been restored. You do this by turning the switch clockwise. © swissQprint AG, 2014... -
Page 52: Membrane Keyboard With Lcd Display
LCD status display Numerical input field Note! The membrane keyboard is mainly used for diagnostics and for making service settings. Further information on using the membrane keyboard for service purposes can be found in the service handbook. © swissQprint AG, 2014... - Page 53 Press this key to move the print head carriage to the right. Press the left key to maintain speed. Speed key Press this key to increase the acceleration of the print head carriage and the beam speed. © swissQprint AG, 2014...
-
Page 54: Daily Commissioning
Check the fill level in the purge tray and clean it if necessary. Note! The waste container contains chemicals that are harmful to the environment. Dispose of these in accordance with local regulations. • After extended downtime, check the expiry date of the ink. © swissQprint AG, 2014... -
Page 55: Switching On The Printing System
In the initialisation phase, the print head first moves to the top position in the Z-direction, then forwards to the X-position and finally to the Y-position on the far left. Never touch the machine's operating area. © swissQprint AG, 2014... -
Page 56: Maintenance Of Print Heads
• As an operator, you are responsible for correctly maintaining the print heads. Please note that if you do not comply with these instructions, the print heads will be damaged. The swissQprint guarantee does not cover damaged print heads. The swissQprint guarantee does not cover damaged print heads. - Page 57 During longer print jobs, this can result in a layer of ink building up on the base plate. Therefore, also clean the supporting plate at regular intervals, as well as the print heads (as de- scribed in the following chapters). © swissQprint AG, 2014...
-
Page 58: Checking The Print Head
The nozzle plate has no deposits and is not has dried. You can tell that a nozzle plate has discoloured. You can tell this by its reflective become coated when it appears opaque and surface. non-reflective. © swissQprint AG, 2014... -
Page 59: Cleaning Print Heads
Bleed to allow the print heads to drip. 5 Dab off the entire surface of the print head with a swissQprint cleaning cloth. In the event of severe contamination, clean according to chapter "Cleaning instructions" on page 60. © swissQprint AG, 2014... -
Page 60: Cleaning Instructions
Additional instructions for white print heads and very dirty print heads swissQprint recommends that this cleaning procedure be carried out if the nozzle plate is wet or coated with ink mist. Clean the base plate too if it is dirty! Daily or after every shift (8 h) 1 Soak a fresh swissQprint cleaning cloth with swissQprint cleaning agent. -
Page 61: Notes On Avoiding Stray Light
Therefore, cover the free surfaces in front of, behind and between the substrate with panels of the same thickness when panel printing above a thickness of approx. 10 mm. © swissQprint AG, 2014... -
Page 62: Positioning Print Material
The worktop also provides holes for screwing in register pins. The register pins are included in the delivery in different heights: Image Register pin colour Height Min. thickness of material 3 mm 3 mm silver 0.7 mm 0.7 mm © swissQprint AG, 2014... - Page 63 Register pin on vacuum plate 1 Measure the thickness of your processing material with a caliper. 2 Select the appropriate register pins for the thickness of the processing material. 3 Fully screw in the register pins at the desired position. © swissQprint AG, 2014...
-
Page 64: Changing The Rotation Direction
Changing the rotation direction Tip! The rotation direction can only be changed if the winding and unwinding units are deactivated. Membrane keyboard Keys Function Direction of rotation display +dance++ Changing the rotation direction, unwinding unit -dance-- © swissQprint AG, 2014... -
Page 65: De)Activating The Automatic Tensioning Device
Membrane keyboard display Activating the unwinding unit +dance++ / -dance-- : *dance** Deactivating the unwinding unit *dance**: +dance++ / -dance-- Activating the winding unit +roll+ / -roll- : *roll* Deactivating the winding unit *roll* : +roll+ / -roll- © swissQprint AG, 2014... -
Page 66: Supporting Short Material Rolls
This stops the shaft from bending so much and the material can be wound and unwound without buck- ling. © swissQprint AG, 2014... -
Page 67: Roll Printing With Reinforced Roll Option
1 Push the material roll onto the roll holder. 2 Push the movable disc onto the roll holder. 3 Align the material roll as desired on the roll holder. 4 Pressurise the roll holder via the valve. © swissQprint AG, 2014... -
Page 68: Fitting The Roll Holder
1 Pivot the lock lever into the upper position on both sides. 2 Lift the prepared material roll and position it on the roll support. Note! Make sure to place the roll at the unguided side of the roll retainer first. © swissQprint AG, 2014... - Page 69 Lever for lock 1 Pivot the lock lever into the lower position. 2 Repeat the process on the opposite side. Result • The material roll is guided. • The material roll disc rests against the drive. © swissQprint AG, 2014...
-
Page 70: Preparatory Tasks
Dancer deflection roller 1 Pull the rocker deflection all the way to the top in the middle. Result The magnets fix the compensating rocker at the upper stop. 2 Repeat the process on the front side. © swissQprint AG, 2014... - Page 71 Pressure roller in feed position 1 Rotate and hold the rotary handle in the direction of the arrow. Result The lock is released and the pressure roll can be adjusted. 2 Pivot the pressure roll into the feed position. © swissQprint AG, 2014...
- Page 72 Controls and operation Pushing the encoder upwards Encoder Fastening screw 1 Loosen the fastening screw. 2 Push the encoder upwards. 3 Tighten the fastening screw. © swissQprint AG, 2014...
-
Page 73: Feeding Through The Roll Material
Deflection roller Working area Rear material roll 1 Feed through the roll material from behind as shown in the previous figure. 2 Fix the roll material to the centre of the cardboard core using sticky tape. © swissQprint AG, 2014... - Page 74 Controls and operation Lowering the encoder Encoder Fastening screw Material 1 Loosen the fastening screw. 2 Lower the encoder onto the material. The arm of the encoder must be parallel to the underlay! 3 Tighten the fastening screw. © swissQprint AG, 2014...
- Page 75 Pressure roller in rear position with maximum possible wrapping 1 Rotate and hold the rotary handle in the direction of the arrow. Result The lock is released and the pressure roll can be adjusted. 2 Pivot the pressure roller into the desired position. © swissQprint AG, 2014...
-
Page 76: Changing The Rotation Direction
Changing the rotation direction Tip! The rotation direction can only be changed if the winding and unwinding units are deactivated. Changing the rotation direction of the unwinding unit Membrane keyboard Keys Direction of rotation display +dance++ -dance-- © swissQprint AG, 2014... -
Page 77: De)Activating The Automatic Tensioning Device
Membrane keyboard display Activating the unwinding unit +dance++ / -dance-- : *dance** Deactivating the unwinding unit *dance**: +dance++ / -dance-- Activating the winding unit +roll+ / -roll- : *roll* Deactivating the winding unit *roll* : +roll+ / -roll- © swissQprint AG, 2014... -
Page 78: Vacuum
4.8.1 Operation using the membrane keyboard Tip! swissQprint provides a vacuum switch on the machine as an optional accessory. The vacuum can be activated/deactivated using the membrane keyboard in ONLINE mode. • Press the function key to switch the vacuum on/off. -
Page 79: Setting The Position
3 Position the vacuum slide at the left outer end of the material to be printed. 4 Fasten the vacuum slide fastening. 5 Where necessary, cover the remaining surface behind the material to be printed with a thin, air- tight material. © swissQprint AG, 2014... -
Page 80: Setting The Position With 220 Mm Uv Lamps
Opening the cover Note! • The cover is monitored by a sensor. • Printing is not possible with the cover open. Cover Opening key 1 Press the key on the cover downwards. 2 Fully open the cover . © swissQprint AG, 2014... - Page 81 4 Tighten the vacuum slide fastening. 5 Where necessary, cover the remaining surface behind the material to be printed with a thin, air- tight material. 6 Close the cover and ensure that it is completely closed. © swissQprint AG, 2014...
-
Page 82: Setting The Vacuum Intensity
4 Check the vacuum intensity on the pressure gauge. 5 Check the contact pressure of the material to be printed by feeding the material forwards. 6 Adjust the vacuum intensity using the adjusting wheel (pos. 2) (for roll printing). © swissQprint AG, 2014... -
Page 83: Breaks
2 Move the print head to the parking position. 3 Clean the print heads as described under "Maintenance of print heads" on page 56. 4 Close Amber and shut down the PC. 5 Switch off the machine. © swissQprint AG, 2014... - Page 84 Controls and operation © swissQprint AG, 2014...
-
Page 85: Maintenance
• All other jobs may be carried out by qualified personnel, swissQprint customer service or authorised partners only. If the machine is to be shut down for a prolonged period of time or decommissioned, please con- tact your customer service representative to arrange for the machine to be preserved properly. -
Page 86: Safe Maintenance
Observe the rules on environmental protection upon the disposal of spent materials. • Collect and store all spent materials separately in suitable containers and dispose of them in an eco-friendly manner and only at official sites. © swissQprint AG, 2014... - Page 87 Please observe the storage regulations for the UV ink. • Only use original UV ink. • The date of manufacture of the ink is printed on the label. Ensure that the expiry date has not passed. © swissQprint AG, 2014...
-
Page 88: Cleaning Fluids
• Do not mix the original cleaning fluid with other cleaning fluids. This can result in the formation of poisonous or inflammable vapours. Note! The print heads are damaged by the use of incorrect cleaning fluid, not approved by swissQprint. Only use cleaning fluids approved by swissQprint. Designation... -
Page 89: Maintenance List
Meaning of symbols: Outline symbols: This service and maintenance work is carried out by authorised swissQprint service personnel or authorised service personnel. Solid symbols: Service and maintenance work is the individual responsibility of the company operating the ma- chine or its operating personnel. -
Page 90: Maintenance List
Check steel belt for even running; adjust if necessary Check tension of steel belt; adjust if necessary Clean the encoder scale 2000 h Lubricate Y runner block 4000 h Lubricate X runner block Remove energy chain flaking © swissQprint AG, 2014... - Page 91 Colour system Emptying/cleaning the purge tray Replenish/replace ink according to expiry date 3 years, Replace the colour ink filter (capsule) 20 L colour Replace the white ink filter (capsule) Replace the "last chance filter" print head © swissQprint AG, 2014...
-
Page 92: Maintenance
This will cause dirt to accumulate in the bearing and drive belt and damage these components. Procedure • Clean control panel, all covers and panelling with a cleaning agent suitable for plastic at regular intervals. • Keep the working environment clean. © swissQprint AG, 2014... -
Page 93: Cleaning The Vacuum Plate
2 Vacuum any ink chips or wipe them up with a cloth. Cleaning the vacuum plate with isopropyl alcohol Caution! Risk of damage to varnished parts when using other cleaning agents. 1 Moisten a cloth with isopropyl alcohol. 2 Clean the vacuum plate. © swissQprint AG, 2014... -
Page 94: Waxing The Vacuum Plate
Waxing the plate can restore these properties. 1 Cleaning the vacuum plate 2 Clean the vacuum plate with isopropyl alcohol. 3 Apply the wax according to the manufacturer's instructions and wax and polish the entire vac- uum plate. © swissQprint AG, 2014... -
Page 95: Cleaning The Uv Lamp Air Filters
4 Remove the filter housing. 5 Blow out the filter housing a sufficient distance away from the machine. 6 Re-attach the filter housing, first by snapping the clip into place. 7 Repeat the procedure for the second UV lamp. © swissQprint AG, 2014... -
Page 96: Replacing The Uv Lamp Air Filters
4 Remove the filter housing and place it on an even surface. 5 Press the filter brackets out of the lock on one side using a screwdriver. 6 Loosen the brackets on one side on the inside. © swissQprint AG, 2014... - Page 97 Maintenance 7 Replace the filter. 8 Snap the brackets back into place. 9 Re-attach the filter housing, first by snapping the clip into place. 10 Repeat the procedure for the second UV lamp. © swissQprint AG, 2014...
-
Page 98: Replacing Uv Lamps
Avoid contact between unprotected skin and the UV lamps. When warm, the surface of the UV lamp may be permanently damaged by skin particles. Disposal The UV lamps contain mercury. Lamps must be disposed of in accordance with official local laws. © swissQprint AG, 2014... - Page 99 2 Allow the UV lamps to cool. Result The fans switch off after cooling down. 3 Switch off the machine. 4 Loosen the screw with the Allen key. Result The UV cartridge will come out. 5 Remove the UV cartridge. © swissQprint AG, 2014...
- Page 100 5 Close the metal holders carefully (4 on both sides). 6 Attach the cooling fins on both sides. 7 Insert the UV cartridge. 8 Carefully tighten the Allen screw for the UV cartridge. 9 Switch on the machine. © swissQprint AG, 2014...
- Page 101 Statistics...select. (Also see Volume 2 - "Calling up statistics" in the software operating manual) 2 Right-click on the desired statistic in the overall statistics. 3 Click on Detail. 4 Click on the Left lamp changed Right lamp changed button to set the counter to 0. © swissQprint AG, 2014...
-
Page 102: Emptying/Cleaning The Purge Tray
3 Empty the purge tray. 4 Close the drain valve. 5 Clean up the waste ink on the drain valve using a cloth. 6 Dispose of the waste ink in the catchment tank in accordance with local environmental laws. © swissQprint AG, 2014...
Need help?
Do you have a question about the Nyala and is the answer not in the manual?
Questions and answers