Table of Contents
Advertisement
Quick Links
Download this manual
See also:
User Manual
Advertisement
Table of Contents

Related Manuals for Innovatis cedex hires

Summary of Contents for Innovatis cedex hires
- Page 1 Cedex HiRes Analyzer Operator’s Guide Software version 2.1...
- Page 3 System Description Installing the Cedex HiRes System ........................21 Completing the Windows Mini-setup ........................21 Configuring Access to the Cedex HiRes Software for Windows User Accounts ........22 Choosing a Suitable Location ..........................27 Starting the Cedex HiRes System after Installation ................... 27 Securing Access Rights ............................28...
- Page 4 Tracking of Status of Events Carried out by the Analyzer ..................32 Preparing the Analyzer for Measurements ......................33 Switching on ..................................33 Logging in at the Computer Operating System Level ..................33 Starting the Cedex HiRes Software 2.1 ........................33 Performing a HW Startup and Prime ..........................34 Preparing the Reagent Kit ..............................35 2.5.1.
- Page 5 Table of Contents Software Using the Measurement Results Window ......................53 Result Data area .................................54 Sample Parameters and Processing Parameters areas ..................55 Image Area ...................................56 1.3.1. Viewing Individual Cell Images .............................56 1.3.2. Viewing a Cell Image Using the Image View Window ..................57 1.3.3.
- Page 6 Deleting an existing Cell Type ............................99 7.5.7. Working with the Live Operator............................99 7.5.8. Description of the Individual Operator Parameters ................... 101 Archiving Data .................................103 7.6.1. Archive ....................................103 7.6.2. Restore ....................................104 7.6.3. Deleting Archived Data ..............................104 Cedex HiRes Analyzer Operator’s Guide...
- Page 7 Tracking Trends in SST Checkpoints with Measurements ................123 8.3.2. Tracking SST Checkpoints without Measurements ...................125 Locking – Unlocking the System ..........................126 Troubleshooting Diagnosis of the Cedex HiRes Analyzer ......................127 Trace and Logging ................................128 The System Audit Trail File ............................128 Appendix System Options und User Preferences ......................129...
- Page 8 Cedex HiRes Analyzer Operator’s Guide...
-
Page 9: Prologue
Nonnenwald 2 82377 Penzberg, Germany Every effort has been made to ensure that all the information contained in the Cedex HiRes System Operator’s Guide is correct at the time of printing. However, Roche Diagnostics GmbH reserves the right to make any changes necessary without notice as part of ongoing product development. - Page 10 The warranty conditions are specified in the sales contract. Contact your Roche Diagnostics representative for further information. Any unauthorized modification of the Cedex HiRes Analyzer and/or the Cedex HiRes Software will result in invalidity of the guarantee and service contract.
-
Page 11: Viii. Preamble
Preamble VIII. Preamble Before setting up operation of the Cedex HiRes Analyzer, it is important to read this Operator’s Guide thoroughly and completely. Non-observance of the instructions contained herein or performing an operation not stated in this Operator’s Guide could involve safety hazards. - Page 12 Operating this equipment in a residential area is likely to cause harmful interference, in which case the user will be required to correct the interference at his own expense. Cedex HiRes Analyzer Operator’s Guide...
-
Page 13: Xii. Warnings And Precautions
XII. Warnings and Precautions Moving parts may cause hand injuries. Never use the Cedex HiRes Analyzer without the protective cover on the Multi Sampler and Syringe Module. It is important that the following safety instructions and guidelines be observed in order to ensure safe and reliable operation of Cedex HiRes Analyzer: Place the device on a dry and sturdy surface, free of vibrations. -
Page 14: Xiii. Disposal Of The Analyzer
Operator’s Guide. The settings described in this Operator’s Guide apply to systems on which Software version 2.1 has been installed as the original software. The software and hardware of your Cedex HiRes System can differ from the information described here, but this should not make a difference to the operational functions in general. -
Page 15: A Overview
The evaluation of the samples is based on automatically obtained digital images that are analyzed using analysis software on a separate computer (Cedex HiRes Control Unit). All the necessary steps – from the staining of the samples to the recording and evaluation of the image data – are automatically performed by the analyzer. -
Page 16: Description Of The Cedex Hires System
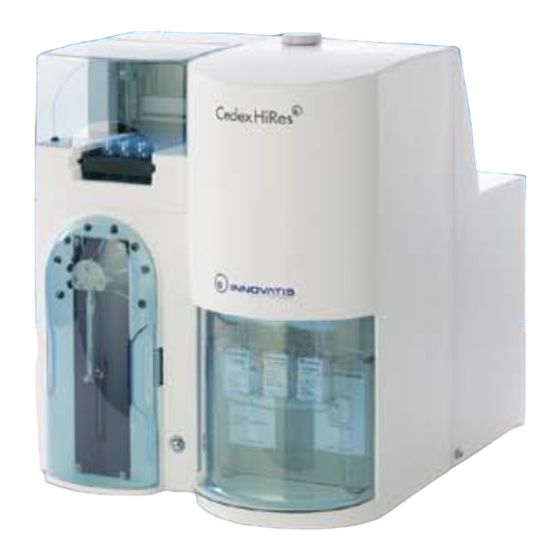
Description of the Cedex HiRes System Description of the Cedex HiRes System The Cedex HiRes System consists of two functional units, the Analyzer (see Figure 1) and the Control Unit (computer equipped with Cedex HiRes Software 2.1). Preparation and processing of the samples takes place in the analyzer. The analysis software is installed on a computer and controls the analyzer, as well as the analysis and evaluation of the images obtained. -
Page 17: The Measurement Procedure
The Measurement Procedure The Measurement Procedure The determination of the number of viable cells (cells/ml) and viability of cell suspensions (the percentage of viable cells from the total cell sample) is a fully automated, standardized procedure based on the manual Trypan Blue Exclusion Method. -
Page 18: Data Analysis
The analysis software and its graphical user interface (GUI), known as the Cedex Control Center, enables the user to work with Cedex HiRes Analyzer. The image analysis software (Operator) recognizes structures and identifies particles, thus differentiating cells from cell debris and dirt particles. Live and dead cells are differentiated according to their degree of Trypan Blue staining. -
Page 19: Technical Specifications Of The Analyzer
Technical Specifications of the Analyzer Technical Specifications of the Analyzer Cedex HiRes Analyzer Method of measurement Digital image and pattern recognition Viable/dead cell differentiation Trypan Blue Exclusion Method Detectable cell concentration range 5 × 10 – 1 × 10 cells per ml Detectable cell diameter range 2 µm –... - Page 20 Technical Specifications of the Analyzer Hardware Requirements for the Cedex HiRes Control Unit Computer x86-Architecture, Intel Pentium IV minimum 2 GHz required, 3 GHz recommended Operating system Windows ® XP Professional Minimum 1 GB RAM Hard-disk storage 100 MB free hard-disk storage for installation of application.
-
Page 21: System Description
Completing the Windows Mini-setup When starting the Cedex HiRes Control Unit for the first time, a Windows mini-setup may run. The setup allows the user tweak the final settings of the new system (e.g., selection of time zone, keyboard etc.). The mini-setup dialogs should be self-explanatory. -
Page 22: Configuring Access To The Cedex Hires Software For Windows User Accounts
Test Certificate Installation To install the test certificate, do the following: Select the file Innovatis AG Test.cer. This file is found in the folder to which the Cedex 2.1 software was installed (Default: C:\Cedex2) (see Figure 2). Figure 2... - Page 23 Installing the Cedex HiRes System Configuring Access to the Cedex HiRes Software for Windows User Accounts Right click with the mouse on the file Innovatis AG Test.cer and select Install Certificate (or the equivalent word(s) in the chosen operating system language) (see Figure 3).
- Page 24 Archive Certificate Installation To install the archive certificate, do the following: Select the file Innovatis AG Archive Test.pfx. This file can be found in the folder to which the Cedex 2.1 software was installed (Default: C:\Cedex2) (see Figure 9). Figure 9...
- Page 25 Installing the Cedex HiRes System Configuring Access to the Cedex HiRes Software for Windows User Accounts Right click with the mouse on the file Innovatis AG Archive Test.pfx and select Install PFX (see Figure 10). Figure 10 Click on Next in the Certificate Import Wizard window that opens (see Figure 11).
- Page 26 Installing the Cedex HiRes System Configuring Access to the Cedex HiRes Software for Windows User Accounts In the window that appears make no entries. Click Next (see Figure 13). Figure 13 In the following window, check the box Automatically select the certificate store…, then click on Next (see Figure 14).
-
Page 27: Choosing A Suitable Location
Verification”). Starting the Cedex HiRes System after Installation The hardware components of the Cedex HiRes System must be switched on before the analysis software can be started, otherwise the software will not be properly initialized. After the initial installation, switch on the individual devices in the order given below: Switch on the Cedex HiRes Analyzer. -
Page 28: Securing Access Rights
Cedex Server icon on the desktop. Start the Cedex HiRes Software 2.1 by double clicking the Cedex Client icon on the desk top (the Cedex Server must be successfully launched before the Cedex Client can be started). The Log In window of the Cedex HiRes System will open. -
Page 29: Menu Bar
Overview of the Cedex Control Center Menu Bar Operation Overview of the Cedex Control Center The Cedex Control Center is divided into three elements: Menu bar Shortcuts area Event window detailing status of events carried out by the analyzer A description of the individual areas is given below (see Figure 17): Figure 17: The Cedex Control Center Menu Bar The menu bar at the top of the Control Center has 7 menu items:... -
Page 30: Measurement Menu
Data Exchange: Data can be imported or exported from the database of one system to the database of another system using these windows. Archiving: Data from the database can be archived or restored in these windows. Cedex HiRes Analyzer Operator’s Guide... -
Page 31: Setup Menu
Overview of the Cedex Control Center Reports Menu Reports Menu Reports can be generated using this menu for the following types of information: Operational Data Measurement Data System Configuration Parameters Audit Trail Report about the Multi Run Automatic Adjustment and Alignment Verification Master Data Menu The menu items have the following functions: Liquid Container Configuration: This window allows the user to set the minimum and maximum volumes... -
Page 32: Help Menu
If, for example, a cleaning routine is run, the completion of the routine will be noted in this window. Previous events can be looked at by using the scroll bar on the right. The window is cleared each time the software is shut down. Cedex HiRes Analyzer Operator’s Guide... -
Page 33: Preparing The Analyzer For Measurements
■ The user may be prompted to create a new password the first time the Cedex HiRes Software 2.1 is started. This serves the purpose of replacing the temporary password given to the user by the Administrator when the user account was created. -
Page 34: Performing A Hw Startup And Prime
Both the HW Startup and the Prime functions are located in the same window. Follow the instructions below to perform a HW Startup and Prime: Click on the HWM button in the Cedex HiRes Control Center or else select Hardware Management under the Functions menu. The Hardware Management window will open. -
Page 35: Preparing The Reagent Kit
Shutdown and HW Shutdown”). Open the Reagent Kit chamber in Cedex HiRes Analyzer by pushing the front upwards until it clicks into place (see Figure 18, below). Remove the old Reagent Kit with the tray and dispose of the old reagent bottles if necessary. -
Page 36: Refilling Containers Individually
Set Full button or Empty button, in the case of waste, in the Reagent Kit Status window (see Figure 19). If you are using your own reagents, it may be necessary to filter them before use. Roche Diagnostics GmbH recommends using the Cedex HiRes Reagent Kit. Cedex HiRes Analyzer Operator’s Guide... -
Page 37: Checking The Analyzer
■ Checking the Analyzer Since measurement results obtained with the Cedex HiRes Analyzer depend on correctly filled reagent containers and the proper performance of the analyzer, the user should check the analyzer for possible wear and tear, and also check whether the reagent containers have the correct volume prior to each set of measurements, as follows: Check the syringe module (2.5 ml syringe and 8-way valve) for wear and tear or contamination. -
Page 38: Carrying Out A Single Measurement
The measurement procedure can only begin when the steps above have been completed. Perform a HW Startup and Prime prior to the first measurement if the Liquid and Hardware Management system were previously shut down (see “Performing a HW Startup and Prime”). Cedex HiRes Analyzer Operator’s Guide... -
Page 39: Opening The Measurement Window And Specifying The Operating Mode And Sample Data
Dilutions that are an automatic part of the measurement process in the analyzer are already taken into account by the Cedex HiRes Software. The calculations are carried out automatically and have nothing to do with the entered dilutions. -
Page 40: Defining The Measurement And Analysis (Process) Parameters
“Working with the Multi Sampler”). In the case of single measurements run via the Measurement window on a Cedex HiRes System with a Multi Sampler attached, the software will auto matically incrementally increase the sample cup position number with each new measurement. The cup position can also be fixed (see “Turning off automatic... -
Page 41: Preparing The Sample And Attaching It To The Multi Sample Tray Or Sample Port
Transfer the selected volume of a well-mixed cell suspension to a clean sample cup. The Cedex HiRes Analyzer tolerates volume variations of +/- 10%. Any greater variation in sample volume will lead to inaccurate results, and the Reagent Control monitor will no longer function correctly. -
Page 42: End Of Measurement
Image area (see “Image Area”). Figure 21: Cedex HiRes Analyzer Measurement window with the final results The measurement results can be directly printed out via the Print button in the middle of the measurement window. -
Page 43: Interrupting A Measurement
If the Cedex HiRes Analyzer is to be shut down after a set of measurements, or at the end of the day, the complete Liquid Management system should be cleaned with an LM Shutdown procedure to maximize the life- span of the Cedex HiRes Analyzer and guarantee optimal performance. -
Page 44: Working With The Multi Sampler
Multi Sampler. The Multi Sampler is part of the Cedex HiRes Analyzer (see Figure 22 and Figure 23). The Multi Sampler can convey up to 20 cell suspension samples in sequence to the Cedex HiRes System for analysis. Once the samples have been loaded in the Multi Sample Tray and the analysis parameters for each sample have been set, the samples are automatically delivered to the Cedex HiRes System and analyzed. -
Page 45: The Multi Sampler Defaultcup
The Multi Sampler DefaultCup Sampling probe Multi Sample Tray Figure 23: Cedex HiRes Analyzer including Multi Sampler The Multi Sampler DefaultCup The position of the sample cup used for the Prime, LM Shutdown, calibration and cleaning routines is called the DefaultCup. -
Page 46: Preparing The Measurement
Hardware Management to render the tray ejectable again (see “Carrying out an LM Shutdown and HW Shutdown”). In some cases it may be necessary to restart the Cedex HiRes Software 2.1 and Analyzer. 4.2.3. Performing a Prime The Prime and HW Startup are performed as usual in the Liquid Management window as described in “Performing a HW Startup and... -
Page 47: Carrying Out Measurements With The Multi Sampler
Working with the Multi Sampler Carrying out Measurements with the Multi Sampler Carrying out Measurements with the Multi Sampler Before carrying out measurements, ensure that the system is operational as described in “Checking the Analyzer”. 4.3.1. The Multi Run Data Entry Window Click on the Multi Run button in the Shortcuts area of the Cedex Control Center or select Multi Run in the Measurements menu. -
Page 48: Adding Measurements To The List While Measurements Are Running
When the Pause button is selected, the measurement that is in progress will be finished as usual but no new measurements in the list will be started. Clicking on the Resume button will resume the analysis of the rest of the measurements in the list. Cedex HiRes Analyzer Operator’s Guide... -
Page 49: Disruption Of Measurements
Working with the Multi Sampler Carrying out Measurements with the Multi Sampler 4.3.4. Disruption of Measurements The following error messages may appear in the Errors and Messages area of the Multi Run window if a sample can’t be run: If a sample cup is not available in its position on the Multi Sample Tray during measurements, then the Cup ‘X’... -
Page 50: Results
Wait until the Multi Sample Tray has stopped moving before changing the samples! Results The measurement results obtained by the Cedex HiRes system are stored and displayed as described in “Using the Measurement Results Window” and “Using the Measurement List”. -
Page 51: Switching Off The Cedex Hires Analyzer
Carrying out an LM Shutdown and HW Shutdown Switching off the Cedex HiRes Analyzer Switching off the Cedex HiRes Analyzer should always be carried out in the following order: Carry out an LM Shutdown. Shut down the analysis software (optional, see note below regarding the use of the scheduler). -
Page 52: Logging Out
Switching off the Cedex HiRes Analyzer Shutting down the Control Center Logging out To log out of the Cedex Control Center, select Logout under the System menu or click on the Logout button in the Cedex Control Center. If an LM Shutdown has not yet been carried out, the message, “Do you really want to log out without performing an LM Shutdown?”, will appear. -
Page 53: D Software
Using the Measurement Results Window Software Using the Measurement Results Window Measurement results are displayed in the Measurement window (see Figure 29). If a single measurement has been run using the Measurement window, the analysis results obtained from that measurement are automatically displayed in the same window after the analysis process has been completed. -
Page 54: Result Data Area
This value indicates the number of viable cells counted. Dead Cell Count Value: This value indicates the number of dead cells counted. Total Object Count Value: This value indicates the number of all detected objects counted. Cedex HiRes Analyzer Operator’s Guide... -
Page 55: Sample Parameters And Processing Parameters Areas
Using the Measurement Results Window Sample Parameters and Processing Parameters areas In addition, the Result Data area for the individual images has a Valid and an Excluded column next to the image number. Images that could lead to incorrect measurement results during analysis, e.g. due to impurities or large bubbles, are automatically recognized as invalid and excluded from evaluation by the analysis software. -
Page 56: Image Area
Viewing Individual Cell Images The Cedex HiRes Software 2.1 enables a close view of a single image or an enlarged display for evaluation. Individual images can be viewed in the Image area of the Measurement window. The results from the individual images are listed at the bottom of the Measurement window in the Result Data area. -
Page 57: Viewing A Cell Image Using The Image View Window
The user can thus get a sense of how cell shapes and clusters have been evaluated by the software. The Cedex HiRes Software 2.1 offers various options for optimizing measurement results by adjusting the Operator used for the image analysis. Thus, the image analysis Operator can be adjusted for abnormal cell culture images or for specific internal counting strategies. -
Page 58: Excluding Images From The Evaluation Process/Including Excluded Images
Should stripy shadows or lines appear on the images, a new focus adjustment needs to be run as poor image quality can affect the results of the measurement (see “Automatic Adjustment and Alignment Verification”). Cedex HiRes Analyzer Operator’s Guide... -
Page 59: Viewing The Prescan Image
Using the Measurement Results Window Image Area 1.3.4. Viewing the Prescan Image During a measurement, a so-called Prescan is carried out before the cells are scanned. The entire flow chamber is scanned in order to identify impurities and bubbles that may influence the measurement. The Prescan image is stored together with the measurement and can be viewed when the Measurement window with results has been opened for that measurement. -
Page 60: Using The Measurement List
View button in the bottom right-hand corner of the Measurement List window. This will open a Measurement window containing all of the relevant data results for the selected measurement (see “Using the Measurement Results Window”). Cedex HiRes Analyzer Operator’s Guide... -
Page 61: Searching For Measurements
Using the Measurement List Searching for measurements Searching for Measurements It is possible to search for measurements using a number of different filter criteria including sample drawing date, process date, Reactor ID, and Sample ID in the Filter By area at the top of the Measurement List window. To search for measurements based on the sample drawing date or the process date, for example, do the following: Click on the drop-down menu button next to the Sample Drawing Date From or Process Date From sections. -
Page 62: Editing Existing Analysis Results/Data Sets
The Reprocess Button Editing Existing Analysis Results/Data Sets The Cedex HiRes Software 2.1 allows for existing measurement results or data sets to be modified and reprocessed. These changes are done on existing software data (image and analysis results) and, therefore, do not require any adjustments to the analyzer. -
Page 63: Effective Data Sets
Editing Existing Analysis Results/Data Sets Effective Data Sets Effective Data Sets When measurements are reprocessed, it is possible to label one of the resultant data sets as Effective. The Effective data set is the version of the measurement (original or reprocessed) that has the correct parameters. Once a data set has been selected as Effective it will be labeled as such in the Measurement List window. -
Page 64: Graphical Display Of The Analysis Results
Graphical Display of the Analysis Results In addition to displaying the overall analysis values, the Cedex HiRes Software 2.1 can also display graphic diagrams of the results. These diagrams can be viewed after the analysis is finished by clicking on the Diagrams button in the Result Data area of the Measurement window. -
Page 65: Aggregate Histogram
Aggregate Histogram Aggregate Histogram The Cedex HiRes Analyzer offers an evaluation of aggregates in cell cultures. Clusters of up to 15 cells are displayed. Click on the Aggregate Histogram button in the Histograms window to open the corresponding histogram window. - Page 66 Figure 35 shows, for example, that 188 cells of the measurement are found in aggregates of two cells. Figure 35: The Aggregate Histogram, total view (sum of living and dead cells), here: number of cells Cedex HiRes Analyzer Operator’s Guide...
-
Page 67: Cell Diameter Histogram
Graphical Display of the Analysis Results Cell Diameter Histogram The percentage of cells found in aggregates, in relation to the total cell count, can be displayed using the percent button as is shown in Figure 36. Figure 36: The Aggregate Histogram, total view (sum of living and dead cells), Here: percentage Cell Diameter Histogram Clicking on the Cell Diameter Histogram button will bring up the Cell Diameter Histogram. -
Page 68: Object Diameter Histogram
[× 10 objects/ml], are listed in a table under the Object Diameter Histogram for each of the individual intervals. Cedex HiRes Analyzer Operator’s Guide... -
Page 69: Compactness Histogram
Graphical Display of the Analysis Results Compactness Histogram Compactness Histogram The ratio between the cell circumference and the cell area is based on an ideal sphere (4p), which is equivalent to the value >1< on the abscissa of the Cell Compactness Histogram. The extent of variation between the cell shapes and an ideal sphere is reflected in values being greater than 1. -
Page 70: Measurement Statistics Histogram
Area”). The results of each individual image can be seen again by clicking on the Single button. If an image has been automatically excluded by the software or manually excluded by the user, the corresponding position in the diagram will be empty. Cedex HiRes Analyzer Operator’s Guide... -
Page 71: Cultivation Time Chart
Cultivation Time Chart Creating a CTC View Cultivation Time Chart In the Cultivation Time Chart (cultivation progress/result diagram), the growth patterns of cell cultures can be graphically evaluated. It is also possible to export and print out the data. The CTC Views window required for creating a Cultivation Time Chart can be opened by clicking on the CTC button in the Shortcuts area of the Cedex Control Center or by selecting the Cultivation Time Chart option in the Measurements menu. -
Page 72: The View Area
This area is used for creating, editing, viewing and deleting measurement series for a particular View. In order add to or modify specific measurement series for a particular View, that View must be highlighted in the View area. Cedex HiRes Analyzer Operator’s Guide... -
Page 73: Adding Measurements To A View
Cultivation Time Chart Creating a CTC View 5.1.3. Adding Measurements to a View Do the following to find and select measurements for a new View or for a View that has already been created: Highlight the View to be modified in the View area of the CTC Views window and click on the New button on the right-hand side of the Series belonging to the selected view area. -
Page 74: Editing Measurements In A View
Measurements area in the lower left-hand corner. Only series that contain measurements with the correct parameters will be displayed in the Series area in the upper left-hand corner of the Series List window. Figure 43: Series List window Cedex HiRes Analyzer Operator’s Guide... -
Page 75: Deleting Views And Series
Cultivation Time Chart Creating a Cultivation Time Chart 5.1.6. Deleting Views and Series Entire Views can be deleted by highlighting the View and clicking on the Delete button in the View area of the CTC Views window. If one series of a particular View should be deleted, highlight the relevant View in the View area, then highlight the series to be deleted in the Series belonging to the selected view area. -
Page 76: The Data Selection Area
Also, the graphic representation can be enlarged or scaled down again with the use of the mouse (see “Enlarging the Diagrams”). Cedex HiRes Analyzer Operator’s Guide... -
Page 77: Fitting To The Lowest Common Value
Cultivation Time Chart Creating a Cultivation Time Chart 5.2.2. Fitting to the Lowest Common Value The Fit lowest common value button enables automatic shifting of the zero-point of single measurement series to each other. The following can be selected: Viable Cell Density Dead Cell Density Total Cell Density By means of this function, the zero-point of each series will automatically be shifted on the x-axis, in order to be... -
Page 78: The Exponential Regression Button
Exponential Regression window. To print out a chart, click on the Print button. A window will open in which the printer settings can be selected or the chart can be directly printed. Clicking on the Print button will open a window with a preview of the page to be printed. Cedex HiRes Analyzer Operator’s Guide... -
Page 79: Data Management
General Functions of the System Data Management General Functions of the System The Cedex Control Center offers users with the appropriate rights access to a set of functions in addition to the basic functions of analyzing, modifying and reprocessing samples and measurement results. These functions allow for easy and user-friendly operations with the Control Center, although some functions may only be available to the Administrator (see “Administrator... -
Page 80: Export To File
Click on the Export Selected Data button. A message window will appear to confirm successful export of information. Click on OK. ■ The measurement data can then be viewed in the file created. Figure 47: The Export window Cedex HiRes Analyzer Operator’s Guide... -
Page 81: Data Exchange
General Functions of the System Data Exchange Data Exchange The Data Exchange function allows for the exchange of measurement data between different Cedex Software 2.1 Databases (DBs). The user can export selected data from one Cedex Software 2.1 DB and import it into another. 6.2.1. -
Page 82: Import
The Cedex Software 2.1 automatically creates an Audit Trail (log) file for each sample and records all relevant hardware information relating to the sample. The Audit Trail file data can never be overwritten. This ensures that all recorded, analyzed and modified measurement data is documented (see “The System Audit Trail File”). Cedex HiRes Analyzer Operator’s Guide... -
Page 83: User Preferences
General Functions of the System User Preferences User Preferences The User Preferences window is located under the Master Data drop-down file menu in the Cedex Control Center (see Figure 48, below). A logged-in user with specific access rights to the User Preferences option can set preferences for a number of elements. -
Page 84: Specifying Other Default Parameters
Enter your present password in the first field. Enter your new password in the second and third fields. Click on OK to confirm the entry, and a message will confirm the entry. Click on OK to shut the window. ■ Cedex HiRes Analyzer Operator’s Guide... -
Page 85: Administrator Functions
Administrator Functions Administration of User Accounts Administrator Functions The following system functions are generally only available to the Administrator and/or Superuser: Administration of user accounts Password management and assigning workareas Adjustment of the image analysis Securing data Administration of User Accounts The user usually has limited access rights. -
Page 86: Assigning Access Rights
All Users sub-menu. Right click the user role which is to be deleted and click on Remove the role from the user. ■ Figure 49: User Rights Management area Cedex HiRes Analyzer Operator’s Guide... -
Page 87: Creating User Groups
Administrator Functions Administration of User Accounts 7.1.3. Creating user groups It is possible to generalize one or more user accounts in user groups. Instead of assigning rights to a single user, a user role or a set of user roles can be assigned to a user group. The whole user group, therefore, receives all access rights that have been assigned to the user roles. -
Page 88: Creating And Editing User Roles
Superuser: The Superuser is allowed to use all operational functions of the system mainly for maintenance purposes. Support: Support of the Cedex HiRes System by Roche technical services requires access to all operational functions similar to the Superuser role. Access to the System Options should be restricted to the Administrator, Superuser and Support. All options necessary for a user to modify his workplace according to his needs can be found under User Preferences. -
Page 89: Password Management
Administrator Functions Password Management Password Management The Cedex HiRes Software 2.1 has been equipped with a detailed password management that is compliant with CFR 21 Part 11 guidelines. 7.2.1. Specifying Password Characteristics Password settings can be specified and changed in the User Rights Management window. The following... -
Page 90: Assigning Work Areas
Open the User Workareas sub-menu in the user account that is to be modified. Right click on the work area that is to be removed and click on Remove the workarea from the user. ■ Cedex HiRes Analyzer Operator’s Guide... -
Page 91: The System Options
Preferences” in the Appendix for a detailed description of all of the System Options. The Cedex HiRes Software 2.1 may need to be restarted in order for changes in the System Options to take effect. All elements in the System Options that have not been explicitly described in this Operator’s Guide must not be changed without prior arrangement with Roche Diagnostics GmbH. -
Page 92: Modifying The Standard Setting For The Multi Sampler Defaultcup
If the parameter SuggestNextCupPosition is set to 1, the first row will be set to the last cup position + 1. The cup position number will automatically increase with each subsequently added row. Cedex HiRes Analyzer Operator’s Guide... -
Page 93: Turning Off The Flow Chamber Prescan
If the Prescan should be enabled again, re-enter 1 in the Value column of the parameter MeasurementPrescan- Required. The Cedex HiRes Software 2.1 requires one Prescan image to optimize the image brightness. It is necessary to ensure that at least one Trypan blue stained sample has been run on the system before switching off the Prescan feature. -
Page 94: Error Level Displayed To Users
However, some parameters needed to customize the individual workplace (e.g. definition of the default settings for certain measurement parameters) can be found under User Preferences (see “User Preferences”). Cedex HiRes Analyzer Operator’s Guide... -
Page 95: Adjustment Of The Image Analysis Using The Live Operator
Individual adjustments of the operator can be helpful or necessary for cell cultures that, for instance, have an unusual optical appearance or for a counting strategy that deviates from the Cedex HiRes Software 2.1 analysis (e.g. counting aggregates or cell nuclei differently). -
Page 96: Description Of The Cell Type List And Live Operator
Figure 50). There are several options in this window including: New: Create new Cell Types. Edit: Modify existing Cell Types View: View existing Cell Types. Delete: Delete existing Cell Types Live Operator: Open the Live Operator window. Figure 50: Cell Type List window Cedex HiRes Analyzer Operator’s Guide... -
Page 97: Creating A New Cell Type
Administrator Functions Adjustment of the Image Analysis using the Live Operator 7.5.3. Creating a New Cell Type A new Cell Type must be created and saved via the Cell Type window before the Live Operator window can be opened for modification of that Cell Type. A new Cell Type can be created by following the instructions below: Open the Cell Type List window. -
Page 98: Editing An Existing Cell Type
Offset) and sedimentation time (Sedimentation Duration) can be viewed. Click on the Live Operator button in order to view other parameters within the Live Operator window for that Cell Type (see “Description of the Individual Operator Parameters”). Cedex HiRes Analyzer Operator’s Guide... -
Page 99: Deleting An Existing Cell Type
Administrator Functions Adjustment of the Image Analysis using the Live Operator 7.5.6. Deleting an existing Cell Type Select the Cell Type to be deleted from the list of Cell Types at the top of the Cell Type List window and then click on the Delete button. - Page 100 After loading a measurement (Reactor ID and Sample ID) and selecting an image, the selected image is displayed in the upper right-hand corner of the Live Operator window. Each single cell detected by Cedex HiRes Analyzer is marked as dead (red circle) or living (green circle).
-
Page 101: Description Of The Individual Operator Parameters
Administrator Functions Adjustment of the Image Analysis using the Live Operator 7.5.8. Description of the Individual Operator Parameters ClassificationBias Range: [-20, 20], Default: 0, Unit: [absolute value]. This parameter influences the classification behavior of viable and dead cells. Since dying cells of different cell lines absorb Trypan Blue differently, dead cells can be variably stained. - Page 102 This parameter determines when an image will not be analyzed, i.e. the size (diameter in micrometer) that an object (e.g. dirt or bubbles) must have for an image to no longer be analyzed is given here. The use of the sliders, especially in combination, can lead to unexpected results. Cedex HiRes Analyzer Operator’s Guide...
-
Page 103: Archiving Data
Measurement data must be secured at regular intervals and thereafter deleted from the Measurement List in order to ensure enough storage capacity on the Cedex HiRes Control Unit. All data from a single or a set of measurements, or optionally only the images, can be deleted from the database once the measurement or measurements have been archived. -
Page 104: Restore
7.6.3. Deleting Archived Data Only data that has been archived can be deleted from the Cedex HiRes System Database. Archived data still located in the database can be searched for and displayed in the upper right-hand corner of the Measurement List window. -
Page 105: Maintenance And Care
Run a focus adjustment of the analyzer after every three months or after any change of position or vibration of the measurement system. In order to ensure that the Cedex HiRes Analyzer is fully operational, an Intensive Clean must be carried out once per week even if the system is not in use for measurements. -
Page 106: Scheduling Automatic Cleaning Routines
Prime or LM Shutdown is run (e.g. the hardware is shut down in the evening before a scheduled Prime is to be performed in the morning). Prime and LM Shutdown can only be executed if the Hardware Management is active. Cedex HiRes Analyzer Operator’s Guide... -
Page 107: Daily And Manual Maintenance And Cleaning Routines
Daily and Manual Maintenance and Cleaning Routines Checking the Reagent Containers when Manually Refilling Daily and Manual Maintenance and Cleaning Routines The following cleaning and maintenance routines should be carried out on a regular basis or whenever necessary. Checking the Reagent Containers when Manually Refilling Empty reagent containers lead to wrong measurement results and can cause a dry run, thereby damaging the syringe and the 8-way valve. -
Page 108: Cleaning Routines Carried Out By The Liquid Management
Cleaning Routines Carried out by the Liquid Management The Liquid Management plays a key role in the Cedex HiRes Analyzer. It is necessary to Prime the system at the beginning of the day, and to carry out an LM Shutdown prior to shut down of the system in the evening (see “Carrying out an LM Shutdown and HW... - Page 109 Daily and Manual Maintenance and Cleaning Routines Cleaning Routines Carried out by the Liquid Management Standard Clean (with cleaning solution, detergent, and distilled water for approx. 90 seconds) The entire Liquid Management system is rinsed with distilled water, cleaning solution, detergent and finally with distilled water again.
-
Page 110: The Hardware Management Window
Prime and LM Shutdown can be executed in this window. Prime and LM Shutdown can be executed in this window. An LM Shutdown must be carried out after the last measurement has been run and before shutting down the Cedex HiRes Software 2.1. The Liquid Management system is then prepared for an extended pause, i.e. overnight or weekend. - Page 111 Daily and Manual Maintenance and Cleaning Routines Scanning the Chamber to Verify the Effectiveness of Cleaning Routines The Current area displays the scanned image. Since the flow chamber is represented as a whole, it is necessary to enlarge single regions (especially the inlet and outlet) with the help of the zoom function in order to be able to effectively check the chamber.
-
Page 112: Automatic Adjustment And Alignment Verification
The service technician will carry out a focus adjustment before the initial operation of the Cedex HiRes Analyzer. The focus adjustment is always necessary after the Analyzer has been moved. Additionally, we recommend running a focus adjustment once per month for control purposes. - Page 113 The focus position automatically set for the four corner areas (optimal position) must lie between 850 and 1250. Otherwise, an authorized service technician must re-adjust the Cedex HiRes Analyzer. Another important value is the allowed maximum difference between the optimal focus values of the four corner areas. The focus difference must be between 0 and 20.
-
Page 114: Syringe Maintenance
Remove the bottom screw that connects the plunger to the syringe module with the other hand. Remove the syringe from the syringe module. ■ Figure 58: Syringe Maintenance window Cedex HiRes Analyzer Operator’s Guide... -
Page 115: Assembling And Installing The Syringe
Put the protective cover back on with the use of a philips head screwdriver. Turn the screw 90 degrees clockwise to lock the screw. ■ Never use the Cedex HiRes Analyzer without the protective cover on the Multi Sampler and Syringe Module. Maintenance and Care... -
Page 116: Maintenance Of The Syringe Guide And Spindle
Follow the instructions below: Remove the syringe (see “Removing the Syringe”). Switch off the Cedex HiRes Analyzer. Lubricate the top part of the syringe guide and spindle. Switch on the Cedex HiRes Analyzer. Click on Install in the Syringe Maintenance window. -
Page 117: Components
An arrangement for a maintenance contract with your local Roche representative is recommended. During maintenance, worn-out and defective components are replaced and the functioning of Cedex HiRes Analyzer checked. Only an authorized service technician is permitted to carry out maintenance when the Cedex HiRes Analyzer needs to be opened! Operational Data The Cedex HiRes System keeps track of some operational data including operating hours, number of measurements and liquid consumption. -
Page 118: The System Suitability Test (Sst)
The System Suitability Test (SST) To ensure proper operation of the Cedex HiRes Analyzer and valid analysis results, it is essential that the system is in good condition. The majority of the critical parameters are regulated by design or preventive maintenance activities carried out by local Roche technical services. - Page 119 The System Suitability Test (SST) Creating SST Checkpoints To create a checkpoint for a manual check or maintenance activity, click on the SST Without Measurement button. This will open the System Suitability Test New window that allows for the creation of a checkpoint for a manual check.
-
Page 120: Running A Water Blank
Click on Save to store the change. ■ Measurements that are run despite the fact that not all SST procedures are up to date or valid will have no check-mark in the SST Valid box in the Measurement window. Cedex HiRes Analyzer Operator’s Guide... -
Page 121: Performing An Sst
The System Suitability Test (SST) Performing an SST Performing an SST All procedures related to the System Suitability Test can be controlled via the System Suitability Test List. To access the list, open the Functions menu in the Control Center and click on SST or directly click on the SST button in the Control Center. -
Page 122: Performing An Sst Without Measurements
Figure 61: System Suitability Test List window On some systems, an inactive list of proposed SST checkpoints may automatically be provided in the System Suitability Test List window. Check with the Administrator to see if these SST checkpoints should be activated. Cedex HiRes Analyzer Operator’s Guide... -
Page 123: Tracking Trends In Sst Results Over Time
The System Suitability Test (SST) Tracking Trends in SST Results over Time Tracking Trends in SST Results over Time The results of SST checkpoints can be tracked over time using the SST Trending button. Trends for both checkpoints with and without measurements can be tracked. 8.3.1. - Page 124 Clicking on the normalized view checkbox will normalize the results to the target value and display the differences in percent. Both the mean curve and the moving average curve can be shown or hidden by selecting or de-selecting the appropriate checkboxes. Cedex HiRes Analyzer Operator’s Guide...
-
Page 125: Tracking Sst Checkpoints Without Measurements
The System Suitability Test (SST) Tracking Trends in SST Results over Time 8.3.2. Tracking SST Checkpoints without Measurements To see results from SST checkpoints without measurements over time, do the following: Select the SST checkpoint to be monitored by clicking on the field to the left of the appropriate line to highlight the whole line. -
Page 126: Locking – Unlocking The System
System is fully usable until system re- SystemOK SSTLock, checks validity of SST checkpoints (which SSTManualUnlock or is done at an interval of 300 sec.) MeasurementLock Table 3: Manually settable system status Figure 65: System Status window Cedex HiRes Analyzer Operator’s Guide... -
Page 127: Troubleshooting
Diagnosis of the Cedex HiRes Analyzer For technical support purposes, the user is able to run a diagnosis of the Cedex HiRes Analyzer at the request of an authorized service technician. The diagnosis of the System provides a file containing information about the System software and hardware. -
Page 128: Trace And Logging
The System Audit Trail File All user-initiated activities, as well as important actions carried out by the Cedex HiRes Software 2.1, are recorded in the Audit Trail file. The system also logs all errors in the audit trail, including information from the error message. -
Page 129: G Appendix
System Options und User Preferences The following list provides a description of all of the Systems Options that can be found in the Cedex HiRes Software 2.1 via the Systems Options window found under the Setup menu of the Cedex Control Center. - Page 130 Maximum cell concentration (in cells/ml) per image. When this limit is exceeded, the user will be requested to dilute the sample. This warning will only directly appear as a warning box if the “ErrorLevelDisplayToUser” is set to “4”. Cedex HiRes Analyzer Operator’s Guide...
- Page 131 Maximum acceptable delay (in seconds) between the Delay end of the sedimentation phase and the beginning of the main scan in the case of the Cedex HiRes Analyzer. The user is warned if the time interval is exceeded. Measurement Maximum acceptable time delay during a critical CriticalTime measurement phase (i.e.
- Page 132 Measurement Use of the Prescan in the case of the Cedex HiRes PrescanRequired System (0: don’t run, 1: run). ReactorID Default ReactorID for measurements.
- Page 133 System Options und User Preferences Settings in the section “Measurement List Default Filter“: Option Value Description Save last value CellType Measurement List Default Filter for CellType × DataSet Measurement List Default Filter for DataSet × DataSetType Effective Measurement List Default Filter for DataSet: ×...
- Page 134 SSTTrending SSTTrending Default file name for CSV/Excel export of SST Trending. ExportFileName Export Settings in the section “Tracing“: Option Value Description Save last value TraceOutputPath C:\Cedex2\ Default file name for the trace file. CedexTrace.txt Cedex HiRes Analyzer Operator’s Guide...
- Page 135 System Options und User Preferences Settings in the section “Logging“: Option Value Description Save last value LogOutputPath C:\Cedex2\ Default file name for the log file. CedexLog.log Settings in the section “Series Default Filter“: Option Value Description Save last value DataSet CTC Series New Default Filter for DataSet ×...
- Page 136 FocusFinderMinZ (not adjustable) Minimum focus position increments for the focus adjustment. SaveAutomatic Determines whether the images should be stored with AlignmentImages the automatic adjustment in the database (0: don’t save, 1: save). Cedex HiRes Analyzer Operator’s Guide...
- Page 137 System Options und User Preferences Settings in the section “Reagent“: (These values are used to check the entries put into the “Liquid Container Configuration“!) Option Value Description Save last value CedexDetergentMax Upper Limit for the entry of Min-/Max-/Lock-/Warn-Level for the Cedex Detergent reagent bottle. CedexDetergentMin Lower Limit for the entry of Min-/Max-/Lock-/Warn-Level for the Cedex Detergent reagent bottle.
- Page 138 The name of the report template for report type Measurement Data checkpoint list "SST Trending Measurement Data" Report Template System standard The name of the report template for report type Configuration "System Configuration" Report Template Cedex HiRes Analyzer Operator’s Guide...
- Page 139 System Options und User Preferences Settings in the section “External XML“: Option Value Description Save last value AppendTimestamp Append timestamp to external XML file name ToExternal (0-False/1-True) XMLFilename AppendUsername Append user name to external XML file name ToExternal (0-False/1-True) XMLFilename ExternalApplication C:\Cedex2\ The application providing external XML for...
-
Page 140: Index
Cleaning routines .......... 106, 107 Export ................80 Cleaning solution ............37 Export (Data Exchange) .......... 81 CMaxSize ..............101 ExportPath ..............81 CMinSize..............101 Export to file ..............80 Combine view ............. 70 Compact Histogram ..........69 Cedex HiRes Analyzer Operator’s Guide... - Page 141 Index Index Fast Clean ..............108 Maintenance ........... 105, 122 FCC Notification ............12 Maintenance check list .........105 Fit lowest common value button ......77 Master Data menu ............ 31 Flow Chamber ..16, 17, 40, 42, 93, 112, 117, 118 Max. Size ..............40 Flow Chamber impurities ........41, 59 Measurement .........38, 43, 46, 47 Focus adjustment ..........
- Page 142 Switching off ............... 51 Syringe ..............37, 114 System functions ............79 System menu .............. 29 System Options ...........31, 91 System Options und User Preferences ...129 System parameters ........31, 79, 91 System Suitability Test ...........118 Cedex HiRes Analyzer Operator’s Guide...
- Page 144 Published by Roche Diagnostics GmbH Roche Applied Science 68298 Mannheim Germany 2010 Roche Diagnostics © All rights reserved. 06255426001 1010 For life science research only. Not for use in diagnostic procedures.
- Page 145 Quick guide quick guide...
- Page 146 Quick start guide v. 2.2 for Cedex software version 2.1.2 04/04/2008 (DD/MM/YYYY)
- Page 147 Cedex HiRes – quick start guide 1 Performing a Measurement Start the Analyzer and software Switch on the Cedex HiRes analyzer. Switch on the monitor and PC. Log in to Windows XP. Start the Cedex 2.1 software by double clicking on the Cedex Client icon located on the desktop (the Cedex Server should already be automatically started.
- Page 148 • High: 8 images are used for the analysis. • Very High: 11 images are used for the analysis. Prepare the sample. The Cedex HiRes requires a volume of 300 µL +/- 10%. Any greater variation in sample volume will lead to inaccurate results.
- Page 149 2 Working with the Multi Sampler WARNING Moving parts of the Multi Sampler may cause hand injuries. The Multi Sampler needle may cause injuries during operation. Never use the Cedex HiRes without the protective cover in place for the Multi Sampler. The Multi Sampler DefaultCup The position of the sample cup (sample vial) used for the Prime, LM Shutdown, calibration and cleaning routines is called the DefaultCup.
- Page 150 Make desired changes to the measurements in the list. Click on Resume to resume the measurement of samples in the list. Re-arrangement of measurements in a Sample Series Measurements of activated samples always follow a sequence of position 1 to 20. If samples need to be analyzed in a different sequence, the sample order can be changed.
- Page 151 Click on LM Shutdown in the Hardware Management window to shut down the Liquid Management. Open the reagent chamber in Cedex HiRes by pushing the front upwards until it clicks into place. Remove the old Reagent Kit with the tray and dispose of the old reagent bottles if necessary.
- Page 152 Prescan failure If it is ascertained that there are impurities in the flow chamber, an error message, “Prescan Failed” will appear. When the measurement is viewed in the Measurement window there will be no check in the Valid checkbox below the Image area. Do the following: Click on the View Prescan button in the Measurement window, a part of the prescan image will appear in the image window.
Need help?
Do you have a question about the cedex hires and is the answer not in the manual?
Questions and answers