Table of Contents
Advertisement
NOTE: The 18V
Compact Cordless 3
Piece Tool Kit
(Drill/Driver,
Reciprocating Saw and
Flashlight) #134475
Included Accessories:
1-Hour Fast Charger
#134457
2- 18V Ni-Cd Batteries
#134458
2-Double Ended
(Phillips/Slotted) Driver Bits
Custom Tote
Additional Flashlight Bulb
1-Metal, 1 Wood Cutting
Blade
DRILL
Chuck speeds:
Battery:
Clutch positions:
Keyless chuck:
Weight:
BATTERY & CHARGER
Battery voltage:
Charger:
Charger input:
Charger output:
Need Assistance?
Call us on our toll free customer support line:
1-866-349-8665 Monday – Friday from 9am to 5pm
Eastern Standard Time
Technical questions
Replacement parts
Parts missing from package
Manufactured For and Distributed By
True Value® Company, Chicago, IL
©2011 True Value Company
Made in China
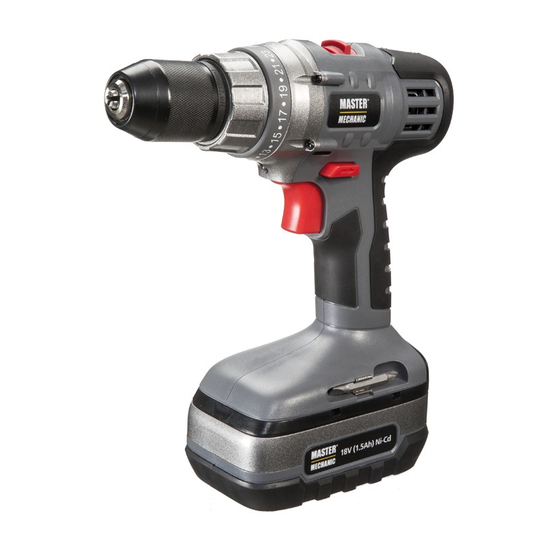
CORDLESS DRILL/DRIVER
PRODUCT SPECIFICATIONS
0–350 / 0–1,400 RPM (no load)
18V Ni-Cd
23 plus drilling mode
3/8" single sleeve
4 lb. 7 oz. (2.0 kg)
18V
1 Hour, Class 2
120V AC, 60 Hz, 60W
18V DC, 2.2 AMP
18V 3/8" COMPACT
Owner's Manual
134453
Advertisement
Table of Contents

Summary of Contents for master mechanic 134453
- Page 1 NOTE: The 18V Compact Cordless 3 Piece Tool Kit 18V 3/8" COMPACT (Drill/Driver, CORDLESS DRILL/DRIVER Reciprocating Saw and Flashlight) #134475 134453 Included Accessories: 1-Hour Fast Charger Owner’s Manual #134457 2- 18V Ni-Cd Batteries #134458 2-Double Ended (Phillips/Slotted) Driver Bits Custom Tote...
- Page 2 TABLE OF CONTENTS Product specifications ………….……………………………………………………. Table of contents ……………………………………………………………………... General safety warnings …………………………………………………………….. 3–4 Eye, ear & lung protection …………………………………………………………… 3–4 Electrical safety ………………………………………………………………………. Power tool safety ……………………………………………………………………... 5–6 General safety rules ………………………………………………………………….. Work area ………………………………………………………………….………….. Electrical safety ………………………………………………………………………. Personal safety ………………………………………………………………………..
-
Page 3: General Safety Warnings
GENERAL SAFETY WARNINGS WARNING: Before using this tool or any of its accessories, read this manual and follow all Safety Rules and Operating Instructions. The important precautions, safeguards and instructions appearing in this manual are not meant to cover all possible situations. It must be understood that common sense and caution are factors which cannot be built into the product. -
Page 4: General Safety Warnings
GENERAL SAFETY WARNINGS WEAR A DUST MASK THAT IS DESIGNED TO BE USED WHEN OPERATING A POWER TOOL IN A DUSTY ENVIRONMENT. WARNING: Dust that is created by power sanding, sawing, grinding, drilling, and other construction activities may contain chemicals that are known to cause cancer, birth defects, or other genetic abnormalities. -
Page 5: Power Tool Safety
POWER TOOL SAFETY WARNING: Read all safety warnings Do not abuse the cord. Never use the and instructions. Failure to follow the cord for carrying, pulling or unplugging the power tool. Keep cord away from warnings and instructions may result in electric shock, fire and/or serious injury. -
Page 6: Power Tool Safety
POWER TOOL SAFETY PERSONAL SAFETY – cont’d Store idle power tools out of the reach of children and do not allow persons Remove any adjusting key or wrench unfamiliar with the power tool or these before turning the power tool on. A instructions to operate the power tool. -
Page 7: Battery Tool Use And Care
POWER TOOL SAFETY Battery tool use and care Recharge only with the charger specified by the manufacturer. A charger that is suitable for one type of battery pack may create a risk of fire when used with another battery pack. Use power tools only with specifically designated battery packs. -
Page 8: Specific Safety Rules
SPECIFIC SAFETY RULES WARNING: Secure the workpiece. Use clamps or a Know your cordless vice to hold the workpiece. It is safer than drill. Do not plug in the charger or using your hand and it frees both hands to install the battery in the tool until you operate the tool. -
Page 9: Battery & Charger Safety
BATTERY & CHARGER SAFETY WARNING: Do not use an extension cord. Plug the Only use the charger cord directly into an electrical diagnostic charger supplied with this kit outlet. to charge the 18V battery. Charging any other batteries may damage the charger Use the charger only in a standard and possibly cause serious injury. -
Page 10: Battery & Charger Safety
BATTERY & CHARGER SAFETY BATTERY PACK RECYCLING To preserve our natural resources, please recycle or dispose of batteries properly. The batteries charged by this charger may contain chemicals and metals that are harmful to the environment. Never dispose of re-chargeable batteries in your normal household garbage or in landfill sites as they will add to the pollution of the environment. -
Page 11: Symbols
SYMBOLS WARNING: Some of the following symbols may appear on the cordless drill. Study these symbols and learn their meaning. Proper interpretation of these symbols will allow for more efficient and safer operation of this tool. Direct current Volts Amperes No load speed Alternating or direct Hertz... -
Page 12: Know Your Cordless Drill
KNOW YOUR CORDLESS DRILL Two speed gearbox switch Horizontal level Vertical level Keyless chuck Forward / Torque reverse switch clutch light Trigger switch Screwdriver bit storage Battery 1-Hour Fast Charger with auto-shut-off Green... -
Page 13: Accessories & Contents
ACCESSORIES & CONTENTS AVAILABLE ACCESSORIES DRILL COMPONENTS DESCRIPTION WARNING: Use only accessories Drill that are recommended for this cordless Double ended bits drill. Follow the instructions that #1 / accompany the accessories. The use of #2 / 6 mm improper accessories may result in See front Battery... -
Page 14: Assembly And Operating
ASSEMBLY AND OPERATING ASSEMBLY AND OPERATING CHARGING THE BATTERY PACK Place the battery charger (1) in a dry location near a 110–120V 60 Hz electrical outlet (Fig. 1) Turn the battery (2) upside down and slide it onto the charger. NOTE: Make sure the grooves (3) in the sides of the battery slide over the matching tabs on the charger (4) until the battery... -
Page 15: Installing A Battery In The Drill
ASSEMBLY AND OPERATING INSTALLING A BATTERY IN THE DRILL Remove the discharged battery (1) from the drill by pressing downward on the battery release button (2) and sliding the battery backward until it is removed from the drill handle (3) (Fig. -
Page 16: Adjusting The Torque
ASSEMBLY AND OPERATING ADJUSTING THE TORQUE – cont’d The proper setting depends upon the type of material and size of screw being used and the function required. Adjust the torque setting as follows: Identify the torque settings located on the torque adjustment ring (1) (Fig. 6). Rotate adjustment ring to align the correct torque setting number with the torque indicator arrow (2). -
Page 17: Two Speed Transmission
ASSEMBLY AND OPERATING TWO-SPEED TRANSMISSION Set the speed control switch (1) to the desired speed (Fig. 9). Slide the speed control switch FORWARD for high-speed operation. Slide the speed control switch BACK for low-speed operation. NOTES: a) Use low-speed setting for drilling large holes and for driving screws. - Page 18 ASSEMBLY AND OPERATING INSTALLING DRILL BITS – cont’d This drill is equipped with a single sleeve keyless chuck. To open the keyless drill chuck, grasp and hold the chuck body (1) and rotate it in a counter-clockwise direction (2) until the chuck jaws (3) open wide enough to accept the bit (4) (Fig.
-
Page 19: Installing Drill Bits
ASSEMBLY AND OPERATING INSTALLING DRILL BITS – cont’d WARNING: Failure to properly insert the drill bit could cause the drill bit to be thrown from the chuck, resulting in possible serious injury or damage to the chuck. REMOVING BITS To open the keyless drill chuck, grasp and hold the chuck body and rotate it in a counter-clockwise direction until the chuck jaws open wide enough to... - Page 20 ASSEMBLY AND OPERATING WARNING For safety reasons, the operator must read the sections of this Owner’s Manual entitled "GENERAL SAFETY WARNINGS", "POWER TOOL SAFETY", "SPECIFIC SAFETY RULES", "BATTERY & CHARGER SAFETY" and "SYMBOLS" before using this cordless drill. Verify the following every time the cordless drill is used: Safety glasses, safety goggles, or face shield is being worn.
-
Page 21: Drilling
ASSEMBLY AND OPERATING DRILLING When drilling into smooth, hard surfaces such as metal, use a center punch to mark the desired hole location. This will prevent the drill bit from slipping off center as the hole is started. The workpiece to be drilled should be secured in a vice or with clamps to keep it from turning as the drill bit rotates (Fig. -
Page 22: Drilling
ASSEMBLY AND OPERATING DRILLING – cont’d Move the drill bit into the workpiece applying only enough pressure to keep the bit cutting. Do not force the drill bit or apply sideways pressure to elongate the hole. WARNING: Be prepared for binding and bit breakthrough. -
Page 23: Driving Screws
ASSEMBLY AND OPERATING DRIVING SCREWS – cont’d Set the torque clutch to the appropriate setting, based on the chart on Page 16. NOTE: If the workpiece material is particularly soft or porous, set the torque clutch to a lower setting to avoid overdriving the screw. -
Page 24: Removing The Chuck
ASSEMBLY AND OPERATING ASSEMBLY AND OPERATING REMOVING THE CHUCK – cont’d Open the chuck jaws as far as possible. Remove the chuck screw using a screwdriver (Fig. 17). NOTE: Turn the screw CLOCKWISE to Fig. 17 remove it. This screw has a left-handed thread. -
Page 25: Assembly And Operating
ASSEMBLY AND MAINTENANCE OPERATING RETIGHTENING A LOOSE CHUCK – cont’d GENERAL Tighten the chuck screw using a WARNING: When servicing, use screwdriver. only identical replacement parts. The use of any other part may create a NOTE: Turn the screw COUNTER- hazard or cause product damage. -
Page 26: Exploded View
EXPLODED VIEW... -
Page 27: Parts List
PARTS LIST WARNING: When servicing, use only original equipment replacement parts. The use of any other parts may create a safety hazard or cause damage to the cordless drill. Any attempt to repair or replace electrical parts on this cordless drill may create a safety hazard unless repairs are performed by a qualified technician. -
Page 28: Parts List
PARTS LIST Key # Part # Part Name Quantity 2010090059 Ring gear 1170070065 3rd level planetary carrier 2010010087 3rd level planetary gear 2030020007 One-hole clamping plate 3150080020 Speed-change box 4030010031 Screw ST2.9x14 2050080149 High/Low speed lever 2010090060 Moveable ring gear 1170070066 2nd level planetary carrier 2010010088... -
Page 29: Warranty
3-Year Limited Warranty: This product is warranted for 3 years against any defects in material and workmanship. If defective the product will be repaired or replaced free of charge. Simply provide proof of purchase and return the tool to your place of purchase.
Need help?
Do you have a question about the 134453 and is the answer not in the manual?
Questions and answers