Table of Contents
Advertisement
Advertisement
Table of Contents

Related Manuals for RAMBO R750


Summary of Contents for RAMBO R750
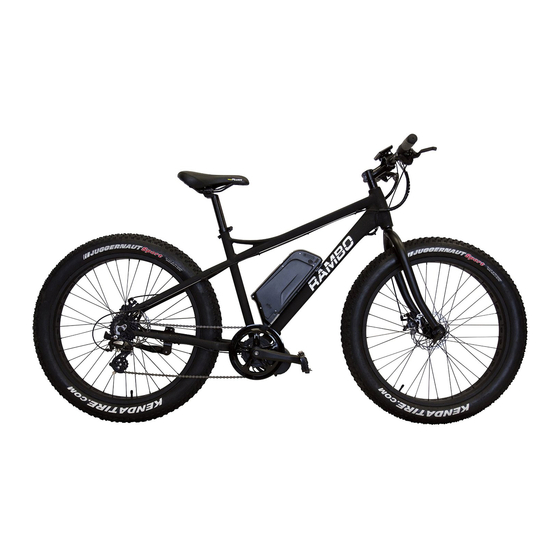
- Page 1 RAMBO Bike Owner’s Manual For Pedal and E-bike Models...
-
Page 2: Your First Ride
Rambo bike. Removing the battery which the bike is being operated. will help ensure the motor is not started inad-... -
Page 3: Section 1 - General Warn- Ings
The Rambo Bike comes equipped with disc brakes. you to lose control and fall. This does not usually These brakes are different from other general types occur at normal riding speeds. - Page 4 BIKE INSPECTION BEFORE EVERY 2. A hollow axle with a “skewer” shaft running through it which has a nut on one end and a hex-key RIDE or other tightening device on the other end. 3. Hex nuts or Hex key bolts are threaded into or on Before every ride, inspect the bike with the following to the hub axle.
- Page 5 not tilt or move. Next, check the security of the seat tube in the frame by attempting to rotate the seat. If the seat rotates, then the seat tube is not properly clamped in to the frame. Check the lights and reflectors Make sure the reflectors are mounted in the...
-
Page 6: Rules For Safe Riding
RULES FOR SAFE RIDING you would in normal road and weather conditions. Never ride in storms with high winds and lightening conditions. You must ensure that you understand the safe oper- ation of this bike and follow all traffic and bike laws Night Riding and Poor Visibility and regulations in the area in which the bike is being Riding at dawn, dusk, during poor visibility or night... - Page 7 WARNING Avoid riding too fast Higher speeds create higher risks and greater forces A bike like any mechanical device is subject to in the event of a crash. At higher speeds, it is more fatigue, stress and wear, Over time and due to use likely that wheels will slip, or that a small bump can the frame and its components can fail.
-
Page 8: Section 2 - General Riding Information
SECTION 2 - GENERAL RIDING and squeezing each brake lever one at a time to deter- mine which one stops the wheel from spinning; this INFORMATION would be your front brake. Once you have inspected your bike and all compo- When preparing nents are in proper working condition, you are ready to slow down or... -
Page 9: Section 3 - Maintenance And Care
SECTION 3 – MAINTENANCE - Check your wheel rims for excessive wear and dents and for loose or damaged spokes AND CARE - Check your tires for tire inflation and excessive wear, cuts, or abrasions Service - Check crankset and bottom bracket - Inspect brake levers, shifters and derailleurs Before every ride complete the bike inspection out- - Lubricate brake levers, shifters, and derailleurs... -
Page 10: Section 4 - Assembly Instructions
Section 4 - Assembly Instructions This manual provides instructions on how to assemble your new Rambo Bike as it comes from the factory. If you feel you do not understand the instructions, have the proper tools or would prefer a qualified technician to perform the assembly, take your new Rambo Bike to your local bike shop. - Page 11 • Remove the adjusting nut from the quick • Turn the tension adjusting nut until it can release skewer. Remove the cone spring next to the no longer be turned by hand and check to be sure tension adjusting nut as shown in Figure 3.1. • Slide the skewer through the hollow hub axle of the wheel so that the quick release lever will be on Quick Release Lever Adjusting Nut Cone Spring...
- Page 12 Note: if the Quick Release Lever can easily be pushed to the CLOSED position, this means that it is not secured tightly enough. If this is the case, move the quick release lever to the OPEN position and tighten the tension adjusting nut an additional 1⁄8 - 1⁄4 revo- Figure 4.1 lution to increase the clamping strength, then return the quick release lever to the CLOSED position.
- Page 13 Saddle Assembly: it down to the desired height, ensuring the minimum insertion mark cannot be seen as shown in Figure 5.3 Figure 5.3 Figure 5 WARNING Your seat post must be inserted in the frame seat tube far enough so that the Minimum Insertion Mark (figure 5.1) cannot be seen.
- Page 14 Pedal Assembly: • Your bike may be fitted with an electric mo- tor and lithium ion battery. WARNING • To Install the battery follow steps below and see figure 7. Incorrect attachment of the pedal into the crank arm can strip the threads in the crank arm, or the threads on the pedal spindle. Doing this will cause costly damage.
- Page 15 Check every component and accessory on your new bike to be sure it is properly mounted, tightened and adjusted before riding. R180 Aluminum Bike/Hand Cart (For use with all Rambo bikes) Custom Rambo Bike accessories also available. Check them out online at www.rambobikes.com...
-
Page 16: Section 5 - Bb5 Installation & Set-Up Guide
Section 5 - BB5 Installation & Be careful not to advance the torque arm as you pull the cable. Tighten cable anchor bolt to the specified Set-Up Guide torque. Use the barrel adjuster at the brake lever to remove any remaining cable slack (if there is any). IMPORTANT: Figure 1. -
Page 17: Fine Tuning
Figure 6. ADJUST THE PADS SPRING TENSION ADJUSTMENT Back the adjustment knob off (counterclockwise) un- If necessary, spring tension can be til the rotor spins freely. Now you can dial the pad in adjusted by turning the spring tension or out until you find the adjustment screw with a 2.5mm hex brake action you prefer wrench. -
Page 18: Section 6 - Rear Derailleur Ad- Justment For Shimano 7 Speed
CAN SLIDE THE SPREADER CLIP BACK INTO POSITION – BETWEEN THE PADS. Pad spreader pad “Left” Black Pads Pad spreader clip in place pad “Right” Black Section 6 - Rear Derailleur Ad- justment for Shimano 7 Speed Gear shifting problems - If your chain comes off when you switch to the granny chainring (i.e., largest rear cog) or your derailleur is consistently having problems keeping your chain on the correct cog then... -
Page 19: Section 7 - C961 Dispaly Control
Section 7 - C961 Dispaly Control- Call service if display out of working ON/OFF Long press Mode to start display. Long press M again to switch off. Display off automatically after no any operation on vehicle for ten munites (default). Walking assist Material &... - Page 20 RAMBO Bike stops working in case of any error. Setting effects after restart. Only when error is gone, can vehicle work again. Setting Advanced setting Preparation Long press M to start display. Long pree press (+) Makes sure good connection then power on.
- Page 21 Level amount setting Press (+) or (-) to change the amount, range from 2 to 9 levels (excluding level 0). Press M to save and exit. Setting effects after restart. Attached list: Error code Definition Throttle no homing Throttle abnormality Low voltage protection Over voltage protection Hall sensor abnormality...
-
Page 22: Standard Limited Warranty
UNDER ANY OTHER LEGAL THEORY, even if advised of the possibility of such damages. In no event will Rambo Bikes™ be liable for sums in excess of the purchase price of the product. Rambo Bikes is thus not liable for lost profits or goodwill; downtime; damage or destruction of items or equipment used with, or in conjunction with, Rambo Bikes™;... - Page 24 Products Register: To activate your product’s warranty, please fill out this card and mail in or go online RamboBikes.com and submit online form. Rambo Bikes PRODUCT REGISTRATION Product Purchased __________________________ Model Number _______________ Serial Number ______________________________ (found on the frame of the bike) Owner’s Name ______________________________...
- Page 25 WWW.RAMBOBIKES.COM 14645 Felton Court Suite 103 • APPLE VALLEY, MN 55124 • Tel: 952-283-0777 • Fax: 952-236-6458...
Need help?
Do you have a question about the R750 and is the answer not in the manual?
Questions and answers