Table of Contents
Advertisement
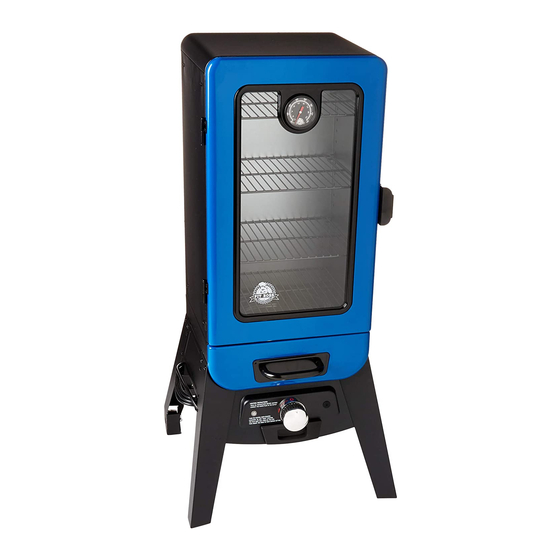
MODEL : PBV3A1
PART : 77320
BLUE BLAZING
ANALOG ELECTRIC VERTICAL
SMOKER (3-SERIES)
SAVE THESE INSTRUCTIONS! MANUAL MUST BE READ
BEFORE OPERATING!
CONFORMS TO:
UL1026 (6
EDITION) / CSA-22.2 NO. 64-10 (R2014)
TH
ELECTRIC HOUSEHOLD COOKING AND FOOD SERVING APPLIANCES
ASSEMBLY AND OPERATION INSTRUCTIONS
WARNING: Please read the entire manual before installation and use of this electric, wood chip burning
appliance. Failure to follow these instructions could result in property damage, bodily injury or even death.
Contact local building or fire officials about restrictions and installation inspection requirements in your area.
Advertisement
Table of Contents

Related Manuals for Pit Boss PBV3A1


Summary of Contents for Pit Boss PBV3A1
- Page 1 MODEL : PBV3A1 PART : 77320 BLUE BLAZING ANALOG ELECTRIC VERTICAL SMOKER (3-SERIES) SAVE THESE INSTRUCTIONS! MANUAL MUST BE READ BEFORE OPERATING! CONFORMS TO: UL1026 (6 EDITION) / CSA-22.2 NO. 64-10 (R2014) ELECTRIC HOUSEHOLD COOKING AND FOOD SERVING APPLIANCES ASSEMBLY AND OPERATION INSTRUCTIONS WARNING: Please read the entire manual before installation and use of this electric, wood chip burning appliance.
-
Page 2: Safety Information
Do not store the electric smoker with HOT ashes inside unit. Store only when all surfaces are cold. • Accessory attachments or parts not supplied by Pit Boss are not recommended and may cause injury. • Never use the electric smoker for anything other than its intended purpose. This unit is not for commercial use. - Page 3 • Do not operate any appliance with a damaged cord or plug, or after appliance malfunctions or has been damaged in any manner. Contact Pit Boss Customer Service for assistance. • Keep a fire extinguisher accessible at all times while operating the electric smoker.
- Page 4 COPYRIGHT NOTICE Copyright 2017. All right reserved. No part of this manual may be copied, transmitted, transcribed, stored in a retrieval system, in any form or by any means without expressed written permission of, Dansons Inc. 3411 North 5th Avenue, Suite 500, Phoenix, AZ, USA 85013 sales@pitboss-grills.com | service@pitboss-grills.com www.pitboss-grills.com Toll-Free: 1-877-303-3134, Fax: 1-877-303-3135...
-
Page 5: Table Of Contents
TABLE OF CONTENTS Safety Information ............3 Operating Instructions ...........17 Tips & Techniques ............19 Parts & Specs ..............7 Cooking Guidelines ............20 Assembly Preparation ............8 Troubleshooting ............. 21 Assembly Instructions Mounting The Legs to Lower Cabinet Assembly ....9 Electrical Wire Diagram ..........23 Mounting Front Legs To Lower Cabinet With Control Care &... -
Page 6: Parts & Specs
PARTS & SPECS PARTS & SPECS NOTE: Due to ongoing product development, parts are subject to change without notice. Contact Customer Service if parts are missing when assembling the unit. - Page 7 UNIT ASSEMBLED (WxHxD) UNIT WEIGHT COOKING AREA TEMP. RANGE 38-162°C Cubic Cooking: 0.07 m / 2.7 ft 570mm x 1190mm x 27. kg PBV3A1 TOTAL - 4,425 cm² / 686 sq. in. / 59 lb / 100-325°F 540mm / 22” x 46” x 21”...
-
Page 8: Assembly Preparation
If any part is missing or damaged, do not attempt to assemble. Shipping damage is not covered under warranty. Contact your dealer or Pit Boss Customer Service for parts. Tools required for assembly: screwdriver and wrench. Tools is not included. -
Page 9: Mounting Front Legs To Lower Cabinet With Control Panel Assembly
2. MOUNTING BOTH FRONT LEGS TO Fig.2 LOWER CABINET WITH CONTROL #19 ---------- PANEL ASSEMBLY #22 -------- Parts Required: 1 x Lower Smoker Cabinet with Control Panel Assembly (#14) 1 x Right Front Leg (#22) 1 x Left Front Leg (#19) 2 x #10-24*1/2”Screw (#C) Installation: •... -
Page 10: Mounting Support Panels To Legs
4. MOUNTING SUPPORT Fig.4 PANELS TO FOUR LEGS Parts Required: 2 x Support Panel (#20) 1 x Right Front Leg (#22) 1 x Left Front Leg (#19) 1 x Right Rear Leg with Wheel Assembly (#17) 1 x Left Rear Leg with Wheel Assembly (#18) 8 x #10-24*1/2”Screw (#C) Installation: •... -
Page 11: Mounting Power Cord Bracket
7. MOUNTING POWER CORD BRACKET Fig.7.1 ONTO LEFT LEG PANEL Parts Required: 1 x Support Panel (#20) 1 x Power Cord Bracket (#25) 2 x #10-24*1/2”Screw (#C) Installation: • Mount Power Cord Bracket (#25) onto the Fig.7.2 left side of Support Panel (#20) using 2 x #10-24*1/2”Screw (#C) as Fig.7.1 &... -
Page 12: Mounting Upper Cabinet To Lower Cabinet Assembly
10. MOUNTING UPPER SMOKER CABINET ASSEMBLY TO THE LOWER SMOKER Fig.10.1 CABINET ASSEMBLY Parts Required: 1 x Upper Smoker Cabinet Assembly (#2) 1 x Lower Smoker Cabinet Assembly (#14) 6 x #10-24*1/2”(#C) Installation: • Mount Upper Smoker Cabinet Assembly (#2)to the Lower Smoker Cabinet Assembly (#14) using 6 x #10-24*1/2”(#C) as Fig.10.1 &... -
Page 13: Attaching Door Assembly
Fig.13 13. ATTACHING DOOR ASSEMBLY INTO THE UPPER SMOKER CABINET ASSEMBLY Parts Required: 1 x Door Assembly (#7) 1 X Upper Smoker Cabinet Assembly (#2) Installation: •Attach Door Assembly (#7)into the Upper Smoker Cabinet Assembly(#2)as Fig.13 shown. 14. INSERTING HEAT INDICATOR INTO Fig.14 THE DOOR ASSEMBLY Parts Required:... -
Page 14: Mounting Door Handle
16. MOUNTING DOOR HANDLE TO THE Fig.16 DOOR ASSEMBLY Parts Required: 1 x Door Handle (#9) 1 X Door Assembly (#7) 2 x #10-24*1/2”(#C) Installation: • Attach the Door Handle (#9) to the Door Assembly (#7) using x #10-24*1/2” (#C) as Fig.16 shown. 17. -
Page 15: Placing Control Knob, Meat Probe
Fig.19 18. PLACING CONTROL KNOB INTO THE VALVE STEM AND INSERTING MEAT PROBE INTO THE BOTTOM PANEL Parts Required: 1 x Control Knob (#12) 1 x Meat Probe (#13) Installation: • Place Control Knob (#12) over the valve stem, making certain to align the flat portion of the stem with the flat portion of the knob and push the Control Knob (#12) onto the stem until it is firmly seated. -
Page 16: Operating Instructions
Operating Instructions for Electric Smoker OPERATING INSTRUCTIONS Smoker is intended for outdoor use only and should be used on a hard, level, non- combustible surface away from roof overhangs and/or any combustible material. Do not use smoker on wooden surface or any other surface that could burn. Place the smoker in an outdoor area that is protected from the wind and keep the smoker away from open windows or doors to prevent smoke from entering your home. - Page 17 Warning: When connecting controller to smoker, plug electric controller into smoker first, make sure controller is set to OFF, then plug into outlet. When unplugging, turn controller to OFF, disconnect from outlet, then remove controller from smoker. Adjust the electric controller to the high position and allow the smoker to heat up. The desired temperature for smoking is between 220F and 250F.
-
Page 18: Tips & Techniques
Note: It is not necessary to soak the wood prior to smoking because hard woods have natural moisture in the wood that will release in the smoker as it heats up. Do not soak your wood chips when using your Pit Boss electric smoker. -
Page 19: Cooking Guidelines
Note: It is not necessary to soak the wood prior to smoking because hard woods have natural moisture in the wood that will release in the smoker as it heats up. Do not soak your wood chips when using your Pit Boss electric COOKING GUIDELINES smoker. -
Page 20: Troubleshooting
Proper cleaning and maintenance will prevent common operational problems. When your Pit Boss smoker is operating poorly, or used less frequently, the following troubleshooting tips may be helpful. For FAQ, please visit www.pitboss-grills.com and click SUPPORT. You may also contact your local Pit Boss authorized dealer or contact Customer Service for assistance. - Page 21 PROBLEM CAUSE SOLUTION No Power To Not Connected To Ensure smoker is plugged into a working power source. Reset breaker. Ensure GFCI is the Controller Power Source correct power supply (see Electric Wire Diagram for access to electric components). Ensure all wire connections are firmly connected and dry.
-
Page 22: Electrical Wire Diagram
ELECTRICAL WIRE DIAGRAM ELECTRICAL WIRE DIAGRAM The Control Board system is an intricate and valuable piece of technology. For protection from power surges and electrical shorts, consult the wire diagram below to ensure your power source is sufficient for the operation of the unit. PB –... -
Page 23: Care & Maintenance
CARE AND MAINTENANCE Any Pit Boss unit will give you many years of flavorful service with minimum cleaning. An important step is allowing the smoke cabinet and cooking grids to self-clean by running the smoker at a high temperature for 5 to 10 minutes after each use. Follow these cleaning and maintenance tips to service your smoker: 1. -
Page 24: Replacement Parts
REPLACEMENT PARTS REPLACEMENT PARTS... - Page 25 REPLACEMENT PARTS DIAGRAM...
-
Page 26: Warranty
WARRANTY CONDITIONS All Electric Vertical Smokers by Pit Boss, manufactured by Dansons Inc., carry a limited warranty from the date of sale by the CONDITIONS original owner. The warranty coverage begins on the original date of purchase and proof of date of purchase, or copy of All Electric Vertical Smokers by Pit Boss, manufactured by Dansons Inc., carry a limited warranty from the date of sale by the... -
Page 27: Ordering Replacement Parts
The serial and model number of your Pit Boss can be found inside the lid of the hopper. Record numbers below as the label may become worn or illegible. -
Page 28: Recipes
Smoking Recipes RECIPES Smoked Pork Tenderloin Take outside wrapper off of meat and wash thoroughly in cold water. Place tenderloin on a paper towel to soak up excess water. Rub your favorite pork rub on the loin. Preheat smokers to 225 degrees and place loin in the center of the smoker. - Page 29 Smoking Recipes Smoked Fish Halibut Select a nice fresh ¾” thick fillet. Wash fillet thoroughly in cold water and lay on paper towel until water is not visible. Melt a whole stick of butter in the microwave and sprinkle a liberal amount of Dill weed in the melted butter. Lay fillets on aluminum foil and fold a lip around edges to contain the butter.
- Page 32 IMPORTANT DO NOT RETURN PRODUCT TO STORE Dansons Inc. stands behind our authorized dealers. Many dealers stock replacement parts and accessories. We strongly suggest that if you need to order parts, options, or require service that you first consult your local dealer. Many dealers do stock current accessories, fuel and service parts.
Need help?
Do you have a question about the PBV3A1 and is the answer not in the manual?
Questions and answers
Why does it kick out ? set temp to 250 click set nothing
The Pit Boss PBV3A1 may kick out at 250°F due to insufficient heat reaching the wood chips. The manual suggests that if the temperature is set too low, the wood chips may not generate enough heat. To resolve this, open the rear vents completely to improve airflow and reset the temperature higher to activate the heating element for 20 minutes. If the issue persists, the wood chip box may be damaged and may need replacement.
This answer is automatically generated
I was using my smoker then my temp starts dropping but the auger is still working and there's fire in it
The temperature in your Pit Boss smoker model PBV3A1 may be dropping even though the auger is working and there is fire due to several possible reasons:
1. Cold Weather: If the outside temperature is below 18°C (65°F), it can take longer for the unit to heat and maintain temperature.
2. Extension Cord Use: Using an extension cord can reduce power to the unit. Plug the smoker directly into a power source.
3. Poor Heating Element Connection: Check if the heating element connectors are firmly connected. Disconnect and reconnect them to ensure proper contact.
4. Defective Controller: If the controller is malfunctioning, it may not regulate temperature correctly and should be replaced.
These issues can cause inconsistent or dropping temperatures even when the auger and fire are functioning.
This answer is automatically generated