Advertisement
Advertisement
Table of Contents

Related Manuals for ROE BP2


Summary of Contents for ROE BP2
- Page 1 User Manual User Manual...
-
Page 2: Table Of Contents
Table of Contents Safety Information Speci cation Connection Accessories Installation Physical Connection Control System Service and Maintenance Package User Manual... -
Page 3: Safety Information
Read this manual before installing, powering or servicing this product, follow the safety precautions listed below and observe all warnings in this manual and printed on the product. If you have questions about how to operate the tile safely, please contact your ROE supplier. PROTECTION FROM ELECTRIC SHOCK Connect the product to AC mains power within the range 100-240V nominal at 50 or 60 Hz only. - Page 4 Do not modify the product in any way not described in this manual. Install only genuine ROE parts in or on the product unless an alternative is described in this manual. Do not operate the product full load if the ambient temperature of power units (Ta) exceeds 50°C (122° F) or less than -20°C(-4°...
- Page 5 1. Temperature higher than 150°C with water; 2. Powder with re. Certification POWER SUPPLY CONFORMS TO UL STD.60950-1 HWA200-4V6 CERTIFIED TO CSA STD. C22.2 NO.60950-1-07 INPUT 100-240V~, 50/60HZ ROE Visual Co.,Ltd Pn=160W Un=4.6V In=35A OUTPUT POWER CONSUMPTION: 160W Max.Operating temperature is 50°C. 4005407 User Manual...
-
Page 6: Speci Cation
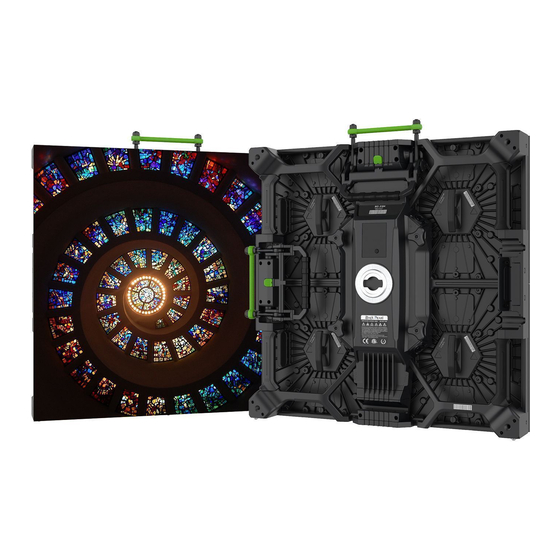
Specification: The Black Pearl is a cost-e cient version from Black OnyX. It has the same award-winning tile design. The innovative design has successively won many famous design awards including IF Gold Award, Reddot Award, G-Mark Design Award, Design For Asia Award. The innovative and friendly design supports a fast and simple setup for both own and ground-supported setups well suited to the needs of large events, concerts and exhibitions. -
Page 7: 03 Connection
03 Connection Hanging System AC 220V AC 220V AC 220V AC 220V AC 220V AC 220V ② ⑤ ⑥ ③ Evision ① AC 220V BP Built in Power Supply Input Voltage AC 220V ⑦ ⑧ ④ AC 220V AC 220V AC 220V AC 220V AC 220V... - Page 8 Stacking System AC 220V AC 220V AC 220V AC 220V AC 220V AC 220V ② ④ ③ Evision ① AC 220V BP Built in Power Supply Input Voltage AC 220V ⑦ ⑧ ⑤ ⑥ 1. Base Bar can load no more than 12 tiles of BP. Notes: 2.
- Page 9 HD101 Processor loading with BP3 This document is valid for Evision system with: Processor rmware: FPGA: 2.63 / ARM 3.07 / LCD 1.15 Tile rmware: FPGA 9.60 Input resolutions for the processor: 1024 x 768 1366 x 768 1440 x 900 1920 x 1080 1280 x 720 1400 x 1536 (max height)
-
Page 10: Accessories
Accessories Name Name Data Cable Name Power Cable Name Data Cable Evision SAP No. SAP No. 208004S0242 SAP No. 208001S0754 SAP No. 201000S0243 201000S0007 Dimension Dimension Dimension W480×H45×D240mm Dimension 0.75m Weight Weight 1.42kg Weight 1.60kg 2.30kg Weight 0.16kg Max Length 100m Max Current Name... -
Page 11: Installation
Installation: Hanging System 0.5m Hanging bar Dimensions: 494mm 1m Hanging bar Dimensions: 994mm Hanging bar components: Adjusting Knob Hanging Clamps Adjusting Screw Vertical Assitant Position Bead Magnet Hanging Installation 1. Fix the Hanging Bar on the Truss Just turn the Adjusting Screw, to make the Clamps close, the Hanging Bar will be fixed on the Truss safely. - Page 12 2. Connect Black Pearl tiles with the hanging bar ①Tiles will be attached to the hanging bar by Magnets automatically. ②Press the red button and lock the tiles by Vertical Connector. ① ② Notes: (For Safety) Please do this by two persons. 3.
- Page 13 Stacking System Stacking System Support Components Major components of the Stacking System support assembly are: 1. Base Bar 2. Base Truss 3. Rear Support Truss 4. Rear Bridge(Half Coupler, Brace Arm, Stacking Connector) Rear Support Truss Brace Arm Stacking Connector Half Coupler Base Bar Safely Clip...
- Page 14 Stacking Installation 1. Base Bar connection with Base Truss Connect the Base Bar and Base Truss by Pin and Safely Clip. Adjust the Knob and make sure the Base Truss and Base Bar in same horizontal Lock of Base Truss 2.
- Page 15 3. Tiles Installation Connect the tiles and Base Bar by Vertical Connector, and Rear Support Truss by Rear bridge. Rear Bridge Vertical Connector 4. Stacking Installation Tile(2×6)Accessories Count: Base Bar: 4×0.5m, 1×1m Base Truss: 4 Rear Support Truss: 4 Rear Bridge: 4 User Manual...
- Page 16 Black Pearl Ballastconfigurator v1 Global truss ROE version Hallen wind:125N/m2 Table shows ballast in KG per tile width. Length factor:2.5 Width Tiles Black Pearl 104 112 120 128 136 144 152 160 168 176 184 192 200 208 216 223 231 239...
-
Page 17: Physical Connection
Physical Connection: Straight Installation Horizontal connector operation Picture 1 Picture 2 Picture 3 Picture 4 Picture 5 1. Press the horizontal blue button to loosen the handle.(pic2) 2. Pull the handle to turn the connecting bar.(pic3) 3. Connect two tiles and align them.(pic 4) 4. - Page 18 Notes: To keep the lights which on the edge of the module from damaging, please operate it as follows. Stacking Installation The Correct way The Wrong way Hanging Installation The Correct way The Wrong way User Manual...
-
Page 19: Control System
Control System: The control system of Black Pearl series consist of receiving card and sending card. Receiving card is integrated with LED tiles. Specifications Working v oltage 100-240V AC Power <20W Working temperature -20°C to 45°C Input port Output ports number 4 ports Communication port USB/RJ45... -
Page 20: Service And Maintenance
Service and Maintenance: Rear Maintenance Picture 1 Picture 2 Picture 3 Picture 3 Easy Maintenance with push-out module and all the modules are the same design. 1. A single modules.(Picture 1) 2. Remove the screw in red.(Picture 2) 3. Hold the handle and push the module.(Picture 3) Application example Maintenance on overall installation, just replace the bad modules. -
Page 21: Package
Package Flightcase Dimensions: 1,164.60 1,142.00 616.60 143.00 1,142.00 21.00 9 Per cent board EVA FOAMED TAPES 111.50 113.00 113.00 113.00 113.00 113.00 113.00 111.50 8 pcs LED tiles per Flightcase User Manual... - Page 22 ROE Visual Europe B.V ROE Visual Co., Ltd ROE Visual US, Inc www.roevisual.com www.roevisual.com www.roevisual.com Zernikelaan 2a, Bldg 7, Zhong Yuntai Industrial Park, 2514 N, Naomi Street, 9351VA Leek, The Netherlands. Shiyan Town, Shenzhen, China. Burbank, CA, 91504 E: europe@roevisual.com E: roe@roevisual.com...
Need help?
Do you have a question about the BP2 and is the answer not in the manual?
Questions and answers