
Related Manuals for Rosewill RHRC-17001


Summary of Contents for Rosewill RHRC-17001
- Page 3 DO NOT DRAPE CORD! KEEP AWAY FROM CHILDREN!
-
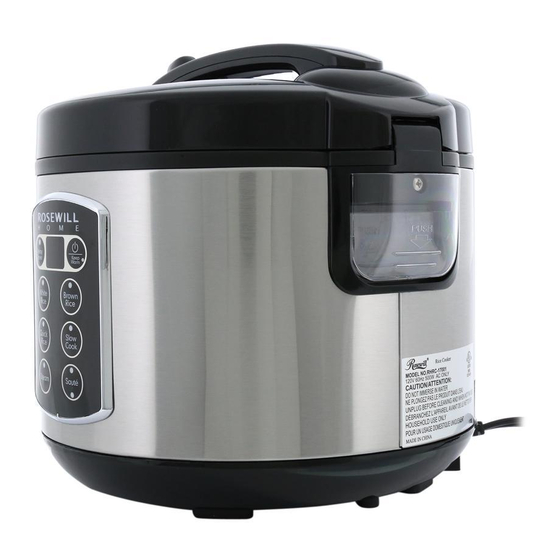
Page 4: Digital Controls
Steam Vent Lid Release Handle Button Condensation Inner Cooking Pot Collector Digital Display Steam Tray Digital Control Panel Measuring Serving Spatula Digital Controls Power Button/Keep-Warm The POWER/KEEP-WARM button turns the rice warm and ready to serve. Delay Timer The DELAY TIMER button allows for rice to be ready when it’s needed. Come home to delicious rice ready to eat! White Rice The WHITE RICE button cooks restaurant-quality rice automatically. - Page 5 US cups NOTE HELPFUL HINTS The provided rice cooker cup is the equivalent to a ¾ standard US cup. Using the provided measuring cup, Rinse rice to remove excess starch. Fill with water to the line which Place the inner cooking pot into the add rice to the inner cooking pot.
- Page 6 Close the lid securely. Plug the power cord into an available Press the POWER button to turn on Press the WHITE RICE or BROWN wall outlet. the rice cooker. RICE button, depending upon the type of rice being cooked. NOTE HELPFUL HINTS The rice cooker will now begin...
- Page 7 UNCOOKED RICE RICE WATER LINE INSIDE POT APPROX. COOKED RICE YIELD COOKING TIMES WHITE RICE: 30-35 Min. 2 Rice Cooker Cups*4 2 Cups Rice Cooker Cups* BROWN RICE: 65-70 Min. WHITE RICE: 32-37 Min. 3 Rice Cooker Cups*6 3 Cups Rice Cooker Cups* BROWN RICE: 75-80 Min.
- Page 8 Add food to be slow cooked to the Place the inner cooking pot into the Close the lid securely. inner cooking pot. slow cooker. Press the POWER/KEEP-WARM Press the Slow Cook button. Plug the power cord into an button to turn the rice cooker on. available outlet.
- Page 9 Press the DELAY TIMER button. Once the needed time is selected, The digital display will countdown Once rice begins cooking, the digital Each press increases in one hour press the WHITE RICE or BROWN from the time selected. display will show a chasing pattern. increments.
- Page 10 Add ingredients to be sautéed/ Place the inner cooking pot into the Plug the power cord into an available Press the POWER button to turn on browned to the inner cooking pot. rice cooker. outlet. the rice cooker. CAUTION Press the SAUTÉ button to begin Using a long-handled wooden Add other called for ingredients and Close the lid securely and allow the...
- Page 11 Add ingredients to be sautéed/ Place the inner cooking pot into the Plug the power cord into an available Press the POWER button to turn on browned to the inner cooking pot. rice cooker. outlet. the rice cooker. CAUTION Press the SAUTÉ button to Using a long-handled wooden Press the KEEP-WARM button to When...
- Page 12 Using the provided measuring Place the inner cooking pot into the Place food to be steamed onto the Place the steam tray into the rice cup, add 3 cups water to the inner rice cooker. steam tray. cooker. cooking pot. NOTE HELPFUL HINTS...
- Page 13 Place food to be steamed onto the Using caution to avoid escaping Place steam tray into the rice Close the lid securely. steam tray. steam, open the lid. cooker. NOTE HELPFUL HINTS Using caution, open the lid to check If food is steaming, remove Allow the rice cooker to continue food for doneness.
- Page 14 When steaming, recommends using 3 cups of water with the provided measuring cup. Vegetable Steaming Table Meat Steaming Table SAFE INTERNAL VEGETABLE STEAMING TIME MEAT STEAMING TIME TEMPERATURE Asparagus 9-11 Minutes Fish 25 Min. 140˚F Broccoli6 -8 Minutes Chicken 30 Min. 165˚F Cabbage 5-7 Minutes...
- Page 15 Press the POWER button to turn on Press the QUICK RICE button to The cooker will now begin cooking and the digital display will show a the rice cooker. begin cooking. chasing pattern. Once cooking is complete, press the When serving, turn the rice Using caution to avoid escaping KEEP WARM button to switch the...
- Page 16 Stirring rice once it switches to caramelized. Keep-Warm will also help to reduce browning/caramelizing. Technical Support Information techsupport@rosewill.com 1-800-575-9885 Thank you for purchasing a quality Rosewill product. Please register your product at : www.rosewill.com for complete warranty information and support for your product.
Need help?
Do you have a question about the RHRC-17001 and is the answer not in the manual?
Questions and answers