Table of Contents
Advertisement
Quick Links
Advertisement
Table of Contents

Related Manuals for Rimage prism III


Summary of Contents for Rimage prism III
- Page 1 SHORT TERM CONFIDENTIAL Prism III Printer User Guide...
- Page 2 Rimage Corporation reserves the right to make improvements to the equipment and software described in this document at any time without any prior notice. Rimage Corporation reserves the right to revise this publication and to make changes from time to time in the content hereof without obligation of Rimage Corporation to notify any person or organization of such revisions or changes.
-
Page 3: Table Of Contents
Clean the Print Head ....................16 Optical Disc Recording Software Disclaimer ............2 Clean the Prism III Print Head Using a Prism Cleaning Kit ..........16 Safety and Compliance Information ................ 3 Clean the Print Head – Alternate Method ................ 17 Safety Precautions ...................... -
Page 4: Introduction
This manual provides the information needed to configure, operate, and maintain the Rimage Prism III printer. The Prism III printer is part of the Rimage series of printers. The Prism For information specific to your autoloader or Rimage AutoPrinter refer III printer is a high speed printer used to print monochrome or color to the product’s User Guide found at www.rimage.com/support. -
Page 5: Important Information
Mexico/Latin America: 952-944-8144 Attn: Rimage Services Fax: 952-944-7808 Rimage offers a variety of service and support options for the Prism III printer including Exchange Services. Please contact your Rimage Value Europe Added Reseller or Rimage for additional information and pricing. -
Page 6: Safety And Compliance Information
Do not disassemble or use tools on the printer. All service procedures attempt to bypass the door interlock. should be performed by a Rimage-authorized technician, or sent in • Please do not use any voltage other than 110VAC or 220VAC. This for Rimage-authorized repair. -
Page 7: Compliance Information
SHORT TERM CONFIDENTIAL Important Information Compliance Information Product Prism III printer Model CDPR6 Notice for USA NOTE: This equipment has been tested and found to comply with the limits for a Class A digital device, pursuant to part 15 of the FCC Rules. -
Page 8: Prism Iii Printer Requirements
Rimage are not included under your Rimage Important! CD Designer is not Macintosh-compatible. warranty or maintenance agreement. For optimum results, store the Prism III ribbons at a temperature 23° to • File format: For best results, save your labels as JPEG or TIFF files. -
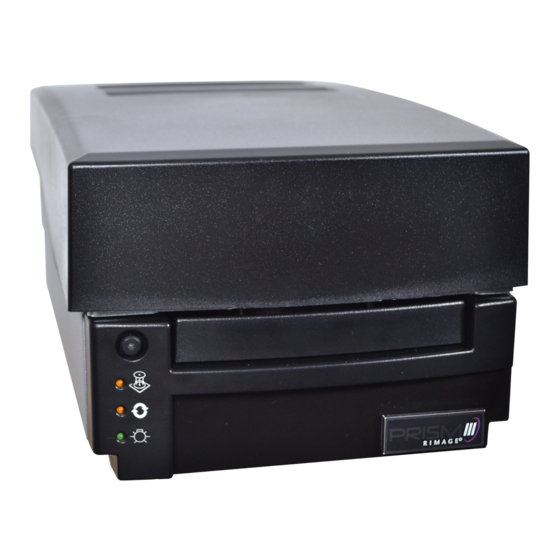
Page 9: Identify The Parts Of The Prism Iii Printer
SHORT TERM CONFIDENTIAL Identify the Parts of the Prism III Printer Front View Back View Printer Tray AC Power Connection Power Switch Operator Panel USB Cable AutoPrinter/AutoLoader Port Control Connection Top View Ribbon Clamp Ribbon Guides Retaining Pins Printer Tray and... -
Page 10: Identify The Parts Of The Prism Iii Printer
SHORT TERM CONFIDENTIAL Identify the Parts of the Prism III Printer Operator Panel Image Name Functionality Disc Not • The Disc Not Present indicator light flashes a fault code The operator panel is located on the front of the printer. There are four Present when an error occurs. -
Page 11: Operate The Prism Iii Printer
Power On or Off a Printer Connected to an Autoloader or AutoPrinter Plate Follow these steps if your Prism III printer is connected to an autoloader or AutoPrinter: Centering Pin Tip: The power switch on the printer must remain in the ‘on’ position. -
Page 12: Set Your Printing Preferences
1. Select: Start > Devices and Printers. The Devices and Printers dialog box opens. 2. Right-click on Rimage Prism III. Masked (no print) 3. Select Printing preferences from the dropdown list. The Rimage Prism III Areas Preferences window displays. Access Print Properties 1. -
Page 13: Service Options
Service Options 2. Select the Service tab. 3. Select Service Toolbox. The Service tab provides information on your Prism III printer and offers a The Service Toolbox dialog box opens. series of tools to keep your printer current and functioning properly. - Page 14 A pattern prints on the disc. Align with Edge of Printer Tray Arrow Bezel 2001809_A For more information visit rimage.com/support...
-
Page 15: Update The Firmware
Tip: Some DVD media has a raised stacking ring on the printable side of the disc. The direct thermal print process used in the Prism III printer cannot print in this area. The DVD with Top Stacking Ring setting causes the printer to skip over the stacking ring which results in an unprinted band on the disc. -
Page 16: Print In Color
• If you select Yes under the Double Print option, the printer will print the disc. The direct thermal print process used in the Prism III printer each disc twice to darken the image. cannot print in this area. The DVD with Top Stacking Ring setting causes the printer to skip over the stacking ring which results in an unprinted •... -
Page 17: Strobe Settings
Strobe settings control the amount of energy used to print a pixel. Higher settings use more energy. As the settings increase, the image becomes more intense and the print-head life decreases. Rimage recommends using the the lowest strobe setting that provides the desired image quality. -
Page 18: Maintain The Prism Iii Printer
SHORT TERM CONFIDENTIAL Maintain the Prism III Printer Use the information in this section to keep your Prism III printer in optimal Tools Task Frequency Instructions operating condition. • Lint-free Clean the Weekly 1. Power off the Prism. Overview cloth printer 2. -
Page 19: Maintain The Prism Iii Printer
When the Disc Not Present indicator light (the second light on the There are two methods for cleaning the Prism III print head—the Prism operator panel) flashes, release the operator button. The printer cleaning kit method, and the alternate method. -
Page 20: Clean The Print Head - Alternate Method
If you removed the printer form an autoloader or AutoPrinter, place the printer on the system and connect all cables and cords. Refer to Identify the Parts of the Prism III Printer section on page 6 Note: If the printing pad on the tray is wet from cleaning, allow the printing pad to completely dry before using the Prism. -
Page 21: Change The Print Ribbon
6. Print Ribbon Change the Print Ribbon Cardboard Core Important! The Prism III printer only operates with genuine Rimage ribbons. Notches Metal Pins Rimage supports only the use of Rimage brand ribbons in our printers. Printer issues that occur as a result of using ribbons by manufacturers other... - Page 22 SHORT TERM CONFIDENTIAL Maintain the Prism III Printer c. Pull the ribbon leader up over the cardboard core. 3. Install the supply roller as shown. Leave some slack in the ribbon leader. d. Attach the adhesive strip to the cardboard core so that the edges a.
- Page 23 SHORT TERM CONFIDENTIAL Maintain the Prism III Printer 5. Install the take-up roller in the Prism and press down firmly until the take-up roller snaps into place. The ribbon should be tight and there should be no creases in the ribbon.
Need help?
Do you have a question about the prism III and is the answer not in the manual?
Questions and answers