Skoda CITIGO Owner's Manual
Hide thumbs
Also See for CITIGO:
- Owner's manual (176 pages) ,
- Operating instructions manual (160 pages) ,
- Owner's manual (172 pages)
Table of Contents
Advertisement
Quick Links
Download this manual
See also:
Owner's Manual
Advertisement
Table of Contents

Related Manuals for Skoda CITIGO


Summary of Contents for Skoda CITIGO
- Page 1 OWNER´S MANUAL Vehicle and Infotainment ŠKODA CITIGO...
- Page 2 1ST012720AP...
-
Page 3: Table Of Contents
Parking Useful links Parking the vehicle » page 91 Parking aid » page 96 Before starting off Adjusting the seat » page 49 Care and maintenance Adjusting the steering wheel » page 10 Service intervals » page 35 Exterior mirrors »... - Page 4 Instruments and warning lights Infotainment Table of Contents Instrument cluster Radio Swing / Blues materials defect liability and ŠKODA warranty Warning lights Important notes for new cars Information system Unit overview and operation Radio equipment - Information on Directive Driver information system Device Settings - Swing 2014/53/EU Driving data (multifunction display)
- Page 5 Inspecting and replenishing Fuel Engine compartment Engine oil Coolant Brake fluid Vehicle battery Wheels Wheels and tyres Operating in winter conditions Do-it-yourself Emergency equipment and self-help Emergency equipment Changing a wheel Breakdown kit Jump-starting Towing the vehicle Remote Emergency unlocking / unlocking of doors Replacing windscreen wiper blades Fuses and light bulbs Fuses...
-
Page 6: Materials Defect Liability And Škoda Warranty For New Cars
A prerequisite for carrying out work under the ŠKODA warranty is that all materials defect liability and ŠKODA warranty for new service work has been carried out in a timely and technically correct manner cars and in accordance with the ŠKODA AUTO's provisions. It must be proven that service work has been carried out properly and in accordance with the ŠKODA Materials defect liability AUTO's provisions when making a claim on the ŠKODA warranty. - Page 7 Mobility warranty The mobility warranty provides a sense of security when travelling in your ve- hicle. As part of the mobility warranty, if your car breaks down as a result of an unex- pected fault when you are on the move, you can access services to ensure your continued mobility.
-
Page 8: Radio Equipment - Information On Directive 2014/53/Eu
» Fig. 1 or enter the following address in your web browser. http://go.skoda.eu/owners-manuals The web page with a model overview of the ŠKODA brand opens. 2. Select the desired model - a menu with the manuals is displayed. 3. Select the construction period as well as the language. -
Page 9: About The Owner's Manual
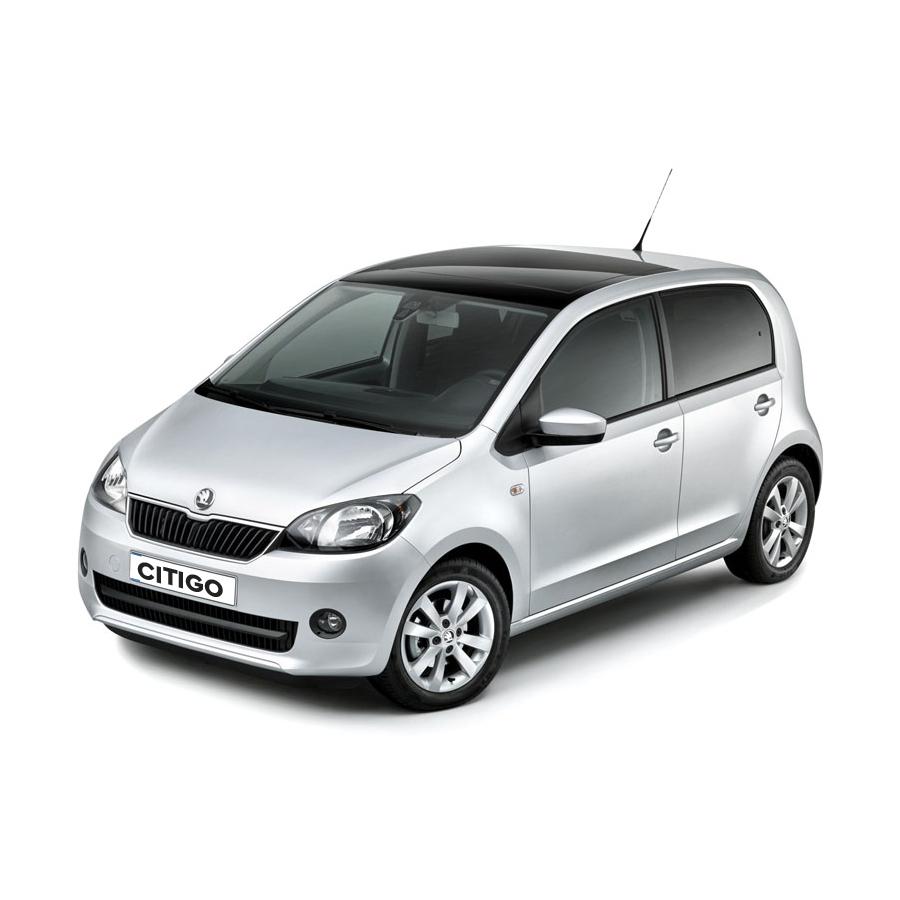
The Pictures in the Owner's Manual are for illustrative purposes only. The illus- trations can differ in minor details from your vehicle; they are only intended to http://go.skoda.eu/owners-manuals provide general information. ›... -
Page 10: Application Myškoda App
Application MyŠKODA App Notes Terms used “Specialist” - Workshop - a workshop that carries out specialist service tasks for ŠKODA vehicles. A specialist can be a ŠKODA partner, a ŠKODA service partner, as well as an independent workshop. “ŠKODA Service Partner” - A Workshop that has been contractually author- ised by ŠKODA AUTO or its sales partner to service ŠKODA vehicles and to sell ŠKODA Genuine Parts. -
Page 11: Safety Passive Safety
Driving safety Safety Passive Safety For safety in traffic, the following precautions must be observed. ▶ Do not become distracted from concentrating on the traffic situation, (e.g. by your passengers or mobile phone calls). General information ▶ Never drive when your driving ability is impaired, (e.g. due to medication, al- ... -
Page 12: Adjusting The Steering Wheel
WARNING WARNING The adjustable seats and all head restraints must be adjusted to match A distance of least 25 cm to the steering wheel should be maintained, ■ ■ the body size at all times and the seat belt must always be fastened proper- otherwise the airbag system will not be able to protect you - hazard! ly to provide the most effective levels of protection to the passengers. -
Page 13: Seat Belts
Correct seating position for the front passenger Seat belts Read and observe on page 10 first. Using seat belts For passenger safety and to reduce the risk of injury in an accident, the follow- Introduction ing instructions must be observed. Position the front passenger seat back as far as possible. - Page 14 Read and observe on page 11 first. WARNING (Continued) Many layers of clothing and loose clothing (e. g. a winter coat over a jack- ■ It is important that the belt is properly routed to ensure seat belts offer the et) do not allow you to be correctly seated and impairs proper operation of maximum protection.
-
Page 15: Inertia Reels And Belt Tensioners
Fastening and unfastening seat belts Inertia reels and belt tensioners Inertia reels Each seat belt is equipped with an inertia reel. When pulling slowly on the seat belt, the belt can move freely. When pulling sharply on the seat belt, the movement is locked by the inertia reel. The belts also lock when full braking, when the car accelerates, when driving downhill and when cornering. -
Page 16: Airbag System
Side airbags Head-Thorax - The stress on occupants’ bodies is cushioned Airbag system when they make contact with the fully-inflated airbag and the risk of injury to head and the entire upper body (chest, stomach and pelvis) is reduced on the Description of the airbag system side facing the door. - Page 17 Triggering conditions WARNING It is not possible to generally determine which deployment conditions apply to General information the airbag system in every situation. The important factors here are the hard- The seat belts and the airbag system can only offer proper protection ■...
-
Page 18: Airbag Deactivation
WARNING Airbag deactivation Information about the side airbags Deactivating airbags No objects (e.g. sun visors pivoted towards the windows) should be ■ placed in the deployment area of the side airbag, and no accessories (e.g. The front passenger airbag can be switched off with the key-operated switch cup holders and the like) should be mounted on the doors - danger of in- »... -
Page 19: Transporting Children Safely
Key switch positions » Fig. 11 - Transporting children safely The front passenger airbag is activated - after switching on the ignition, the warning lamp does not light up » Fig. 11 - Child seat The front passenger airbag is deactivated - after switching on the ignition, ... - Page 20 Read and observe on page 17 first. WARNING (Continued) Safety belts must be checked to ensure that they are running properly. ■ Never use a rearward-facing child restraint system on a seat which is pro- One should also ensure that the belt is not damaged by sharp-edged fit- tected by an active airbag.
- Page 21 Read and observe on page 17 first. Use of a child seat on the front seat The child must not be positioned in the deployment area of the side airbag Applies to Taiwan » Fig. 14 - . Fig. 13 There must be sufficient room between the child and the deployment area of Warning labels the side airbag that the airbag can provide as much protection as possible...
-
Page 22: Fastening Systems
is a system for securing child seats quickly and safely. Group Front passenger seat Rear seats There are two fixing eyes between the seat backrest and the seat cushion of the rear passenger seat for fixing a child seat with the system »... - Page 23 Size class of Group Front passenger seat Rear seats the child seat IL-SU up to 10 kg IL-SU up to 13 kg IL-SU 9-18 kg IL-SU 15-25 kg IL-SU 22-36 kg The size category is shown on the label attached to the child seat. IL-SU The seat is suitable for the use of approved child seats in ...
- Page 24 Fig. 17 Cockpit example for LHD models Using the system...
-
Page 25: Using The System Cockpit
Storage compartment on the front passenger side Using the system Power window in the front passenger door Storage compartment cockpit Light switch Overview Bonnet release lever Regulator for headlamp beam adjustment for the headlights Electric windows Steering wheel locking lever Door opening lever Ignition lock Electric exterior mirror adjustment... -
Page 26: Instruments And Warning Lights
Engine revolutions counter » page 24 Instruments and warning lights Time adjust button » page 31 Instrument cluster The instruments are also illuminated when the side light or low beam light is switched on. Introduction Note Appears in the display then the system indicates that the ignition is switched on. -
Page 27: Warning Lights
The fuel tank has a capacity of about 35 litres. If the fuel level in the fuel tank reaches the reserve area for petrol, the warning light lights up in the display. There are now about 5 litres of fuel in the tank. ... - Page 28 WARNING City Safe Drive » page 30 If the warning light lights up at the same time as warning light ■ START-STOP system » page 30 » page Anti-lock braking system (ABS), do not continue your ...
- Page 29 Stop the vehicle, switch off the engine, and check the engine oil level Functional impairment ▶ » page 113, Checking and refilling. lights up and gear change is not possible - for technical reasons there may ▶ If the warning light lights up or flashes, do not drive any further, even if the be an impairment of the automatic transmission.
- Page 30 WARNING Stability control (ESC) / Traction control (TCS) If the ABS warning light together with the indicator light » page ■ Read and observe on page 26 first. Braking system lights up, do not continue to drive! Seek help from a ...
- Page 31 Other incidents Emission control system The following reasons can explain the warning light being illuminated. Read and observe on page 26 first. ▶ The vehicle is loaded on one side. Distribute the load evenly. ▶ The wheels of one axle are loaded more heavily (e.g. when driving uphill or lights up –...
- Page 32 WARNING Main beam When a fault in the airbag system occurs, there is a risk of the system not Read and observe on page 26 first. being triggered in the event of an accident. Therefore, this must be checked immediately by a specialized garage.
-
Page 33: Information System
Switching between the time and external temperature display Information system only applies to the segment display (instrument cluster - variant 3). Driver information system › Hold the key » Fig. 23 on page 31 until the time / external temperature Display in the instrument cluster display flashes. - Page 34 › Release the button and set the minutes by pressing repeatedly. Recommended gear › Keep the button pressed down until the minute indicator stops flashing on the display. Trip counter Fig. 25 Information on the selected gear / Recommended gear Fig.
-
Page 35: Driving Data (Multifunction Display)
Current fuel consumption - When the vehicle is stationary or moving slowly, Operating the information system the fuel consumption is displayed in l/h (in models in some countries the fol- lowing appears --,- km/l). With G-TEC vehicles the current consumption of the Fig. -
Page 36: Maxi Dot Display
“1” - Single-trip memory Warning at excessive speeds Drive data is stored from when the ignition is switched on to when it is switch- The system offers the possibility to set a speed limit beyond which an acoustic ed off. If the trip is continued within 2 hours after switching off the ignition, warning signal will sound and the following warning message (MAXI DOT Dis- new data will also flow into the calculation of the current driving information. -
Page 37: Service Intervals
Main menu points Menu item Settings MFD (Multifunction display) » page 33 ■ There is an option to change certain settings using the display. The following Audio » page 35 ■ menu items can be selected. Vehicle status » page 35 ■... -
Page 38: Unlocking And Opening
Displaying the distance and days until the next service interval Unlocking and opening Messages regarding the kilometres and days until the next service appoint- Unlocking and locking ment can be displayed any time when the ignition is on, in the service menu item »... - Page 39 Button to unlock the boot lid CAUTION Button for popping out/pushing in the key bit Each key contains electronic components; therefore it must be protected ■ against moisture and severe shocks. Battery status warning light - if the warning light does not flash when you Keep the key grooves clean.
- Page 40 › To unlock the door pull the door opening lever. This function is pointed out by the following message on the display of the instrument cluster after switching out the ignition. Vehicle locking / unlocking with the central locking button Activation display When SafeLock is activated the warning light in the driver's door flashes for 2 Fig.
-
Page 41: Luggage Compartment Lid
› To open from the inside pull the door opening lever and push the door Malfunctions away from you. › Read and observe on page 36 first. To the lock from the inside grab handle and close the door. WARNING Synchronise remote If the buttons on the remote control key have been depressed several times... -
Page 42: Window Operation
WARNING (Continued) Window operation Make sure that when closing the boot lid, no body parts are crushed - ■ Introduction there is danger of injury! Do not press on the rear window when closing the boot lid, it could crack ■... -
Page 43: Panoramic Tilt / Slide Sunroof
Electric windows Manually opening/closing rear windows Fig. 36 Buttons for window levers Fig. 37 Opening/closing rear windows Read and observe on page 40 first. Read and observe on page 40 first. › The electrical power windows can only be operated when the ignition is To open, grasp the safety catch in recess »... - Page 44 WARNING Operation If the tilt / slide sunroof is closed, by pulling on the recess of the switch in the direction of arrow » Fig. 38 on page 42 and the closing process is hindered by an obstacle, then at the third attempt at closing, the force limi- tation will cease to function (if less than 5 s passes between the individual attempts to close).
-
Page 45: Lights And Visibility
WARNING Lights and visibility Always adjust the headlight beam to meet the following conditions - other- wise risk of accident. Light The vehicle does not dazzle other road users, especially oncoming vehi- ■ Introduction cles. The beam range is sufficient for safe driving. ■... - Page 46 Control stalk positions » Fig. 41 The light switch is in position » Fig. 42 then depending on the equipment the automatic switch on / off the lights corresponding to the light or weather Switch on right turn signal ...
- Page 47 › To switch on the rear fog lights, pull the light switch to position ; the Hazard warning light system warning light illuminates in the instrument cluster. If the vehicle is not fitted with fog lights, the rear fog light is switched on by Fig.
-
Page 48: Interior Lighting
Automatic operation - position Driving abroad The system is turned on when any of the following is present. When driving in countries with opposing traffic system (traffic on the ▶ The vehicle is unlocked. left/right), your headlights may dazzle oncoming traffic. Therefore, it is neces- ▶... -
Page 49: Windscreen Wipers And Washers
Note CAUTION If the on-board voltage decreases, the heating switches off automatically If the windscreen wipers are in the switched-off position, they cannot be ■ » page 115, Automatic consumer shutdown - Car battery discharge protec- raised off the windscreen. Before collapsing the wipers, the wipers must be tion. -
Page 50: Rear View Mirror
Setting windscreen wiper interval for position (by setting the switch in Interior mirror dimming the direction of the arrow, the windscreen wipers will wipe more often) Spraying and wiping the disc (spring-loaded position) - after releasing the Fig. 50 operating lever the wipers continue for another 1 to 3 strokes Mirror positions Rear wipers and washer... -
Page 51: Seats And Head Restraints
The knob for the electrically adjustable mirrors can be moved to the following Seats and head restraints positions » Fig. 51 - . Adjust the left-hand exterior mirror Front seats Switch off mirror control Introduction Adjust the right-hand exterior mirror ... -
Page 52: Rear Seat Backrests
› Fold the seat backrest back. The locking mechanism must audibly snap into WARNING (Continued) place. When moving the seat backrest, keep limbs out of the area between the ■ › Check this by pulling on the seat backrest. seat and seat backrest – risk of injury! Never transport the following items on the seat backrest when folded ■... -
Page 53: Headrests
For all-in-one seat backs, pull the two seat belts towards the side panel. After Note folding back the seat back, the release handles should audibly click into The front headrests are integrated into the seat backrests and cannot be ad- place on both sides of the seat back and the red mark should not be visible justed in height. -
Page 54: Useful Features
Seat heating buttons » Fig. 57 Useful features Left seat heating Right seat heating Passenger compartment features › To turn on the heating to max, press button or . Introduction By repeatedly pressing the button, the heat is turned down until it is complete- ly switched off. - Page 55 Ticket holder Storage compartments in the doors Fig. 58 Ticket holder Read and observe on page 52 first. Fig. 60 Storage compartments: in the front door/in the rear door The ticket holder is provided for the attachment of e.g. parking tickets. ...
- Page 56 CAUTION Cup holders Do not leave open beverage containers in the cup holders during the journey. There is a risk of spilling e.g. when braking which may cause damage to the electrical components or seat upholstery. Waste container Fig. 62 Cup holder in the front Fig.
- Page 57 Remove the waste container WARNING › Remove the waste container in the opposite direction to the arrow Be careful when using the cigarette lighter - can cause burns. » Fig. Note Open/close waste container › Lift the lid in the direction of arrow »...
- Page 58 12-volt socket Multimedia holder Fig. 68 Fig. 69 12-volt socket Multimedia holder Read and observe on page 52 first. Read and observe on page 52 first. › To use, open the cover of the socket and insert the lead of the electrical ap- The multimedia holder »...
- Page 59 Storage compartment on the front passenger side - variant 2 Storage compartment for an umbrella Fig. 72 Storage compartment for the umbrella Read and observe on page 52 first. Fig. 71 Open storage compartment / interior of the storage compart- ment The storage compartment under the passenger seat »...
-
Page 60: Phone Bracket
The maximum permissible load for each of the pockets is 150 g. Clothes hook Storage compartments in front of the rear seats Fig. 74 Clothes hooks Fig. 76 Storage compartment Read and observe on page 52 first. The clothes hooks are located on the centre door bars of the vehicle »... - Page 61 › Insert the adapter into the opening in the panel and push in the direction of Securing/removing the bracket arrow until it clicks. Remove adapter › Push the release button in the direction of arrow and remove the adapter in the direction of arrow »...
-
Page 62: Transport Of Cargo
CAUTION Transport of cargo Never exceed the maximum permissible load for the respective fasteners, ■ nets, hooks etc. - these could be damaged. Luggage compartment and transporting objects Please ensure that the heating elements for the rear window heater are not ■... - Page 63 Fixing nets Luggage compartment cover Fig. 81 Example of how to fix nets/fastening details for the rear area of Fig. 83 Remove the luggage compartment cover the luggage compartment Read and observe on page 60 first. If the support straps »...
-
Page 64: Transportation On The Roof Rack
WARNING Class N1 vehicles Do not place any objects on the cover during the trip - risk of injury if ■ Read and observe on page 60 first. braking suddenly or colliding! Never ride with the cover up - risk of damage to the cover. ■... -
Page 65: Heating And Ventilation
Roof load Heating and ventilation The maximum permitted weight of the load incl. carriers is 50 kg. Heating, manual air conditioning system, Climatronic WARNING The following instructions must be observed to aid road safety when trans- Introduction porting cargo on the roof rack. Always distribute the load on the roof rack evenly and secure properly ■... - Page 66 Setting temperature Note Reduce the temperature / Increase the temperature ▶ The air inlet in front of the windscreen must be free of e.g. ice, snow or ■ Setting the fan speed (level 0: blower off, level 4: highest speed) leaves to ensure that the heating and cooling system operates properly.
- Page 67 Switching the airflow to the upper body on and off Climatronic (automatic air conditioning) Switching the airflow to the footwell on and off Switching automatic mode on Switching the cooling system on/off After the cooling system is switched off, only the ventilation function remains active whereby the minimum temperature that can be reached is the outside temperature.
- Page 68 Recirculation Air outlet vents Read and observe on page 63 first. The recirculation mode prevents contaminated outside air getting into the in- terior of the vehicle. In recirculated air mode air is sucked out of the interior of the vehicle and then fed back into the interior. ›...
-
Page 69: Infotainment Radio Swing / Blues
The information contained in this section refer to Swing and Blues radio, un- less it is indicated otherwise. http://go.skoda.eu/compatibility WARNING Applications Applications can be installed on external devices (e.g. mobile phone, tablet) Only use the device in a way that ensures that you are in full control of ■... - Page 70 SD card slot CD-eject button Colour contact-less display Sound settings » page 72 AUX input Operation using the buttons on the device - Radio menu » page 74 - Media menu » page 76 Operation Action Function buttons (current button function is shown in the display above Selecting menu/menu item/func- each button)
- Page 71 Phone menu Note The devices connected to the AUX input can not be operated with the but- But- tons/dials on the multifunction steering wheel. ton/dial Action Function » Fig. 95 Display areas Press Accept a call/end a call Reject a call/Last number dialled/ Fig.
-
Page 72: Device Settings - Swing
Power on / off Device Settings - Swing › To power on/off the device, press Main menu settings Automatic Power On of the device Fig. 98 If the device was not turned switched off using the button before the igni- ... - Page 73 ■ for the ŠKODA Move & Funapplication ® System name: … - Bluetooth device name (Skoda BT XXXXwhere XXXX repre- ■ Balance - Fader - Setting the sound focus between left and right, front and rear ■ sents the last four digits of the vehicle identification number) (applies to equipment with four speakers) ®...
-
Page 74: Device Settings - Blues
Data transfer active - Turn the connection on / off with the Move & Funapplica- Advanced FM settings - Additional FM broadcast range settings ■ ■ tion RDS Regional: … - Setting the automatic change to a regional stations with a ■... - Page 75 Balance - Fader - Setting the sound focus between left and right, front and rear Radio Data System (RDS) - enable/disable RDS function (receiving additional in- ■ ■ (applies to equipment with four speakers) formation from the station) Balance - Setting the sound focus between the left and right (applies to equip- Frequency control (AF) - Search for alternative frequencies of the station cur- ■...
-
Page 76: Radio
Factory settings (to factory settings) Main menu › Press the button →Factory settings. Fig. 99 › Select the menu item to be reset to factory settings. Main menu: By selecting the menu item Reset all, all device menus are reset to factory set- Swing/Blues tings. - Page 77 › To start/finish automatic playback of the available stations, press the dial in Select broadcasting range the Radio main menu . Fig. 100 List of available stations Select broad- casting range: Fig. 101 Swing/Blues List of available stations: Swing/Blues ...
-
Page 78: Media
Refresh list There 12 (applies to Swing) Or 9 (applies to Blues) Station keys for storing In the FM radio area, the station list is updated automatically. preferred stations available n each broadcast area respectively, that are split in three storage groups e.g. FM1, FM2, FM3). In the AM and DABradio area, the update takes place manually by pressing the function button ... - Page 79 Folder/track list » Fig. 104 Folder / track list Audio source folder Select the audio source Fig. 104 Change to the parent folder Folder/track list: Swing/Blues Playback Options Closing the current menu Currently reproduced folder / title / Stopped folder / track playback ...
- Page 80 Playback starts automatically (does not apply to AUX). Play and select audio source If AUX is selected as the audio source, the playback must be started on the connected device. Fig. 105 Select audio CAUTION source from Do not save any important data or that which has not been backed up on the ■...
- Page 81 CAUTION Note Do not use an SD card with a broken write protection slide - there is a risk of After pressing the button , there is a delay of a few seconds before the ■ ■ damage to the SD card reader! CD is ejected.
- Page 82 Some connected audio sources may not be recognised and cannot be charged. Supported audio sources and file formats CAUTION Supported audio sources USB extension cords, or reducers may impair the function of the connected audio source. File sys- Source Interface Type Specification Note...
-
Page 83: Phone
Conditions for pairing › Select the device (the device name is Skoda BT XXXXThe characters XXXX The telephone can be paired with the device under the following conditions. represent the last four digits of the vehicle identification number). - Page 84 If the device connected to another phone, then the phone to be paired is only - Charge status of the phone battery paired with the device. - Signal strength of the phone service network - Current call Pairing and connecting the device to a phone ...
- Page 85 Dialling the emergency number (valid only in certain countries) The device telephone book contains 2000 memory locations for imported tel- ephone contacts. Each contact can contain up to 5 telephone numbers. Dial the breakdown number in case of breakdown ...
- Page 86 The favourites are available in three storage groups, each with four contacts. Function buttons All calls Save favourite Received calls › Show the contact list » page 83 or call history » page 84 › Outgoing Calls Select the phone contact or number and the function button ...
-
Page 87: Application Operationškoda Move & Fun
Delete the coupled external device Managing paired Bluetooth devices Show list of paired external devices. ▶ ▶ Press the function key » Fig. 118 - . Fig. 118 ▶ Use the controller select the external device » Fig. 118 - . -
Page 88: Driving
Main menu Fig. 119 Main menu › To display, press the button » page 70 Function buttons Navigation Drive Green (Driving economy) Vehicle information Virtual instrument cluster Search within the ŠKODA Move & Funapplication (e.g. Contacts, naviga- ... -
Page 89: Driving
Electronic immobiliser and steering lock Driving Read and observe on page 87 first. Starting-off and Driving The electronic immobiliser (hereinafter referred to as immobiliser) makes the Starting and stopping the engine theft or unauthorised use of your vehicle more difficult. ... -
Page 90: Start-Stop System
Do not switch the engine off immediately at the end of your journey if the en- Ignition on / off gine has been working at high revs over a prolonged period, but leave it to run at an idling speed for about 1 minute. This prevents any possible accumulation Fig. - Page 91 The current consumption is too high. ▶ Operation High air conditioning or heating output (high fan speed, big difference be- ▶ tween the desired and actual interior temperature). Fig. 121 If the engine has shut down automatically but the system detects that the en- Display gine is required to run (e.g.
-
Page 92: Brakes And Parking
WARNING Brakes and Parking Greater physical effort is required for braking when the engine is switch- ■ Introduction ed off – risk of accident! When braking in a vehicle with manual transmission, when the vehicle is in ■ gear and at low revs, the clutch pedal must be depressed. Otherwise, the The wear and tear on the brake pads is dependent on the operating conditions functionality of the brake system may be impaired –... -
Page 93: Manual Gear Changing And Pedals
Loosening Manual gear changing and pedals › Pull the handbrake lever up slightly and at the same time push in the locking button » Fig. 123 Introduction › Move the lever right down while pressing the lock button. CAUTION The handbrake warning light lights up when the handbrake is applied, provi- ... -
Page 94: Automated Transmission
CAUTION CAUTION If not in the process of changing gear, do not leave your hand on the gearshift When stopping on a slope, never try to hold the vehicle using the accelerator lever while driving. The pressure from the hand can cause the gearshift mecha- pedal –... -
Page 95: Running In The Engine
With driving mode set, the vehicle will not start up When accelerating, the gearbox automatically shifts up into the higher gear If the vehicle does not start off, the problem may be that the selector lever is just before the maximum permissible engine speed is reached. If a lower gear not completely in the selected position. -
Page 96: Tips On Economical Driving
From about 1,000 to 1,500 km the engine can be pushed up to the maximum CAUTION permitted engine speed. Pay attention to the ground clearance of the vehicle! When driving over ob- ■ jects which are larger than the ground clearance, the vehicle can get damaged. Tips on economical driving Any objects that get trapped under the vehicle floor must be removed as ■... -
Page 97: Assist Systems
Stability Control (ESC) Assist systems Read and observe on page 95 first. General information ESC improves vehicle stability in critical driving situations (e.g. if the vehicle Introduction starts to skid) by braking the individual wheels to maintain the driving direc- tion. -
Page 98: Parking Aid (Parkpilot)
Electronic Differential Lock (EDL) Parking aid (ParkPilot) Read and observe on page 95 first. Introduction EDL prevents the turning of the respective wheel of the driven axle. EDL The parking aid (hereinafter referred to simply as the system) uses acoustic brakes a spinning wheel if required and transfers the drive power force to the signals and an indication in the Swing radio display to draw your attention to other drive wheel. -
Page 99: Cruise Control System
Function Display in the swing radio display Fig. 129 Function keys and dis- play Read and observe on page 96 first. Fig. 128 Fitting the sensors / Range of the sensors Function keys and display » Fig. 129 Read and observe on page 96 first. -
Page 100: City Safe Drive
Take control again / Increase speed Operation Launch control / reduce speed Read and observe on page 97 first. If no speed is set the current speed is adopted. Basic requirements for start of control Once the controls are activated, the CCS maintains the vehicle at the set The GRA is activated. - Page 101 If the system is not available or there is a system malfunction, the message and CAUTION the warning light appears on the display of the instrument cluster flashes in The system can slow down the vehicle to a standstill. If the vehicle continues a slow sequence.
-
Page 102: Tyre Pressure Monitoring
If the tyre inflation pressure changes, the warning light lights up in the in- Disable / Enable strument cluster and an audible signal is heard» page Tyre pressure. The system can only function properly if the tyres have the prescribed inflation Fig. - Page 103 Always save the tyre pressure values in the system if one of the following events occurs. ▶ Change of tyre inflation pressure. ▶ Change one or more wheels. ▶ Change in position of a wheel on the vehicle. ▶ Illumination of the warning light in the instrument cluster.
-
Page 104: General Maintenance
ŠKODA service partner General Maintenance Read and observe on page 102 first. Care and maintenance All ŠKODA service partners work according to the instructions and guidelines Service work, adjustments and technical alterations from ŠKODA AUTO a.s. All service and repair work is therefore carried out on time and at the appropriate quality. - Page 105 ŠKODA service partners are liable for any ŠKODA Genuine Part defects for a Airbags period of 2 years after installation or delivery in accordance with the materials Read and observe on page 102 first. defect liability, provided that nothing else was agreed in the purchase contract or in any other agreements.
-
Page 106: Cleaning And Care
Trailer operation Car washing Read and observe on page 102 first. Read and observe on page 104 first. The vehicle is not approved for towing a trailer. The vehicle is not factory- The best way to protect your vehicle against harmful environmental influences equipped with a towing device and it cannot be retrofitted with a towing de- is frequent washing. - Page 107 WARNING Exterior car care When washing your vehicle in the winter: Water and ice in the braking ■ Read and observe on page 104 first. system can affect the braking efficiency – risk of accident! Take care when cleaning the underbody or the inside of the wheel wells - ■...
- Page 108 If any small amount of wax flow out of the cavities at high temperatures, these Windows and door mirrors ■ must be removed with a plastic scraper and the stains cleaned using a petrole- Do not clean the inside of the windows with sharp objects - there is a risk ■...
- Page 109 Covers on electrically heated seats ■ Vehicle compo- Circumstances Remedy Do not clean either with water or with other liquids - risk of damage to the ■ nents heating system. Wash with clean water and dry with a Windows Soiling Do not dry by switching on the heating.
-
Page 110: Inspecting And Replenishing
Petrol Refuelling Inspecting and replenishing Fuel Introduction Fig. 134 Stickers showing the prescribed fuel Fig. 135 Opening the fuel filler flap / unscrewing the tank cap / placing the tank cap on the fuel filler flap Read and observe on page 108 first. - Page 111 The vehicle can only be operated with unleaded petrol containing a maximum Refuelling with CNG (compressed natural gas) of 10% bioethanol (E10). Unleaded petrol must meet European standard EN 228 (in Germany DIN 51626-1 or E10 for unleaded petrol with octane numbers 95 and 91). Specified petrol is 95 RON / ROZ Use min.
- Page 112 The capacity of the natural gas fuel tank is about 11 kg, of which about 1.5 kg Automatic switching from natural gas to petrol operation - Automatic are in the reserve tank. switching from natural gas to petrol operation takes place in the following sit- uations (examples).
-
Page 113: Engine Compartment
Every 2 years WARNING (Continued) check the filler cap. ▶ Firmly apply the handbrake. ■ ▶ Check the condition of the filler necks and sealing ring in the filler necks, and For vehicles with manual transmission the lever into the neutral position. ■... -
Page 114: Bonnet
› Secure the open bonnet lid by inserting the end of the support into the open- Note ing in the direction of arrow Fluids with the proper specifications can be purchased from the ŠKODA ■ Original Accessories or from the ŠKODA Genuine Parts ranges. Close the flap We recommend you have the operating fluids replaced by a specialist ga- ›... -
Page 115: Engine Oil
Engine oil filler opening Checking and refilling Coolant expansion reservoir Windscreen washer fluid reservoir Fig. 141 Dipstick Windscreen washer fluid Fig. 140 Windscreen washer fluid reser- voir The engine uses up some oil, depending on driving style and operating condi- tions (up to 0.5 l / 1 000 km). -
Page 116: Coolant
CAUTION CAUTION The oil level must never fall outside range » Fig. 141 - otherwise there is a Do not cover the radiator and install any parts (e.g auxiliary lights.) in front of ■ risk of damaging the engine and the exhaust system. the air intakes - risk of the engine overheating. -
Page 117: Brake Fluid
Specification - The brake fluid must comply with the standard VW 501 14 CAUTION (this standard meets the requirements of FMVSS 116 DOT4). If the expansion tank is empty, do not top up with coolant. The system could ■ aerate - risk of engine damage! Stop driving! Switch off the engine and seek ... - Page 118 Warning symbols on the vehicle battery CAUTION Symbol Importance Ensure that battery acid does not come into contact with the bodywork – risk of damage to the paintwork. Always wear eye protection. Note Battery acid is severely caustic. Always wear gloves and eye pro- ...
- Page 119 › If the vehicle is not used for longer than 3 to 4 weeks, then disconnect the To disconnect, switch off the ignition and disconnect the negative terminal negative terminal of the battery or charge the battery constantly with a very first , then disconnect the positive terminal .
-
Page 120: Wheels
The specified running direction must be strictly adhered to, otherwise the fol- Wheels lowing tyre characteristics may be degraded. ▶ Driving stability. Wheels and tyres ▶ Traction. ▶ Tyre noise and tyre wear. Advice on tyre/wheel usage WARNING During the first 500 km, new tyres do not offer optimum grip; appropriate care should therefore be taken when driving. - Page 121 Inflation pressure for increased driving comfort at half load (slightly in- Tyre wear and wheel change creased fuel consumption and emissions) Inflation pressure for full load Tyre pressure value on the front axle Tyre pressure value on the rear axle The approved tyre sizes for your vehicle are listed in the vehicle's technical documentation and in the declaration of conformity (the so-called COC docu- ment).
-
Page 122: Operating In Winter Conditions
Speed symbol - indicates the maximum permissible speed for a vehicle fit- Spare wheel ted with tyres in a given category A full spare wheel is identical to the wheels mounted on the vehicle. speed A temporary spare wheel is provided with a warning label on the rim. Only use symbol this temporary spare wheel to reach the nearest specialist garage since it is Maximum... - Page 123 field of vision which is constantly visible. This specification determines the maximum vehicle speed with mounted all-season or “winter”tires, that may not be exceeded Snow chains The snow chains improve handling in wintry road conditions. Only fit snow chains with links and locks not larger than 15 mm. Remove the full wheel trims before installing the snow chains »...
-
Page 124: Do-It-Yourself
Vehicle tool kit Do-it-yourself Emergency equipment and self-help Emergency equipment Positioning of the warning triangle Fig. 147 Positioning of the warning trian- gle - natural gas vehicles Fig. 149 Vehicle tool kit The box containing the vehicle tool kit is located in the stowage compartment for the spare wheel, and can be secured with a tape depending on the equip- The following information applies to the warning triangle from the ŠKODA ment fitted. -
Page 125: Changing A Wheel
When fitting a wheel with unidirectional tyres, ensure that the direction of ro- CAUTION tation is correct » page 118. Screw the jack back to its starting position prior to putting it back in its box - otherwise, there is a risk of damage to the box. All bolts must be clean and must turn easily. - Page 126 The position of the anti-theft wheel bolt is indicated by means of a symbol on Removing/stowing the spare wheel the back of the wheel trim supplied ex-factory or from the ŠKODA Original Accessories. If using the anti-theft wheel bolt it should be fitted at this point Fig.
- Page 127 › Insert the wheel wrench onto the wheel bolt to the stop. Use the associated Anti-theft wheel bolts attachment for the anti-theft wheel bolts » Fig. 152 on page 125. › To loosen the screws, grasp the key end and turn the screw about one turn Fig.
-
Page 128: Breakdown Kit
The jacking points are located on the lower sill » Fig. 154. Do not remove foreign bodies which have penetrated into the tyre (e.g. nails). › Position the base plate of the jack with its full area resting on level ground Do not use the breakdown kit in the following cases. - Page 129 › Air compressor (the layout of the controls may be different depending on Unscrew the valve insert and place it on a clean base (rag, paper etc.). › the type of air compressor delivered with the vehicle) Forcefully shake bottle several times.
-
Page 130: Jump-Starting
WARNING Jump-starting If the tyre does not inflate to at least. 2.0 bar, the damage is too great. ■ Introduction The sealing agent cannot be used to seal the tyre. Stop driving! Seek help from a specialist garage. The tyre inflation hose and air compressor may get hot as the tyre is be- ■... -
Page 131: Towing The Vehicle
The jump-start cables must be attached in the following sequence. Towing the vehicle › Attach clamp to the positive terminal of the discharged battery. › Attach clamp to the positive terminal of the power-supplying battery. Information about the towing process ›... -
Page 132: Remote
› › Keep the tow rope taut at all times during the towing procedure. To removeit, unscrew the towing eye in the opposite direction to arrow WARNING WARNING Spiral tow ropes must not be used for towing » Fig. 158 - , the towing The towing eye must always be firmly in place, otherwise the towing eye ■... -
Page 133: Emergency Unlocking / Unlocking Of Doors
Emergency unlocking / unlocking of doors Replacing windscreen wiper blades Locking the door without locking cylinders Introduction WARNING Replace the windscreen wiper blades once or twice a year for safety rea- sons. Replacing the windscreen wiper blades Fig. 163 Setting the service position for the wiper arms Fig. - Page 134 › › Push the lever in the direction of arrow » Fig. 163 within 10 seconds and hold Remove the wiper blade in the direction of the arrow for approximately 2 seconds. Attaching the windscreen wiper blade › Removing the wiper blade Slide the windscreen wiper blade in the opposite direction to arrow until ›...
-
Page 135: Fuses And Light Bulbs
Fuses in the dashboard Fuses and light bulbs Fuses Fig. 167 Remove the fuse box cover. Introduction Fig. 166 Blown fuse Read and observe on page 133 first. The fuses are located underneath the steering wheel on the underside of the dash panel »... - Page 136 Consumer Fuse assignment in the dashboard Vehicle with START-STOP system: Radio Vehicle without START-STOPsystem: Lighting of switches, heating, Fig. 168 automatic transmission, light switch, license plate light Fuses Vehicle lighting - Rear fog light Rear window wiper Panoramic roof Central locking system Rear window heating Reversing lights, fog lights Horn...
- Page 137 › Loosen the cover and remove in the direction of the arrow. Consumer › Replace the defective fuse. Control lever under the steering wheel, front and rear window wash- › Press down on the cover until it clicks into place. Lambda probe, radiator fan, gas valve, oil pressure valve, valve for ac- Assignment of the fuses on the side of the dash panel tivated charcoal filter...
-
Page 138: Bulbs
Consumer Fuses in the engine compartment ABS/ESP Fig. 171 Battery data module, ignition lock Remove the fuse box cover. Ignition lock, starter Bulbs Introduction We recommend having bulbs replaced by a specialist garage or seeking other expert help in the event of any uncertainties. ... - Page 139 Note Removing bulbs for low and high beam- Variant 1 This Owner's Manual only describes the replacement of bulbs where it is ■ possible to replace the bulbs on your own without any complications arising. Other bulbs must be replaced by a specialist garage. We recommend that a box of replacement bulbs always be carried in the ve- ■...
- Page 140 › Change the bulb and insert the connector with the new bulb into the head- Replacing the bulb for daytime running lights and parking lights- light in the opposite direction to the arrow Variant 1 › Turn the connector with the new bulb in the opposite direction to the arrow until it stops.
- Page 141 › Remove the socket with the bulb in the direction of arrow Changing light bulbs for fog lights › Place a new connector with the bulb in the headlamp and turn it in the direc- tion of arrow as far as the stop. ›...
- Page 142 Removing/installing taillights Replacing the bulbs in the tail lamp assembly Fig. 181 Remove light / pull out connector Fig. 182 Inner part of the lamp Read and observe on page 136 first. Read and observe on page 136 first. Removing Changing a bulb ›...
-
Page 143: Technical Data
Type plate Technical data The type plate » Fig. 183 is located at the bottom of the B-pillar on the left driver's side. Technical data The type plate contains the following data. Basic vehicle data Vehicle manufacturers Vehicle identification number (VIN) ... - Page 144 The calculation of the combined fuel consumption considers a weighting of Engine Transmission Operating weight (kg) about 37 % for the intra-urban cycle and 63 % for the extra-urban cycle. 1.0 l/44 kW MPI Green tec Note The emission and fuel consumption figures given on the ŠKODA websites or ■...
- Page 145 Dimensions Fig. 184 Vehicle dimensions The vehicle dimensions given in the vehicle's technical documentation always take precedence over the details in the Owner's Manual. The dimensions listed below are for the basic model without any optional equipment. Vehicle dimensions for operating weight without driver (in mm) »...
- Page 146 Departure angle Fig. 185 Overhang angle Angle » Fig. 185 Overhang angle, front Overhang angle, rear The overhang angle values indicate the maximum incline of a slope, up which the vehicle can drive at a slow speed without the bumper or underbody mak- ing contact with the slope.
-
Page 147: Vehicle-Specific Data Depending On The Engine
Vehicle-specific data depending on the engine Introduction The values given have been determined in accordance with regulations and in conditions prescribed by legal or technical provisions for determining the operat- ing and technical data of vehicles. The exhaust gas standard is specified in the vehicle's technical documentation, as well as in the declaration of conformity (in the so-called COC document). The declaration of conformity (the so-called COC document) can be obtained from a ŠKODA Partner (only valid for some countries and some models). -
Page 148: Index
Sound settings Index Status line Ashtray Blues Radio Assist systems Device description Audio source Information on the device system Auto check control Operation Blues radio display Automated manual transmission Warning light Bluetooth profile Kick-down Accessories Bluetooth® player Tiptronic Adjusting Bonnet Automated transmission Seat Close... - Page 149 Broadcasting range Changing wheels COMING HOME Wheels buttons Compartments Swing Radio Charging a vehicle battery Component protection Buttons Check Compressed natural gas Blues radio Brake fluid see CNG Engine oil Computer Oil level see Multifunction display Checking Call list Conditions for pairing Battery condition Call list Coolant...
- Page 150 Dipstick Tyre repair file formats Unlocking / locking the door media Directive 2014/53/EU Requirements and Restrictions Emergency call Disclaimer Films Emergency equipment Display Jack Flashing Cardinal points Reflective vest Fuel Vehicle tool kit Fuel level Fog lights Warning triangle Gear changing Fog lights/rear fog light In the instrument cluster Emission control system...
- Page 151 Gear changing Infotainment Replacing bulbs Gear stick see Radio Swing / Blues Turn signal/main beam Information on the selected gear Instrument cluster Light bulbs Recommended gear See instrument cluster Replacing Genuine parts Warning lights Lighting Interior light Interior lighting Luggage compartment ISOFIX Lights Handbrake...
- Page 152 Unlock the boot lid Main menu Oil changing Variable loading floor Playback control Engine oil safe removal of Blues radio data source Luggage compartment cover On-board computer safe removal of the Swing radio data source See multifunction display Luggage compartment lid SD-card Operating weight Operation...
- Page 153 Delete favourite Radio Blues Rims Delete paired device Radio equipment Roof Dialilng phone number Information on Directive 2014/53/EU Load Emergency call Radio operation Roof rack Enter phone number Radio Swing Running in Establishing conection Brake pads Radio volume Establishing connections Engine Raising the vehicle Information service...
- Page 154 Headrests Swing radio language Stop engine Heating Swing radio menu media Stopping Rear Swing radio Software update see Parking Rear seat backrests Swing radio system information Storage Setting Swing radio telephone Storage compartments Swing sound radio Seats and head restraint see Practical features Swing system radio Select broadcasting range...
- Page 155 Switch telephone conversation Trip counter Useful Features To the device 12-volt socket Turn off the radio To the phone Ashtray Turn on the radio Cigarette lighter Turn signal Pockets Turn signal system Reflective vest Warning light Ticket holder Operation Type plate Useful links Warning light Tyre load capacity...
- Page 156 Weights 141, 142 Wheel bolts Anti-theft wheel bolts Caps Loosening and tightening Wheels Full trim Load Index Snow chains Speed symbol Tyre age Tyre damage Tyre pressure Tyre storage Unidirectional tyres Winter tyres Window operation Windscreen washer fluid Refilling Windscreen washing systems Windscreen wipers and washers Activation 47, 48...
- Page 157 Index...
- Page 158 Reprinting, reproduction, translation, or any other use, either in whole or in Subject to change. part, is not permitted without the written consent of ŠKODA AUTO a.s.. Issued by: ŠKODA AUTO a.s. ŠKODA AUTO a.s. expressly reserves all rights relating to copyright laws. ©...
- Page 160 Návod k obsluze Citigo anglicky 11.2017 1ST012720AP 1ST012720AP...
Need help?
Do you have a question about the CITIGO and is the answer not in the manual?
Questions and answers