
Summary of Contents for FootyMaster G4FTYK
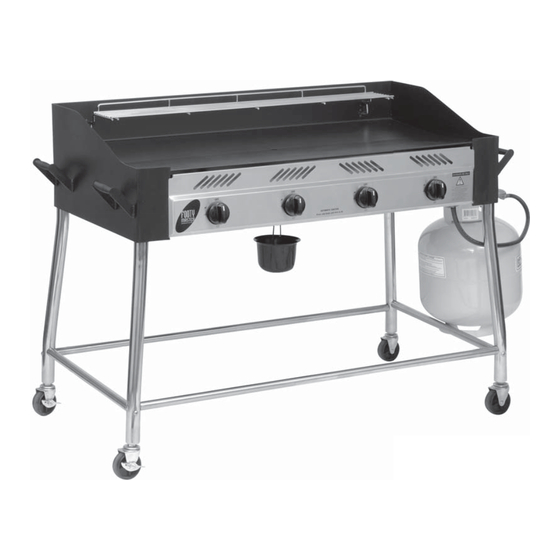
- Page 1 IN STRUC TIONS For The Safe Use And En joy ment Of Your New FootyMaster Barbeque Solid plate style barbeques Tools required: 2 adjustable spanner/wrenches 1 phillips head screwdriver Model G4FTYK...
-
Page 2: Safety First
Congratulations On Your Pur chase Thank you and congratulations for choosing a quality barbeque as part of your outdoor entertaining world. By following these instructions for safe and easy operation, you will enjoy years of satisfying, trouble-free outdoor cooking. And when you’re fully up and running, you can visit your retailer for some great accessories and cooking tips to make your experience even more rewarding. - Page 3 Where To Put Your Barbeque Most importantly, you must observe the clearances listed on the data sticker on your barbeque. It will tell you how close you can put the barbeque to combustible surfaces (wood, gyprock, trees, wooden fences etc). If you don’t follow these clearances, there is a chance that nearby surfaces will heat up and catch fi...
- Page 4 Make Sure You Have All The Parts Start by unpacking the barbeque, and placing it on a smooth, fl at surface. Be careful not to damage the painted fi nish. If there is any protective fi lm on the barbeque, it should be removed at the end of the assembly process.
- Page 5 Assembling Your Barbeque holes for long brace Attach The Legs should line up on both holes for short brace back legs and both should line up on both front legs left legs and both right Turn the barbeque upside down. Push the legs into legs the corners of the barbeque, with the fl...
- Page 6 Assembling Your Barbeque Tighten The Legs Turn the angled screw so that it tightens in towards the leg. Note that it does not screw into a hole in the leg. Rather, it simply presses into the leg to keep it in place. Attach The Casters (Optional) Screw the casters into the bottom of the legs, and tighten with a spanner.
- Page 7 Assembling Your Barbeque Attach The Heat Shield And Gas Cylinder Hook Use the top holes only Use 4 screws to attach the cylinder heat shield and cylinder hook to the side of the barbeque. For the heat shield, use only the two holes closest to the edge.
- Page 8 Installation Attach The Warming Rack There are two prongs on the rear underside of the warming rack. Insert these prongs into the brackets above the hotplate. The warming rack should sit fl at above the hotplate. Connecting To Portable LPG You should now connect your barbeque to either a 4 kg or 9 kg gas cylinder, which can be refi...
-
Page 9: Checking For Leaks
Lighting the barbeque is easy, but must be done with due care. Make sure that the gas is turned on at the cylinder, or that gas is available to the barbeque. Automatic Ignition - Footymaster barbeques are equipped with automatic ignition on each burner. Push the knob in and turn anticlockwise to the MAX position. - Page 10 First Time Use Controlling The Flame The knobs have three basic positions: Off, MAX and MIN. You can achieve any fl ame height between HI and LO by rotating the barbeque control knob between these positions. To turn to MAX, Keep turning Off is push the knob...
-
Page 11: Turning Off
First Time Use Turning Off When you’ve fi nished cooking, leave the burner controls on Max for a maximum of 5 minutes to burn off excess grease from the burner and other surfaces. To turn the barbeque off, it is best to turn off the cylinder fi rst, and allow all the gas left in the hose to burn off. -
Page 12: Cooking Hints
Using Your Barbeque Preparing To Cook Ensure the fat container is empty and is back in position underneath the barbeque, as you did during the assembly. Lightly coat the cooking surfaces with edible oil. This will prevent food from sticking. Light the burners and leave on Max for about 3-5 minutes to warm the barbeque up. -
Page 13: Care And Maintenance
Care and Maintenance Cleaning Your barbeque will look better and last longer if you keep it clean. The cooking surface. While the hotplate is still hot, take a long handled brush and a scraper and remove remaining oil and food scraps. You should use an oven mitt to avoid burning yourself. Then recoat the plate with canola oil for continued protection. - Page 14 Care and Maintenance Replacing The Hose If there are any signs of wear or cracking in the barbeque, you will need to replace it immediately. Ensure you replace it with a hose and regulator purchased from Barbeques Galore to ensure proper gas connection compatibility.
-
Page 15: Spare Parts
G4FTYH-A020100 Fire box G4FTYH-A0202 Warming rack G4FTYH-A0203 Burner G4FTYH-A0204 Valve RP8W900 Hose and Regulator G4FTYK-7A0207 Gas bottle heat insulation panel G4FTYK-5A0210 Gas bottle hook G4FTYH-A0303 Leg bolt G4FTYK-030100 Leg - front left / back right G4FTYK-B0302B Wheel - no lock... - Page 16 Technical Refer to the sticker on your barbeque for jet sizes, gas pressures etc. Please note that we are continually updating our barbeques, so these specifi cations may change over time. All dimensions are in millimetres. Width 1146 mm Gas Connection 150 mm Depth 585 mm...
Need help?
Do you have a question about the G4FTYK and is the answer not in the manual?
Questions and answers